SVGのアニメーションを行うため、Sanp.svgを使ってみた
Sanp.svgとは?
Adobeがオープンソースで提供しているJavaScriptライブラリ
http://snapsvg.io/
導入・構成
npm installできるが、今回はダウンロードしてjsを同ディレクトリに配置
├── sample.html
├── sample.svg
└── snap.svg.js
npm installをしたい人は以下を参考に
https://github.com/adobe-webplatform/Snap.svg
使ってみる
今回は、サイズの変更、回転、CSSアニメーションを行ってみる
<!DOCTYPE html>
<html>
<head>
  <title>SVG Sample</title>
  <script src="http://ajax.aspnetcdn.com/ajax/jQuery/jquery-1.12.4.min.js"></script>
  <script src="snap.svg.js"></script>
  <style type="text/css">
  .svg_anime {
    animation: spin 1s linear 0s 1 normal, reverse;
    transform-origin: 50% 50%;
  }
  @keyframes spin {
    from { transform: rotateX(0deg); }
    to   { transform: rotateX(720deg); }
  }
  </style>
  <script type="text/javascript">
  $(document).ready(function(){
    var s = Snap("#svgArea");
    var g = s.group();
    Snap.load("sample.svg", function(loadedFragment) {
      g.append(loadedFragment);
    });

    $("#btnAnimation").click(function() {
      var bbox;

      var item01 = Snap.select("#item01");
      bbox = item01.getBBox();
      item01.transform('s1.0,1.0');
      item01.animate({transform: 's1.5,1.5,' + bbox.cx + ',' + bbox.cy}, 1000, mina.bounce);

      var item02 = Snap.select("#item02");
      bbox = item02.getBBox();
      item02.transform('r0,' + bbox.cx + ',' + bbox.cy);
      item02.animate({transform: 'r1080,' + bbox.cx + ',' + bbox.cy}, 1000, mina.linear);

      var item03 = Snap.select("#item03");
      var item03Clone = item03.clone(true);
      item03.before( item03Clone ).remove();
      item03Clone.attr({ id: "item03" });
      item03Clone.addClass("svg_anime");
    });
  });
  </script>
</head>
<body>
<div style="width: 600px;">
  <svg id="svgArea" width="100%" viewBox="0 0 400 200" preserveAspectRatio="xMaxYMax"></svg>
</div>
<input type="button" id="btnAnimation" value="Start">
</body>
</html>
<?xml version="1.0" encoding="UTF-8" standalone="no"?>
<svg
   xmlns:dc="http://purl.org/dc/elements/1.1/"
   xmlns:cc="http://creativecommons.org/ns#"
   xmlns:rdf="http://www.w3.org/1999/02/22-rdf-syntax-ns#"
   xmlns:svg="http://www.w3.org/2000/svg"
   xmlns="http://www.w3.org/2000/svg"
   xmlns:sodipodi="http://sodipodi.sourceforge.net/DTD/sodipodi-0.dtd"
   version="1.1"
   id="svgSample"
   viewBox="0 0 400 200"
   height="200"
   width="400"
   sodipodi:docname="sample.svg">
  <sodipodi:namedview
     pagecolor="#ffffff"
     bordercolor="#666666"
     borderopacity="1"
     objecttolerance="10"
     gridtolerance="10"
     guidetolerance="10"
     id="view" />
  <rect
     id="item01"
     style="opacity:1;fill:#ff0000;fill-opacity:1;stroke:#990000;stroke-width:2;stroke-linejoin:round;stroke-miterlimit:4;stroke-dasharray:none;stroke-opacity:1"
     width="90"
     height="90"
     x="32"
     y="50"
     ry="0" />
  <path
     id="item02"
     style="opacity:1;fill:#00ff00;fill-opacity:1;stroke:#009900;stroke-width:2;stroke-linejoin:round;stroke-miterlimit:4;stroke-dasharray:none;stroke-opacity:1"
     d="m 200,50 22,45 22,45 -45,0 -45,0 22,-45 z" />
  <circle
     id="item03"
     style="opacity:1;fill:#0000ff;fill-opacity:1;stroke:#000099;stroke-width:2;stroke-linejoin:round;stroke-miterlimit:4;stroke-dasharray:none;stroke-opacity:1"
     cx="322"
     cy="94"
     r="45" />
</svg>
説明
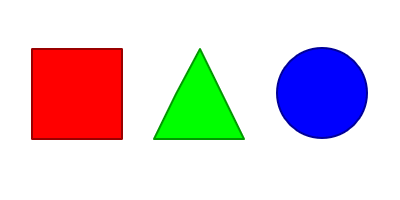
四角、三角、丸の3つのオブジェクトをSVGで作成し、それぞれにitem01、item02、item03とIDを付与
SVGはフリーソフトで作成するならInkscapeがおすすめ
https://inkscape.org/ja/
SVGファイルのロード
対象のSVGをロード
    var s = Snap("#svgArea");
    var g = s.group();
    Snap.load("sample.svg", function(loadedFragment) {
      g.append(loadedFragment);
    });
<div style="width: 600px;">
  <svg id="svgArea" width="100%" viewBox="0 0 400 200" preserveAspectRatio="xMaxYMax"></svg>
</div>
svgタグのviewBoxにはsvgの元サイズを指定、これを変更することでトリムして表示することが出来る
親のサイズに合わせてwidthやheightを%指定し、preserveAspectRatioを指定することでレスポンシブ対応とか画面サイズが変わってもSVGの画像サイズもいい感じに表示される
アニメーション
item01とitem02はtransformとeasingを変えているだけなのでitem01についての説明
      var item01 = Snap.select("#item01");
      bbox = item01.getBBox();
      item01.transform('s1.0,1.0');
      item01.animate({transform: 's1.5,1.5,' + bbox.cx + ',' + bbox.cy}, 1000, mina.bounce);
Snap.select()で対象のエレメントを取得、今回はIDで取得しているがCSSセレクタで指定できる
select()だと1つしか取得できないので、複数取得する場合はselectAll()を使用する
getBBox()は対象エレメントの位置やサイズの情報が取得できる、transformでは中心座標を指定することが多いので、取得した情報のcx,cyを使用するとよい
transform()は2回目にクリックした際の初期化用、アニメーション開始時の状態を記述すればいいが1回しかアニメーションしないなら不要
animate()は以下の4つのパラメータを指定する
- アニメーション後の状態:transformや色、パスなどを指定する
- アニメーションの時間:ミリ秒で指定
- easing(省略可):始めはゆっくりで徐々に早くなるとか、自作もできるがminaという関数が用意されているので基本的にはこの中から指定する(http://snapsvg.io/docs/#mina)
- アニメーション完了後のコールバック関数(省略可):連続してアニメーションする場合などに使用
続いてitem03のCSSアニメーションの説明
  .svg_anime {
    animation: spin 1s linear 0s 1 normal, reverse;
    transform-origin: 50% 50%;
  }
  @keyframes spin {
    from { transform: rotateX(0deg); }
    to   { transform: rotateX(720deg); }
  }
      var item03 = Snap.select("#item03");
      var item03Clone = item03.clone(true);
      item03.before( item03Clone ).remove();
      item03Clone.attr({ id: "item03" });
      item03Clone.addClass("svg_anime");
事前にcssでアニメーションを用意しておいて、そのスタイルクラスを設定してあげることでアニメーションさせている
サンプルではややこしいことをしているが、基本的にはaddClass()でアニメーション設定をしているスタイルクラスを追加してあげればよい
何故ややこしいことをしているかというと、2回目以降にクリックした際にアニメーションを初期化するためで、単純にremoveClass()をして、再度addClass()をしても2回目のアニメーションは行われないので、一度エレメントを削除して新たに作り直している(これはSnap.svgに限らず、cssでアニメーションさせるとこうなるはず)
おわりに
本当に簡単に触ってみただけで全体の機能としてはどんなことができるのか?というところまでは見れていない
ただアニメーションはセンスや、アイデア次第で、簡単な動作の組み合わせでもそれなりになると思うので、まずは触ってみるのもありだと思う
その中で自分が必要な機能があれば深く調べればいいので、今回は一旦触ってみるところまで