Arduino UnoのWi-FiシールドはCC3000 Wi-Fiシールドなど高価なものが多くArduino Uno本体より高くなります。なるべく安く仕上げたいのと、Arduino Pro Miniやmbedでも使いたいのでESP8266をaitendoから680円で購入しました。USB-TTLシリアル変換ケーブルを使いWindowsを接続してインターネットへの接続を確認します。
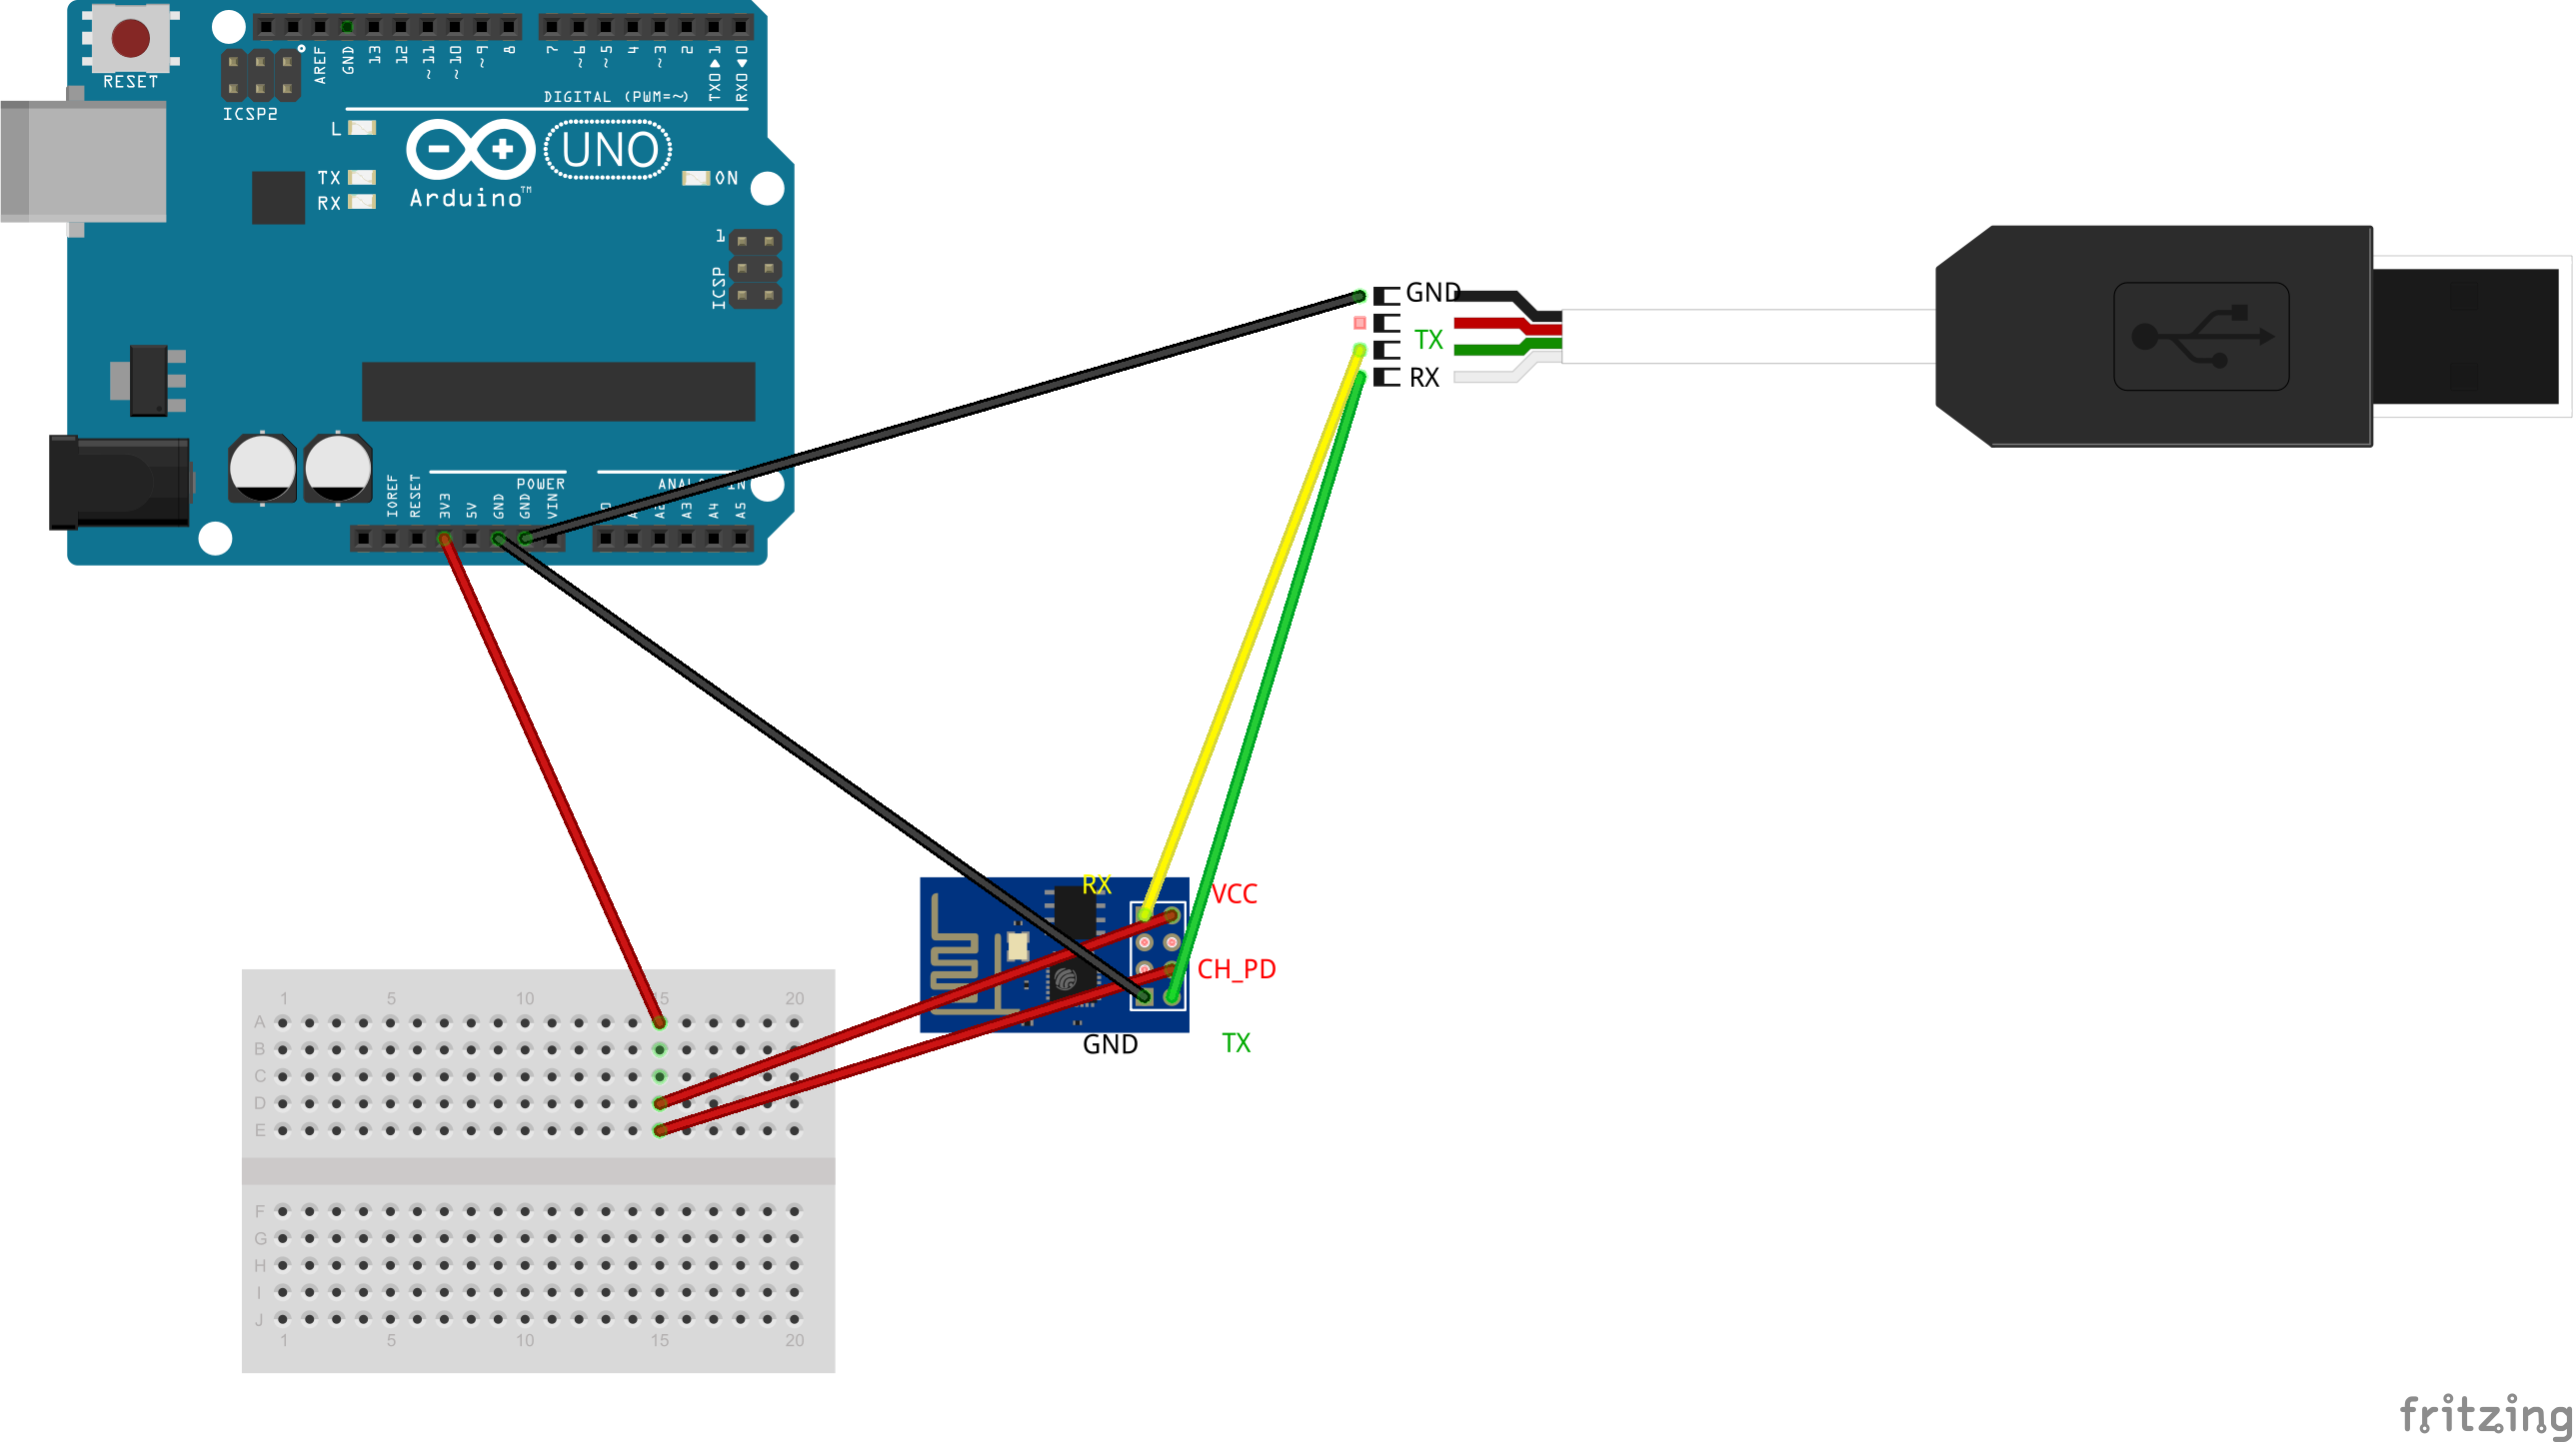
ブレッドボード配線
今回のArduinoはESP8266に3.3V電源を供給する用途で使います。USB-TTLシリアル変換ケーブルはPL2303HXチップを搭載しています。ESP8266とPL2303HXはどちらも3.3Vで動作します。USBケーブルはWindowsのUSBポートに接続します。
- RX (ESP8266) -> TX (USB-TTL)
- TX (ESP8266) -> RX (USB-TTL)
- CH_PD (ESP8266) -> VCC (Arduino Uno 3.3V)
- VCC (ESP8266) -> VCC (Arduino Uno 3.3V)
- GND (ESP8266) -> GND (Arduino)
- GND (USB-TTL) -> GND (Arduino)
CoolTerm
WindowsにCoolTermをインストールします。CoolTermからESP8266にシリアル接続をしてATコマンドを発行します。ESP8266のATコマンドはWikiにリファレンスがあります。
接続の確認
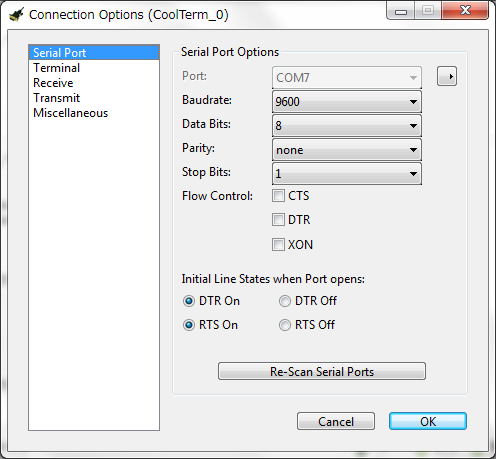
CoolTermを起動したらOptionsボタンを押して設定を確認します。今回の環境ではCOM7ポートを使います。
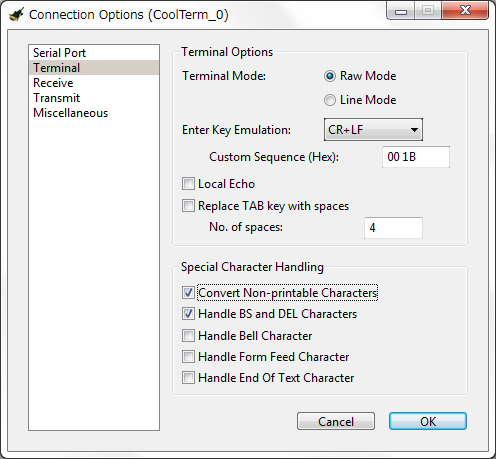
Terminalタブをクリックします。Handle BS and DEL CharactersにチェックをいれてターミナルでBackSpaceキーを使えるようにします。
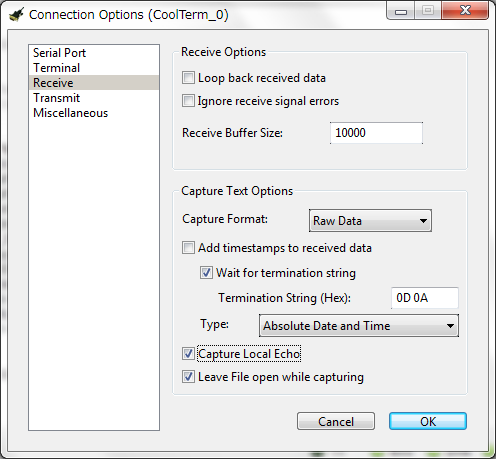
ReceiveタブではCapture Local Echoをチェックして後でテストするHTTPレスポンスが表示されるようにします。
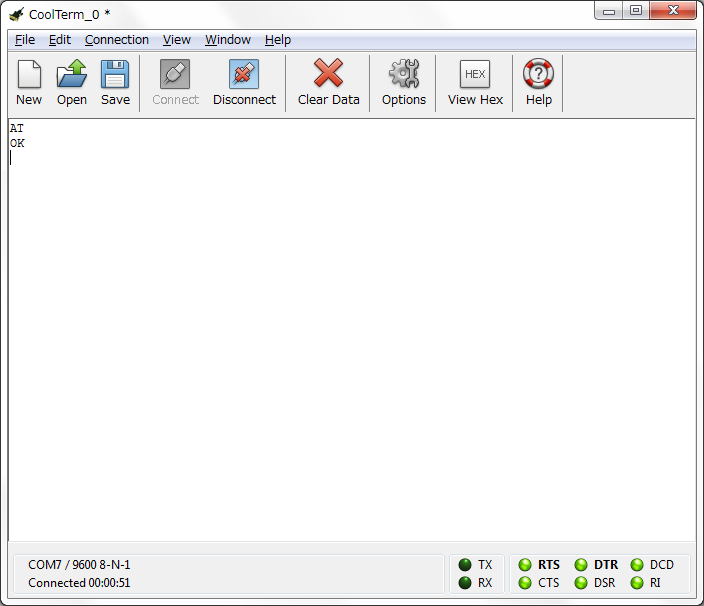
AT
ATでESP8266への接続をテストします。
AT+GMR
AT+GMRでファームウェアのバージョンを表示します。
AT+GMR
0018000902-AI03

OK
AT+CWJAP
AT+CWJAPでアクセスポイントに接続します。SSIDとパスワードを入力します。
AT+CWJAP="ssid","pwd"
OK
AT+CIPSTART
AT+CIPSTARTでMeshbluのサーバーに接続します。
AT+CIPSTART="TCP","xxx.xxx.xxx.x",3000
OK
Linked
AT+CIPSEND
AT+CIPSENDは最初に送信するデータのバイト数を指定します。HTTPのリクエストの文字列は以下です。最後は空行になります。
GET /status HTTP/1.0
Host: xxx.xxx.xxx.x
送信するデータのバイト数をPythonで計算します。
$ python
Python 2.7.6 (default, Mar 22 2014, 22:59:56)
[GCC 4.8.2] on linux2
Type "help", "copyright", "credits" or "license" for more information.
>>> cmd = "GET /status HTTP/1.0\r\n"
>>> cmd += "Host: "
>>> cmd += "xxx.xxx.xxx.x"
>>> cmd += "\r\n\r\n"
>>> len(cmd)
45
AT+CIPSEND=45コマンドでリクエストのバイト数を入力すると>が表示されます。
AT+CIPSEND=45 >
続けて先ほどPythonでバイト数を計算したリクエスト文字列を入力します。
AT+CIPSEND=45 >
GET /status HTTP/1.0
Host: xxx.xxx.xxx.x
HTTPリクエストを送信するとターミナルにレスポンスが表示されます。MesubluステータスのJSON{"meshblu":"online"}が表示されました。
 SEND OK

+IPD,540:HTTP/1.1 200 OK
Access-Control-Allow-Origin: *
Content-Type: application/json
Content-Length: 20
Access-Control-Allow-Headers: Accept, Accept-Version, Content-Length, Content-MD5, Content-Type, Date, Api-Version, Response-Time
Access-Control-Allow-Methods: GET
Access-Control-Expose-Headers: Api-Version, Request-Id, Response-Time
Connection: close
Content-MD5: JSFOAmXDth0rK0AUCW8RBQ==
Date: Sun, 29 Mar 2015 09:23:40 GMT
Server: restify
Request-Id: 4807d360-daac-11e4-9cf7-a53c7accdff6
Response-Time: 2

{"meshblu":"online"}
OK

OK
Unlink
