はじめに
今回はA.Angelovaらの「Real-time pedestrian detection with deep networkcascades」
http://static.googleusercontent.com/media/research.google.com/en//pubs/archive/43850.pdf
などを実装したDeepCascadeモデルをインストールする。
コードはこちら
https://github.com/jerrygood0703/DeepCascade
環境
Ubuntu14.04
chainerやTensorflowが走る程度に諸々のlibrariesをインストール済み
DeepCascadeモデルの概要
DeepCascadeモデルはDeep Learningモデルの一種で、以下の図のようなarchitectureである。

ConvやらPoolingやらを何層か重ねた構造だ。
これで何をやるかというと、歩行者検知(Pedestrian Detection)である。論文の説明では、現状のstate-of-the-artsに比肩する精度で、かつリアルタイムで検出が可能なほどに高速であるとのこと。以下の画像は論文中に記載された検出例である。
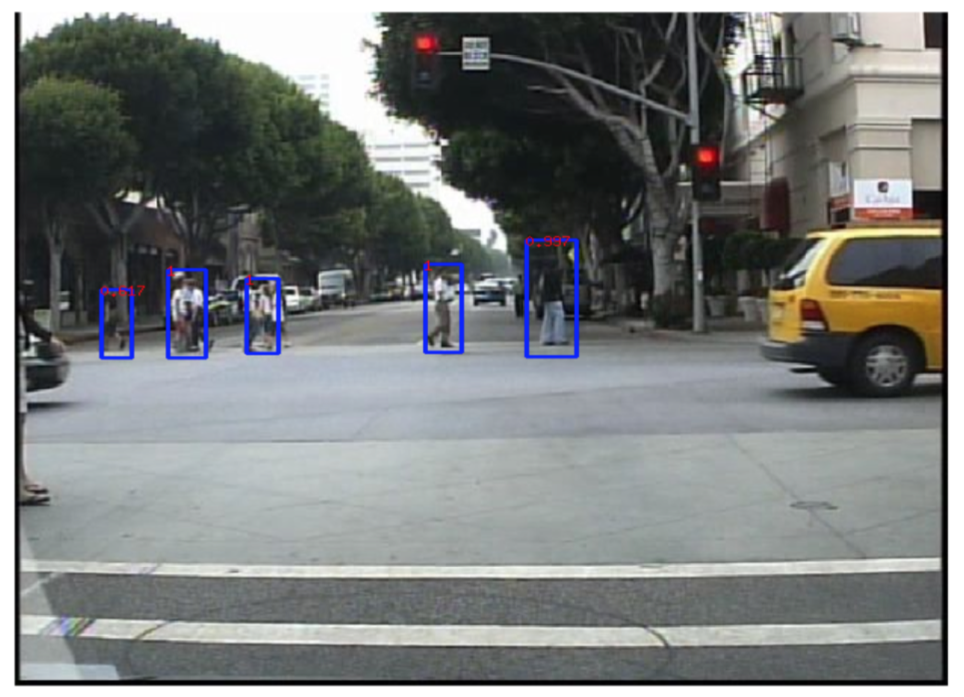
こんなのが毎秒15フレームくらいの速度で検出できるとのこと。
Requirementsのインストール
GitHubのREADMEには以下のようなrequirementsが書かれている。
- Linux (the code can in theory compile and run on windows, but practice has shown this to be a bad idea)
- C++ and CUDA compilation environments properly set. Only gcc 4.5 or superior are supported
- A GPU with CUDA capability 2.0 or higher (only for objects detection code, stixels code is CPU only), and ~200 Mb of free memory (for images of 640x480 pixels)
- All boost libraries
- Google protocol buffer
- OpenCv installed (2.4, but code also work with older versions. 3.0 not yet suppoted, but pull requests welcome).
- libjpeg, libpng
- libSDL
- CMake >= 2.4.3 (and knowledge on how to use it)
- Fair amount of patience to get things running
この中で1、2、3、6は問題ないだろう。4から検証する。
boost librariesはC関係だろうが、よくわからないのでネットで調べたところここ
http://askubuntu.com/questions/168053/how-to-install-all-the-boost-development-libraries
によると、以下のコマンドでいける。
sudo apt-get install libboost-all-dev
・・・
・・・
libboost-all-dev はすでに最新版です。
アップグレード: 0 個、新規インストール: 0 個、削除: 0 個、保留: 41 個。
もともと入ってた。次に5のGoogle protocol buffer。TensorFlowとか入れるときにインストールした気がするが、念のため確認。
protoc --version
libprotoc 2.5.0
入ってるっぽい。次に7のlibjpegとlibpng。Cで画像処理する時によく使うが、これも確認。まずlibjpegを今一度入れてみる。
sudo apt-get install libjpeg-dev
・・・
・・・
libjpeg-dev はすでに最新版です。
アップグレード: 0 個、新規インストール: 0 個、削除: 0 個、保留: 41 個
入ってた。次にlibpng。
sudo apt-get install libpng-dev
・・・
・・・
libpng12-dev はすでに最新版です。
アップグレード: 0 個、新規インストール: 0 個、削除: 0 個、保留: 41 個。
これも入っていた。次にSDL。これは以下のコマンドで確認する。
dpkg -l | grep sdl
ii  libsdl1.2-dev                                         1.2.15-8ubuntu1.1                                   amd64        Simple DirectMedia Layer development files
ii  libsdl1.2debian:amd64                                 1.2.15-8ubuntu1.1                                   amd64        Simple DirectMedia Layer
ii  libsdl2-2.0-0:amd64                                   2.0.2+dfsg1-3ubuntu1.1                              amd64        Simple DirectMedia Layer
ii  libsdl2-dev                                           2.0.2+dfsg1-3ubuntu1.1                              amd64        Simple DirectMedia Layer development files
入ってるみたい。次にCmake。これは2.4.3以上が要求される。
camke --version
cmake version 2.8.12.2
2.8.12.2なので大丈夫。最後の10のFair amount of patience to get things runningは「時間かかるから我慢しろ!」ってことか?
結局、全て入っていた。次にcompileするが、長くなるので各段階に分ける。
compile step1
「Before trying to compile anything you must edit the file common_settings.cmake to add the configuration specfic to your own machine (check line 338)」だそうだが、line 338には該当するものがない。editする過程で行が変わったのだろう。該当するのは以下の342〜345だと思われる。
elseif(${HOSTNAME} STREQUAL  "sylar")
# change the_name_of_your_machine to what /bin/hostname returns
message(STATUS "Using the_name_of_your_machine compilation options")
sylarやthe_name_of_your_machineを自分のパソコンの名前に変える。ちなみに自分のパソコンの名前はshellで
hostname
と打てば出てくる。次に以下のコマンドを実行してprotcol bufferのヴァージョンが適合するか確かめる。
generate_protocol_buffer_files.sh
・・・
・・・
+ cd src/tests/data_sequence/
+ protoc --cpp_out=./ TestData.proto
+ cd ../../..
+ echo End of game. Have a nice day!
End of game. Have a nice day!
Have a nice day!とか出てるから大丈夫っぽい。
compile step2
このstepではCPUだけで走らせて、動作確認する。
まず以下を実行する。
cd src/applications/ground_estimation
cmake -D CMAKE_BUILD_TYPE=RelWithDebInfo . && make
・・・
・・・
Linking CXX executable ground_estimation
[100%] Built target ground_estimation
100%とか出てるからうまくいったのだろうか。次に以下を実行。
cmake . && make -j2 && ./ground_estimation -c test.config.ini
・・・
・・・
File ../../../data/sample_test_images/bahnhof/image_00000000_0.png not found
File ../../../data/sample_test_images/bahnhof/image_00000000_1.png not found
A std::exception was raised: Could not read the first input frames pair
terminate called after throwing an instance of 'std::runtime_error'
  what():  Could not read the first input frames pair
中止 (コアダンプ)
とエラーが出た。確かに../../../data/sample_test_images/bahnhof/image_00000000_0.pngなどというディレクトリは無い。
そこでこのGitHubコードの元になっている以下のサイト
https://bitbucket.org/rodrigob/doppia/src/tip/?at=v2
を調べたところ、こっちにはある。よってここからdata/sample_test_imagesディレクトリをコピーしてくる。
再度、実行。
cmake . && make -j2 && ./ground_estimation -c test.config.ini
なにやらこんな感じのデモ
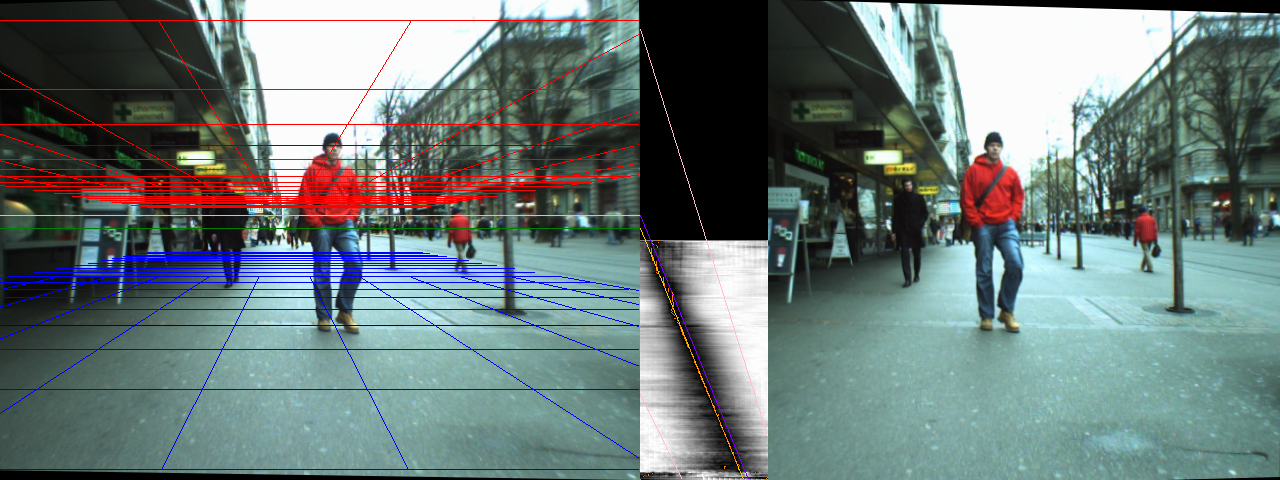
が表示された。
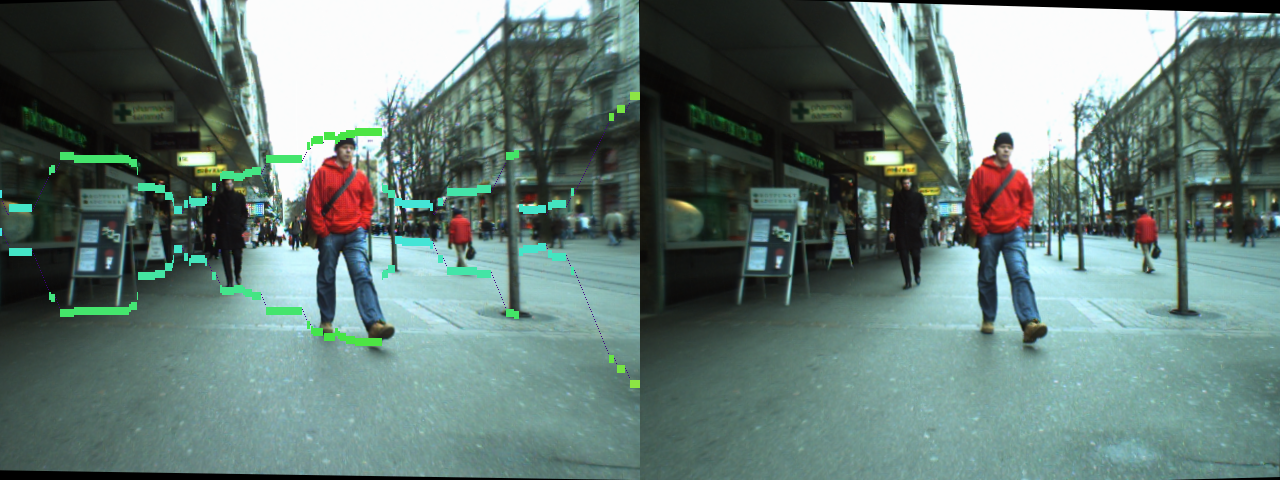
次にstixel_worldディレクトリに移動して同様のプログラムを走らせる。
cd ../stixel_world
cmake . && make -j2 && OMP_NUM_THREADS=4 ./stixel_world -c fast.config.ini --gui.disable false
今度はこんな感じのデモが表示された。
長くなったので、以下はこちら。
http://qiita.com/masataka46/items/df3b9aba6fa7dc6bbff5