AngularJS
ng-app ng-controller ng-init
--> 必ず``の記述をはじめにする--> ng-controllerスコープを利用するコンストラクタ
--> ng-init初期設定をする
注意
<h1 ng-init="count = 0" ng-click="click()">count:{{count}}</h1>
$scope.click = function(){
       $scope.count = "Hello World";
}
のようにng-init="expression" ng-click="function"とそれぞれタグ内とjsファイル内に別々に書くとng-clickが評価された後にタグ内のng-initと評価され、count:0になり、count:Hello Worldにはならない。
解決策として
<h1 ng-init="init()" ng-click="click()">count:{{count}}</h1>
$scope.init = function(){
       $scope.count = 0;
}
$scope.click = function(){
       $scope.count = "Hello World";
}
のように二つともjsファイル内にexpressionを書けば解決する。
ng-repeat
--> `ng-repeat="item in items"` itemsに配列を渡すことでitemの所にひとつずつわたされる。ng-click
--> `ng-click`でクリックイベントをつけられる。例
<button ng-click="count = count + 1">count:{{count}}</button>
or
<button ng-click="click()">count:{{count}}</button>
var x = 0;
$scope.click = function(){
             x++;
             $scope.count = x;
}
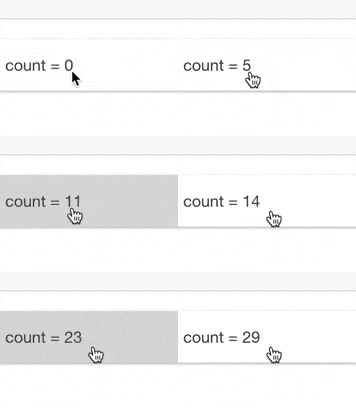
実行結果
Angularjsでsocket.ioを使う
まずmoduleに以下を記入する
 //--socket-factory------------------------------------------------------------------↲
  5 .factory('socket',function($rootScope){↲
  6     var socket = io.connect(location.host + '/');↲
  7     return {↲
  8         on:function(eventName,callback){↲
  9           socket.on(eventName,function(){↲
 10               var args = arguments;↲
 11               $rootScope.$apply(function(){↲
 12                   callback.apply(socket,args);↲
 13               });↲
 14           });↲
 15         },↲
 16         emit:function(eventName,data,callback){↲
 17           socket.emit(eventName,data,function(){↲
 18               var args = arguments;↲
 19               $rootScope.$apply(function(){↲
 20                   if(callback){↲
 21                     callback.apply(socket,args);↲
 22                   }↲
 23               });↲
 24           });↲
 25         }↲
 26     };↲
 27 });
で、コントローラではsocketでリスナーをよべる
1 .controller('test',function($scope,socket){
2         socket.emit('eventName',{data});
3         socket.on('evetName',function(data){
4                 $scope.model = data.~;
5                }
6 }
見ないな感じ。
Angularjs + jQuery
angularjsの中にはJqueryLiteみたいなのがあるが、普通にjQueryを使いたい
ということでjqueryLiteをJQueryに上書きする。
 1 //---jquery-----------------------------------------↲
  2 function buindJQuery(){↲
  3     jQuery = window.jQuery;↲
  4     if(jQuery){↲
  5         jqLite = jQuery;↲
  6         extend(jQuery.fn,{↲
  7             scope: JQLitePrototype.scope,↲
  8             isolateScope:JQLitePrototype.isolateScope,↲
  9             controller:JQLitePrototype.controller,↲
 10             injector:JQLitePrototype.injector,↲
 11             inheritedData:JQLitePrototype.inheritedData↲
 12         });↲
 13 ↲
 14         jqLitePatchJQueryRemove('remove',true,true,false);↲
 15         jQLitePatchJQueryRemove('empty',false,false,false);↲
 16         jQLitePatchJQueryRemove('html',false,false,true);↲
 17 ↲
 18     } else {↲
 19         jqLite = JQLite;      ↲
 20     }↲
 21     angular.element = jqLite;↲
 22 }↲
を記述。
でangularjsが読み込まれる前にjQueryが先に読み込まれるようにするので

参考 http://dev.classmethod.jp/client-side/javascript/angularjsandjquery/
使用例
1 angular.element("id or class ").prepend("<ul><li>" + "hello!" + "</li></ul>");
