はじめに
ソフトバンクロボティクスが販売している Pepper のタブレット部分は本体とは独立して動作しており、HTMLを表示することもできます。というのを第5回Apache Cordova勉強会で知りまして、自分でもやってみる機会がありましたのでメモがてら書いていきます。
ついでですので、AngularJS で作ったアプリを GitHub Pages にデプロイして、そこから Pepper を操作することにしてみます。
アプリを作る
まずはタブレットに表示するアプリを Yeoman 作ります。AngularJS 用ジェネレーターはいろいろありますが、今回は generator-gulp-angular を使います。
まずは、Yeoman とジェネレーターのインストールからです。
$ npm install -g yo bower gulp
$ npm install -g generator-gulp-angular
次にプロジェクトを作ります。
$ mkdir pepper-webapp
$ cd pepper-webapp
$ yo gulp-angular
プロジェクトの設定はほぼ既定のままです。Babel を有効にしていること、ngRoute を使っていること (今更ですが...)、$http のみにしていることが違いです。
? Which version of Angular do you want? 1.4.x (stable)
? What Angular modules would you like to have? (ngRoute and ngResource will b
? Do you need jQuery or perhaps Zepto? jQuery 2.x (new version, lighter, IE9+
? Would you like to use a REST resource library? None, $http is enough!
? Would you like to use a router? ngRoute, the official router
? Which UI framework do you want? Bootstrap, the most popular HTML, CSS, and
? How do you want to implement your Bootstrap components? Angular UI Bootstra
? Which CSS preprocessor do you want? Sass (Node), Node.js binding to libsass
? Which JS preprocessor do you want? ES6 (Babel formerly 6to5), ECMAScript 6
compiled with Babel which requires no runtime.
? Which HTML template engine would you want? None, I like to code in standard
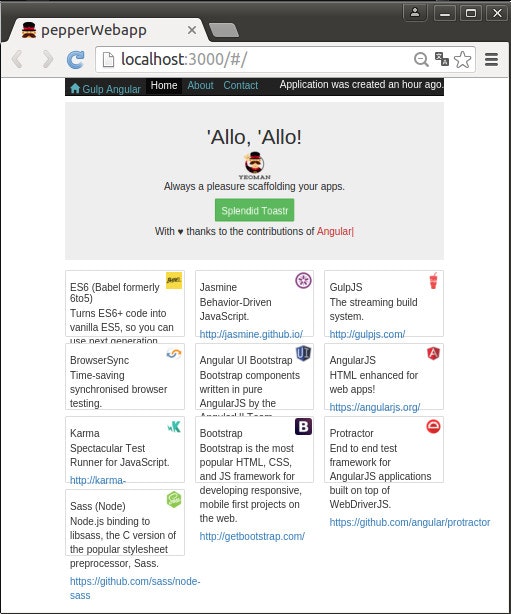
インストールまでできていれば gulp serve でアプリをプレビューできます。
$ gulp serve
gulp build でアプリをビルドすることができます。
$ gulp build
dist ディレクトリにアプリが成果物が出来上がります。こちらを GitHub Pages にデプロイします。手動でデプロイは面倒なので、gulp-gh-pages プラグインを使います。
プラグインをインストールして、gulp/deploy.js を作ります。
$ npm install --save-dev gulp-gh-pages
'use strict';

var gulp = require('gulp');
var ghPages = require('gulp-gh-pages');

gulp.task('deploy', function () {
  return gulp.src('./dist/**/*')
    .pipe(ghPages());
});
これで gulp deploy で GitHub Pages にデプロイできるようになりましたが、GitHub リポジトリがまだありませんのでそちらを作ります。
Create a New Repositoryにアクセスしてリポジトリを作ってください。
$ git init .
$ git add .
$ git commit -m 'first commit'
$ git remote add origin git@github.com:{username}/{repositoryname}.git
$ git push -u origin master
リポジトリへの Push が完了したら、GitHub Pages へデプロイします。(念の為アプリはリビルドします)
$ gulp clean && gulp build
$ gulp gh-pages
http://{username}.github.io/{repositoryname}/ にアクセスすると、デプロイしたアプリを見ることができます。
ひとまずアプリ側はこれで完了です。
Pepper のタブレットをネットワークにつなぐ
Pepper のタブレットは本体とは独立しています。ネットワークの設定も別になります。
あまりいい方法ではないかもしれませんが、Pepper に SSH でログインして設定する方法があります。デフォルトではユーザー名が nao でパスワードも nao です。(もしかしたらパスワードはセットアップ時に決めたものかもしれません)
$ slogin nao@{pepper_ipaddress}
Password:

$ qicli call ALTabletService.configureWifi wpa {SSID} {password}
ALTabletService.configureWifi: true
[W] 5276 qimessaging.transportsocket: connect: No route to host
$ qicli call ALTabletService.enableWifi
ALTabletService.enableWifi: null
$ qicli call ALTabletService.getWifiStatus
ALTabletService.getWifiStatus: "CONNECTED"
Pepper で、作ったアプリを表示する
次に Pepper で、作ったアプリを表示してみます。
Choregraph を起動し、Tablet にある Show App ボックスをドラッグしてください。そして、開始点とボックスをドラッグしてつなぎます。
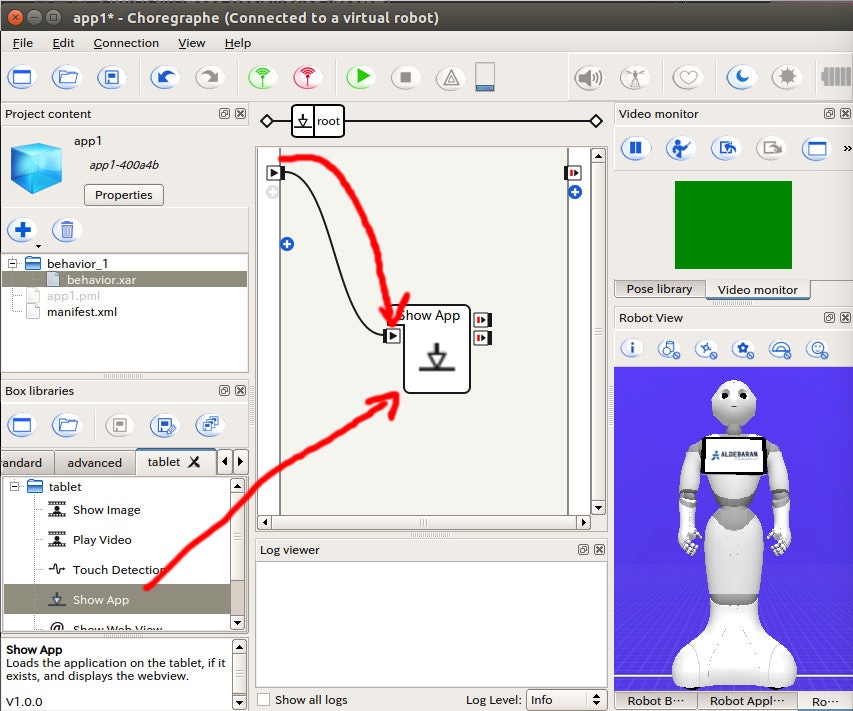
その後、Show App ボックスをダブルクリックして Python コードを表示します。
Show App ボックスには問題があるようで、そのままだとうまくウェブを表示できないようです。37 行目あたりに一行追加します。
            fragment = behaviorPath.split(appsFolderFragment, 1)[1]
            # 以下の一行を追加する
            fragment = fragment.split("/")[1]
            return fragment.lstrip("\\/")
タブレットには外部サイトも表示できますので、デプロイしたアプリを直接表示することができます。ですが、その場合 Pepper 本体をコントロールするための Web API を呼び出せなくなるようです。ですので、index.html ファイルだけは Choregraph プロジェクトに含めることにします。
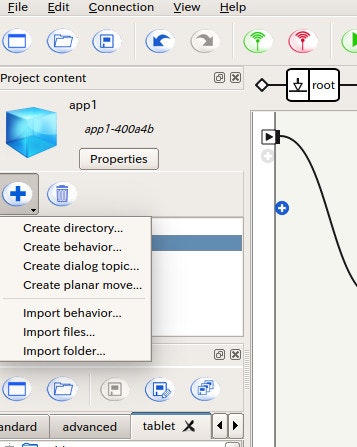
Choregraph の Project content タブの + ボタンを押して、Create directory をクリックしてください。名前は html です。
ディレクトリを作成したらプロジェクトを保存します。プロジェクト内に html ディレクトリができていますので、その中に index.html ファイルを作ります。
<!doctype html>
<html ng-app="pepperWebapp" ng-strict-di="">
  <head>
    <meta charset="utf-8">
    <title>pepperWebapp</title>
    <meta name="description" content="">
    <meta name="viewport" content="width=device-width">
    <link rel="stylesheet" href="http://{username}.github.io/{repositoryname}/styles/vendor.css">
    <link rel="stylesheet" href="http://{username}.github.io/{repositoryname}/styles/app.css">
  </head>
  <body>
    <div ui-view=""></div>
    <script src="http://{username}.github.io/{repositoryname}/scripts/vendor.js">
    </script>
    <script src="/libs/qimessaging/1.0/qimessaging.js"></script>
    <script src='https://cdn.mlkcca.com/v2.0.0/milkcocoa.js'></script>
    <script src="http://{username}.github.io/{repositoryname}/scripts/app.js">
    </script>
  </body>
</html>
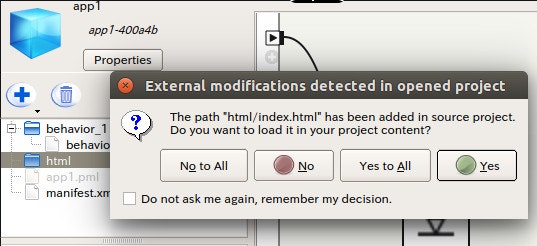
html/index.html ファイルの保存が完了したら Choregraph が変更を検出しますので、 Yes to All をクリックします。
余談ですが、qimessaging.js は Pepper 本体を操作するためのライブラリ、milkcocoa.js は Milkcocoa 用のライブラリです。(次回以降で使います!)
あとは Pepper の実機につないで F5 を押して実行するだけです! なんですが、実際には何も表示されません。
generator-gulp-angular で作成したプロジェクトは、JavaScript/CSS ファイルのファイル名にハッシュが追加され、ビルドのたびに変わります。そのたびに Choregraph プロジェクト内の html/index.html ファイルを修正するのは大変面倒ですので、名前が変わらないようにします。
アプリの gulp/build.js ファイルを修正し、ファイル名を書き換えている gulp-rev プラグインを無効化します。
diff --git a/gulp/build.js b/gulp/build.js
index 06970a0..38c7ca3 100644
--- a/gulp/build.js
+++ b/gulp/build.js
@@ -41,7 +41,6 @@ gulp.task('html', ['inject', 'partials'], function () {
   return gulp.src(path.join(conf.paths.tmp, '/serve/*.html'))
     .pipe($.inject(partialsInjectFile, partialsInjectOptions))
     .pipe(assets = $.useref.assets())
-    .pipe($.rev())
     .pipe(jsFilter)
     .pipe($.sourcemaps.init())
     .pipe($.uglify({ preserveComments: $.uglifySaveLicense })).on('error', conf.errorHandler('Uglify'))
@@ -55,7 +54,6 @@ gulp.task('html', ['inject', 'partials'], function () {
     .pipe(cssFilter.restore)
     .pipe(assets.restore())
     .pipe($.useref())
-    .pipe($.revReplace())
     .pipe(htmlFilter)
     .pipe($.minifyHtml({
       empty: true,
タスクを変更しましたので、リビルドしてデプロイします。
$ gulp clean && gulp build
$ gulp deploy
しばらく後に Choregraph で F5 を押して実行してください。今度こそアプリが表示されたと思います。(残念ながら画像が表示されませんが...)
まとめ
今回は、Pepper 本体のウェブサーバーに index.html ファイルを配置して、そこから GitHub Pages にデプロイされた JavaScript/CSS ファイルを読みこむようにしました。
こういった構成のため、画像ファイルを Pepper 本体のウェブサーバーに取得しにいきますので、画像をうまく表示できません。
ですが、AngularJS のビューは表示されています。これは generator-gulp-angular で作成したプロジェクトでは、ビューはプリコンパイルされ、scripts/app.js ファイルに追加されるからです。
これで、GitHub Pages にデプロイすれば Pepper のタブレットでアプリが動作するようになりました。次回、Milkcocoa を利用して、アプリから Pepper を喋らせられるようにしてみます。