まず始めに
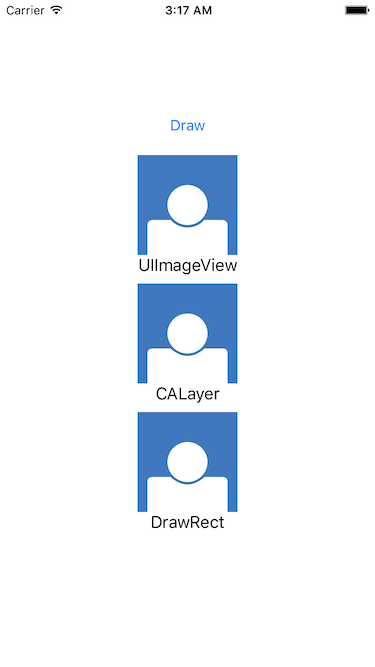
上の画像を以下3つの方法で描画してみました。
- PNGで書きだした画像を
UIImageViewで描画 -
UIViewのdrawRectでpathを描画 -
CAShapeLayerでpathを描画
結果は以下のようになりました。
UImageView draw time: 0.0182009935379028
CALayer draw time   : 0.000609993934631348
DrawRect draw time  : 0.00013202428817749
drawRectがだいぶ速いです。
それぞれ描画したものは、違いなく以下のように表示されました。
どのように実装しているか
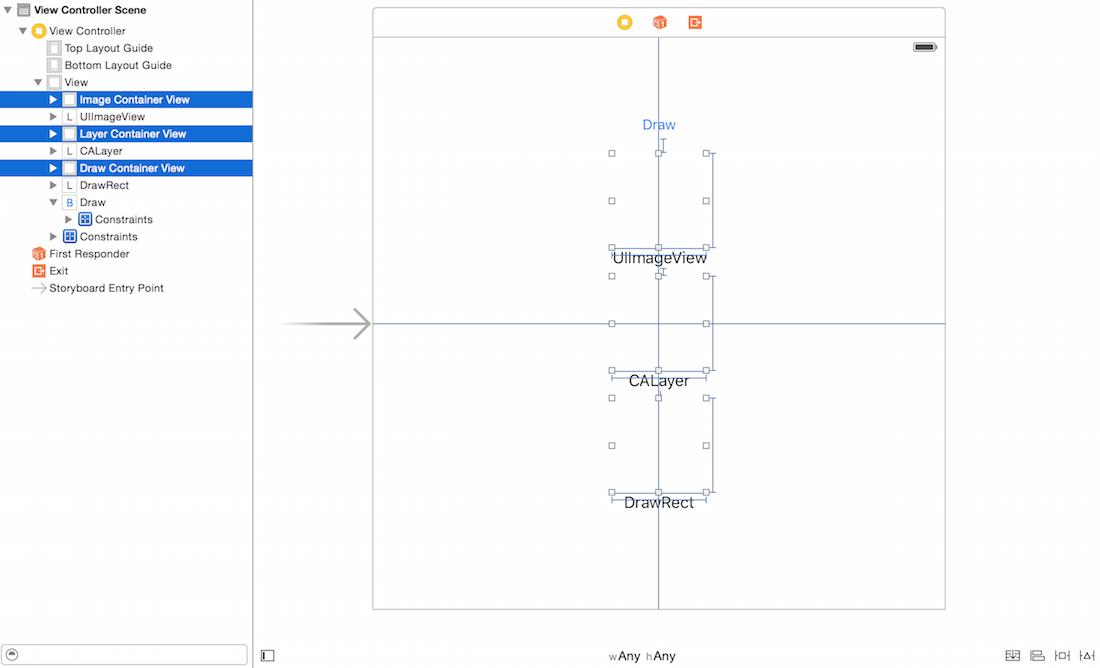
まずStoryboadにUIImageView、drawRect、CALayerを載せるコンテナーを置いておきます。
Drawボタンが押された時に、インスタンス生成からaddSubviewをそれぞれの方法で行われるようにします。
class ViewController: UIViewController {
    @IBOutlet weak var imageContainerView: UIView!
    @IBOutlet weak var layerContainerView: UIView!
    @IBOutlet weak var drawContainerView: UIView!

    override func viewDidLoad() {
        super.viewDidLoad()
        // Do any additional setup after loading the view, typically from a nib.
    }

    override func didReceiveMemoryWarning() {
        super.didReceiveMemoryWarning()
        // Dispose of any resources that can be recreated.
    }
    @IBAction func didTapDrawButton(sender: AnyObject) {
        removeSubviews(imageContainerView)
        removeSubviews(layerContainerView)
        removeSubviews(drawContainerView)

        printTime("UImageView draw time:") {
            let imageView = UIImageView(frame: CGRect(x: 0, y: 0, width: 100, height: 100))
            imageView.image = UIImage(named: "icon")
            self.imageContainerView.addSubview(imageView)
        }

        printTime("CALayer draw time   :") {
            let layerView = LayerView()
            layerView.setPathLayer()
            self.layerContainerView.addSubview(layerView)
        }

        printTime("DrawRect draw time  :") {
            let drawView = DrawView()
            self.drawContainerView.addSubview(drawView)
        }
    }

    private func removeSubviews(superview: UIView) {
        for view in superview.subviews {
            view.removeFromSuperview()
        }
    }

    private func printTime(label: String, excuteAction action: () -> Void) {
        let startDate = NSDate()
        action()
        let endDate = NSDate()
        print("\(label) \(endDate.timeIntervalSinceDate(startDate))")
    }
}
drawRectで描画する
drawRect内で、画像を同じものをPathで描画します。
class DrawView: UIView {

    init() {
        super.init(frame: CGRect(x: 0, y: 0, width: 100, height: 100))
    }

    required init?(coder aDecoder: NSCoder) {
        fatalError("init(coder:) has not been implemented")
    }

    // Only override drawRect: if you perform custom drawing.
    // An empty implementation adversely affects performance during animation.
    override func drawRect(rect: CGRect) {
        // Drawing code
        UIColor(red: 64 / 255, green: 120 / 255, blue: 192 / 255, alpha: 1).setFill()
        UIRectFill(bounds)

        UIColor.whiteColor().setFill()
        let path = UIBezierPath(roundedRect: CGRect(x: 30, y: 30, width: 40, height: 40), cornerRadius: 20)
        path.fill()

        UIColor.whiteColor().setFill()
        let bodyPath = UIBezierPath()
        bodyPath.moveToPoint(CGPoint(x: 15, y: 65))
        bodyPath.addLineToPoint(CGPoint(x: 33, y: 65))
        bodyPath.addQuadCurveToPoint(CGPoint(x: 67, y: 65), controlPoint: CGPoint(x: 50, y: 80))
        bodyPath.addLineToPoint(CGPoint(x: 85, y: 65))
        bodyPath.addQuadCurveToPoint(CGPoint(x: 90, y: 70), controlPoint: CGPoint(x: 90, y: 65))
        bodyPath.addLineToPoint(CGPoint(x: 90, y: 100))
        bodyPath.addLineToPoint(CGPoint(x: 10, y: 100))
        bodyPath.addLineToPoint(CGPoint(x: 10, y: 70))
        bodyPath.addQuadCurveToPoint(CGPoint(x: 15, y: 65), controlPoint: CGPoint(x: 10, y: 65))
        bodyPath.fill()
    }
}
CALayerでPathを描画する
CAShapeLayerで画像と同じものをPathで描画します。
class LayerView: UIView {

    init() {
        super.init(frame: CGRect(x: 0, y: 0, width: 100, height: 100))
    }

    required init?(coder aDecoder: NSCoder) {
        fatalError("init(coder:) has not been implemented")
    }

    func setPathLayer() {
        backgroundColor = UIColor(red: 64 / 255, green: 120 / 255, blue: 192 / 255, alpha: 1)

        let circleLayer = CAShapeLayer()
        circleLayer.fillColor = UIColor.whiteColor().CGColor
        circleLayer.frame = CGRect(x: 30, y: 30, width: 40, height: 40)
        circleLayer.path = UIBezierPath(roundedRect: CGRect(x: 0, y: 0, width: 40, height: 40), cornerRadius: 20).CGPath
        layer.addSublayer(circleLayer)

        let bodyLayer = CAShapeLayer()
        bodyLayer.frame = CGRect(x: 10, y: 65, width: 80, height: 35)
        bodyLayer.fillColor = UIColor.whiteColor().CGColor
        let bodyPath = UIBezierPath()
        bodyPath.moveToPoint(CGPoint(x: 5, y: 0))
        bodyPath.addLineToPoint(CGPoint(x: 23, y: 0))
        bodyPath.addQuadCurveToPoint(CGPoint(x: 57, y: 0), controlPoint: CGPoint(x: 40, y: 15))
        bodyPath.addLineToPoint(CGPoint(x: 75, y: 0))
        bodyPath.addQuadCurveToPoint(CGPoint(x: 80, y: 5), controlPoint: CGPoint(x: 80, y: 0))
        bodyPath.addLineToPoint(CGPoint(x: 80, y: 35))
        bodyPath.addLineToPoint(CGPoint(x: 0, y: 35))
        bodyPath.addLineToPoint(CGPoint(x: 0, y: 5))
        bodyPath.addQuadCurveToPoint(CGPoint(x: 5, y: 0), controlPoint: .zero)
        bodyLayer.path = bodyPath.CGPath
        layer.addSublayer(bodyLayer)
    }
}
まとめ
非同期で画像を読み込んだりする場合のプレースホルダーイメージが、Pathで簡単に表現できるくらいのものであるならdrawRectで描画してしまう方がパフォーマンスが良くなると思います。


