まず始めに
iPhone6s、iPhone6s plusから3D Touchが使えるようになりました。3D Touchを使った表現にはPeek and PopやQuick Actionsなどありますが、それ以外の部分で具体的にどういった部分に導入すれば良いかというものは決まっていない印象があります。いろいろと導入箇所を検討してみたところ、UINavigationControllerの履歴と紐付けたら面白いのではないかと考えました。
そこで、元々リリースしていたSAHistoryNavigationViewControllerというUINavigationControllerの履歴を表示し任意のViewControllerまで戻れるライブラリに、3D Touchを追加してみました。
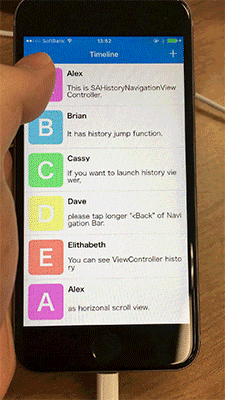
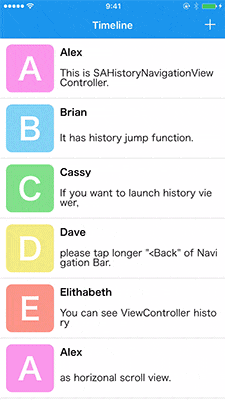
追加してみた結果のGIFアニメーションが以下になります。
実装のポイント
以下が実装時のポイントです。
-
UINavigationBarのバックボタンの部分に3D Touchを追加する -
UINavigationBarのバックボタンのアクションと3D Touchのアクションが衝突しないようにする - ViewControllerの遷移と3D Touchの深度を紐付かせるために、カスタムアニメーションを実装しUIPercentDrivenInteractiveTransitionでインタラクティブな動きにする
3D Touchを扱うクラスをつくる
import UIKit.UIGestureRecognizerSubclass
import AudioToolbox.AudioServices

@available(iOS 9, *)
/*
 * UINavigationBarのバックボタンのアクションと3DTouchのアクションが衝突しないようにするために
 * UILongPressGestureRecognizerを継承してminimumPressDurationをしたいからです。
 */
class SAThirdDimensionalTouchRecognizer: UILongPressGestureRecognizer {
    // 3DTouchの深度をパーセンテージにするために使います
    private(set) var percentage: CGFloat = 0
    // 3DTouchのアクションが完了する割合を設定するために使います
    var threshold: CGFloat = 1

    init(target: AnyObject?, action: Selector, threshold: CGFloat) {
        self.threshold = threshold
        super.init(target: target, action: action)
    }

    override func touchesMoved(touches: Set<UITouch>, withEvent event: UIEvent) {
        super.touchesMoved(touches, withEvent: event)

        guard let touch = touches.first else {
            return
        }
        percentage = max(0, min(1, touch.force / touch.maximumPossibleForce))
        /*
         * minimumPressDurationで設定した秒数後にstateが.Begin -> .Changedになる可能性があるので
         * stateが.Changedだった場合を条件文に含んでいます
         */
        if percentage > threshold && state == .Changed {
            state = .Ended
            // 3DTouchのバイブレーションがなかったので、システムのバイブレーションを使います。
            AudioServicesPlayAlertSound(kSystemSoundID_Vibrate)
        }
    }

    override func touchesEnded(touches: Set<UITouch>, withEvent event: UIEvent) {
        super.touchesEnded(touches, withEvent: event)
        // touchesMovedでstateを.Endにするので、ここに入った場合は失敗となります
        state = .Failed
    }

    override func reset() {
        super.reset()
        percentage = 0
    }
}
3D Touchを追加する
バックボタンに直接アクションを追加することができないので、まずUINavigationBarに3DTouchが有効になるようにします。バックボタンのアクションと3D Touchが衝突しないようにするために、minimumPressDurationも設定します。
let gestureRecognizer = SAThirdDimensionalTouchRecognizer(target: self, action: "handleThirdDimensionalTouch:", threshold: 0.75)
gestureRecognizer.minimumPressDuration = 0.2
gestureRecognizer.delegate = self
navigationBar.addGestureRecognizer(gestureRecognizer)
UINavigationBarのバックボタンあたりでだけ3D Touchが有効になるようにするために、UIGestureRecognizerDelegateに以下のような実装をします。
extension SAHistoryNavigationViewController: UIGestureRecognizerDelegate {
    public func gestureRecognizerShouldBegin(gestureRecognizer: UIGestureRecognizer) -> Bool {
        if let _ = visibleViewController?.navigationController?.navigationBar.backItem, view = gestureRecognizer.view as? UINavigationBar {
            var height = 64.0
            if visibleViewController?.navigationController?.navigationBarHidden == true {
                height = 44.0
            }
            let backButtonFrame = CGRect(x: 0.0, y :0.0,  width: 100.0, height: height)
            let touchPoint = gestureRecognizer.locationInView(view)
            if CGRectContainsPoint(backButtonFrame, touchPoint) {
                return true
            }
        }
        return false
    }
}
ViewControllerの遷移と紐付ける
UIViewControllerTransitioningDelegateで任意のUIViewControllerAnimatedTransitioningを実装したクラスのインスタンスを返して、ViewControllerが表示されるときのみインタラクティブな遷移をするように実装します。
extension SAHistoryNavigationViewController : UIViewControllerTransitioningDelegate {
    public func animationControllerForPresentedController(presented: UIViewController, presentingController presenting: UIViewController, sourceController source: UIViewController) -> UIViewControllerAnimatedTransitioning? {
        return SAHistoryViewAnimatedTransitioning(isPresenting: true)
    }

    public func animationControllerForDismissedController(dismissed: UIViewController) -> UIViewControllerAnimatedTransitioning? {
        return SAHistoryViewAnimatedTransitioning(isPresenting: false)
    }

    public func interactionControllerForPresentation(animator: UIViewControllerAnimatedTransitioning) -> UIViewControllerInteractiveTransitioning? {
        // UIPercentDrivenInteractiveTransitionのproperty
        return interactiveTransition
    }
}
3D Touchを検知した際に以下のようにViewControllerを生成して、presentViewControllerした後に、gestureのstateに合わせて処理をしていきます。
@available(iOS 9, *)
func handleThirdDimensionalTouch(gesture: SAThirdDimensionalTouchRecognizer) {
    switch gesture.state {
    case .Began:
        let viewController = ViewController()
        viewController.transitioningDelegate = self
        presentViewController(viewController, animated: true, completion: nil)

    case .Changed:
        // インタラクティブな遷移をさせるために、3D Touchの深度を元にしたパーセンテージを渡しています。
        interactiveTransition?.updateInteractiveTransition(min(gesture.threshold, max(0, gesture.percentage)))

    case .Ended:
        if gesture.percentage >= gesture.threshold {
            interactiveTransition?.finishInteractiveTransition()
        } else {
            interactiveTransition?.cancelInteractiveTransition()
        }

        case .Cancelled, .Failed, .Possible:
            break
        }
    }
最後に
UINavigationControllerのバックボタンに3D Touchを追加してみたところ思っていたよりも不自然さがないので、UINavigationControllerにpushされ続けるとなかなかトップに戻れない問題の新しいユーザー体験の1つになるのではないかと思っております。