はじめに
UITextFieldなどで文字が入力されたときに、その文字列をもとにAPIをたたくことがあると思います。
その際にサーバー負荷なども考慮して、APIを叩く頻度を絞ったりすると思います。
RxSwiftのthrottle/debounceを利用することで、上記のような仕様を満たした実装を容易に実現できますが、プロジェクトに何らかの理由(アプリの容量だったり、サービスの仕様であったり...)でRxSwiftを導入できないこともあるかと思います。
そういった場合、scheduledTimer(timeInterval:target:selector:userInfo:repeats:)などを利用して実装することになると思いますが、timerを管理したり、timerが実行された際にハンドリングするメソッドを実装したりしなければなりません。
そこでDispatchQueueのextensionとしてthrottle/debounceのような実装を呼び出せるようにしていきます。
利用時のサンプル
UIViewController内で、UITextFieldが前回の入力時から一定の秒数以内に入力がなかった際に、textをprintする実装は以下のように実装することができるようになります。
class ViewController: UIViewController {

    @IBOutlet weak var textField: UITextField!

    //0.5秒ごとに処理をglobalQueueで行うClosureをPropertyとして保持
    let debounceAction = DispatchQueue.global().debounce(delay: .milliseconds(500))

    override func viewDidLoad() {
        super.viewDidLoad()
        //UITextFieldのtextの変更通知の監視登録
        let nc = NotificationCenter.default
        nc.addObserver(self,
              selector: #selector(ViewController.textFieldTextDidChange(_:)),
                  name: .UITextFieldTextDidChange,
                object: nil)
    }

    @objc private func textFieldTextDidChange(_ notification: Notification) {
        debounceAction { [unowned self] in
            //前回の入力から0.5秒以内に入力がなかった際にtextをprint
            print(self.textField.text)
        }
    }
}
throttleの実装
まずthrottleを実装していきます。
throttleは、イベント発生中であっても、一定時間は同じ処理を実行しないという挙動です。
DispatchTimeIntervalを引数として、実行する処理を引数とした関数を返します。
関数の内部では、前回に実行された時間を保持するlastFireTimeを定義し、現在の時刻を代入します。
返り値となる関数ではlastFireTimeは参照渡しに、selfとdelayをキャプチャーリストとし、現在時刻+delayを代入したdeadlineを定義します。
DispatchQueue.asyncAfter(deadline:qos:flags:execute:)を利用し、usingのクロージャーで現在時刻と最後に実行された時刻+delayの時刻を比較します。
現在時刻の方が進んでいた場合に、lastFireTimeを更新し、引数で受け取っていたactionを実行します。
extension DispatchQueue {
	func throttle(delay: DispatchTimeInterval) -> (_ action: @escaping () -> ()) -> () {
		var lastFireTime: DispatchTime = .now()

		return { [weak self, delay] action in
			let deadline: DispatchTime = .now() + delay
			self?.asyncAfter(deadline: deadline) { [delay] in
				let now: DispatchTime = .now()
				let when: DispatchTime = lastFireTime + delay
				if now < when { return }
				lastFireTime = .now()
				action()
			}
		}
	}
}
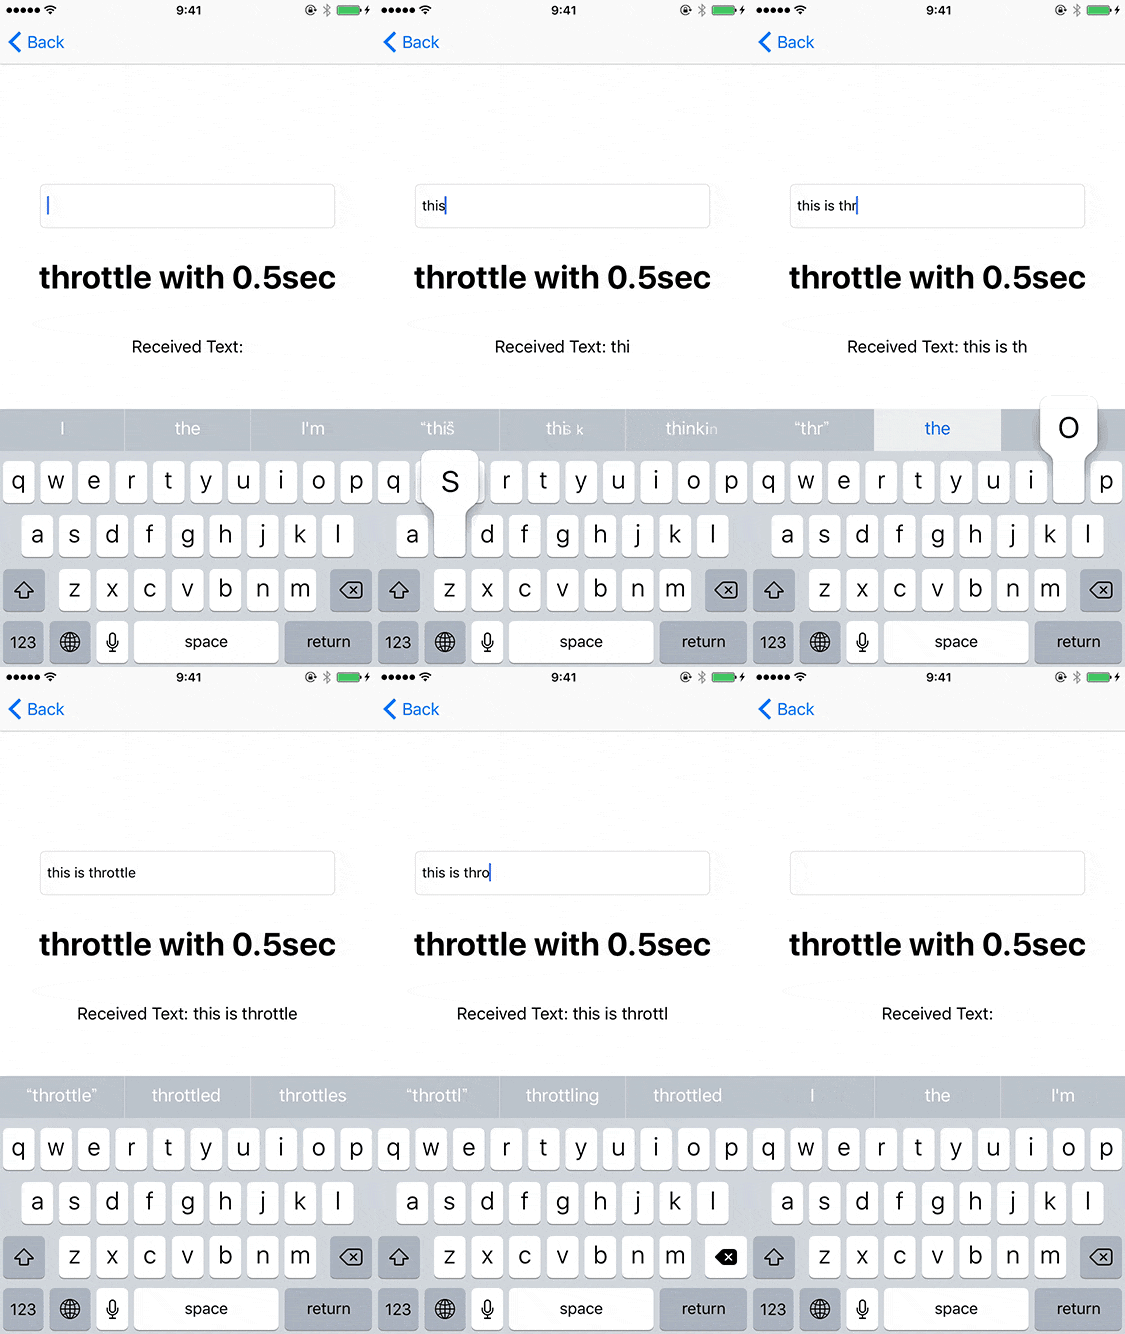
上記の実装とUITextFieldのtextを組み合わせると、次のような動きになります。
debounceの実装
次にdebounceを実装していきます。
debounceは、前回のイベント発生後から一定時間内に同じイベントが発生するごとに処理の実行を一定時間遅延させ、一定時間イベントが発生しなければ処理を実行するという挙動です。
基本的な実装は、throttleに非常に似ています。
throttleとの違いはasyncAfterを実装前に、lastFireTimeに現在時刻を再代入している部分になります。
extension DispatchQueue {
	func debounce(delay: DispatchTimeInterval) -> (_ action: @escaping () -> ()) -> () {
		var lastFireTime: DispatchTime = .now()

		return { [weak self, delay] action in
			let deadline: DispatchTime = .now() + delay
			lastFireTime = .now()
			self?.asyncAfter(deadline: deadline) { [delay] in
				let now: DispatchTime = .now()
				let when: DispatchTime = lastFireTime + delay
				if now < when { return }
				lastFireTime = .now()
				action()
			}
		}
	}
}
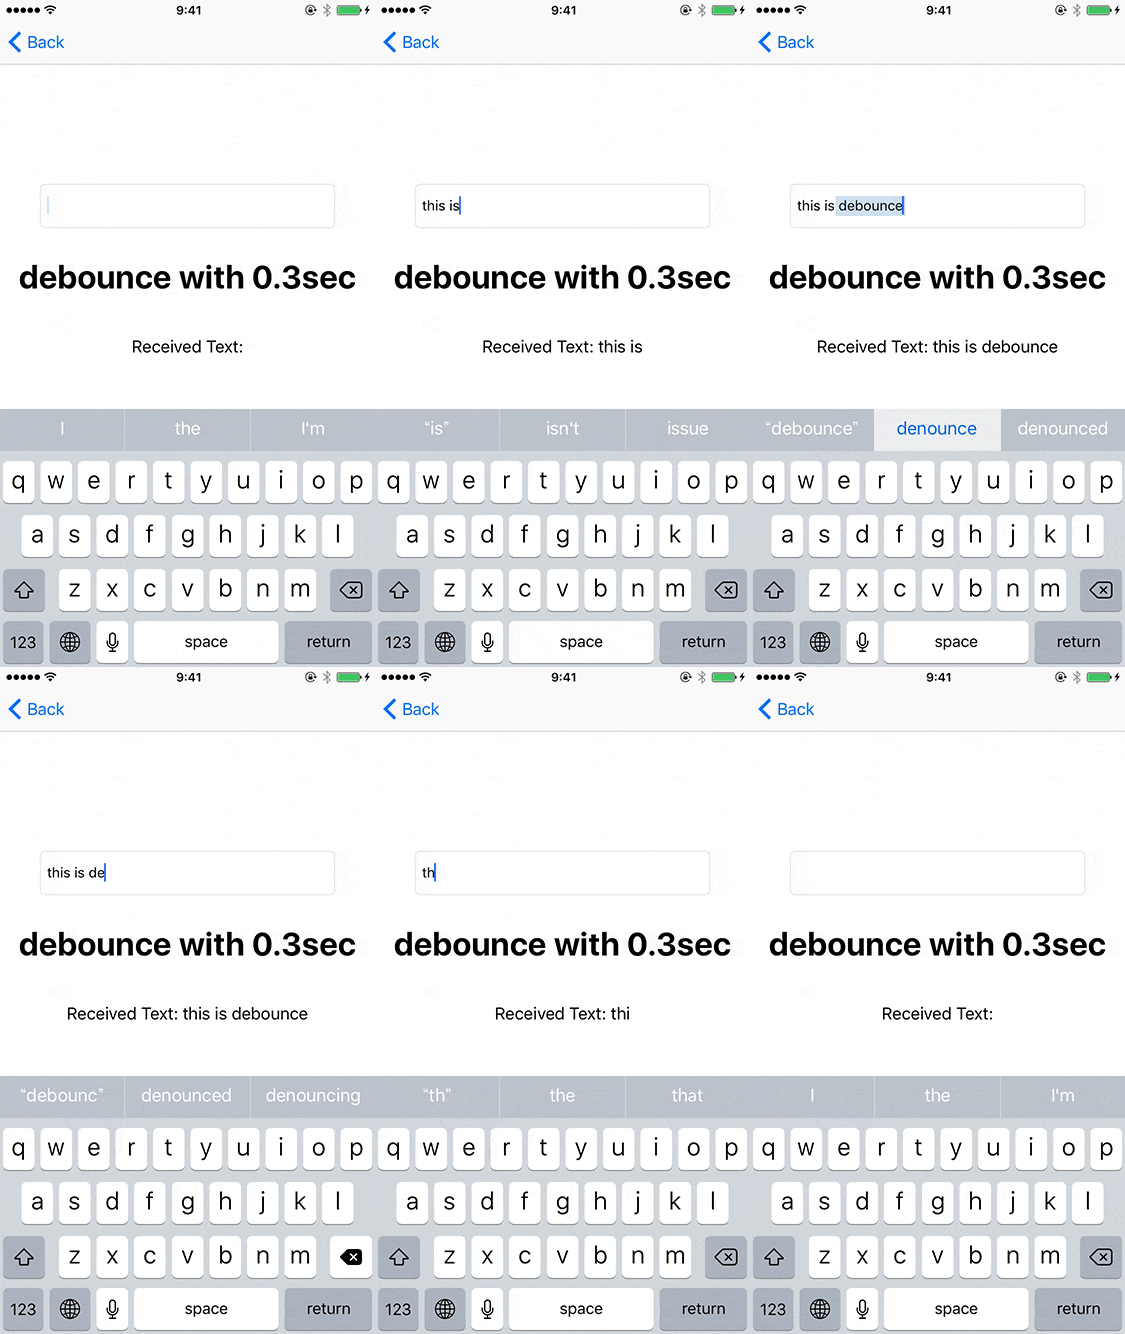
上記の実装とUITextFieldのtextを組み合わせると、次のような動きになります。
最後に
このようにthrottle/debounceのような実装をすることができるので、是非利用してみてください。

