CoreOSとはDockerを利用してコンテナを動かすことに特化した軽量なLinuxディストリビューションの一つです。
コンテナを実行させるためのDocker以外にetcd(設定情報共有)、fleet(クラスタリング)などのツールが標準でインストールされている反面、一般的なLinuxディストリビューションで提供されているようなパッケージ管理機構は用意されていません。
また、これから後述する内容はUbuntuやCentOSでも実行可能ですが、
設定ファイルなどのパスをそれぞれのOSに置き換えて考えて下さい。
以下はCoreOSのリリースノートになります
https://coreos.com/releases/
- CoreOSを動かす
- Remote APIの設定
- コンテナ上でWordPressの実行
- Remote API + Dockerfile
1. CoreOSを動かす
今回はStable 899.17.0を使用することにします。
CoreOSを実行する環境はAWSを使用することにしました。
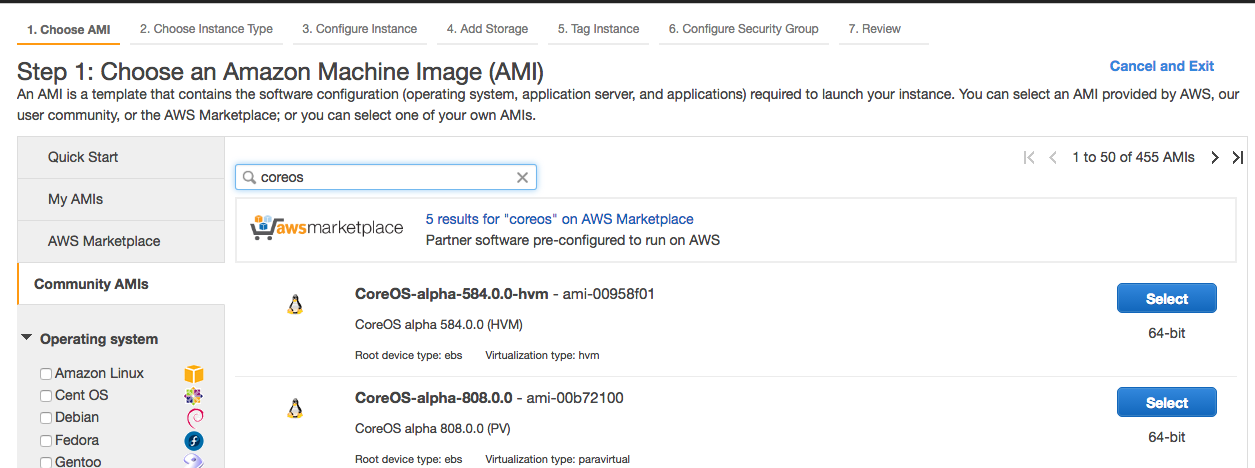
Launch Instanceからインスタンス作成を行います。

Community AMIsからcoreosを探します。
この時にリリースノートをみてStableの最新を選択しておくと予期せぬ不具合などに遭遇しないと思います。。。
このあとは通常のAWSのインスタンス作成と同じです。
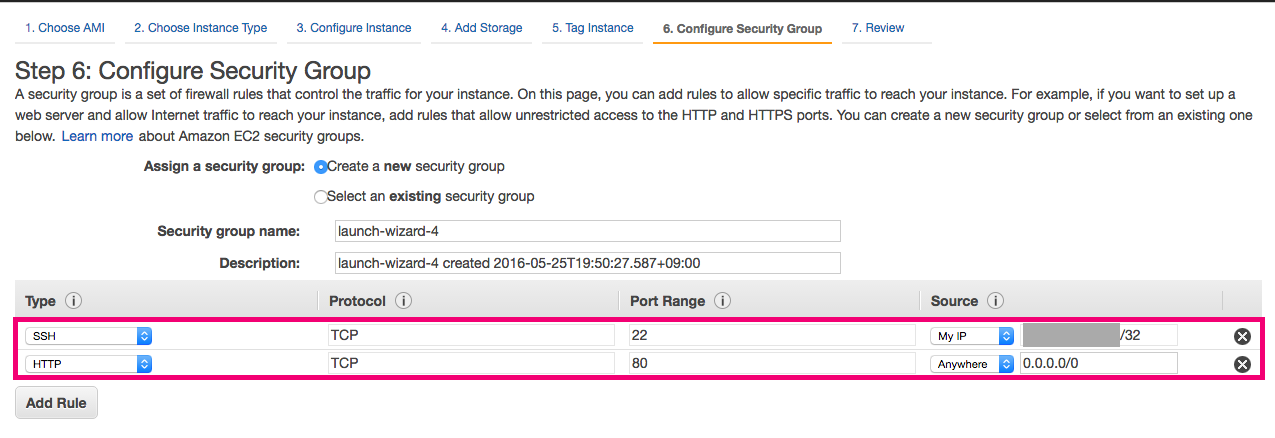
セキュリティグループでは以下のポートを開けておきましょう
80番:どこかでもアクセス可能
22番:自分のPCからのみ
あとは流れに沿って設定して下さい。
インスタンス起動後、SSHで接続できればオッケーです。
接続方法は以下になります。
$ ssh -i 鍵ファイル core@グローバルIP
Swap領域の作成
※これ以降はcoreosにリモート接続していることが前提で書いています
AWSで構築するとSwap領域が無いことが多いです。メモリを大量に積んでいるインスタンスタイプを選択しているなら良いのですが小さいインスタンスタイプを選択しているのなら念のためSwap領域を作成しておきましょう!
swap領域がないことを確認
$ free
             total       used       free     shared    buffers     cached
Mem:        606164     599536       6628        236       4548     519928
-/+ buffers/cache:      75060     531104
Swap:            0          0          0
以下のコマンドでSwap領域を作成
$ sudo dd if=/dev/zero of=/swapfile bs=1M count=4096
4096+0 records in
4096+0 records out
4294967296 bytes (4.3 GB) copied, 109.819 s, 39.1 MB/s

$ sudo mkswap /swapfile
Setting up swapspace version 1, size = 4 GiB (4294963200 bytes)
no label, UUID=2fd7ef19-f353-4104-a9ff-2060d56dddd4

$ sudo swapon /swapfile
swapon: /swapfile: insecure permissions 0644, 0600 suggested.
Swap領域が作成されていることの確認
$ free
             total       used       free     shared    buffers     cached
Mem:        606164     599076       7088        236       4620     515744
-/+ buffers/cache:      78712     527452
Swap:      4194300          0    4194300
2. Remote APIの設定
Remote APIとはdockerコンテナ操作に用意されているAPIの事を指します。デフォルトではUNIXソケットのみの対応なのでtcp経由で操作可能にするためには設定ファイルの変更が必要になります。
該当ファイルが存在しないことを確認
$ sudo ls -l /etc/systemd/system/docker-tcp.socket
ファイルの追加
$ sudo vi /etc/systemd/system/docker-tcp.socket
以下の内容保存
[Unit]
Description=Docker Socket for the API

[Socket]
ListenStream=2375
BindIPv6Only=both
Service=docker.service

[Install]
WantedBy=sockets.target
これで設定が完了して設定ファイルをロードします。
$ sudo systemctl enable docker-tcp.socket
$ sudo systemctl stop docker
$ sudo systemctl start docker-tcp.socket
$ sudo systemctl start docker
英語ですが以下のURLにも同様の記載があります。
https://coreos.com/os/docs/latest/customizing-docker.html
動作確認を行います
$ wget http://localhost:2375/images/json -O - -q |jq .
以下の様な結果が帰ってくればオッケー
[
  {
    "Id": "b1e98eb57559ef5427fc1d6237025c594b33c7be9dfa6145c828699d5cb4c1e8",
    "ParentId": "99e412eadf227b802f27d987d33f7357b5104fe454eae7b3600ebfb9f4ff16c9",
    "RepoTags": [
      "ubuntu:latest"
    ],
    "RepoDigests": [],
    "Created": 1461607192,
    "Size": 0,
    "VirtualSize": 120123901,
    "Labels": {}
  },
  {
    "Id": "0a6ba66e537a53a5ea94f7c6a99c534c6adb12e3ed09326d4bf3b38f7c3ba4e7",
    "ParentId": "b901d36b6f2fd759c362819c595301ca981622654e7ea8a1aac893fbd2740b4c",
    "RepoTags": [
      "hello-world:latest"
    ],
    "RepoDigests": [],
    "Created": 1444780068,
    "Size": 0,
    "VirtualSize": 960,
    "Labels": null
  }
]
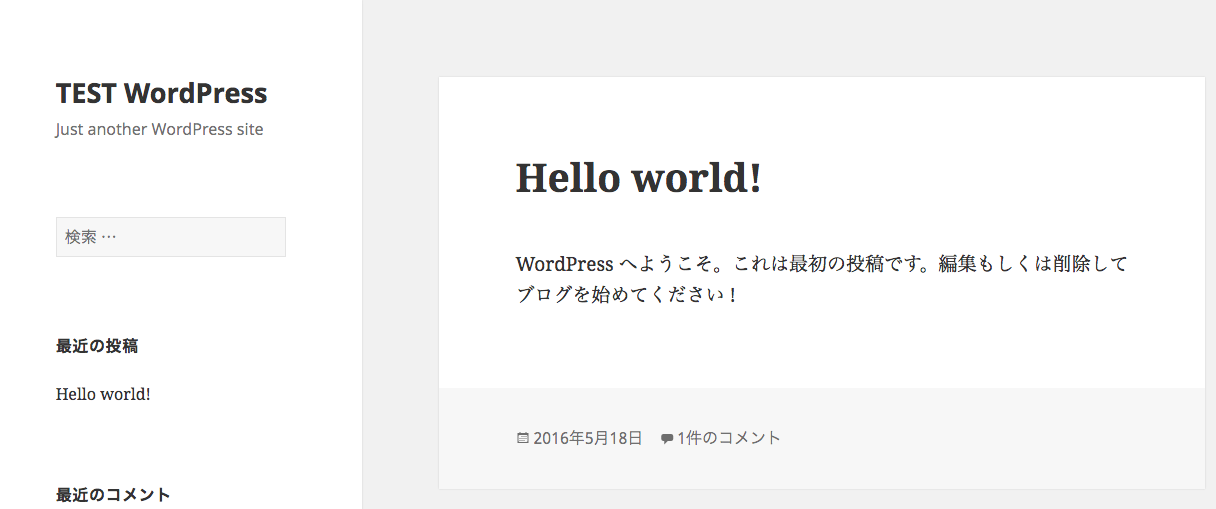
3. コンテナ上でWordPressの実行
$ docker run -d -p 80:80 --name=wordpress-test tutum/wordpress
http://CoreOSのグルーバルIP/ にアクセスするとWordPressの通常のインストール画面が表示されます。
以下はインストール後の画面になります。

Webサイト側もこんな感じ
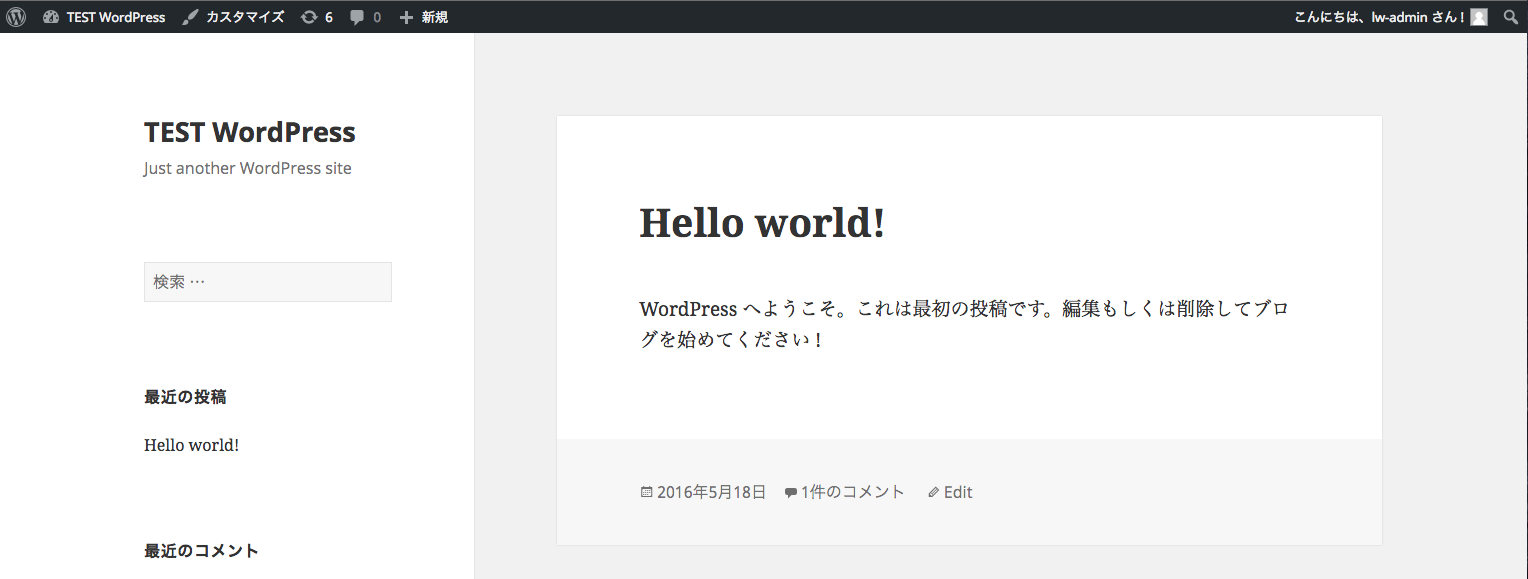
簡単にWordPressを動作させる事が出来ました。
それではdockerを停止を実施してみます。
$ docker stop wordpress-test
また、起動させてみます。
$ docker start wordpress-test
$ docker ps -a
ONTAINER ID        IMAGE               COMMAND             CREATED             STATUS                   PORTS                          NAMES
c8caf89f2320        tutum/wordpress     "/run.sh"           47 hours ago        Up 3 seconds             0.0.0.0:80->80/tcp, 3306/tcp   wordpress-test
先ほどのdocker runで指定したポートがマッピングされていることが確認できます。
4. Remote APIを使用してコンテナの実行を行う
これまでの内容をRemote APIを使用して実行してみようと思います。
自分のPCからRemote APIを実行することを前提としています
また、今回、Remote APIを使用するにあたり暗号化通信は省略しています。
※使用しているバージョン
Docker 1.9.1
Remote API v1.21
Remote APIを使用する準備
まずはAWSよりRemote APIを使用するIPをセキュリティグループから追加します。
ポート番号
2375番:自分のPCからのみ
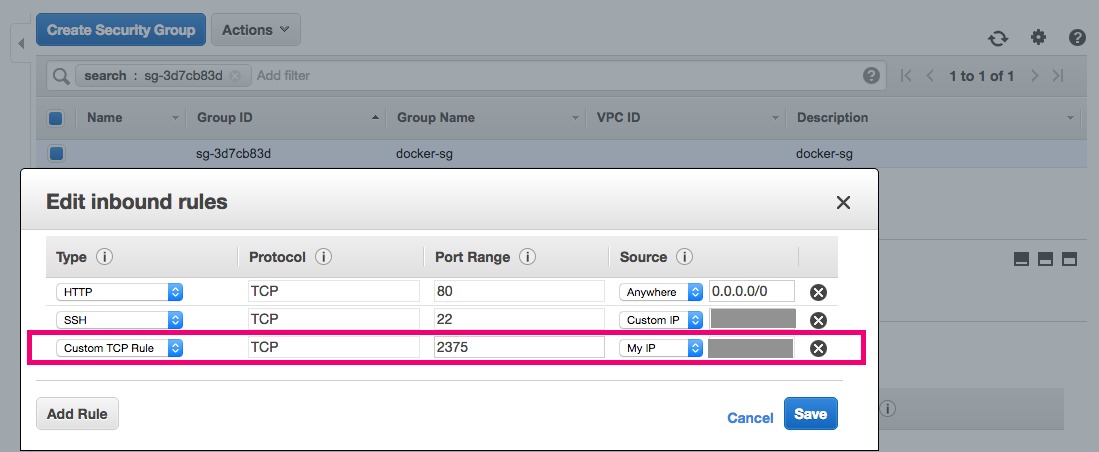
2375番を追加できたら準備は完了
Remote APIを使用してコンテナを実行してみる
まずはこれまでに作成したコンテナをRemote APIを使用して実行してみます。
Remote APIはREST APIなのでcurlコマンドから実行可能です。
APIの詳細は以下より確認できます。
https://docs.docker.com/engine/reference/api/docker_remote_api_v1.24/
自分のPCからターミナルを起動させてコンテナの起動を行ってみます。
※curlコマンドの実行環境は自分PC上だと読み替えて下さい。
$ curl -v  -X POST  http://CoreOSのIP:2375/containers/wordpress-test/start
*   Trying xxx.xxx.xxx.xxx...
* Connected to xxx.xxx.xxx.xxx (xxx.xxx.xxx.xxx) port 2375 (#0)
> POST /containers/wordpress-test/start HTTP/1.1
> Host: xxx.xxx.xxx.xxx:2375
> User-Agent: curl/7.43.0
> Accept: */*
>
< HTTP/1.1 204 No Content
< Server: Docker/1.10.3 (linux)
< Date: Thu, 02 Jun 2016 10:21:18 GMT
<
* Connection #0 to host xxx.xxx.xxx.xxx left intact
ターミナルから実行しているかどうか確認してみます。
CoreOSへSSHで接続してから確認してください。
$docker ps -a
CONTAINER ID        IMAGE               COMMAND             CREATED             STATUS                   PORTS                          NAMES
c8caf89f2320        tutum/wordpress     "/run.sh"           2 weeks ago        Up 6 seconds             0.0.0.0:80->80/tcp, 3306/tcp   wordpress-test
起動されている事が確認できたのブラウザよりアクセスを行ってみます。
ブラウザからWordPressにアクセス出来たと思います。
次にコンテナを停止させます。
$ curl -v -X POST http://CoreOSのIP:2375/containers/wordpress-test/stop
停止された事が確認できたかと思います。
少し難しい内容をRemote APIで実行してみようと思います。
新しくimageを取得してみます。dockerコマンドで言う所のpullにあたります。
nginxの最新版のイメージをCoreOSにダウンロードされます。
$ curl -v  -X POST  http://CoreOSのIP:2375/images/create?fromImage=nginx:latest
*   Trying xxx.xxx.xxx.xxx...
* Connected to xxx.xxx.xxx.xxx (xxx.xxx.xxx.xxx) port 2375 (#0)
> POST /images/create?fromImage=nginx:latest HTTP/1.1
> Host: xxx.xxx.xxx.xxx:2375
> User-Agent: curl/7.43.0
> Accept: */*
>
< HTTP/1.1 200 OK
< Content-Type: application/json
< Server: Docker/1.10.3 (linux)
< Date: Thu, 02 Jun 2016 10:59:19 GMT
< Transfer-Encoding: chunked
<
{"status":"Pulling from library/nginx","id":"latest"}
{"status":"Pulling fs layer","progressDetail":{},"id":"51f5c6a04d83"}
{"status":"Pulling fs layer","progressDetail":{},"id":"a3ed95caeb02"}
{"status":"Pulling fs layer","progressDetail":{},"id":"51d229e136d0"}
{"status":"Pulling fs layer","progressDetail":{},"id":"bcd41daec8cc"}
以下、省略
{"status":"Status: Downloaded newer image for nginx:latest"}
* Connection #0 to host xxx.xxx.xxx.xxx left intact
正常にダウンロードが完了したら次にそのイメージを使用してコンテナを実行してみます。
jsonデータをcurlコマンドでPOSTしています。
先ほどnginxのイメージをダウンロードしたのでimageにnginxを指定しています。
コンテナの名前はnameパラメータ付与して下さい。
$ curl -v -H "Accept: application/json" -H "Content-type: application/json" -X POST -d '{ "Image" : "nginx","PortBindings": { "80/tcp": [{ "HostPort": "80" }] }}' http://xxx.xxx.xxx.xxx:2375/containers/create?name="test-nginx"
* Trying xxx.xxx.xxx.xxx...
* Connected to xxx.xxx.xxx.xxx (xxx.xxx.xxx.xxx) port 2375 (#0)
> POST /containers/create HTTP/1.1
> Host: xxx.xxx.xxx.xxx:2375
> User-Agent: curl/7.43.0
> Accept: application/json
> Content-type: application/json
> Content-Length: 20
>
* upload completely sent off: 20 out of 20 bytes
< HTTP/1.1 201 Created
< Content-Type: application/json
< Server: Docker/1.10.3 (linux)
< Date: Thu, 02 Jun 2016 11:20:34 GMT
< Content-Length: 90
<
{"Id":"ab655edcbe6f092ac2d4d982f52bb346756c80589fbbd062db18486e2a966a6c","Warnings":null}
* Connection #0 to host xxx.xxx.xxx.xxx left intact
コンテナの作成が出来たら次にコンテナの実行です
$ curl -v  -X POST  http://xxx.xxx.xxx.xxx:2375/containers/test-nginx/start
*   Trying xxx.xxx.xxx.xxx...
* Connected to xxx.xxx.xxx.xxx (xxx.xxx.xxx.xxx) port 2375 (#0)
> POST /containers/test-nginx/start HTTP/1.1
> Host: xxx.xxx.xxx.xxx:2375
> User-Agent: curl/7.43.0
> Accept: */*
>
< HTTP/1.1 204 No Content
< Server: Docker/1.10.3 (linux)
< Date: Thu, 02 Jun 2016 11:40:34 GMT
<
* Connection #0 to host xxx.xxx.xxx.xxx left intact
ブラウザからアクセスしてみます
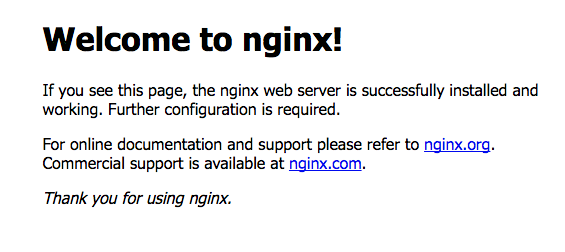
curlコマンドで簡単にDockerを操作できるのは面白かったです。
APIの仕様を見ることでDockerへの理解力があがった気がします。
Remote APIにはclinet libraryが用意されているので次は試してみたいと思います。
https://docs.docker.com/engine/reference/api/remote_api_client_libraries/