前回は、
ダウンロードはコチラから。
とダウンロードサイトからのインストールを勧めましたが、
今回は、Homebrewを使ってEmacsインストールする方法です。
Homebrewをインストールする
パッケージ管理のHomebrewを利用します。
$ /usr/bin/ruby -e "$(curl -fsSL https://raw.githubusercontent.com/Homebrew/install/master/install)"
$ brew update
Homebrew Caskをインストールする
$ brew tap caskroom/cask
Emacsをアップデートする
初期のemacsはバージョンが古い(事が多い)ため、Homebrewをインストール後、
アップデートを行ないます。
※El Capitan だと、 22.1.1 だった
最新版のEmacsをインストール
$ brew cask install emacs
caskを使わない場合
$ brew install --with-cocoa --srgb emacs
$ brew linkapps emacs
※caskを使わない場合、Applicationにシンボリックリンクを設定しておく必要があった
既にcaskを入れている場合以下のようなメッセージが表示されました。
Please try the Cask for a better-supported Cocoa version:
  brew cask install emacs

To have launchd start emacs now and restart at login:
  brew services start emacs
Or, if you don't want/need a background service you can just run:
  emacs

.app bundles were installed.
Run `brew linkapps emacs` to symlink these to /Applications.
この場合は、メッセージに従って
最新版のEmacsをインストール
$ brew cask install emacs
でインストールしましょう。
「いや、別にいいよ」って人は brew linkapps emacs して進んじゃいましょう。
確認
インストールが完了すると
==> Verifying checksum for Cask emacs
==> It seems there is already an App at '/Applications/Emacs.app'; not
==> Symlinking Binary 'emacsclient' to '/usr/local/bin/emacsclient'
==> Symlinking Binary 'ctags' to '/usr/local/bin/ctags'
==> Symlinking Binary 'ebrowse' to '/usr/local/bin/ebrowse'
==> Symlinking Binary 'etags' to '/usr/local/bin/etags'
🍺  emacs was successfully installed!
となります。
ターミナルを再起動してバージョンの確認をします。
$ emacs --version

GNU Emacs 25.1.1
Copyright (C) 2016 Free Software Foundation, Inc.
GNU Emacs comes with ABSOLUTELY NO WARRANTY.
You may redistribute copies of GNU Emacs
under the terms of the GNU General Public License.
For more information about these matters, see the file named COPYING.
これで最新のEmacsが準備できました。
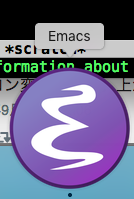
古いEmacs.appを利用されていた場合、アイコンが新しくなっています。
アイコンが変わっていない場合、もともと入っている Emacs.app が残っているからなので、ApplicationのEmacs.appを削除し、brew linkapps emacs を実行してシンボリックリンクを設定すると新しいバージョンへのシンボリックリンクがApplicationに配置されます。
まとめ
Homebrew Cask はとっても便利なので Emacs に関わらず活用することをお勧めします。

