このエントリは2枚目 SoftLayer Advent Calendar 2014の14日目のエントリです.
一般的なサーバ構成として,フロントエンドにphpなどのプログラムを配置し,バックエンドにMysqlなどのDBを配置することが多いのではないでしょうか?
SoftlayerではDevice購入時にPrivateNetworkOnlyなマシンとして作成することできます.
しかし,例えバックエンドのマシンであっても,パッケージのインストールなどのため,一時的にpublicNetworkに接続したくなることもあるでしょう.
このエントリではDeviceのpublicネットワークの有効/無効化,すなわちサーバのフロントエンドとバックエンドの切り替え方法を説明します.
フロントエンドからバックエンドへの切り替え(publicNetworkの無効化)
まず管理ポータルの[Device]→[Device List]から切り替えを行いたいデバイスを選択しましょう.
この一覧画面では割り当てられているIPが表示されますが,有効になっているかどうかはわかりません.

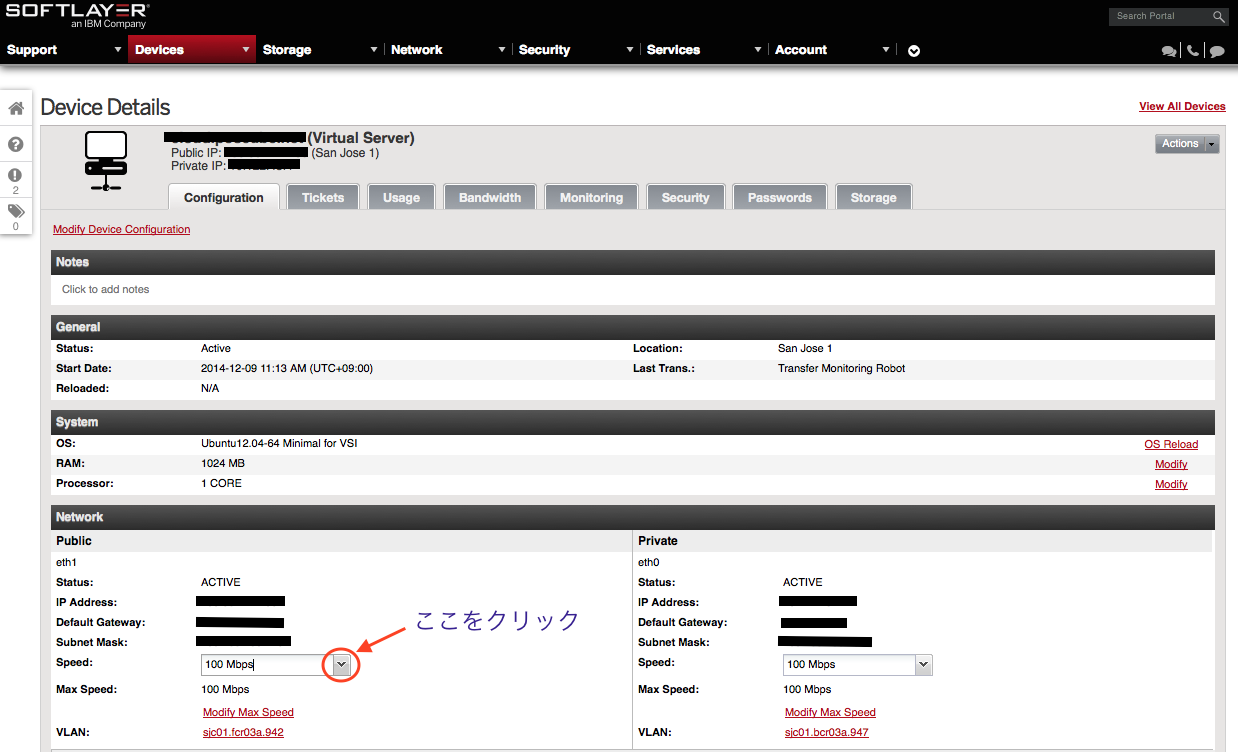
詳細を開くと下のような画面が出てきます.
今回はpublicへの接続を切断したいので左側(public)のSpeedをクリックします.

選択肢の中からDisconnectを選び,右側のチェックをクリックするとpublicネットワークから切断され,
privateのみで利用できるようになります.

バックエンドからフロントエンドへの切り替え(publicNetworkの有効化)
次にPrivateNetworkOnlyになっているDeviceをpublicに戻す方法を紹介します.
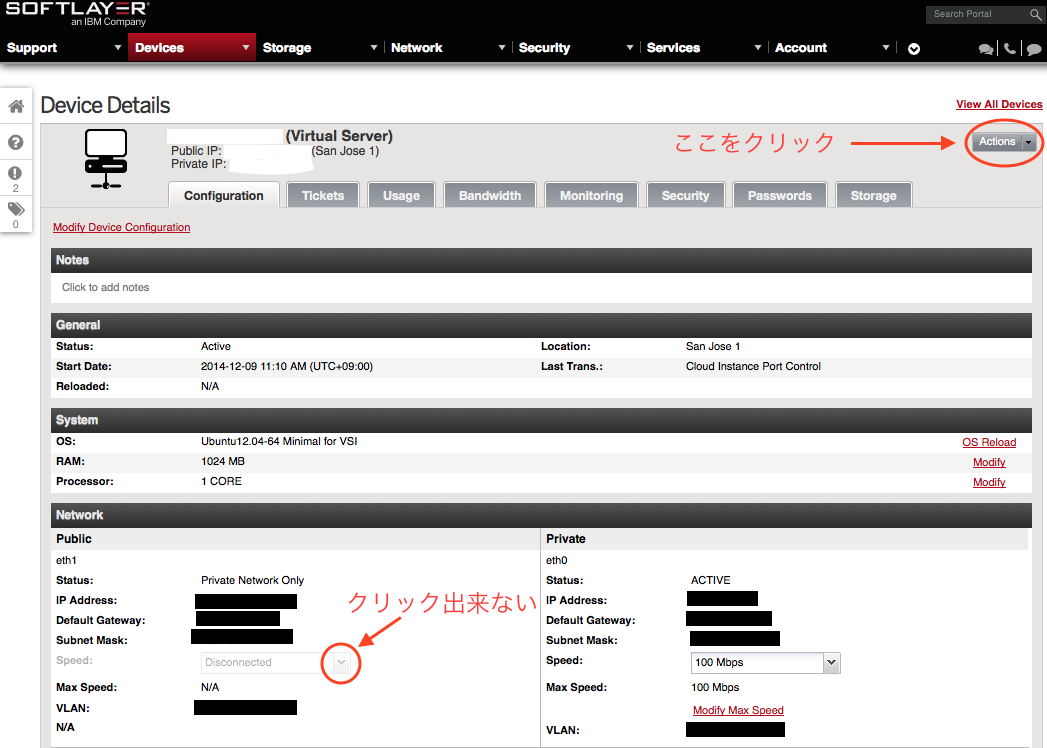
詳細画面を開いて先ほどと同じ場所をクリックしようとしてもできなくなっています.
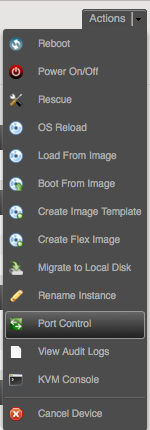
public networkを有効にするには右上にある[Actions]を押しましょう.
(publicの無効化も実はここから出来ます)


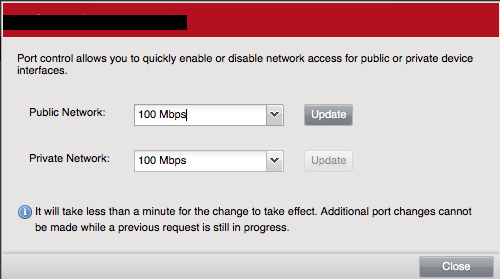
Actionsの中から[Port Control]を選択すると下記のようなpublic, privateのport状態を選択できる画面が表示されます.
あとはpublic NetworkをDisconnectから100Mbpsに変更し,Updateボタンを押せば再度publicネットワークに接続できるようになります.
