はじめに
ListFragmentの使い方を勉強。
基礎の基礎は少し調べればすぐ出るけど、表示するデータは自分で作成したクラスのデータにしたい、ということで検索検索。
自分なりにまとめてみますことに。
環境
OS X 10.9.3
Android Studio (Beta) 0.8.0
Sony SOL25 Android 4.4.2(API 19)
ListFragment
Fragmentを用いて簡単に(?)Listを表示させることができるモノです、誤解を恐れながら言うと。
Fragmentを用いたActionBarによるTab表示で作成したProjectを参考にしながら、ちょこちょこ変えていきました。
今回は、タブを2つにし、ひとつをListFragmentとしてTabにSetしました。
前置きが長い、ザクっと行きます。
Itemクラス
サンプルに作った適当なデータクラスです。idと名前を持った簡単なモノですね。
public class Item implements Parcelable{
    public String id;
    public String name;

    public Item(String id, String name) {
        this.id = id;
        this.name = name;
    }

    public Item(Parcel in){
        this.id = in.readString();
        this.name = in.readString();
    }

    @Override
    public void writeToParcel(Parcel dest, int flags){
        dest.writeString(id);
        dest.writeString(name);
    }

    @Override
    public int describeContents() {
        return 0;
    }//FileDescriptor未使用の場合は0

    // 今は定型文という認識で
    public static final Creator<Item> CREATOR = new Creator<Item>() {
        public Item createFromParcel(Parcel in) {
            return new Item(in);
        }

        public Item[] newArray(int size) {
            return new Item[size];
        }
    };
}
Parcelableクラス
独自にデータクラスを作成した場合に都合がいい模様(適当でごめんなさい)。必要があれば調べてまとめたいところ。
注意点としては、writeToParcel(Parcel dest, int flags)で書き込む順番とItem(Parcel in)で読み出す順番を同じにするところだそうです。気をつけよう。
今回に関してはあまり関係ないです。
ListFragmentをextendsしたクラス作成
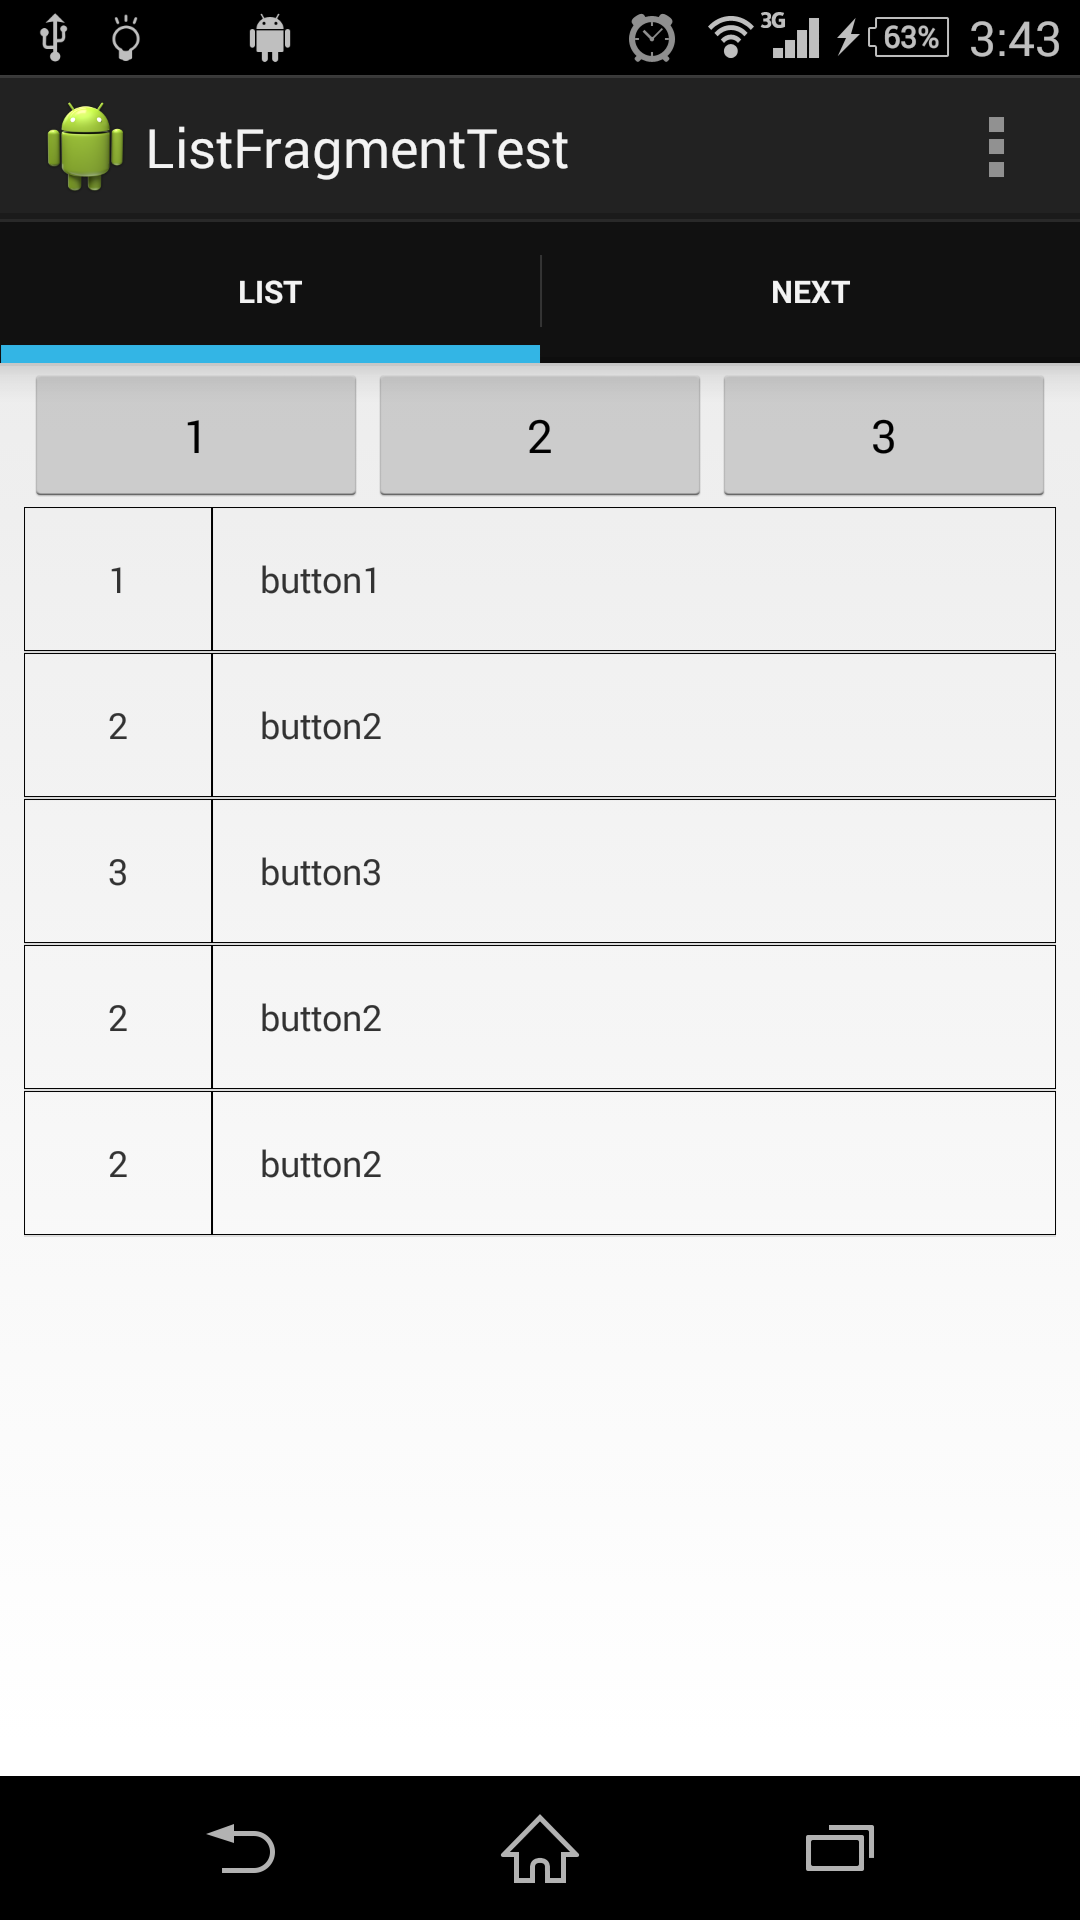
データを表示するフラグメントですね。今回はListViewだけでは悲しいので、ボタンを3つ設けちゃいました。
//import等は割愛

public class ItemListFragment extends ListFragment {

    private ItemListAdapter adapter;

    public ItemListFragment() {
    }

    @Override
    public void onCreate(Bundle savedInstanceState) {
        super.onCreate(savedInstanceState);

        //set adapter
        adapter = new ItemListAdapter(getActivity());
        setListAdapter(adapter);
    }

    @Override
    public void onStart() {
        super.onStart();

        this.getView().findViewById(R.id.one).setOnClickListener(new View.OnClickListener() {
            @Override
            public void onClick(View v) {
                adapter.add("1", "button1");
            }
        });
        this.getView().findViewById(R.id.two).setOnClickListener(new View.OnClickListener() {
            @Override
            public void onClick(View v) {
                adapter.add("2", "button2");
            }
        });
        this.getView().findViewById(R.id.three).setOnClickListener(new View.OnClickListener() {
            @Override
            public void onClick(View v) {
                adapter.add("3", "button3");
            }
        });

    }

    @Override
    public View onCreateView(LayoutInflater inflater, ViewGroup container, Bundle savedInstanceState) {
        return inflater.inflate(R.layout.item_listfragment, container, false);
    }

}
ボタンを押すとItemがListViewに追加されるという寸法です。レイアウトも見ていきます。
<?xml version="1.0" encoding="utf-8"?>
<LinearLayout xmlns:android="http://schemas.android.com/apk/res/android"
    android:orientation="vertical"
    android:layout_width="match_parent"
    android:layout_height="match_parent"
    android:paddingLeft="8dp"
    android:paddingRight="8dp">

    <LinearLayout
        android:layout_width="match_parent"
        android:layout_height="wrap_content"
        android:orientation="horizontal">

        <Button
            android:id="@+id/one"
            android:layout_width="match_parent"
            android:layout_height="wrap_content"
            android:layout_weight="1"
            android:text="1"/>
        <Button
            android:id="@+id/two"
            android:layout_width="match_parent"
            android:layout_height="wrap_content"
            android:layout_weight="1"
            android:text="2"/>
        <Button
            android:id="@+id/three"
            android:layout_width="match_parent"
            android:layout_height="wrap_content"
            android:layout_weight="1"
            android:text="3"/>

        </LinearLayout>

    <ListView
        android:id="@id/android:list"
        android:layout_width="match_parent"
        android:layout_height="match_parent"
        android:drawSelectorOnTop="false"/>

	//データがない場合に表示される
    <TextView
        android:id="@id/android:empty"
        android:layout_width="match_parent"
        android:layout_height="match_parent"
        android:gravity="center"
        android:text="No data"
        android:textSize="32sp"/>

</LinearLayout>
ListAdapter
AdapterはListViewとデータをつなげる重要人物です。
こちらを参考にさせていただきました。非常に説明が細かくされており、勉強になります。もう、私のよりここをみたほうがよいかも。悲しい。
public class ItemListAdapter extends ArrayAdapter<Item> {

    // 見易さのために定義。普段は直接 getView で指定する。
    private static final int resource = R.layout.custom_listview_item;

    public ItemListAdapter(Context context){
        super(context, 0);
    }

    @Override
    public View getView(int position, View convertView, ViewGroup parent) {
        // super.getView() は 呼ばない(カスタムビューにしているため)
        View view;

        // テンプレート処理。
        if (convertView == null) {
            LayoutInflater inflater = LayoutInflater.from(getContext());
            view = inflater.inflate(resource, parent, false);
        } else {
            view = convertView;
        }

        // データをgetItemで取る
        Item item = getItem(position);

        // カスタムビューの場合はViewが確実にあるtry-catch は不要ためか。
        TextView id = (TextView) view.findViewById(R.id.id);
        id.setText(item.id);
        TextView name = (TextView) view.findViewById(R.id.name);
        name.setText(item.name);

        return view;
    }

    // 設定されている CustomListItem の ArrayList を返す。
    // 縦横切替などでデータを移行するために使う。
    public ArrayList<Item> getItemList() {
        // 今回は Bundle#putParcelableArrayList() を使うことを想定する。
        // 必要に応じて Bundle#putSparseParcelableArray() を使ってもいい。

        int size = getCount();
        ArrayList<Item> itemList = new ArrayList<Item>(size);
        for (int index = 0; index < size; index++) {
            itemList.add(getItem(index));
        }
        return itemList;
    }

    // Bundleから復元するときに必要になるはず。
    public void addAll(ArrayList<Item> parcelableArrayList) {
        // 強制でキャスト。落ちる場合は、設計か実装が間違っている。
        @SuppressWarnings("unchecked")
        ArrayList<Item> itemList = (ArrayList<Item>) parcelableArrayList;
        super.addAll(itemList);
    }

    public void add(String id, String name) {
        Item item = new Item(id, name);
        super.add(item);
    }

    // 削除
    public void remove(int index) {
        if (index < 0 || index >= getCount()) {
            return;
        }
        remove(getItem(index));
    }
}
その他のクラス
あとはもうひとつのタブに適当なフラグメントをSetします。それだけ。
カスタムビューを一応作りました、適当ですね。
<?xml version="1.0" encoding="utf-8"?>

<LinearLayout
    xmlns:android="http://schemas.android.com/apk/res/android"
    android:orientation="horizontal"
    android:layout_margin="8dp"
    android:layout_width="match_parent"
    android:layout_height="match_parent">

    <TextView
        android:id="@+id/id"
        android:layout_width="wrap_content"
        android:layout_height="48dp"
        android:layout_weight="1"
        android:background="@drawable/border"
        android:gravity="center"
        android:text="id"/>
    <TextView
        android:id="@+id/name"
        android:layout_width="wrap_content"
        android:layout_height="48dp"
        android:paddingLeft="16dp"
        android:layout_weight="4"
        android:background="@drawable/border"
        android:gravity="center_vertical"
        android:text="name"/>

</LinearLayout>
実行確認
おわりに
GithubにてProjectを公開しております。割愛した説明はここを見てもらえれば。
また、説明不足が際立つ(説明してない)。メモとして見返してこれでわかるか、いや、わかるまい。質問等あれば適宜、追記したいところ。なくても追記したいところ。
ご指摘やアドバイス等を頂けると本当に幸いです。
参考
技術見聞録 - ListViewのカスタムビューを作るときにやるべきこと
Android Parcelable を使ってクラスのメンバを一時保存
美しいOnClickListenerの実装方法(を教えてください)
ListFragment | Android Developers
