Formデーター送信する流れ
Formデータをサーバーへ送信する操作はウェブ開発者にとっては基本的な知識だと思います。Ajaxを使用したら裏でデータを送信することができまして基本てきなステップは以下のようにまとめらせていただきます。
- FormのHTML作成して送信先と送信メソッドを定義する
- サーバーの処理を定義する
- JavaScriptで以下の操作を定義する。
- 通常にSubmitボタンのアクションをキャンセルする
- 複数のsubmitが起きないように送信ボタンを無効にする
- jQuery.ajax()という関数のパラメーターとを正しく指定する
- 送信した後に後処理が必要であれば定義する (せめてsubmitボタンを有効にしなければならない)
- ajaxを動かしてデータ送信する 詳細は以下の例で徐々に説明させていただきます。
*HTMLの部分
<div class="col-md-6">
<!-- general form elements -->
<div class="box box-warning">
<div class="box-header with-border">
<h3 class="box-title">{{auth()->user()->name}}</h3>
</div>
<!-- /.box-header -->
<!-- form start -->
{!!Form::open(array('route' =>
array('user.update','id'=>auth()->user()->id),'id'=>'frmUserUpdate','name'=>'frmUserUpdate',
'method' => 'POST')) !!}
<div class="box-body" style="display: block;">
<div class="alert alert-dismissible" id="alerts_profile"
name="alerts_profile" style="display: none">
<button type="button" class="close" data-dimiss="alert"
aria-hidden="true">×</button>
<h4>
<i class="icon fa fa-check"></i> Alerts
</h4>
<ul id="alert_profile_content" name="alert_profile_content">
</ul>
</div>
<div class="form-group">
<label for="MyName">Name</label>
<input type="text" class="form-control" id="MyName" name="MyName"
value="{{auth()->user()->name}}">
</div>
<div class="form-group">
<label for="MyEmail">Email</label>
<input type="email" class="form-control" id="MyEmail" name="MyEmail"
disabled value="{{auth()->user()->email}}">
</div>
<div class="form-group">
<label for="MyOldPassword">Old Password</label>
<input type="password" class="form-control" id="MyOldPassword"
name="MyOldPassword" value="">
</div>
<div class="form-group">
<label for="MyNewPassword">New Password</label>
<input type="password" class="form-control" id="MyNewPassword"
name="MyNewPassword">
</div>
<div class="form-group">
<label for="MyNewPassword_confirmation">Confirm Password</label>
<input type="password" class="form-control"
id="MyNewPassword_confirmation" name="MyNewPassword_confirmation">
</div>
</div>
<div class="box-footer">
<button type="submit" class="btn btn-primary" id="btnProfileUpdate"
name="btnProfileUpdate">Submit</button>
</div>
{!!Form::close()!!}
</div>
<!-- /.box -->
</div>
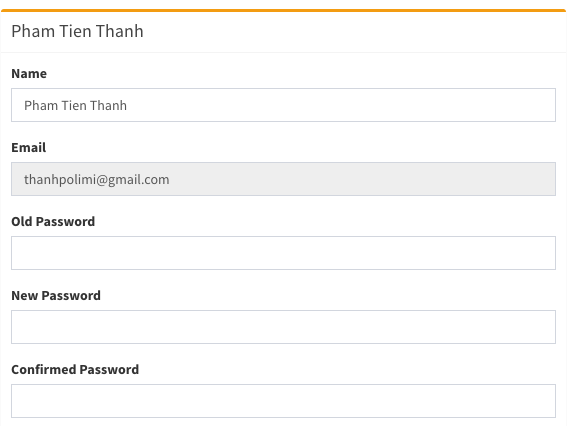
フォームのイメージ
*サーバー処理の定義
ユーザ情報更新である基本的な例を持って説明していこうと思います。
まずはLaravelのroute.phpで用いるルートを定義します
Route::post('user/{id}', ['as'=>'user.update', 'uses'=>'UserController@updateUserProfile']);
UserController@updateUserProfileの内容は大体以下のようになります。
private function validator(array $data)
{
        return Validator::make($data, [
                'MyName' => 'required|max:255',
                'MyOldPassword'=>'required|min:6',
                'MyNewPassword' => 'required|confirmed|min:6',
        ]);
}
public function updateUserProfile(Request $request, $id){
   Log::debug($request);
   //データーの検証する
   $validator = $this->validator($request->all());
   if ($validator->fails()) {
    return json_encode(['success' => false, 'errors' => $validator->getMessageBag()->toArray()]);
   }
   //現在のデーター
   $user = User::find($id);
   $oldPassword = $request->input('MyOldPassword');
   //パスワードの検証
   if(!Hash::check($oldPassword , $user->password)){
    return json_encode(['success' => false, 'errors' => ['MyOldPassword'=>['Provided old password does not match.']]]);
   }
   $newPassword = bcrypt($request->input('MyNewPassword'));
   $user->password = $newPassword;
   $name = $request->input('MyName');
   $user->name = $name;
   $code = str_random(60);
   $user->remember_token = $code;
   try{
       $user->save();
       return json_encode(['success' => true, 'message' => ['Updated Successfully!!!']]);
    }catch (Exception $e){
       return json_encode(['success' => false, 'errors' => ['UserObj'=>[$e->getMessage()]]]);
    }
Ajaxの定義
<script type="text/javascript">
//送信準備
$(document).ready(function(){
  $.ajaxSetup({
     headers: {
    'X-CSRF-TOKEN': $('meta[name="csrf-token"]').attr('content')
     }
  });
//フォームのsubmitを拾う
$('#btnProfileUpdate').on('click', function(event){
  //通常のアクションをキャンセルする
  event.preventDefault();
  //Formの参照を取る
  $form = $(this).parents('form:first');
  $.ajax({
       url : $form.attr('action'), //Formのアクションを取得して指定する
       type: $form.attr('method'),//Formのメソッドを取得して指定する
       data: $form.serialize(),  //データにFormがserialzeした結果を入れる
       timeout: 10000,
       beforeSend : function(xhr, settings){
           //Buttonを無効にする
           $('#btnProfileUpdate').attr('disabled' , true);
           //処理中のを通知するアイコンを表示する
       $('#boxEmailSettings').append('<div class="overlay" id ="spin" name = "spin"><i class="fa fa-refresh fa-spin"></i></div>');
       },
       complete: function(xhr, textStatus){
            //処理中アイコン削除
        $('#spin').remove();
            $('#btnProfileUpdate').attr('disabled' , false);
       },
       success: function (result, textStatus, xhr) {
       ret = jQuery.parseJSON(result);
           //Alertで送信結果を表示する
       if(ret.success){
           $('#alert_profile_content').html(ret.message);
           $('#alerts_profile').attr('class','alert alert-success alert-dismissible');
       }else{
           var messageBags = ret.errors;
           $('#alertContent').html('');
           var html = '';
               jQuery.each(messageBags, function(key,value){
                     var fieldName = key;
                     var errorMessages = value;
                     jQuery.each(errorMessages, function(msgID, msgContent){
                 html += '<li>'+ msgContent + '</li>';
             });
        });
                $('#alert_profile_content').html(html);
            $('#alerts_profile').attr('class','alert alert-danger alert-dismissible');
        }
                 $('#alerts_profile').show();
        },
        error : function(data){
            $('#btnProfileUpdate').attr('disabled' , false);
            console.debug(data);
        }
    });
});

});
結論
ほとんどのデータ送信したい場合は以上のようにするだけでいいと思います。
以上