セットアップ方法を自分用にまとめておくためのメモ
参考サイト
http://d.hatena.ne.jp/Michael_e29/20140701/1404181242
http://yamaryu0508.hatenablog.com/entry/2014/08/15/001312
http://blog.livedoor.jp/victory7com/archives/42656911.html
http://blog.shibayan.jp/entry/20150222/1424607212
https://gist.github.com/annem/3183536
https://github.com/KipCrossing/kivypi/blob/master/install-kivypi.sh
http://denshikousaku.net/extend-life-expectancy-of-raspberry-pi-sd-card
http://ohwhsmm7.blog28.fc2.com/blog-entry-390.html
1.購入物一覧
・Raspberry Pi2 Model B ボード&ケースセット【¥6,840】
・SAMSUNG EVO microSDXCカード 64GB【¥3,980】
・BUFFALO WLI-UC-GNM 11g/b対応【¥714】
・ハックラズベリーパイ電子工作入門キット【¥2,280】
・画面(OnLap-1005) 【約¥30,000】
2.使用するもの
・MAC BOOK PRO
・無線LANアクセスポイント
・SDカードアダプタ(microSDXC変換用)
3.手順
3.1 OSのダウンロード
・http://www.raspberrypi.org/downloads/でRASPBIANをダウンロードして解凍する。
3.2 SDカードに書き込み
$ df -h
 Filesystem      Size   Used  Avail Capacity   iused    ifree %iused  Mounted on
 /dev/disk1     465Gi  385Gi   80Gi    83% 100929397 20914313   83%   /
 devfs          187Ki  187Ki    0Bi   100%       648        0  100%   /dev
 map -hosts       0Bi    0Bi    0Bi   100%         0        0  100%   /net
 map auto_home    0Bi    0Bi    0Bi   100%         0        0  100%   /home
 /dev/disk2s1    56Mi   14Mi   41Mi    26%       512        0  100%   /Volumes/ UNTITLED
$
$ diskutil umount /Volumes/UNTITLED
$ df -h
 Filesystem      Size   Used  Avail Capacity   iused    ifree %iused  Mounted on
 /dev/disk1     465Gi  385Gi   80Gi    83% 100929397 20914313   83%   /
 devfs          187Ki  187Ki    0Bi   100%       648        0  100%   /dev
 map -hosts       0Bi    0Bi    0Bi   100%         0        0  100%   /net
 map auto_home    0Bi    0Bi    0Bi   100%         0        0  100%   /home
$
$ sudo dd if=2014-01-07-wheezy-raspbian.img of=/dev/rdisk2 bs=1m
$
3.3 ネットワークの設定
RaspberryPiに有線LANと書き込んだSDカードを挿して起動する(DHCP必須)。起動後に取得されたIPアドレスを調べてSSHにて接続する。そして、有線LANを固定IPにして無線LANの設定を行う(Default login:pi / raspberry)。
$ ssh pi@192.168.32.105
pi@192.168.32.105s password:
pi$
pi$ sudo vi /etc/network/interfaces
auto lo

iface lo inet loopback
# iface eth0 inet dhcp  <--- コメントアウト
iface eth0 inet static <--- 追加
address 192.168.32.222 <--- 追加
netmask 255.255.255.0 <--- 追加
gateway 192.168.32.1 <--- 追加

allow-hotplug wlan0
# iface wlan0 inet manual <--- コメントアウト
iface wlan0 inet dhcp <--- 追加
# wpa-roam /etc/wpa_supplicant/wpa_supplicant.conf <--- コメントアウト
wpa-conf /etc/wpa_supplicant/wpa_supplicant.conf <--- 追加
iface default inet dhcp
pi$ sudo wpa_passphrase SSID_hogehoge PASSPHRASE_hogehoge
network={
	ssid="SSID_hogehoge"
	#psk="PASSPHRASE_hogehoge"
	psk=1d7e4c575c34f9bf797d562f72e134c357302f6e3d1b971636310324a371f32d
}
pi$
pi$ sudo vi /etc/wpa_supplicant/wpa_supplicant.conf
ctrl_interface=DIR=/var/run/wpa_supplicant GROUP=netdev
update_config=1
network={
  ssid="SSID_hogehoge" <--- 変更
  proto=WPA2
  key_mgmt=WPA-PSK
  psk=1d7e4c575c34f9bf797d562f72e134c357302f6e3d1b971636310324a371f32d <--- 変更
}
3.4 Bonjourのインストール&設定
pi$ sudo apt-get update
pi$ sudo apt-get install avahi-daemon
pi$ sudo vi /etc/hostname
hogehoge
3.5 ネットワーク設定の確認
有線LANを抜き、電源OFFし、無線LANトングルを接続して起動する。無線LANにてSSH接続を試み、もし接続できなければ有線LAN接続して設定を見直す。
$ ssh pi@hogegoge.local
pi@hogegoge.locals password:
pi$
3.6リモートデスクトップのインストール
pi$ sudo apt-get install xrdp
pi$ sudo vi /etc/xdg/autostart/lxpolkit.desktop
NotShowIn=GNOME;KDE;LXDE
3.7 C#のインストール
pi$ sudo apt-key adv --keyserver keyserver.ubuntu.com --recv-keys 3FA7E0328081BFF6A14DA29AA6A19B38D3D831EF
pi$ echo "deb http://download.mono-project.com/repo/debian wheezy main" | sudo tee /etc/apt/sources.list.d/mono-xamarin.list
pi$ sudo apt-get update
pi$ sudo apt-get install mono-complete
pi$ sudo apt-get install monodevelop
・RDP接続して、画面を確認し、IDEが起動するか確認する。
3.9 PIN操作用低レベルライブラリ
FILEベースのGPIO操作を使う場合は、これは必要ない。
pi$ wget http://67.192.60.197/mikem/bcm2835/bcm2835-1.5.tar.gz
pi$ tar xvfz bcm2835-1.5.tar.gz
pi$ cd bcm2835-1.5
pi$ ./configure
pi$ make
pi$ cd src
pi$ cc -shared bcm2835.o -o libbcm2835.so
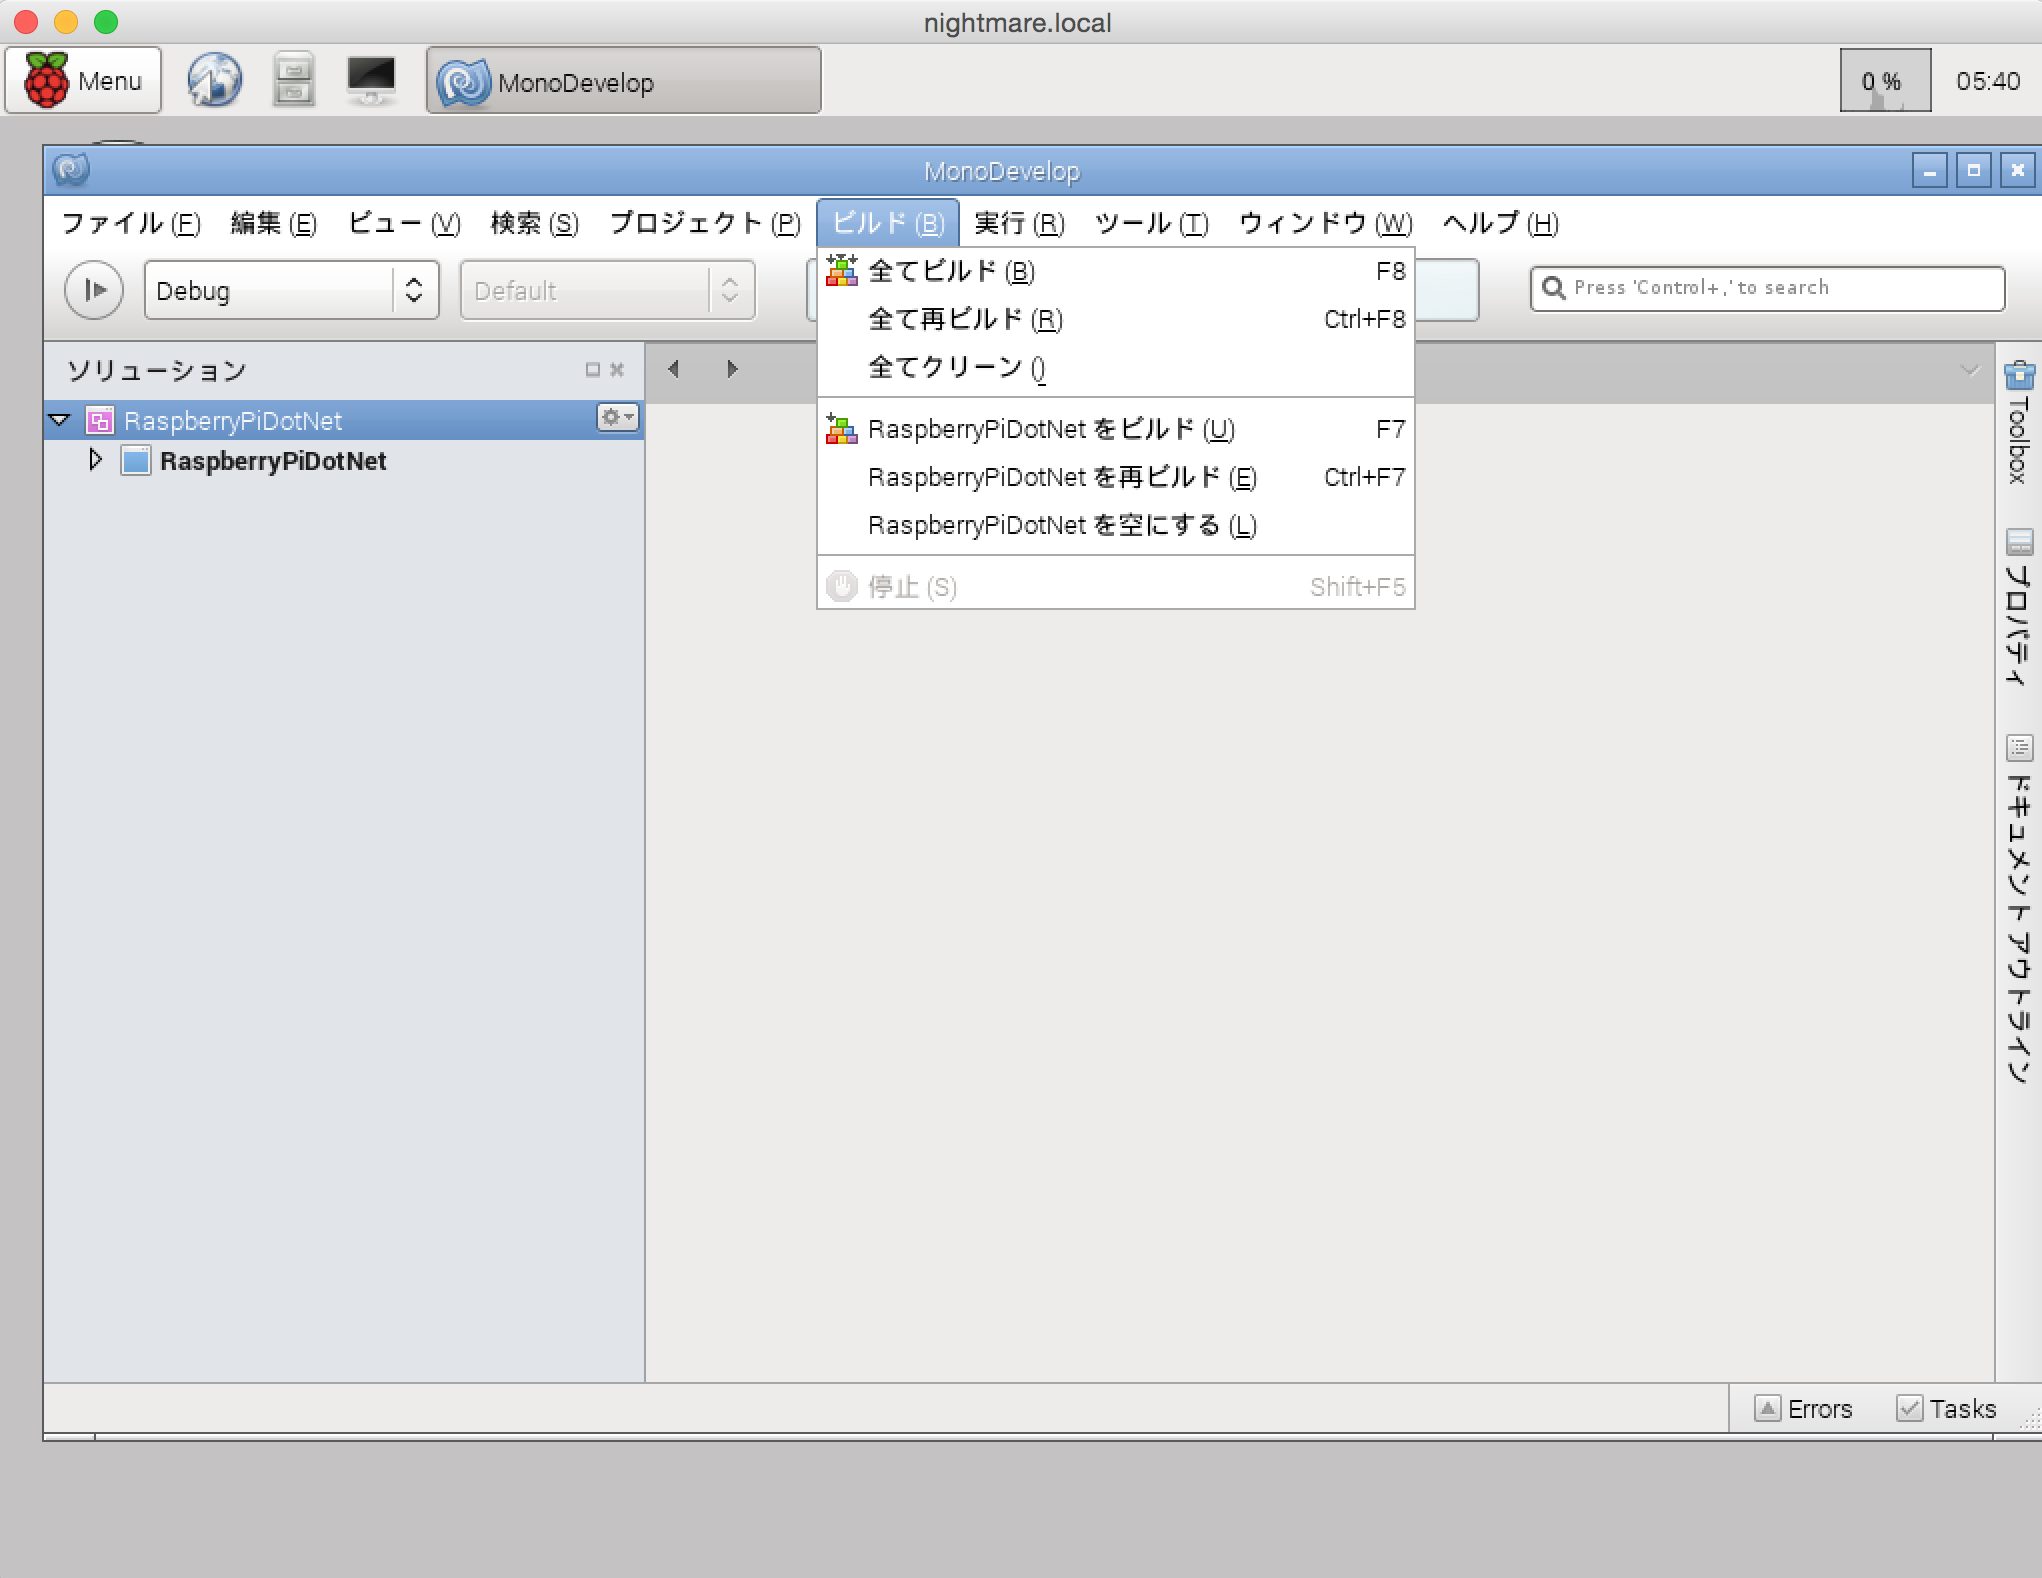
3.10 C#用のPIN操作用のライブラリ
pi$ git clone https://github.com/cypherkey/RaspberryPi.Net
・エラーなしで全て再ビルドできたら、正常にライブラリが生成されたことになる。
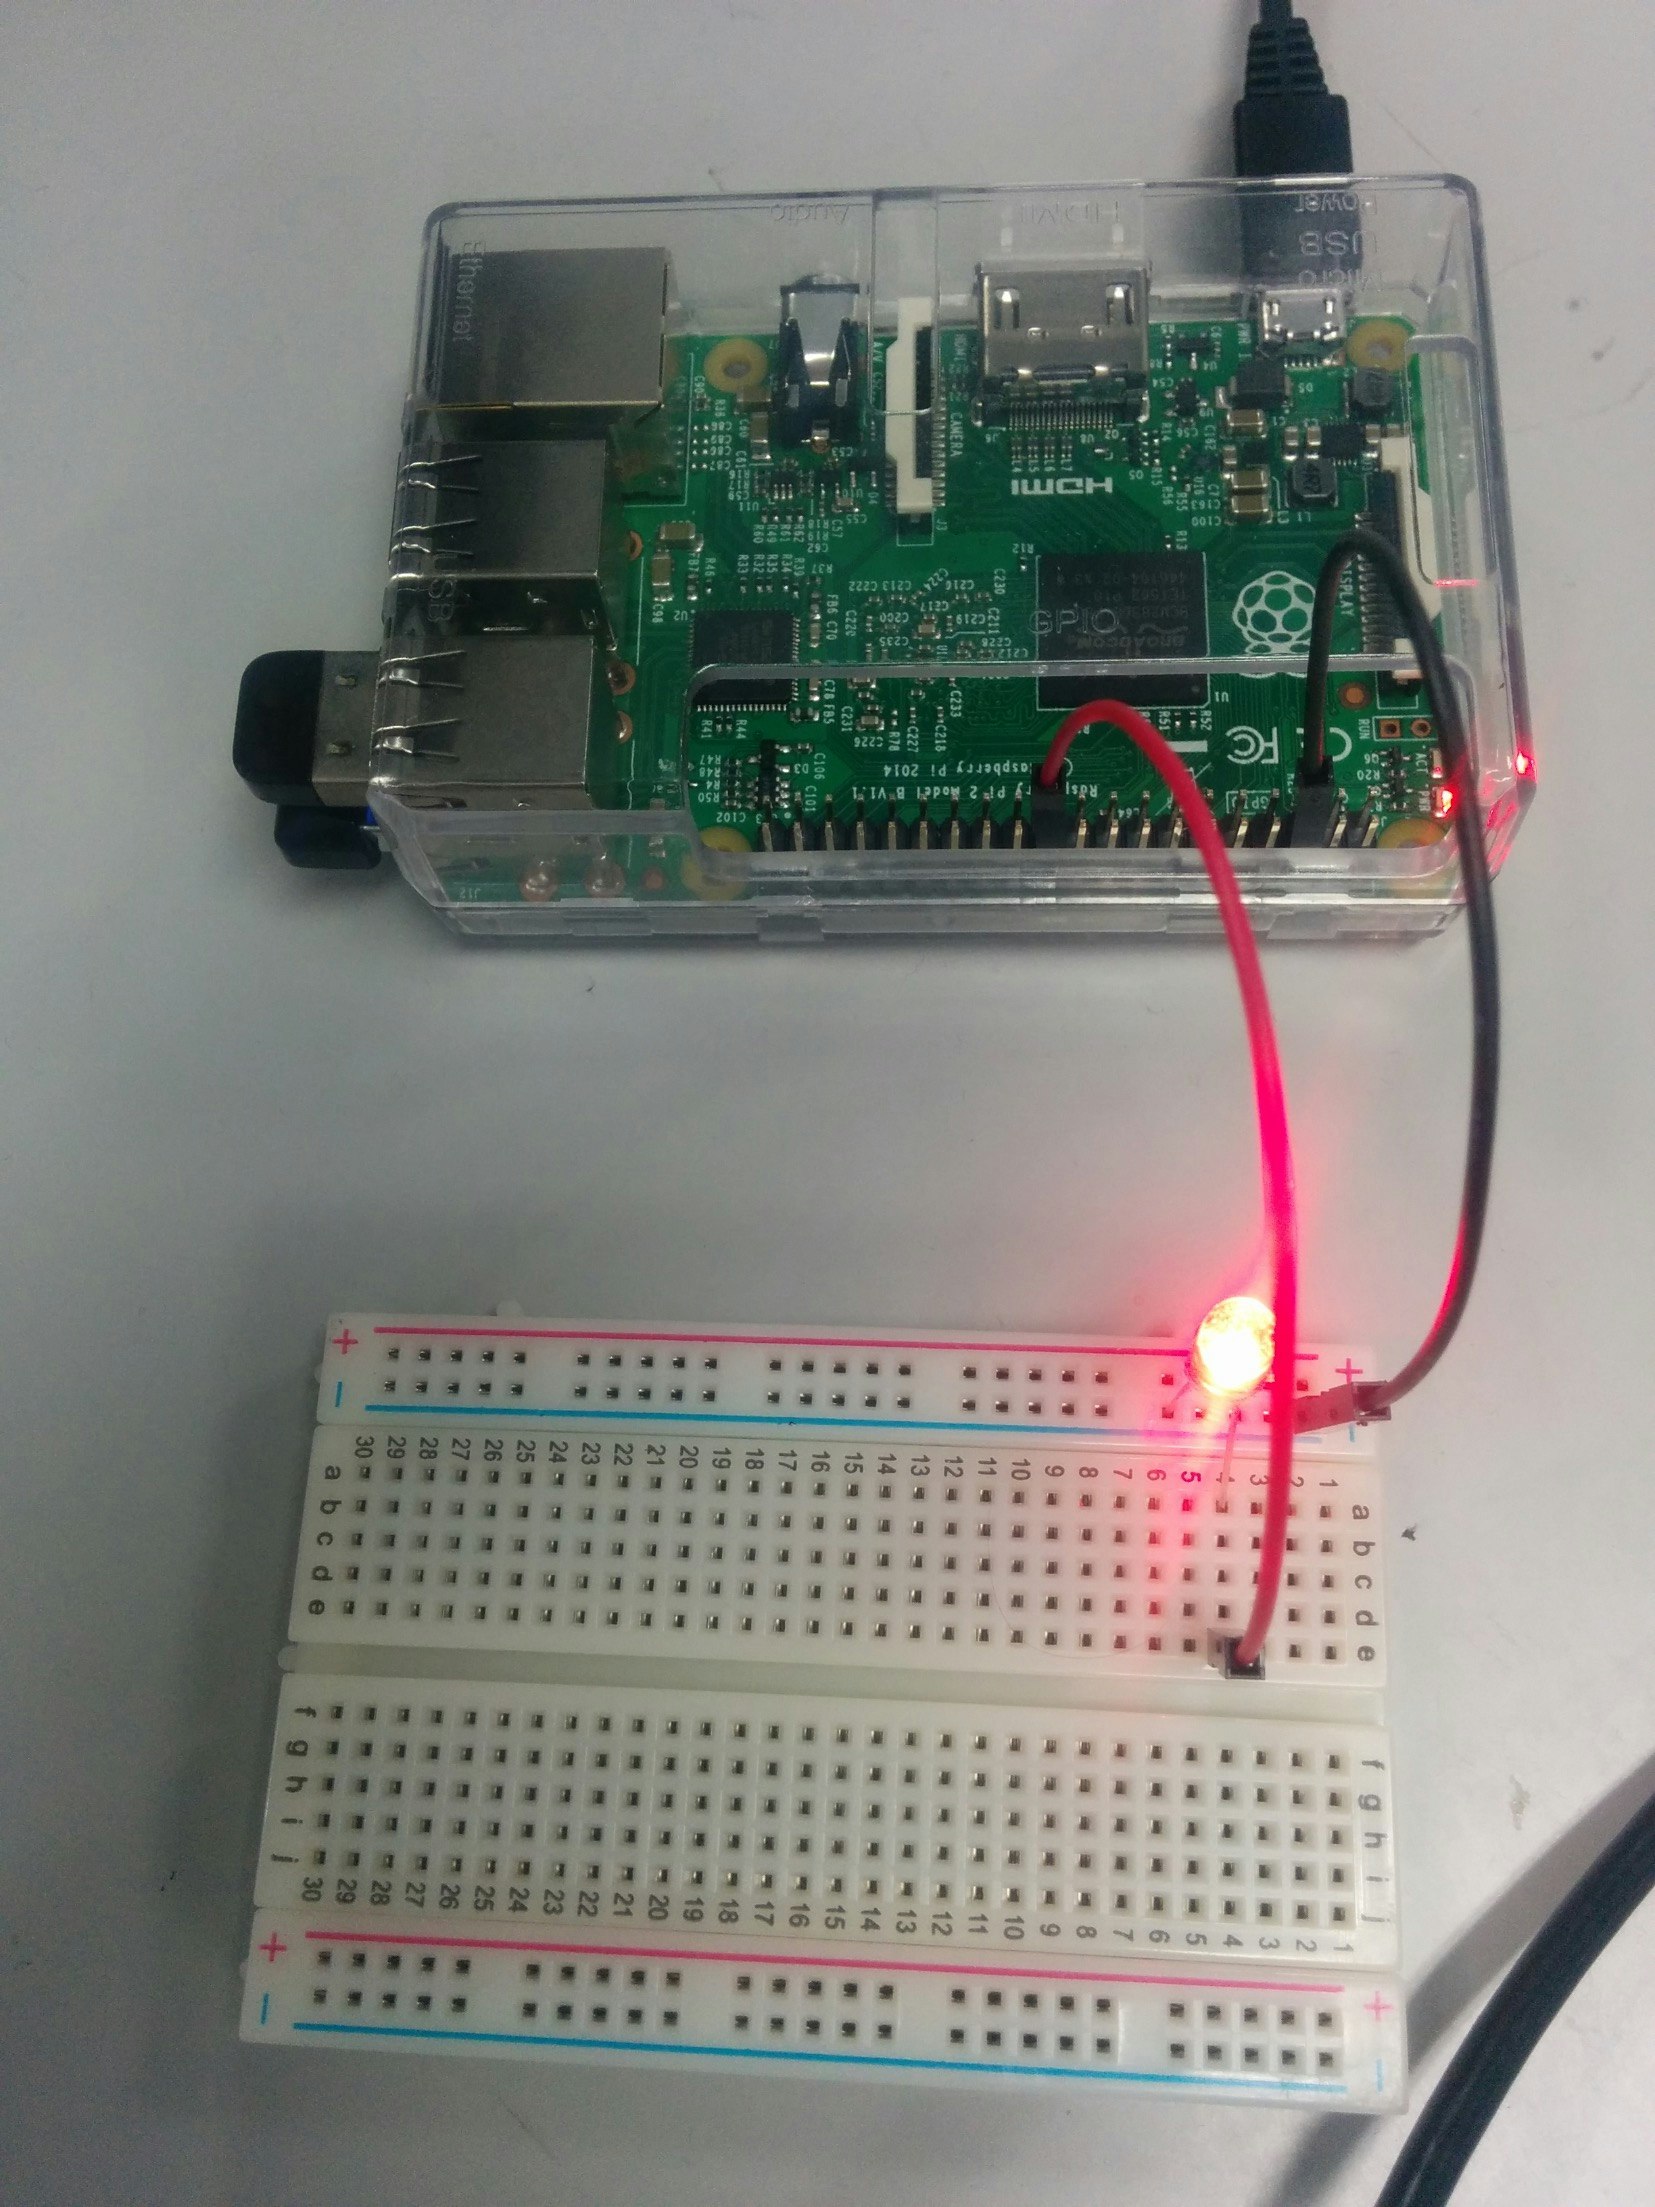
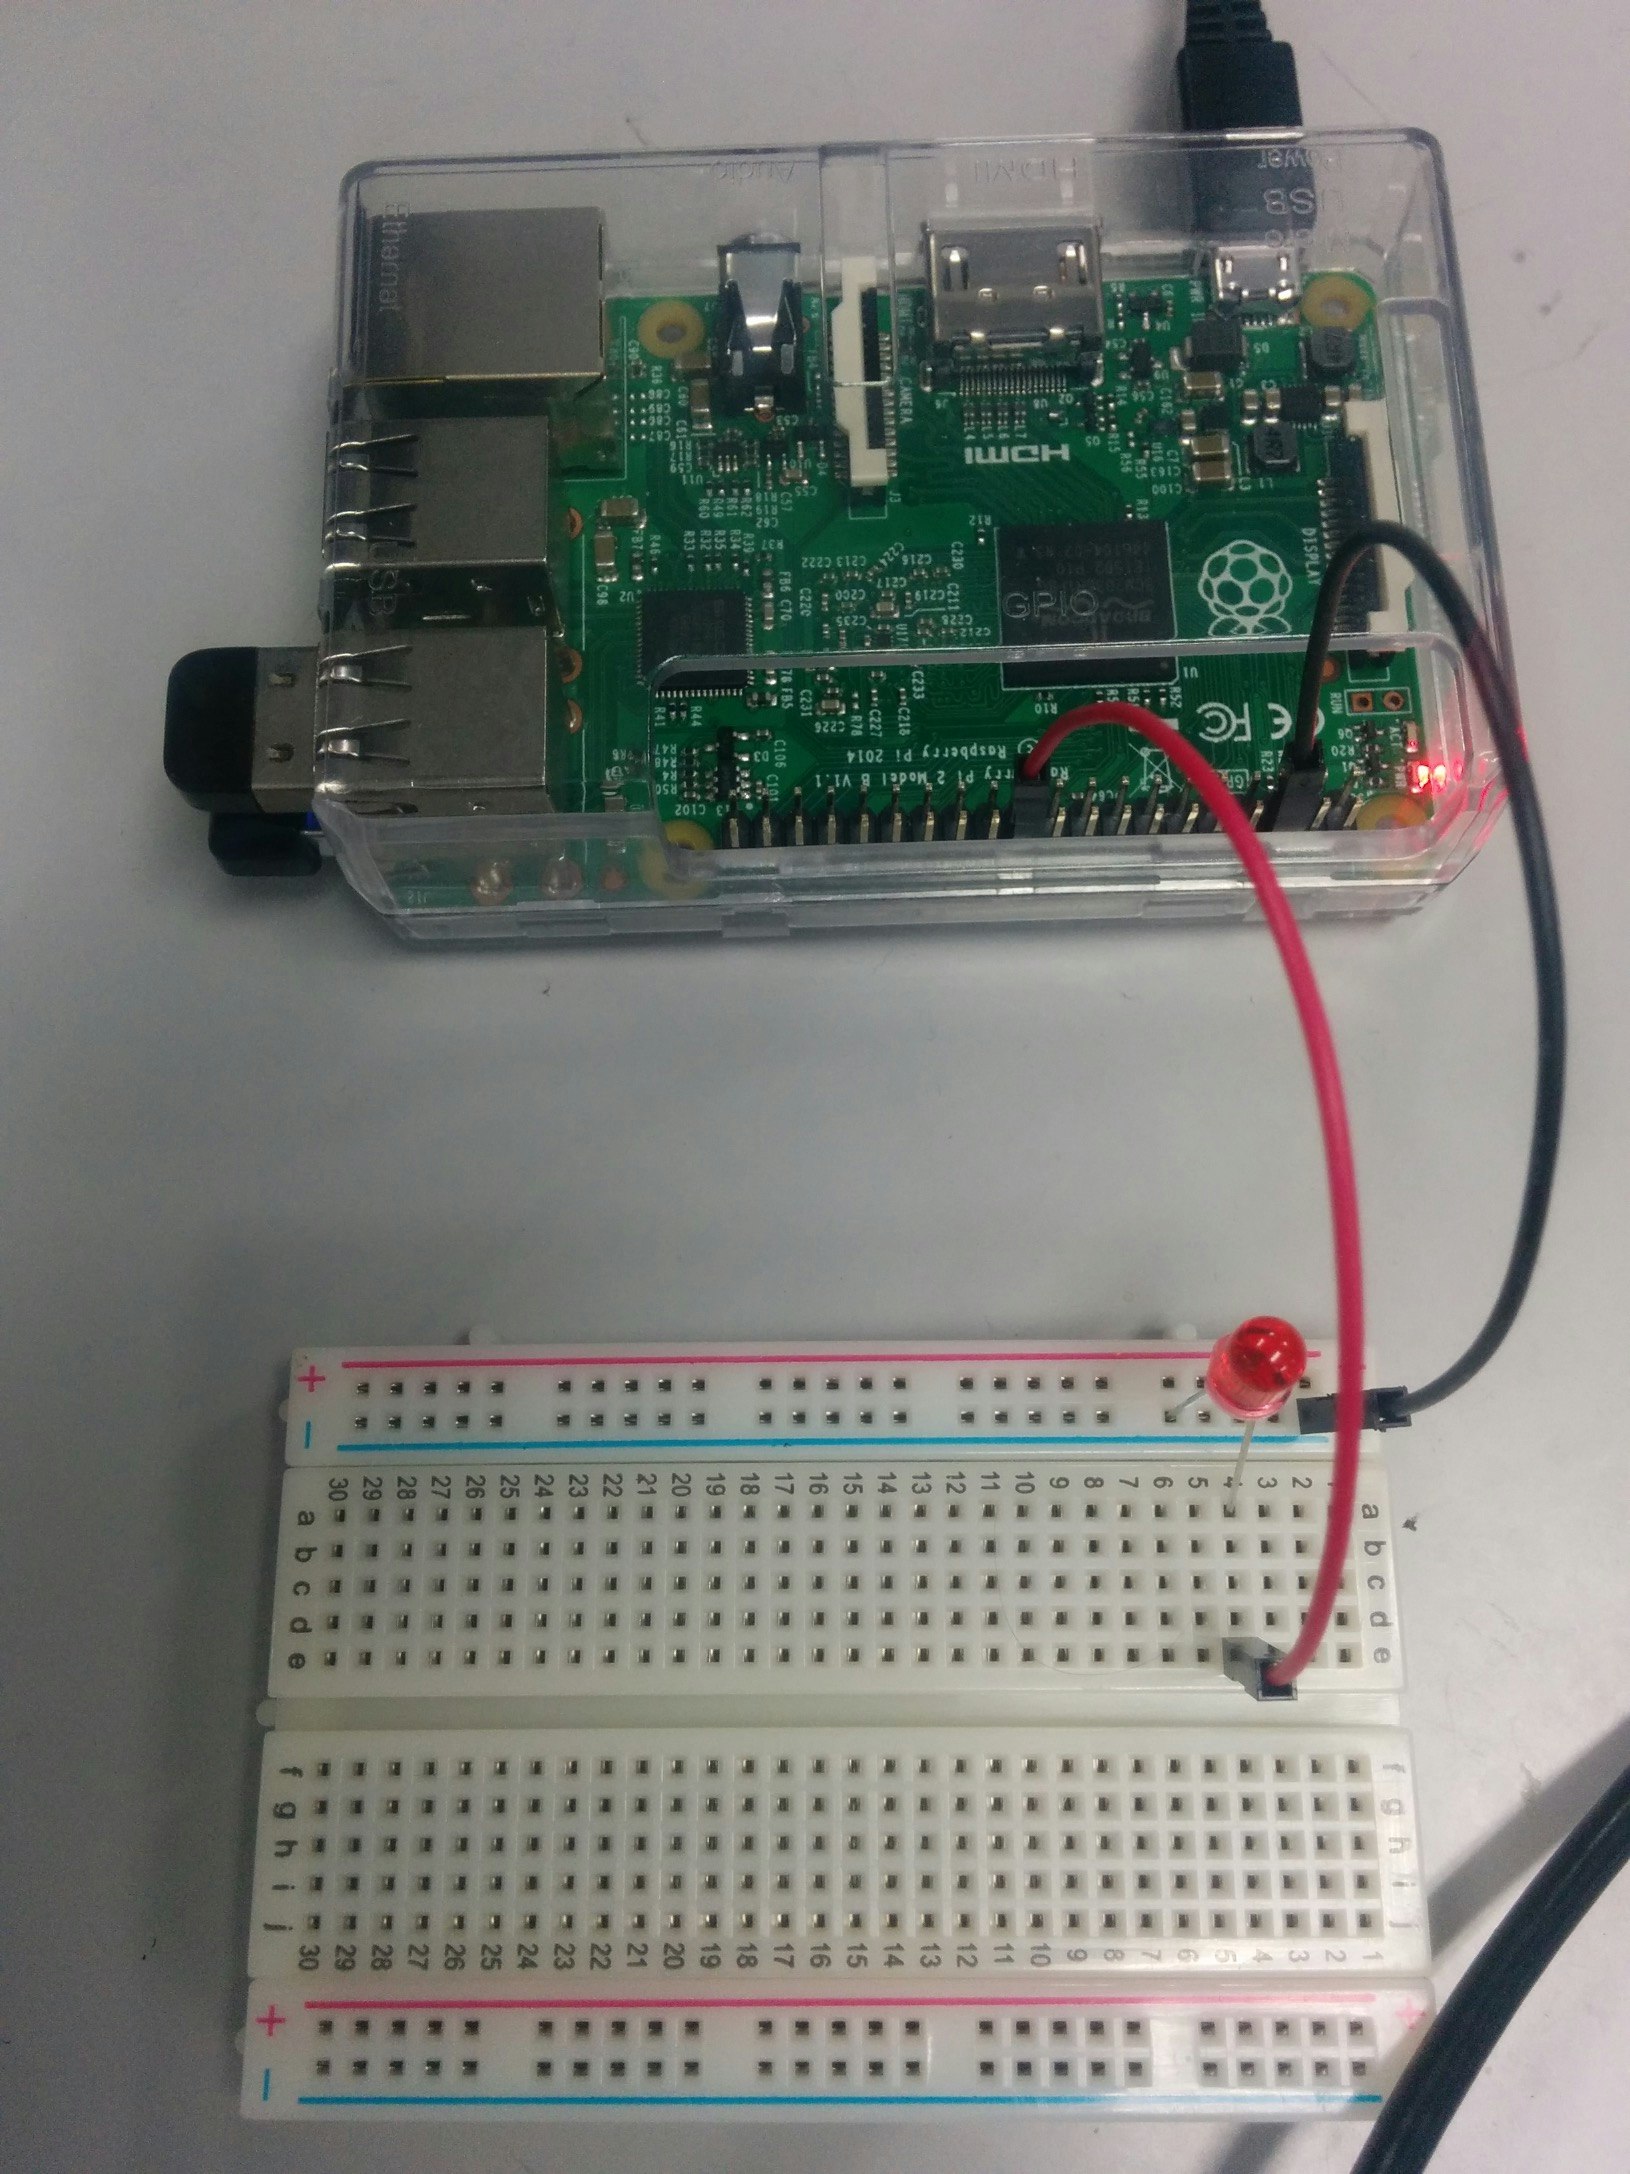
3.10 ダイオードを手動で発光確認
・GPIO設定
pi$ echo "25" > /sys/class/gpio/export
pi$ echo "out" > /sys/class/gpio/gpio25/direction
・LEDをON
pi$ echo "1" > /sys/class/gpio/gpio25/value
・LEDをOFF
pi$ echo "0" > /sys/class/gpio/gpio25/value
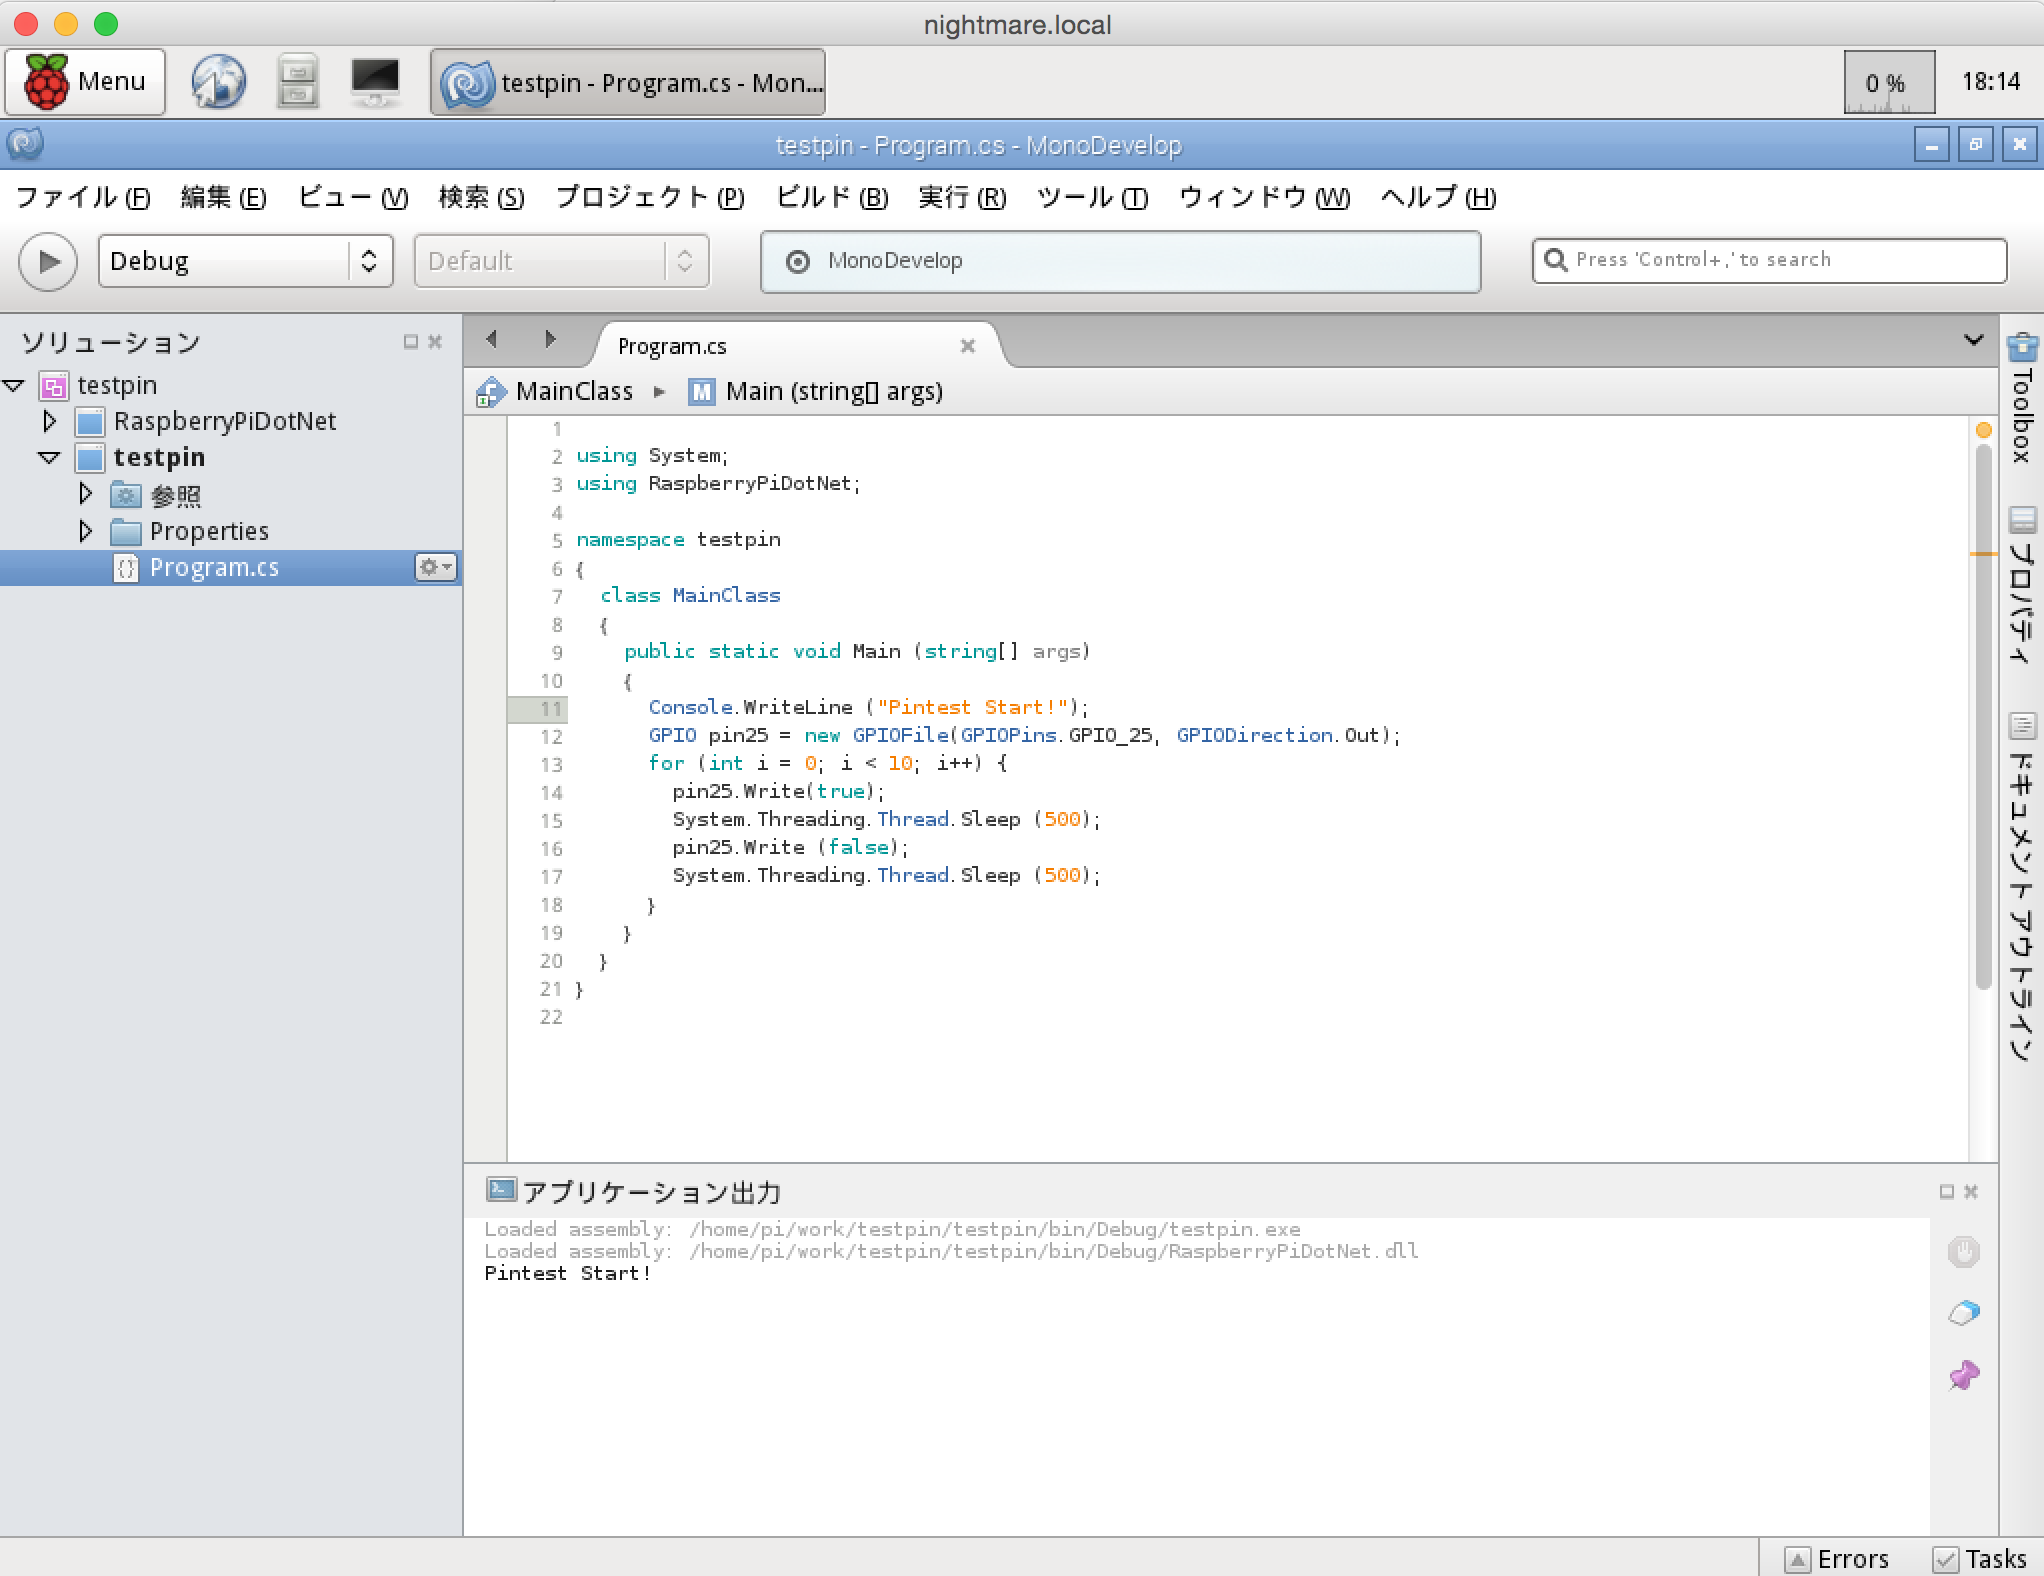
3.11 C#でGPIO操作でダイオードを発光確認
monodevelpでコンソールプログラムを作成して、C#で可能する。
using System;
using RaspberryPiDotNet;

namespace testpin
{
	class MainClass
	{
		public static void Main (string[] args)
		{
			Console.WriteLine ("Pintest Start!");
			GPIO pin25 = new GPIOFile(GPIOPins.GPIO_25, GPIODirection.Out);
			for (int i = 0; i < 10; i++) {
				pin25.Write(true);
				System.Threading.Thread.Sleep (500);
				pin25.Write (false);
				System.Threading.Thread.Sleep (500);
			}
		}
	}
}
4.その他の設定
4.1 起動設定
なんか、起動時にワーニングが気になったので設定(cgroup_enable=memoryを追加)と思ったけど、特にリソース制限はつかわないので最終的には外した(笑)
dwc_otg.lpm_enable=0 console=ttyAMA0,115200 console=tty1 root=/dev/mmcblk0p2 roo tfstype=ext4 cgroup_enable=memory elevator=deadline rootwait
4.2 Kivypi
pi$ sudo su -
pi# apt-get install python-setuptools python-pygame python-opengl python-dev build-essential python-pip -y
pi# pip install cython==0.21
pi# git clone git://github.com/kivy/kivy.git
pi# cd kivy
pi# python setup.py build_ext --inplace -f
pi# python setup.py install
・タッチパネル(OnLap-1005)
[input]
%(name)s = probesysfs,
	provider=hidinput,param=min_pressure=1,param=max_pressure=99
4.3 スワップ無効化
pi$ sudo swapoff --all
pi$ sudo apt-get remove dphys-swapfile
4.4 Bluetoohでキーボード入力
余っていたMacの無線キーボードとBluetoothトングルにて接続してみた。ベアリングのところで割と苦労した。というのは、パスコートをいくら入れても繋がらずなぜかと思いきや、ラズの方で入れたパスコードをキーボードの方で入力するのを理解するのに時間がかかったから(^^;
pi$ sudo aptitude install bluez
pi$ sudo apt-get install bluez-utils
pi$ hcitool scan
Scanning ...
	XX:XX:XX:XX:XX:XX	Apple Wireless Keyboard
pi$ sudo bluez-simple-agent hci0 XX:XX:XX:XX:XX:XX
RequestPinCode (/org/bluez/2249/hci0/dev_XX_XX_XX_XX_XX_XX)
Enter PIN Code: 0000   <-- ここで入れたコードをキーボード側で入力
Release
New device (/org/bluez/2249/hci0/dev_XX_XX_XX_XX_XX_XX)
pi$ sudo bluez-test-device trusted XX:XX:XX:XX:XX:XX yes
pi$ sudo bluez-test-input connect XX:XX:XX:XX:XX:XX
pi$ sudo reboot
4.5 WebCamera接続
余っているUSB接続のWebカメラを接続して使用可能かを試した。
WebカメラはElecom製の130MPのもの。motionをインストールして実行した結果、JPGができ中身が取れていれば成功。
pi$
pi$ sudo dmesg
[ 1871.083749] usb 1-1.2: new high-speed USB device number 6 using dwc_otg
[ 1871.208508] usb 1-1.2: New USB device found, idVendor=0ac8, idProduct=c500
[ 1871.208537] usb 1-1.2: New USB device strings: Mfr=1, Product=2, SerialNumber=0
[ 1871.208556] usb 1-1.2: Product: Venus USB2.0 Camera
[ 1871.208573] usb 1-1.2: Manufacturer: Vimicro Corp.
[ 1871.245314] media: Linux media interface: v0.10
[ 1871.268330] Linux video capture interface: v2.00
[ 1871.328059] usbcore: registered new interface driver snd-usb-audio
[ 1871.328140] uvcvideo: Found UVC 1.00 device Venus USB2.0 Camera (0ac8:c500)
[ 1871.331458] input: Venus USB2.0 Camera as /devices/platform/bcm2708_usb/usb1/1-1/1-1.2/1-1.2:1.0/input/input0
[ 1871.331791] usbcore: registered new interface driver uvcvideo
[ 1871.331806] USB Video Class driver (1.1.1)
[ 1871.617125] usb 1-1.2: USB disconnect, device number 6
[ 1871.913696] usb 1-1.2: new high-speed USB device number 7 using dwc_otg
[ 1872.038266] usb 1-1.2: New USB device found, idVendor=0ac8, idProduct=c500
[ 1872.038285] usb 1-1.2: New USB device strings: Mfr=1, Product=2, SerialNumber=0
[ 1872.038297] usb 1-1.2: Product: Venus USB2.0 Camera
[ 1872.038309] usb 1-1.2: Manufacturer: Vimicro Corp.
[ 1872.039990] uvcvideo: Found UVC 1.00 device Venus USB2.0 Camera (0ac8:c500)
[ 1872.042563] input: Venus USB2.0 Camera as /devices/platform/bcm2708_usb/usb1/1-1/1-1.2/1-1.2:1.0/input/input1
pi$
pi$ sudo apt-get update
pi$ sudo apt-get install motion
4.6 HDMI接続時に常時表示
# !/bin/sh -e
#
# rc.local
#
# This script is executed at the end of each multiuser runlevel.
# Make sure that the script will "exit 0" on success or any other
# value on error.
#
# In order to enable or disable this script just change the execution
# bits.
#
# By default this script does nothing.

setterm -blank 0   <--- 追加

# Print the IP address
_IP=$(hostname -I) || true
if [ "$_IP" ]; then
  printf "My IP address is %s\n" "$_IP"
fi