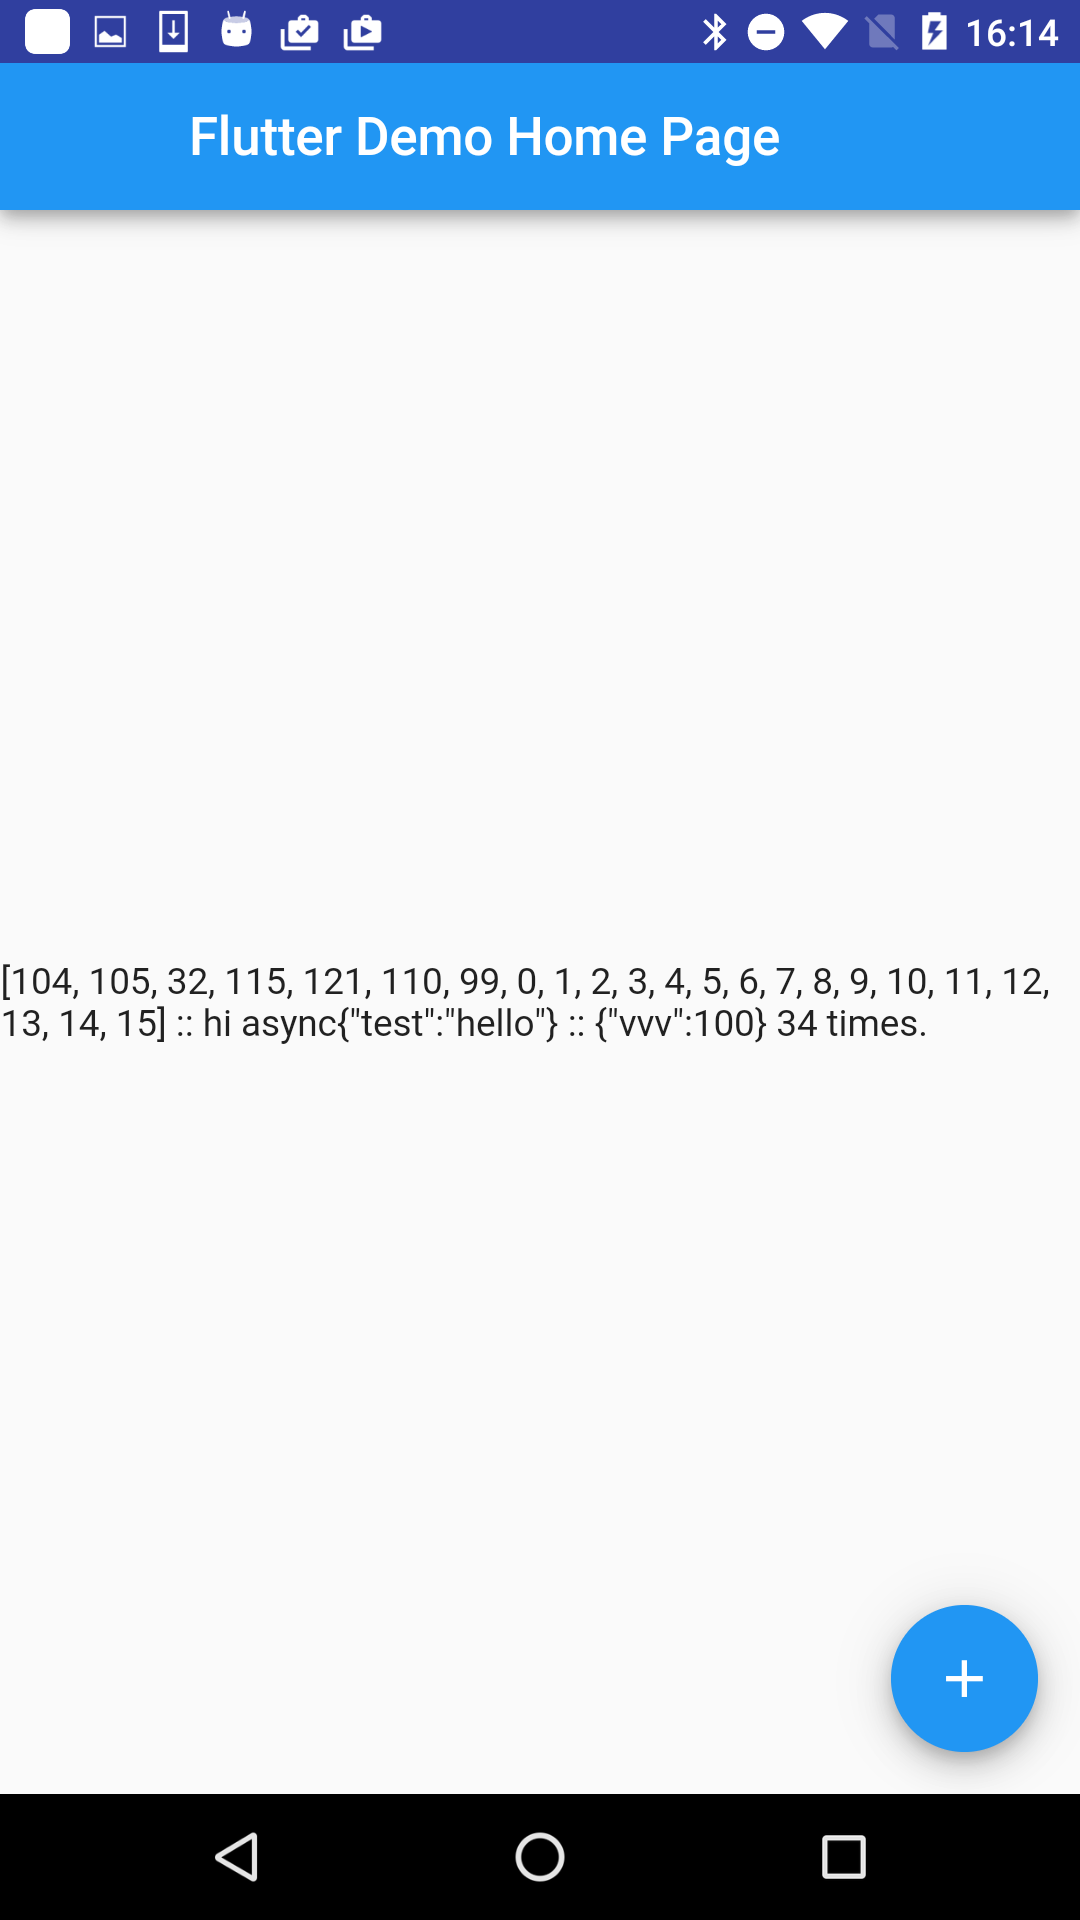
Dart の スマートフォーン用フレームワークであるFlutterも、徐々に良い感じにブラッシュアップされてきました。
Dart での スマートフォン開発環境はかなり快適なので、私はとても期待しています。
そこで、Flutter について学習を再開してみました。
Android や iOS のネイティブ機能と連携できるようになった
今回ためしたのは、 platform service です。この機能を利用すると、Android や iOS のネイティブ機能と連携できるようになります。 Androidの場合だと、 Java と Dart が相互に連携します。この機能を利用すれば、足りない機能は独自に追加する事ができます。
※ パッと見た感じ。Cordovaのpluginとかを、流用できるのでは、とちょっと感じました。
試してみました。
公式のサンプル(https://github.com/flutter/flutter/tree/master/examples/hello_services) を参考にして、ゼロから DartとJavaの連携用のコードを書いてみました。
試したコードは以下におきました。
(https://github.com/kyorohiro/dart.flutter.platformservice)
(https://github.com/kyorohiro/dart.flutter.ibeacon)

コード自体はとても少なく済んでいます。
また、AtomなどのIDEからもDartのプロジェクトとして実行できるので、
拡張したとしても、ストレスなく開発を続ける事ができます。
作業した順序
1. まずは、IntelliJ を利用して、Flutterプロジェクトを作る
まずは、Flutterのプロジェクトを作ってみました。
(https://github.com/kyorohiro/dart.flutter.ibeacon/tree/8d7bfdc166f6027999c6ca57acfb6a7edfd0bc41)
2. android配下を削除して、Android Stdioでプロジェクトを作る
(https://github.com/kyorohiro/dart.flutter.ibeacon/tree/5bc3631a5a644753ddcfc8daf9062201248a4d10)
(https://github.com/kyorohiro/dart.flutter.ibeacon/tree/5ff7facd1a2b8c4f19791a68b754e83e07770fda)
3. buildSrcをサンプルから、コピーして、各種設定をする。
GradleのFlutterプラグインを利用します。公式のサンプルコードからコピーしました。
https://github.com/kyorohiro/dart.flutter.ibeacon/tree/8496c634ebb15c7ee6a8855d250627eddcb012b8
3.1 android/app/build.gradleに追加
+apply plugin: 'flutter'
+
+
+flutter {
- source '../..'
+}
3.2 local.propertiesにパスを追加
- flutter.sdk=/Users/kyorohiro/tools/git/flutter
4. とりあえず、Dartのコードを動作させてみる
Dartを動作させる環境ができたので、上手く動作するか確認してみした。AndroidManifesrtとActivityを少し変更します。
(https://github.com/kyorohiro/dart.flutter.ibeacon/tree/4d09df74bf678d4094c3e56a4f632564f7f0e81e)
4.1 AndroidManifestのApplication Name を Dart用に変更する
<manifest package="info.kyorohiro.ibeacontest" xmlns:android="http://schemas.android.com/apk/res/android">

    <application android:allowbackup="true" android:icon="@mipmap/ic_launcher" android:label="@string/app_name" android:name="org.domokit.sky.shell.SkyApplication" android:supportsrtl="true" android:theme="@style/AppTheme">
        <activity android:name=".MainActivity">
            <intent-filter>
                <action android:name="android.intent.action.MAIN"></action>
                <category android:name="android.intent.category.LAUNCHER"></category>
            </intent-filter>
        </activity>

    </application>

</manifest>
4.2 Dartのコードを読み込むようにする
package info.kyorohiro.ibeacontest;

import android.app.Activity;
import android.os.Bundle;
import android.widget.LinearLayout;

import io.flutter.view.FlutterMain;
import io.flutter.view.FlutterView;

/**
 * Created by kyorohiro on 2017/01/13.
 */

public class MainActivity extends Activity {
    @Override
    protected void onCreate(Bundle savedInstanceState) {
        super.onCreate(savedInstanceState);
        FlutterMain.ensureInitializationComplete(this,null);
        LinearLayout rootLayout = new LinearLayout(this);
        this.setContentView(rootLayout);

        FlutterView flutterView = new FlutterView(this);
        rootLayout.addView(flutterView);

        flutterView.runFromBundle(FlutterMain.findAppBundlePath(getApplicationContext()), null);
    }
}
5 JavaとDart 間で通信するコードを追加する
実際にJavaとDartを連携させてみました。上手く動作した。
package info.kyorohiro.ibeacontest;

import android.app.Activity;
import android.os.Bundle;
import android.widget.LinearLayout;

import io.flutter.view.FlutterMain;
import io.flutter.view.FlutterView;

import org.json.JSONException;
import org.json.JSONObject;

/**
 * Created by kyorohiro on 2017/01/13.
 */

public class MainActivity extends Activity {
    @Override
    protected void onCreate(Bundle savedInstanceState) {
        super.onCreate(savedInstanceState);
        FlutterMain.ensureInitializationComplete(this,null);
        LinearLayout rootLayout = new LinearLayout(this);
        this.setContentView(rootLayout);

        FlutterView flutterView = new FlutterView(this);
        rootLayout.addView(flutterView);

        flutterView.runFromBundle(FlutterMain.findAppBundlePath(getApplicationContext()), null);

        flutterView.addOnMessageListener("callback_sync", new FlutterView.OnMessageListener(){
            @Override
            public String onMessage(FlutterView flutterView, String message) {
                return "hi sync" + message;
            }
        });

        flutterView.addOnMessageListenerAsync("callback_async", new FlutterView.OnMessageListenerAsync() {
            @Override
            public void onMessage(FlutterView flutterView, String message, FlutterView.MessageResponse messageResponse) {
                messageResponse.send("hi async" + message);
            }
        });

        flutterView.addOnMessageListenerAsync("callback_proc", new FlutterView.OnMessageListenerAsync() {
            @Override
            public void onMessage(FlutterView flutterView, String message, final FlutterView.MessageResponse messageResponse) {
                JSONObject jsonMessage = new JSONObject();
                try {
                    jsonMessage.put("vvv", 100);
                } catch(JSONException e){
                }
                //jsonMessage.put("v",1);
                flutterView.sendToFlutter("hi", jsonMessage.toString(), new FlutterView.MessageReplyCallback() {
                    @Override
                    public void onReply(String s) {
                        messageResponse.send(s);
                    }
                });
            }
        });
    }
}
import 'package:flutter/material.dart';
import 'package:flutter/services.dart' as fsv;
import 'dart:typed_data';
import 'dart:convert';

void main() {
  runApp(new MyApp());

}

class MyApp extends StatelessWidget {
  @override
  Widget build(BuildContext context) {
    fsv.PlatformMessages.setJSONMessageHandler("hi",(String v) async{
      return v;
    });
    return new MaterialApp(
      title: 'Flutter Demo',
      theme: new ThemeData(
        primarySwatch: Colors.blue,
      ),
      home: new MyHomePage(title: 'Flutter Demo Home Page'),
    );
  }
}

class MyHomePage extends StatefulWidget {
  MyHomePage({Key key, this.title}) : super(key: key);
  final String title;

  @override
  _MyHomePageState createState() => new _MyHomePageState();
}

class _MyHomePageState extends State<MyHomePage> {
  int _counter = 0;
  String message = "";

   _incrementCounter() async {
     //
    ByteData buffer0 = await fsv.PlatformMessages.sendBinary("callback_sync", new ByteData.view(
      new Uint8List.fromList([0,1,2,3,4,5,6,7,8,9,10,11,12,13,14,15]).buffer
    ));

    //
    String buffer1 = await fsv.PlatformMessages.sendString("callback_async", JSON.encode({"test":"hello"}));

    //
    String buffer2 = await fsv.PlatformMessages.sendString("callback_proc", "hello");


    //
    message = "${buffer0.buffer.asUint8List()} :: ${buffer1} :: ${buffer2}" ;
    setState(() {
      _counter++;
    });
  }

  @override
  Widget build(BuildContext context) {
    return new Scaffold(
      appBar: new AppBar(
        title: new Text(config.title),
      ),
      body: new Center(
        child: new Text(
          '${message} $_counter time${ _counter == 1 ? '' : 's' }.',
        ),
      ),
      floatingActionButton: new FloatingActionButton(
        onPressed: _incrementCounter,
        tooltip: 'Increment',
        child: new Icon(Icons.add),
      ), // This trailing comma tells the Dart formatter to use
    );
  }
}
PS
自分のブログでも似たような事を書いたのですが、布教用にQiitaにも書いてみました。
(http://kyorohiro.blogspot.jp/2017/01/dart-x-flutter-platform-service-javadart.html)