はじめに
CocoStudioのAnimationEditorを使って簡単なアニメーションを作成し、
Coso2d-x上で読み込んで実行するまでの説明になります。
対応バージョン
- CocoStudio 1.4.0.1(VMFusionでWin8上で起動)
- Cocos2d-x3.1(2014/05/24版)
前提条件
-
Cocos2d-xの開発環境が整っている -
cocos newコマンドでCocos2d-xプロジェクトを作れる -
Xcodeで起動することができる
こんなもんですかね?足りなかったら指摘ください。。。
プロジェクトを作成まで
Animation Editorを起動
新規プロジェクトを作成
SpriteFrameを配置する
元データはこちら。
素材提供元 臼井の会 素材支部
いつもお世話になっておりますm(_ _)m
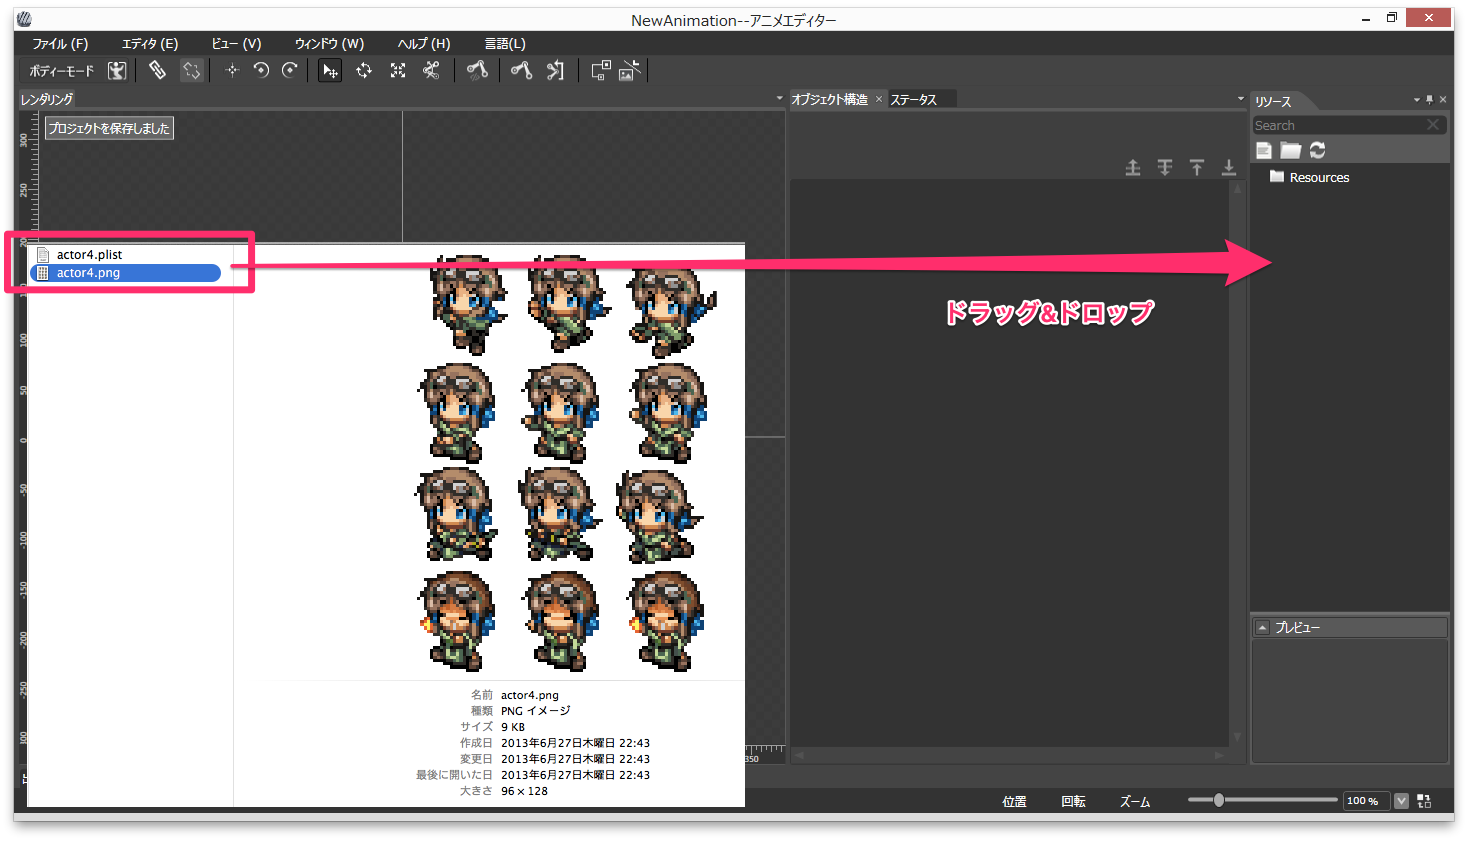
plistと対になるpngを読み込む
上記2ファイルを空プロジェクトのResourceへ、ドラッグ&ドロップします。
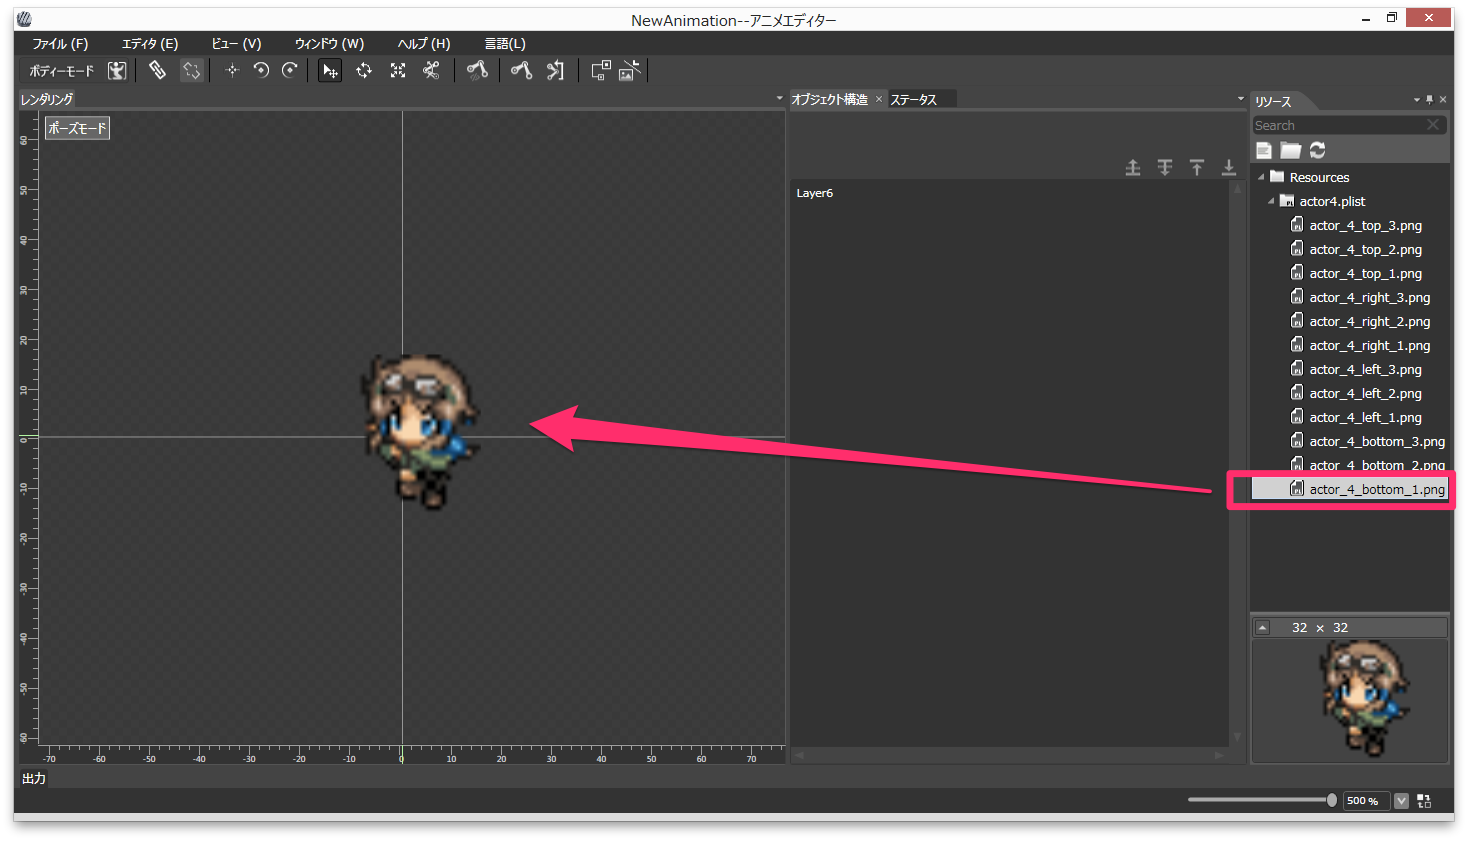
ベースのSpriteを配置
Resourceの中から適当に選んで1つドラック&ドロップします。
アニメーションを設定
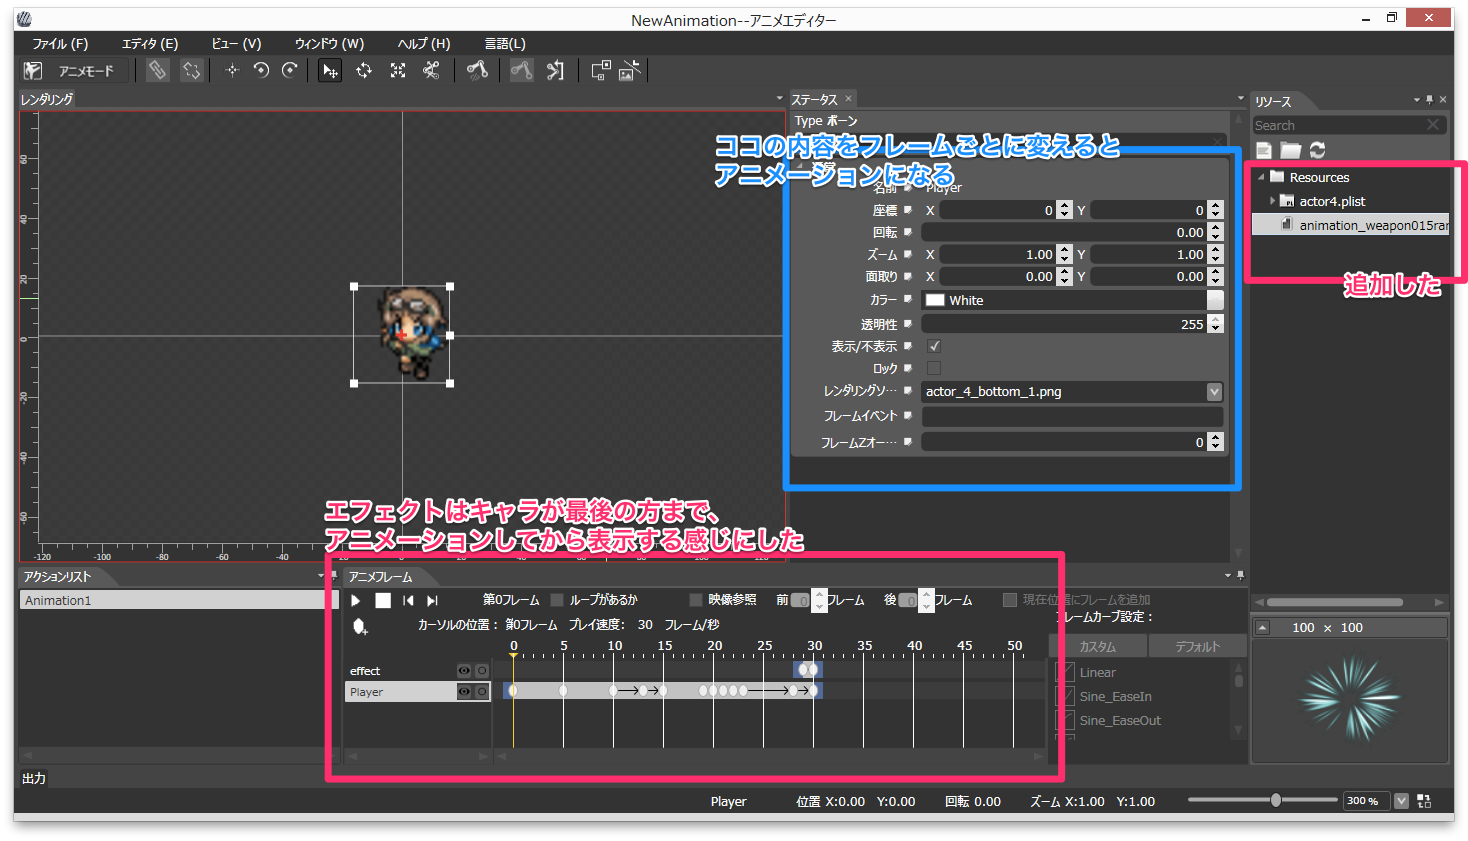
配置したSpriteに対して、フレームの切り替えと移動とカラー変更をタイムラインで制御します。
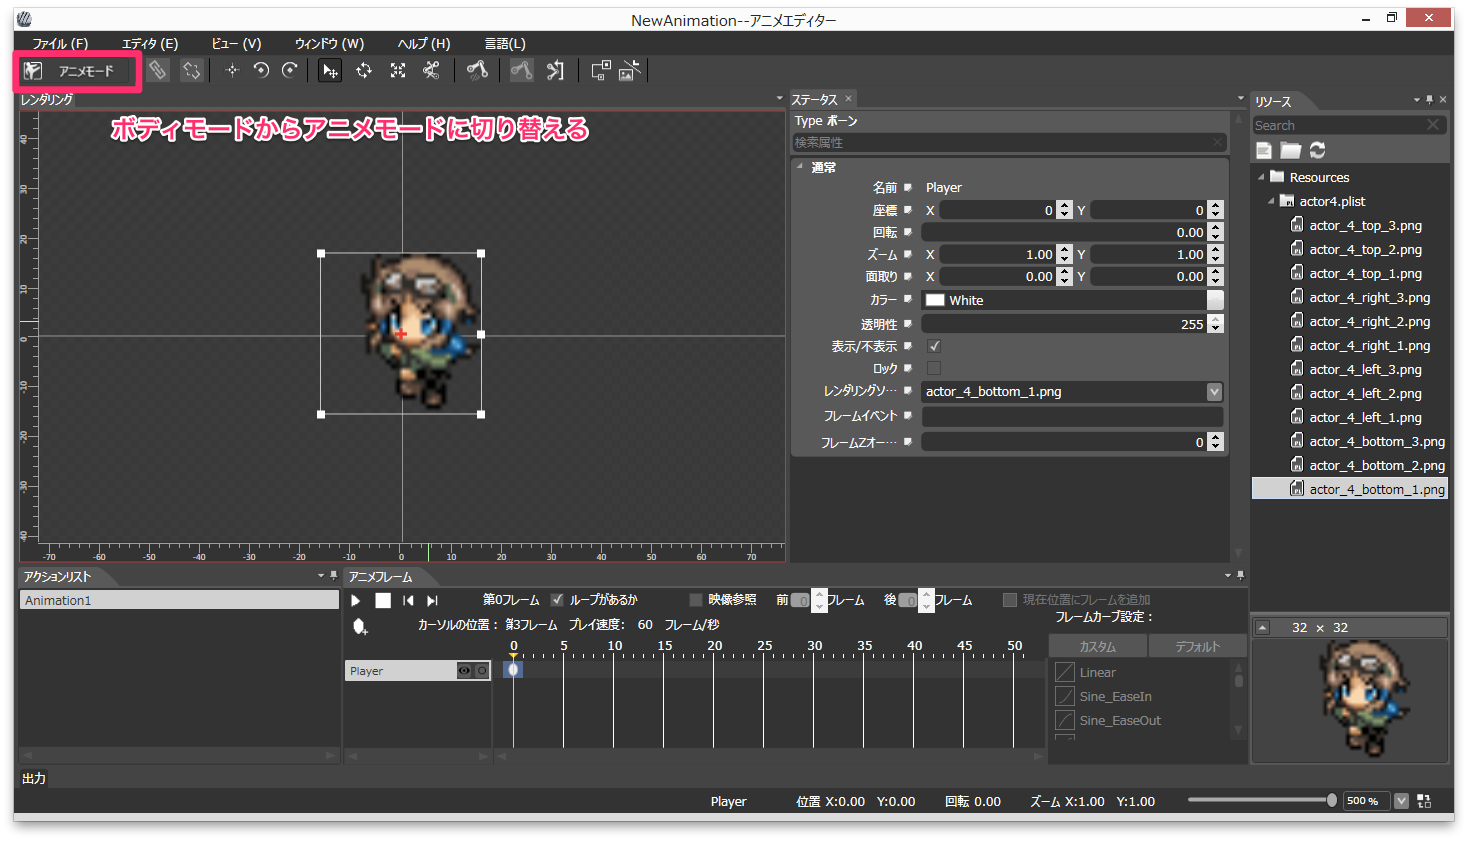
アニメモードに切り替える
ここボタンなのか。。。ってくらいわかりにくい感じです。
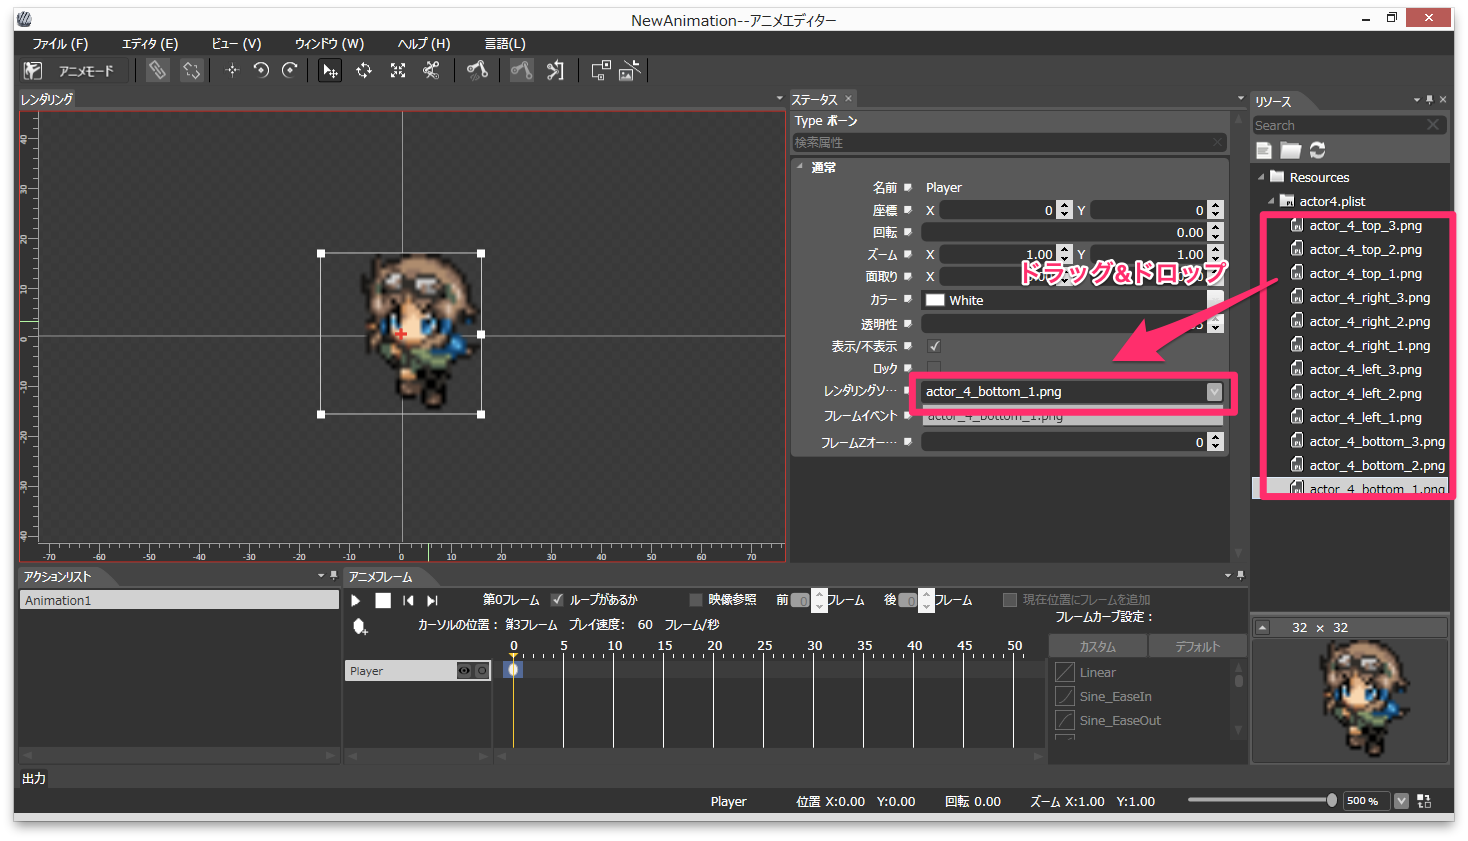
フレームイベントを追加する
いまのままだと最初に選んだフレームしかないので、レンダリングリソースの欄へドラッグ&ドロップで追加します。
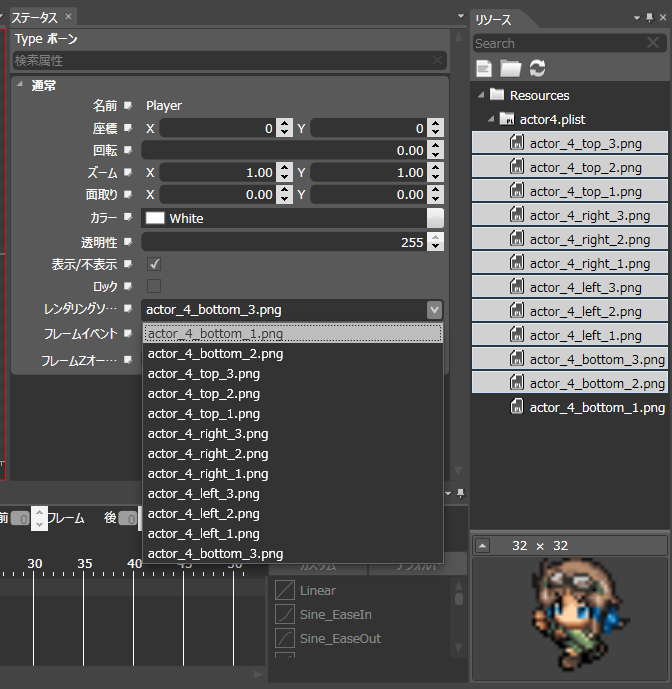
こんな感じに選べるようになります。
タイムラインを編集する
Adobe製品とかのタイムラインみたいな感じで直感的にいじれます。
適当に試してみてください。
キャラだけだと味気ないので、エフェクトも追加してこんな感じにしました。

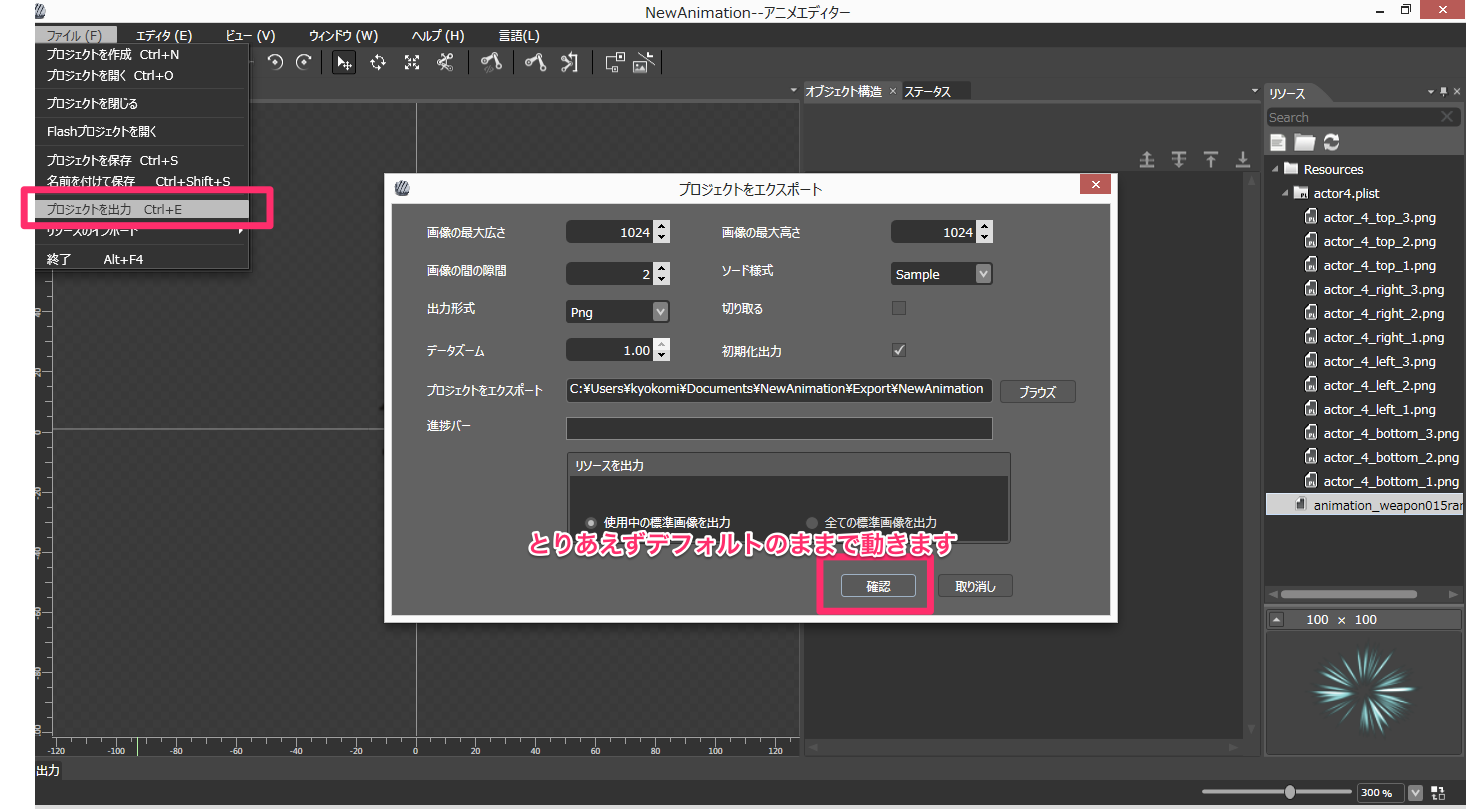
プロジェクト出力
ここでCocoStudioの操作は終わりです。
Cocos2d-xプロジェクトへ組み込む
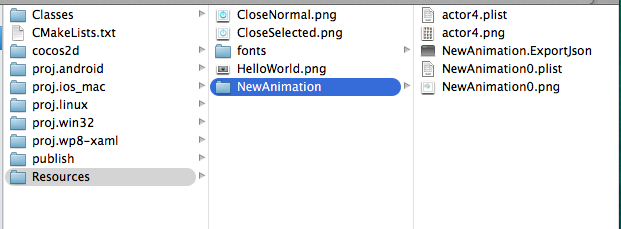
CocoStudioで出力したファイルを配置
Cocos2d-xのプロジェクト配下にあるResourceディレクトリに、
先ほどCocoStudioから出力したディレクトリを配置します。
NewAnimationってやつです。
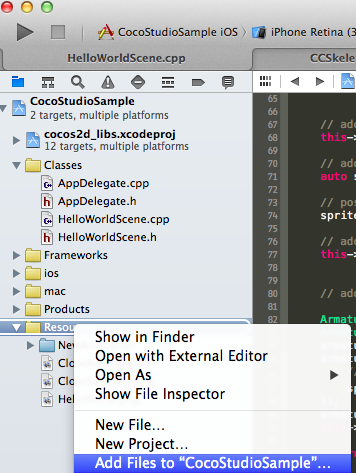
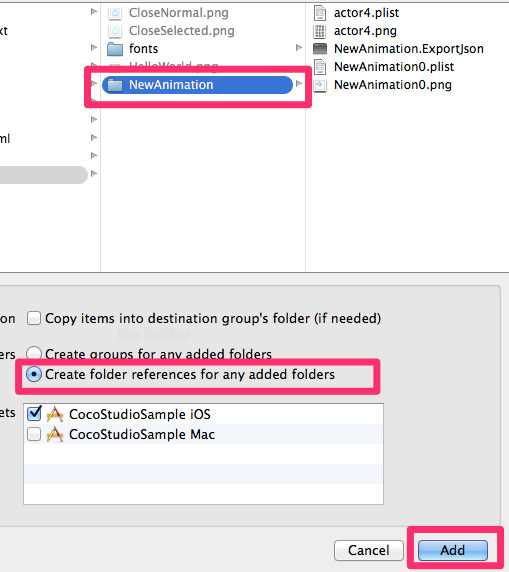
Xcodeで読み込む
この辺は普段ファイル読み込むのと同じです。
HelloWorldSceneクラスを修正
今回作ったアニメーションを呼び出すようにします。
ちなみにアニメーション終了時にCocos2d-xのHelloWorld画像を吹っ飛ばすようにしました。
# include "cocostudio/CocoStudio.h"

using namespace cocostudio;

// 〜省略〜

// on "init" you need to initialize your instance
bool HelloWorld::init()
{
    //////////////////////////////
    // 1. super init first
    if ( !Layer::init() )
    {
        return false;
    }

    Size visibleSize = Director::getInstance()->getVisibleSize();
    Vec2 origin = Director::getInstance()->getVisibleOrigin();

    /////////////////////////////
    // 2. add a menu item with "X" image, which is clicked to quit the program
    //    you may modify it.

    // add a "close" icon to exit the progress. it's an autorelease object
    auto closeItem = MenuItemImage::create(
                                           "CloseNormal.png",
                                           "CloseSelected.png",
                                           CC_CALLBACK_1(HelloWorld::menuCloseCallback, this));

	closeItem->setPosition(Vec2(origin.x + visibleSize.width - closeItem->getContentSize().width/2 ,
                                origin.y + closeItem->getContentSize().height/2));

    // create menu, it's an autorelease object
    auto menu = Menu::create(closeItem, NULL);
    menu->setPosition(Vec2::ZERO);
    this->addChild(menu, 1);

    /////////////////////////////
    // 3. add your codes below...

    // add a label shows "Hello World"
    // create and initialize a label

    auto label = LabelTTF::create("Hello World", "Arial", 24);

    // position the label on the center of the screen
    label->setPosition(Vec2(origin.x + visibleSize.width/2,
                            origin.y + visibleSize.height - label->getContentSize().height));

    // add the label as a child to this layer
    this->addChild(label, 1);

    // add "HelloWorld" splash screen"
    auto sprite = Sprite::create("HelloWorld.png");

    // position the sprite on the center of the screen
    sprite->setPosition(Vec2(visibleSize.width/2 + origin.x - sprite->getContentSize().width/2, visibleSize.height/2 + origin.y));

    // add the sprite as a child to this layer
    this->addChild(sprite, 0);

    // ここから CocoStudio Animationの読み込み
    ArmatureDataManager::getInstance()->addArmatureFileInfo("NewAnimation/NewAnimation.ExportJson");
    Armature *armature = Armature::create("NewAnimation");
    armature->getAnimation()->playWithIndex(0);
    armature->getAnimation()->setMovementEventCallFunc([sprite](Armature *armature, MovementEventType type, const std::string & name) {
        // Animation終了時(LOOP設定したらループごとに呼ばれる)
        sprite->runAction(MoveTo::create(0.2f, Point(-500, sprite->getPositionY())));
    });
    armature->setPosition(Vec2(visibleSize.width/2 + origin.x, visibleSize.height/2 + origin.y));
    this->addChild(armature);

    return true;
}
動かしてみるとこんな感じになります。

おわり
自分もまだ昨日今日触り始めたばかりなので、よくわかってないので何かあればお気軽にコメントとかTwitter等で連絡いただければと思います。