はじめに
こんぬづは、講師の田中です。
このQiitaは 2017/02/19 開催の【男性参加可!学生無料】TwitterAPIとSwiftを使ってiOSアプリを作ろう! − presents by dots.女子部 #dotsgirls - dots.[ドッツ] のハンズオン用の教材になります。
- 前編: TwitterAPIとSwiftを使ってiOSアプリを作ろう! - 前編 - #dotsgirls - Qiita
- 後編: TwitterAPIとSwiftを使ってiOSアプリを作ろう! - 後編 - #dotsgirls - Qiita
カスタマイズ編でやること
- UIのカスタマイズ
- セルの背景色を変える
- フォントの色を変える
- フォント・フォントサイズを変える
- アイコンに角丸をつける、丸くする
- アイコンに縁をつける
- 機能のカスタマイズ
- 投稿機能を追加する
- 更新機能を追加する
UIのカスタマイズ
セルの背景色を変える
セルのbackgroundColorを変えてみましょう。TimelineTableViewCell.swift にawakeFromNib() というメソッドを追加します。
    func fill(tweet: Tweet) {

        let downloadTask = URLSession.shared.dataTask(with: URL(string: tweet.user.profileImageURL)!) { [weak self] data, response, error in
            if let error = error {
                print(error)
                return
            }

            DispatchQueue.main.async {
                self?.iconImageView.image = UIImage(data: data!)
            }
        }
        downloadTask.resume()

        nameLabel.text = tweet.user.name
        screenNameLabel.text = "@" + tweet.user.screenName
        textContentLabel.text = tweet.text
    }

//ここから追加
    override func awakeFromNib() {
        super.awakeFromNib()

        // 背景色をグレーにしてみる
        self.contentView.backgroundColor = .gray

        // 背景色を特定のRGBにしてみる(0~1のCGFloat型で指定。RGBは0~255なので、255.0で割ることに注意)
        self.contentView.backgroundColor = UIColor(red: 16.0/255.0, green: 16.0/255.0, blue: 16.0/255.0, alpha: 1.0)

        // 背景色をColorLiteralで指定すればXcode上で色がついて見やすい
        self.contentView.backgroundColor = #colorLiteral(red: 0.2549019754, green: 0.2745098174, blue: 0.3019607961, alpha: 1)

        let downloadTask = URLSession.shared.dataTask(with: URL(string: tweet.user.profileImageURL)!) { [weak self] data, response, error in
フォントの色を変える
    override func awakeFromNib() {
        super.awakeFromNib()

        self.nameLabel.textColor = .white
        self.screenNameLabel.textColor = .white
        self.textContentLabel.textColor = .white

        let downloadTask = URLSession.shared.dataTask(with: URL(string: tweet.user.profileImageURL)!) { [weak self] data, response, error in
フォント・フォントサイズを変える
    override func awakeFromNib() {
        super.awakeFromNib()

        //システムフォントの指定の仕方
        self.nameLabel.font = UIFont.boldSystemFont(ofSize: 16)
        self.screenNameLabel.font = UIFont.italicSystemFont(ofSize: 12)
        self.textContentLabel.font = UIFont.systemFont(ofSize: 14)

        //自分でフォントファイルを組み込んで指定することも可能(ここでは割愛)

        let downloadTask = URLSession.shared.dataTask(with: URL(string: tweet.user.profileImageURL)!) { [weak self] data, response, error in
アイコンに角丸をつける、丸くする
    override func awakeFromNib() {
        super.awakeFromNib()

        //角丸をつけるための設定。falseだと真四角のまま。
        self.iconImageView.clipsToBounds = true
        //角丸の半径
        self.iconImageView.layer.cornerRadius = 3.0
        //widthの半分にすると、ちょうど真円になる
        self.iconImageView.layer.cornerRadius = self.iconImageView.frame.size.width / 2.0

        let downloadTask = URLSession.shared.dataTask(with: URL(string: tweet.user.profileImageURL)!) { [weak self] data, response, error in
アイコンに縁をつける
    override func awakeFromNib() {
        super.awakeFromNib()

        //アイコンの縁の色指定。UIColorではなく、CGColorで指定する必要があるので、以下のように.cgColorをつける。
        self.iconImageView.layer.borderColor = UIColor.white.cgColor
        //アイコンの縁の幅の指定。
        self.iconImageView.layer.borderWidth = 1.0

        let downloadTask = URLSession.shared.dataTask(with: URL(string: tweet.user.profileImageURL)!) { [weak self] data, response, error in
ここまでのまとめ
ここまでやったUIのカスタマイズを行うと、タイムラインの見た目が変わります!
    override func awakeFromNib() {
        super.awakeFromNib()

        self.contentView.backgroundColor = #colorLiteral(red: 0.2549019754, green: 0.2745098174, blue: 0.3019607961, alpha: 1)

        self.nameLabel.textColor = .white
        self.screenNameLabel.textColor = .white
        self.textContentLabel.textColor = .white

        self.nameLabel.font = UIFont.boldSystemFont(ofSize: 16)
        self.screenNameLabel.font = UIFont.italicSystemFont(ofSize: 12)
        self.textContentLabel.font = UIFont.systemFont(ofSize: 14)

        self.iconImageView.clipsToBounds = true
        self.iconImageView.layer.cornerRadius = self.iconImageView.frame.size.width / 2.0
        self.iconImageView.layer.borderColor = UIColor.white.cgColor
        self.iconImageView.layer.borderWidth = 1.0
    }
}

機能のカスタマイズ
投稿機能を作る
Coming soon...
更新機能を追加する
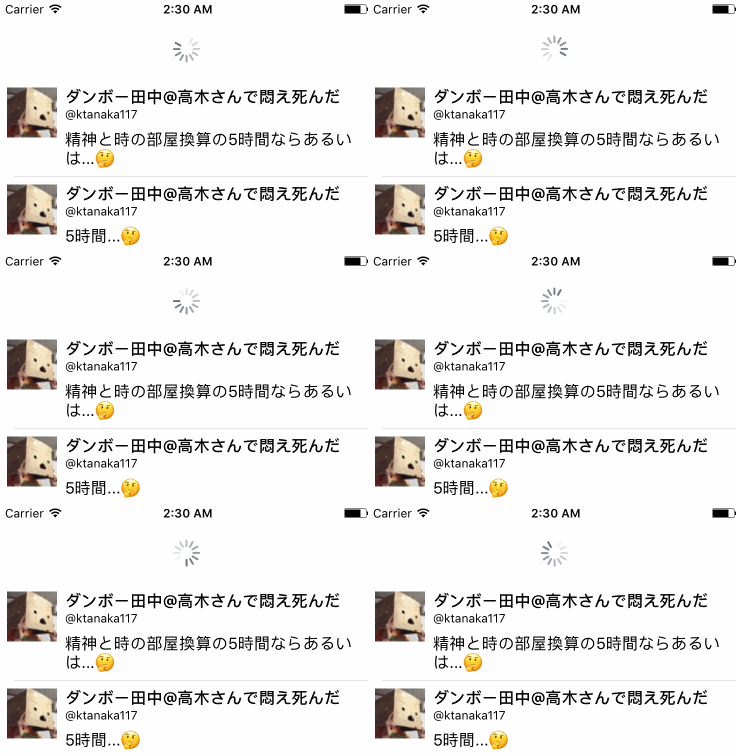
Pull to Refresh(下に引っ張って更新するやつ)の実装をします。
TimelineViewController.swiftに fetch() メソッドを追加します。
    override func viewDidLoad() {
        super.viewDidLoad()

        tableView.delegate = self
        tableView.dataSource = self

//この2行を追加
        let refreshControl = UIRefreshControl()
        tableView.refreshControl = refreshControl

        LoginCommunicator().login() { isSuccess in
tableViewにrefreshControl: UIRefreshControlというプロパティが用意されています。
このプロパティにUIRefreshControlを入れてあげることでPull to Refreshの見た目を実現することができます。
次にPull to Refresh時にデータを取得し直すコードも追加していきましょう。
    override func viewDidLoad() {
        super.viewDidLoad()

        tableView.delegate = self
        tableView.dataSource = self

        let refreshControl = UIRefreshControl()
//この1行を追加
        refreshControl.addTarget(self, action:#selector(TimelineViewController.refresh), for: .valueChanged)

        tableView.refreshControl = refreshControl

        LoginCommunicator().login() { isSuccess in
追加した行の内容としては
refreshControlの値が更新されたら(valueChanged)、
TimelineViewControllerで定義されている関数(TimelineViewController.refresh)を呼ぶようにする。
と言った意味になります。
関数(TimelineViewController.refresh)を呼ぶようにする。
実際のデータを取得し直す処理はTimelineViewController.refresh)を追加して、
ここに書いてあげましょう。
viewDidLoadで書かれている処理と全く一緒でいいので、
元の処理を関数にしてから、書いてあげるといいです。
    override func viewDidLoad() {
        super.viewDidLoad()

        tableView.delegate = self
        tableView.dataSource = self

        let refreshControl = UIRefreshControl()
        refreshControl.addTarget(self, action: #selector(TimelineViewController.refresh), for: .valueChanged)
        tableView.refreshControl = refreshControl

        LoginCommunicator().login() {[weak self] isSuccess in
            switch isSuccess {
            case false:
                print("ログイン失敗")
            case true:
                print("ログイン成功")

                //ここを `fetch()` に変更
                self?.fetch()
            }
        }
    }

//ViewDidLoadに書いてあった処理をここに移す
    func fetch() {
        TwitterCommunicator().getTimeline() { [weak self] data, error in

            if let error = error {
                print(error)
                return
            }

            let timelineParser = TimelineParser()
            let tweets = timelineParser.parse(data: data!)
            self?.tweets = tweets

            DispatchQueue.main.async { [weak self] in
                self?.tableView.reloadData()
            }
        }
    }

//ここを追加
  func refresh() {
    fetch()
  }
ここで実際に動かして見るとわかるのですが一度引っ張ったらインディケーターがずっと表示されてしまいます。

これはPull to Refreshの終わりのタイミングを伝えていないからです。
UIRefreshControl.endRefreshというメソッドが定義されています。
いくつか方法があるのですが、先ほどtableViewのrefreshControlに代入する書き方をしたので
今回もその方法でインディケーターが周り続けているrefreshControlへメソッドを実行したいと思います。
tableView.refreshControl?.endRefreshing() と書けば実行されますね。
これをfetchメソッドの次に呼んであげましょう。
  func refresh() {
    fetch()
//このいち業を追加
    tableView.refreshControl?.endRefreshing()
  }
もう一度試して見るとうまく言っていると思います。