どうも。前日のRubyに負けるな!HerokuでPython(Django)動かす方法に触発されて思わず登録してしまいました。kounoikeです。
herokuでmatplotlibでSVGなグラフを書くという記事でもFlask+herokuの導入について触れているのですが、今回はmatplotlib抜きの記事としてみましょう。その代わりに MongoHQ をちょこっと使ってみます。
Flaskとは?
Djangoが「フルスタック」Web フレームワークなら、Flask は「micro」Web フレームワークです。標準の Flask コアは Jinja2 テンプレートエンジンと Werkzeug WSGI ツールキットの2つのライブラリにしか依存していません。提供する主な機能はルーティング、Jinja2 テンプレート、静的ファイルの提供、デバッグ支援くらいでしょうか(すべてを知っている訳ではないので・・・)。もちろん、様々な Flask 拡張ライブラリが提供されているので、もっと凝ったことも色々できるはずです。
.py ファイルが1ファイルで始められる非常にシンプルなフレームワークですので、簡単な Web アプリを作って公開してみたいというときに便利でしょう。
また、昨日の記事を見るに Django では静的ファイルの配信に一手間かかるようですが、Flask では単にstaticの下に置くだけですので js/css/img の配信も楽々です。
まずは簡単に始めてみましょう
heroku のアカウント作成や Toolbelt 導入は済んでるものとします。また、環境は Mac で pyenv, pyenv-virtualenv を導入済みとしています。
heroku の python は 2.7.8 か 3.4.1 なのですが、ここでは 2.7.8 を選択しています。
ライブラリの準備
$ mkdir heroku-qiita-advent-2014
$ cd heroku-qiita-advent-2014
$ pyenv virtualenv 2.7.8 qiita-advent-2014
$ pyenv local qiita-advent-2014
$ echo .python-version > .gitignore
$ pip install flask
テンプレート、アプリの準備
#!/bin/env python
# coding: utf-8
import os
from flask import Flask, render_template
app = Flask(__name__)
app.debug = True
@app.route('/')
def index():
return u'テスト'
@app.route('/hello/<name>')
def hello(name=''):
if name == '':
¦ name = u'ななしさん'
return render_template('hello.html', name=name)
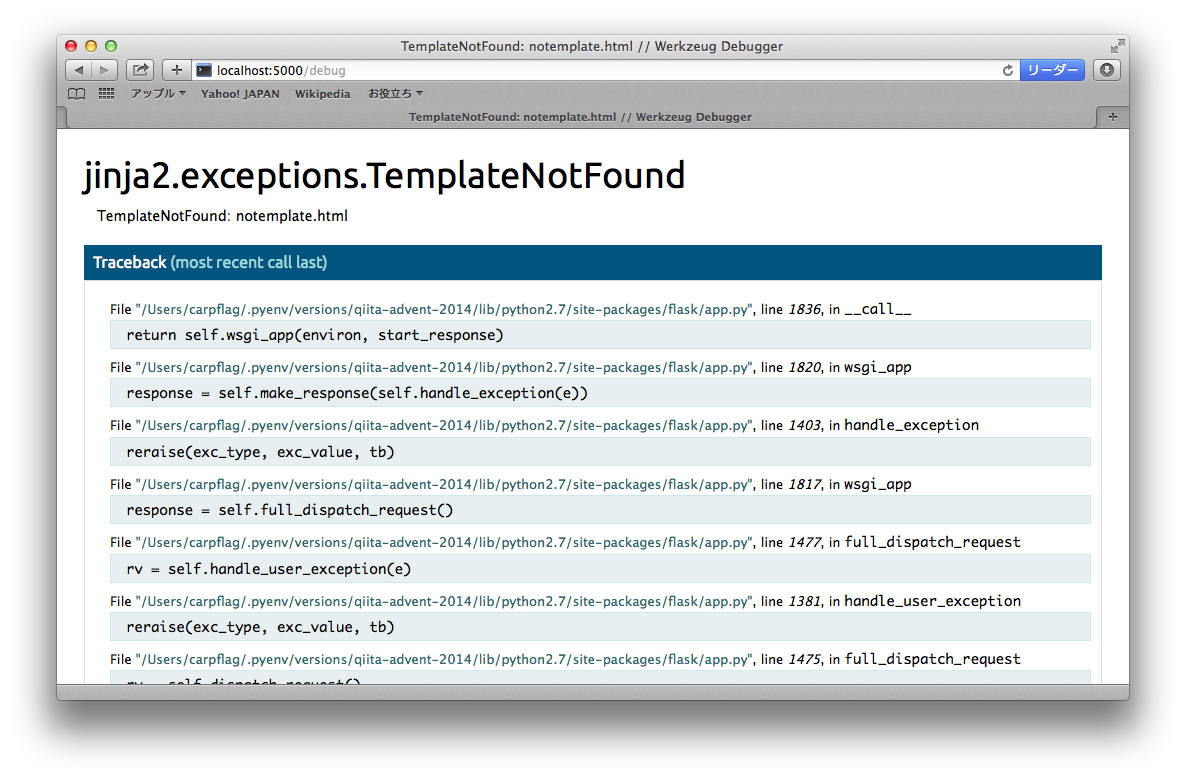
@app.route('/debug')
def debug():
return render_template('notemplate.html')
if __name__ == '__main__':
port = int(os.environ.get('PORT', 5000))
app.run(port=port)
テンプレートファイルは templates/ 以下に置きます。また、静的ファイルはstatic/以下に置きます。
<html>
<head>
    <title>Hello {{ name }}</title>
</head>
<body>
    <h1>こんにちは{{ name }}さん</h1>
    <a href="http://flask.pocoo.org/"><img src="/static/img/flask.png"></a>
</body>
</html>
$ tree
.
├── Procfile
├── app.py
├── requirements.txt
├── runtime.txt
├── static
│   └── img
│       └── flask.png
└── templates
    └── hello.html
ローカルで試してみよう
python app.pyとするとローカルホストのポート 5000 でアプリが立ち上がります。/ と /hello/名前 と /debug がありますので試してみましょう。
app.debug = Trueを入れてあるので,http://localhost:5000/debug にアクセスするとエラーページが出ます。
heroku にデプロイ
heroku 用のファイルを準備する
$ pip install gunicorn
$ pip freeze > requirements.txt
$ echo python-2.7.8 > runtime.txt
$ echo web: gunicorn app:app --log-file=- > Procfile
git で管理する
$ git init
$ git add .gitignore
$ git add .
$ git commit -m "initial commit"
heroku にデプロイ
$ heroku login
$ heroku apps:create
$ git push heroku master
https://stark-forest-4893.herokuapp.com/ でこのアプリが見られます。https://stark-forest-4893.herokuapp.com/hello/ に続けて適当な名前を入れてみてください。
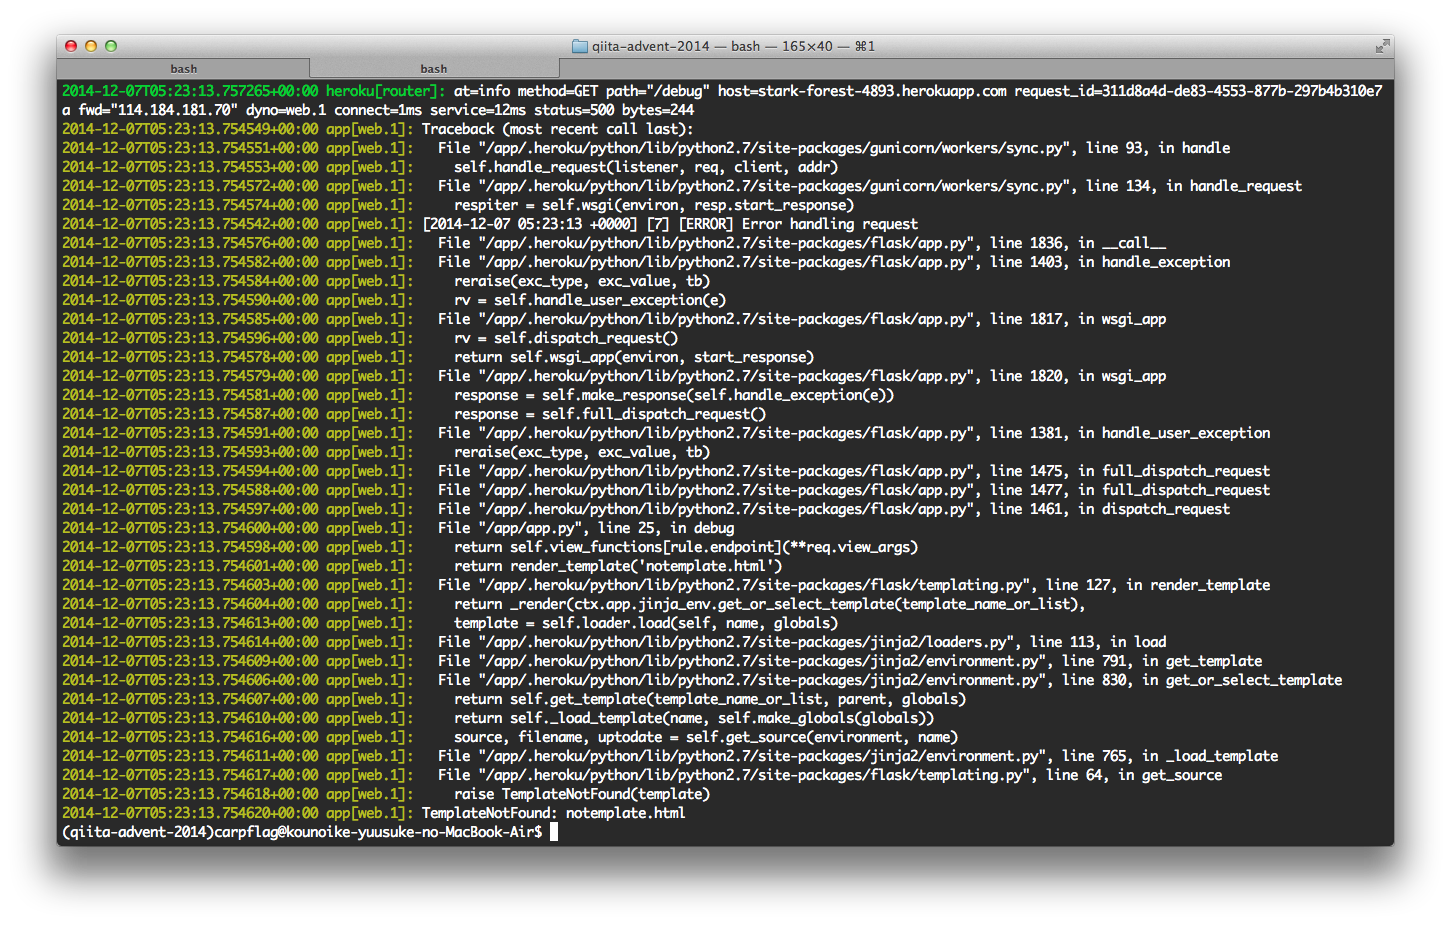
また、heroku 上だと Flask のapp.debug = Trueは無効になっています。
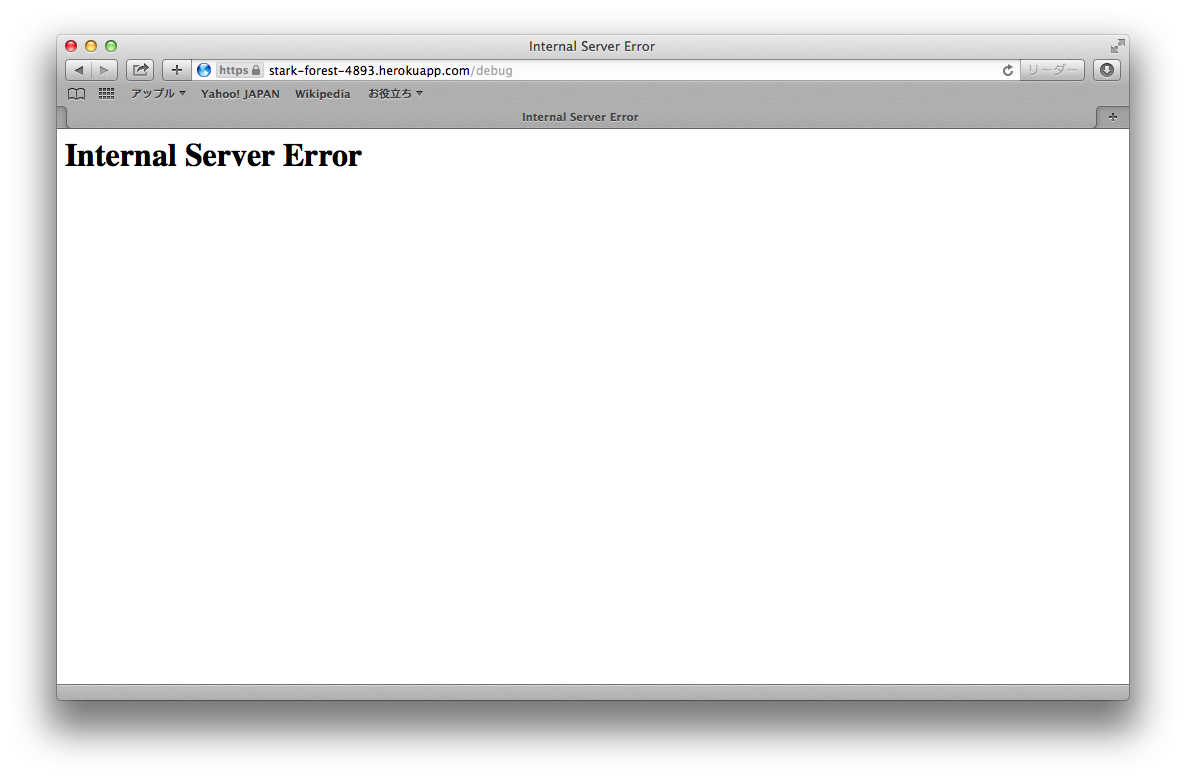
heroku logs コマンドで確認しましょう。
データベースを使おう
PostgreSQL の使い方は、英語の記事になりますが、Flask and PostgreSQL on Herokuを参照すると良いでしょう(使ったことないもので・・・)。
なんで使ったことないかと言うと、無料枠は1万行までという制限がきつくて、MongoHQを使っちゃうからです。MongoHQは512MBまでが無料枠です。小さなデータが数多くある場合はこちらの方が使い勝手が良いですね。
MongoHQを使う
色々準備しましょう。
$ heroku addons:add mongohq
$ pip install pymongo
$ pip freeze > requirements.txt
アプリ&テンプレートの修正
#!/bin/env python
# coding: utf-8

import os
from urlparse import urlparse

from flask import Flask, render_template
from pymongo import Connection


app = Flask(__name__)
app.debug = True

MONGO_URL = os.environ.get('MONGOHQ_URL')

if MONGO_URL:
    # Get a connection
    connection = Connection(MONGO_URL)
    # Get the database
    db = connection[urlparse(MONGO_URL).path[1:]]
else:
    # Not on an app with the MongoHQ add-on, do some localhost action
    connection = Connection('localhost', 27017)
    db = connection['QiitaAdvent2014']


@app.route('/')
def index():
    return u'テスト'


@app.route('/hello/<name>')
def hello(name=''):
    if name == '':
        name = u'ななしさん'
    return render_template('hello.html', name=name)


@app.route('/hello2/<name>')
def hello2(name=''):
    if name == '':
        name = u'ななしさん'

    helloObj = db.hello.find_one({'name': name})
    if not helloObj:
        helloObj = {'name': name, 'count': 1}
    else:
        helloObj['count'] += 1
    db.hello.save(helloObj)

    return render_template('hello2.html', hello=helloObj)


@app.route('/debug')
def debug():
    return render_template('notemplate.html')


if __name__ == '__main__':
    port = int(os.environ.get('PORT', 5000))
    app.run(port=port)
<html>
<head>
    <title>Hello {{ hello.name }}</title>
</head>
<body>
    <h1>こんにちは{{ hello.name }}さん</h1>
    <h2>{{ hello.count }}回目ですね!</h2>
</body>
</html>
https://stark-forest-4893.herokuapp.com/hello2/<名前> で名前ごとにカウントされるようになりました。色々と手抜きですが、サンプルということで。
お次は
kiyotoさんによるfluentd, Postgres, TreasureData 関係だそうです!
fluentd は最近色々と話題ですね。私も興味があります。これらがどう heroku と結びつくのか・・・楽しみです。