※本記事は、 一般に公開されている情報を元に作成しています。
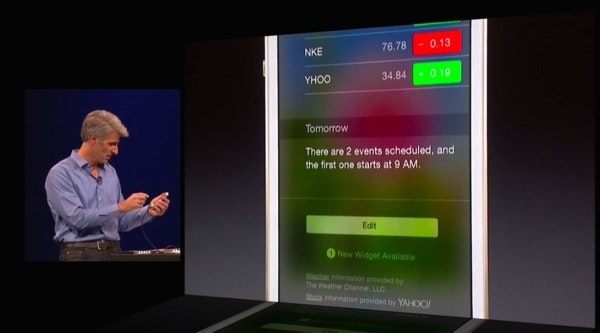
iOS 8から通知センターにウィジェット(Widgets)を設置できるようになりました。
実装方法はすでに 一般にも公開されており、 開発者以外も読むことができます。
App Extension Programming Guide
ウィジェットは Extensions のひとつ
iOS 8 から Extensions という、新しいアプリ間連系の仕組みが導入されました。Extensions については shu223 さんの記事でとてもわかりやすく解説されています。
【iOS8】App Extension の実装方法 その1:Action
その中の「Today Extension」がウィジェットにあたります。(つまり、ウィジェットは Extensions のひとつ。なので "Widgets" で検索しても引っかからないかも)
実装方法
実装上のポイントは次の通り。
- ウィジェットは別ターゲットとして作成する
- ウィジェット内ではキーボードが使えない
- あまりスペースを専有しすぎないように注意
- ウィジェット内では定期的にスナップショットが撮られ、表示する際には最新のスナップショットが使われる
- スナップショットが更新されるタイミングで呼ばれるメソッドが用意されている
1. Extension 追加
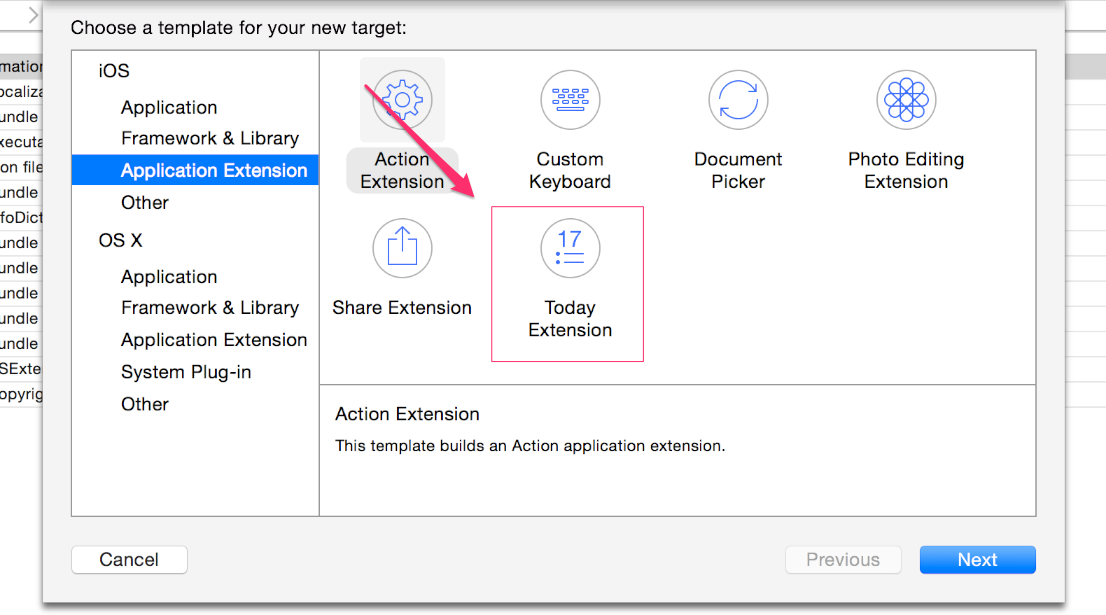
File > New > Target から画面を開いて「Today Extension」を選びましょう。

(iOS Developerサイトから引用。Xcode 6のスクリーンショットではありません)
ウィジェット用のストーリーボードが自動で作成されます。
2. Info.plist
ウィジェット用のストーリーボードと一緒に Info.plist が作成されます。
<key>NSExtension</key>
    <dict>
        <key>NSExtensionPointIdentifier</key>
        <string>com.apple.widget-extension</string>
        <key>NSExtensionMainStoryboard</key>
        <string>MainInterface</string>
    </dict>
NSExtensionMainStoryboard に指定したストーリーボードがウィジェットに表示されます。
ストーリーボードを使わない場合は NSExtensionMainStoryboard を削除し、NSExtensionPrincipalClass を追加します。このキーに、ウィジェットとして表示したいビューコントローラクラスを指定します。
3. スナップショット更新直前に呼ばれるメソッドを実装
ウィジェットは定期的に更新されるようです。そのたびに次のメソッドが呼ばれます。
- (void)widgetPerformUpdateWithCompletionHandler:(void (^)(NCUpdateResult))completionHandler {
    // Perform any setup necessary in order to update the view.

    // データの更新があるならここでビューを更新しておく

    // 該当する値を返却する
    // If an error is encoutered, use NCUpdateResultFailed
    // If there's no update required, use NCUpdateResultNoData
    // If there's an update, use NCUpdateResultNewData

    completionHandler(NCUpdateResultNewData);
}
このメソッド内でウィジェットの更新処理を行い、その結果を NSExtensionPointIdentifier に渡します。
- NCUpdateResultFailed - データの更新処理に失敗した
- NCUpdateResultNoData - データが更新されていない
- NCUpdateResultNewData - データの更新処理に成功した
(データの更新がない場合、またはデータの更新に失敗した場合はスナップショットの更新をしない?)
4. 実行
アプリを起動し、通知センターを表示すると新しくウィジェットが追加されています。
Xcode 6 は 現在NDA下にある ため、実行結果のスクリーンショットの掲載は控えておきます。
レイアウト調整
ウィジェットの高さを変更する
高さは preferredContentSize プロパティで調整できます。幅は指定しても効果が無いようです。
size.height = 100.0;
self.preferredContentSize = size;
ウィジェット内の余白を調整する
余白は
- (UIEdgeInsets)widgetMarginInsetsForProposedMarginInsets:(UIEdgeInsets)defaultMarginInsets
デリゲートで UIEdgeInsets を返すことで調整できます。
極端な例ですが、余白をゼロにするには次のようにします。
- (UIEdgeInsets)widgetMarginInsetsForProposedMarginInsets:(UIEdgeInsets)defaultMarginInsets
{
    return UIEdgeInsetsZero;
}
ウィジェットからアプリを開く

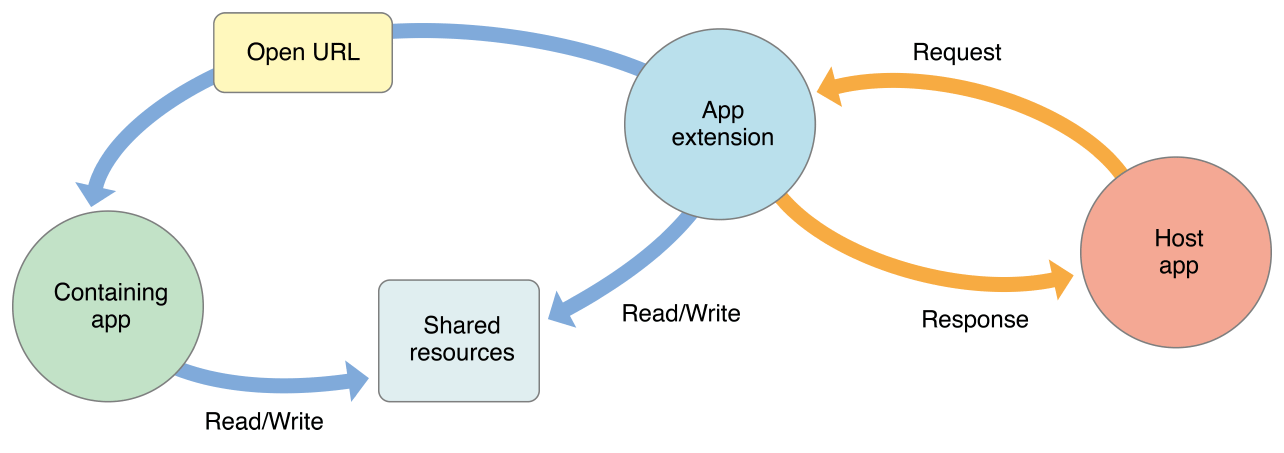
(https://developer.apple.com/library/prerelease/ios/documentation/General/Conceptual/ExtensibilityPG/index.html#//apple_ref/doc/uid/TP40014214-CH20-SW1 から引用)
URLスキームを使って特定のアプリを開くことができるようです。
NSString *urlStr = @"urlscheme://";
[[self extensionContext] openURL:[NSURL URLWithString:urlStr] completionHandler:nil];
ウィジェット↔アプリ間のデータ共有
toyshipさんのスライドが非常に参考になります。
今まで通り Keychain によるアプリ間のデータ共有も使えますが、もっと便利な App Group という仕組みが追加されました。
group.com.company.appname のような Group ID を設定することで、
- NSUserDefaults
- CoreData
- ファイル
によるデータ共有が可能になるようです。
例えば、アプリ本体側で
NSUserDefaults *userDefaults = [[NSUserDefaults alloc] initWithSuiteName:@"group.com.company.appname"];
[userDefaults setObject:@"hoge" forKey:@"hello"];
のようにセットしたデータは、ウィジェット側で次のように取り出すことが可能です。
NSUserDefaults *userDefaults = [[NSUserDefaults alloc] initWithSuiteName:@"group.com.company.appname"];
NSString *str = [userDefaults objectForKey:@"hello"];
ウィジェットを非表示にする
アプリ側から 次のコードを実行することで、データが無いことを伝えます。こうすることでウィジェットが非表示になります。
    NCWidgetController *widgetController = [NCWidgetController widgetController];
    [widgetController setHasContent:NO forWidgetWithBundleIdentifier:@"Myapp.QiitaWidget.Widget"];
再び表示したいときは YES を設定してやります。
[widgetController setHasContent:YES forWidgetWithBundleIdentifier:@"Myapp.QiitaWidget.Widget"];
