これは何?
Chrome apps or extension の Inline Installation の使い方。すげー便利な API なのに、ネットに体系的な使い方情報がほとんどのってな(くて、すごく苦労したので)かったのでまとめてみました。
Inline Installationって?
Chrome Web Store に行かなくても Webサイト内で拡張機能なんかをインストールする機能。その名もずばり chrome.webstore.install()
例えば、appear.inの画面共有の拡張機能をインストールするのに使われていて、Chrome extension でインストールした拡張機能を、エレガントなフローで活用することができるようになります。
Inline Installation の活用例(appear.in の場合)
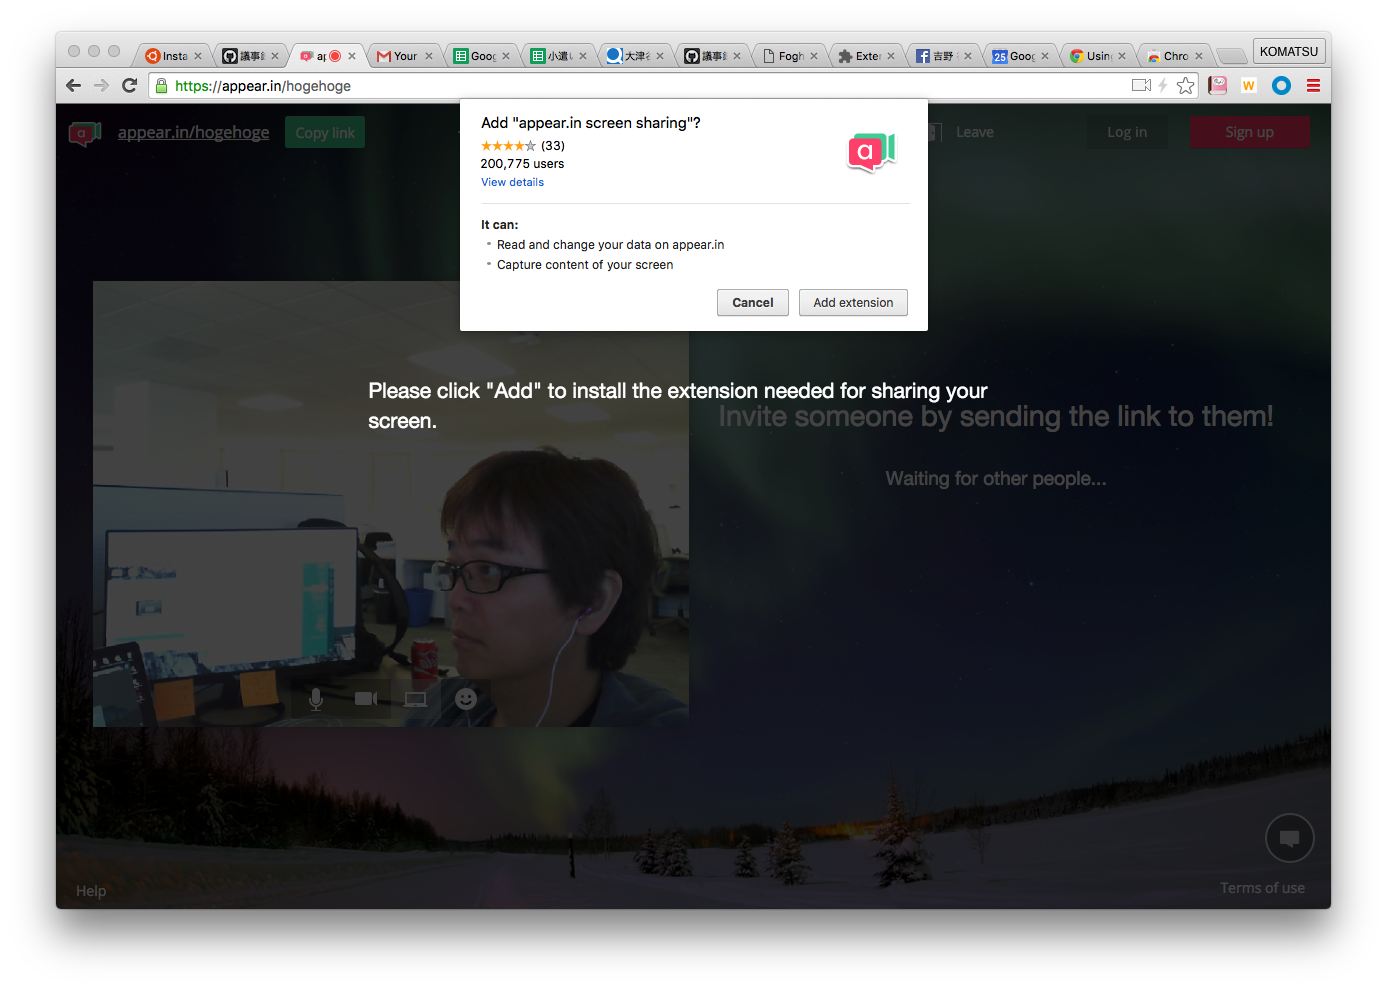
拡張機能が入ってない状態で画面共有機能を使おうとすると、inline で install ダイアログが表示される(Chrome WebStoreに飛ばされない辺りが美しい ;-))
Add extension をクリックすると、インストールがその場で実行され、完了後即座に画面共有機能のダイアログが表示される。
設定方法
Inline Installation を利用する場合は、まず拡張機能を利用する Webサイトを Web master tool と Chrome Web store developer dashboard 双方で設定する必要があります。
Web master toolでの設定
まず、Web master toolで、Webサイトをverify します。Search Consoleで、ADD A PROPERTY をクリックし、利用するサイトのOriginを指定。その後、表示される HTML verification file を指定したサイトに配置して、VERIFY をクリックしてください。Googleさんがそのファイルアクセスに成功すると、めでたくverify完了です。
なお、Inline Installationでは、指定したOriginに対し、サブドメインでも利用可能です。例えば、
https://example.com/
を登録しておけば
https://test.example.com/
でも利用できます。
Chrome Web store developer dashboard での設定
Chrome Web store developer dashboard より、Inline Installation するアプリ・拡張機能の設定を変更します。
- 設定するアプリ・拡張機能右端の [Edit] をクリック
- [Websites] の Verify that this is an official item for a website you own: で、Webサイトの Origin を指定(Web master toolでVerifyされたものをプルダウンで選択)
- [Inline install] の This item uses inline install. をチェック
あとは、 Publish changes してください(Preview changesでもいけるのかな?試してない)。たぶん、10分も待つと反映されるはずです。(この待ち時間のおかげで、デバッグはチョーめんどいのが難点 ><)
使い方
Chrome Web Store linkの設定
Webサイトの html に、以下の タグを指定します。
<link rel="chrome-webstore-item" href="https://chrome.google.com/webstore/detail/itemID">
ここで、itemID はアプリ・拡張機能のIDです。例えば、 appear.in の画面共有拡張機能の場合、Chrome WebStoreでのURLは
となりますが、この最後の暗号じみたパス bodncoafpihbhpfljcaofnebjkaiaiga が itemID です。対象となる Extension なりに応じて、変更してください。
Inline Installationの実行
あとは、Webサイトのjsで、chrome.webstore.install() を呼べば、Inline Installation が実行されます。使い方はこんな感じ
chrome.webstore.install("", function(){
  // install成功した時のふがほげ
}, function(errString, errCode){
  // install失敗した時のふがほげ
});
なお、第一引数の文字列は上述の <link> を複数書いている場合に、どれをインストールするかを URL 指定するために用いられます(省略されている場合は、一番最初にかかれている <link> の URL が適用される)
content scriptを自動起動する
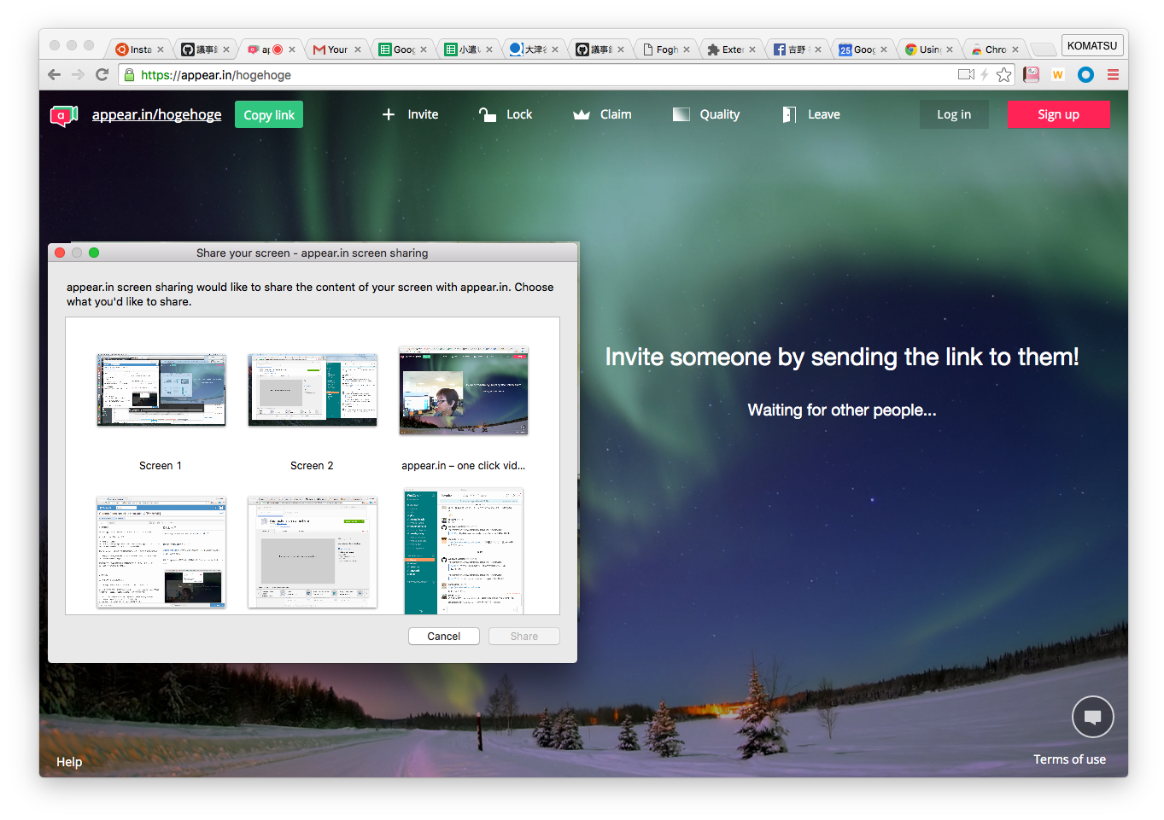
Inline Installationには一点注意が必要で、インストールが完了すると Background Pages は起動してくれるものの、 Content Scripts は起動してくれません(起動するためには、ページリロードが必要)。なので、そのままだと冒頭の appear.in のように、
inline installation 実行 => そのまま画面共有機能を実行
といったエレガントな動作にはなりません。
これを解決するには、Background Pages側で executeScript() を使えばokです。Background Pagesの最後に以下を記述します。
// obtain target tabs to inject content script
chrome.tabs.query({
  "status": "complete",
  "url": "*://test.example.com/*",
}, function(tabs) {
  tabs.forEach(function(tab){
    // inject script
    // assuming that content script is 'content.js'
    chrome.tabs.executeScript(tab.id, {
      "file": "content.js",
      "runAt": "document_start"
    });
  });
});
あと、manifest.jsonで
"permissions": [
  "tabs",
  "https://*.example.com/*" // in case of inline installation, you have to set your webapp's origin here.
],
"content_scripts": [
  {
    "matches": ["https://*.example.com/*"],
    "js": ["content.js"],
    "run_at": "document_start"
  }
],
とパーミッション設定を忘れずに。これで、content.js がめでたくロードされ、Webサイトから利用できるようになります。パチパチ
ただ、ここで注意が必要なのが、Content Scriptのロードが完了した後 Webサイトからその機能を呼ばなきゃならないってこと。このため、Content Script の最後でメッセージを発火させます。
// Write below snipet in the end of script
window.postMessage({ type: 'ContentScriptInjected' }, '*');
で、Webサイト側では chrome.webstore.install の第二引数 ( onSuccess )で、このメッセージをハンドルしてやるようにします。
chrome.webstore.install("", function(){
  window.addEventListener('message', function(ev) {
    if(ev.data.type === "ContentScriptInjected") {
      // execute api in content.js
    }
  }, false);
}, function(err, errCode) { ... });
これで、appear.in のようなエレガントなフローが実現できます。
まとめると、
- Inline Installationの実行
- Background Pagesより、Content Scriptのロードを行う
- Content Scriptのロード完了時にメッセージを発火
-
Webサイトでそれをハンドルし、拡張機能を実行する
といった感じです。
設定まわりがいろいろとあって、また、デバッグもめんどいのが玉に瑕ですが、拡張機能に対応したエレガントなサイトを作れるテクニック。うまく動くとなかなかの快感ですw