前回は PWM を使ってみましたが、前面ピンで使えないのが残念でした。
今日ここをのぞいていたら、こんなことがかいてありました!
http://kinoma.com/develop/create/pins/
The majority of the back pins are fixed function, with 8 of the back pins mirroring the pin configuration on the Front-Left pins.
背面ピンの大半は機能が固定されておりますが、8つのピンに関しては左側前面ピンの設定を反映します。
なにー!
確かに、Front-LeftX とかいてある。
すなわち、
Front-Left1(Pin51) = Pin38
Front-Left2(Pin52) = Pin37
Front-Left3(Pin53) = Pin40
Front-Left4(Pin54) = Pin39
... なわけである。
とすると、背面ピンの PWM をピンでつないでやれば、PWM を前面ピンで使えるのでは???
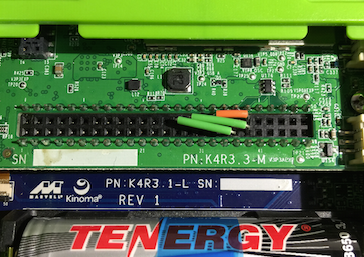
というわけで、ジャンプワイヤで以下のように PWM ピンをつなぐ。
Front-Left2: Pin28 <-> Pin37
Front-Left3: Pin34 <-> Pin40
Front-Left4: Pin30 <-> Pin39
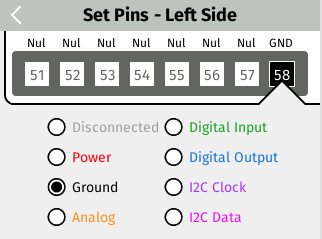
前面ピンの設定を以下のようにしてやって、
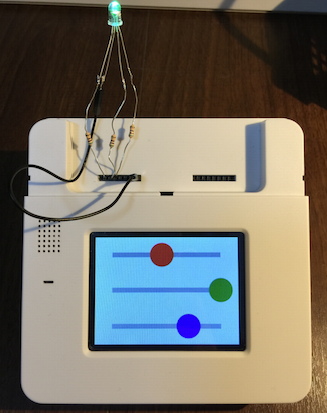
前面ピンを下の写真のようにつないでやるとできました。同様にして、UART通信も多分前面ピンからおそらく使えることでしょう。

でも、本当にこんなことしていいのかはわからないので、 良い子はマネをしないように!
少なくとも、ピン設定で今回PWMをつないだところに Disconnected 以外のものを割り当てると壊れてしまうかもしれませんので。つないでたこと忘れちゃうかもしれないしね。


