個人的に使用する機会があったので環境構築方法をまとめ。
Windows向けの記事になります。(たぶんLinuxとかでもある程度は一緒かと思います)
※普段は組み込みLinux向けにC/C++を使ってる人間なので、メンテされてない可能性がありますのでご注意ください
検証環境(2017/02/25)
- Windows 10
- Visual Studio Code 1.9.1
- Node.js v6.10.0 LTS
- TypeScript v2.2.1
1. Visual Studio Code(以下VSCode)の環境整備
1.1. VSCodeのインストール
前提としてVSCodeをインストールします。
Visual Studio Code - Code Editing. Redefined
1.2. Node.js のインストール
Node.jsを公式ページからインストールします。
特に理由がなければLTSの方をインストールしてください。
インストールが完了すれば、VSCode内の端末から npm コマンドが実行できるようになっているはずです。
端末> npm -v
3.10.10
1.2. TypeScript のインストール
1.2.1. package.jsonの作成
npmでTypeScriptの最新をインストールします。
[表示] => [統合ターミナル] または Ctrl + ` キーで端末を開きます。
package.json がない場合は作成します。
端末> npm init
大体はデフォルトでとりあえずはいいですが、Licenseの設定だけは適切なものに変更してください。
1.2.2. TypeScriptのインストール
TypeScript本体をインストールします。
端末> npm install typescript tslint
1.2.3. TypeScriptの型定義ファイルについて
型定義ファイルの扱いについては tsd やら Typings やらでよくわかりませんでしたが、最近では npm + @types でなんとかなるようです。なので、本記事では @types 指定での方法を記載します。
参考:
npmでTypeScriptの型定義を管理できるtypesパッケージについて - Qiita
特別なツール不要! TypeScript 2.0時代の型定義ファイルの取り扱い方 - Qiita
1.2.4. tsc でのコンパイルの実行
今回はプロジェクトのローカルにインストールしたため、以下のパスに存在します。
.\node_modules\.bin\tsc
ひとまずバージョンの表示で実行できることを確認してください。
端末> .\node_modules\.bin\tsc -v
Version 2.2.1
以上で共通の環境作成は完了です。
1.3. TSLintの拡張機能をインストール
TSLintを実行するプラグインをインストールします。
2. TypeScript のビルドの基本機能の確認
以下は TypeScript を使ってプロジェクトを作成する例になります。(1の環境設定が完了していることが前提です)
2.1. VSCodeのTaskRunnerの設定を行う
詳細なドキュメントは以下などを参照してください。
今回は tsc をそのまま使うタスクを抜粋しています。以下の手順を実行してください。
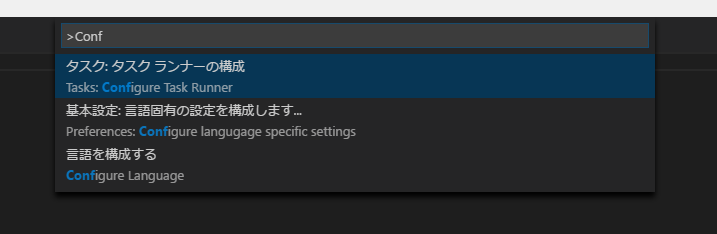
1. F2 or Ctrl+Shift+P でコマンドパレットを開く
コマンドパレットを開きます。
2. Configure Task Runner とタイプして Enter で選択
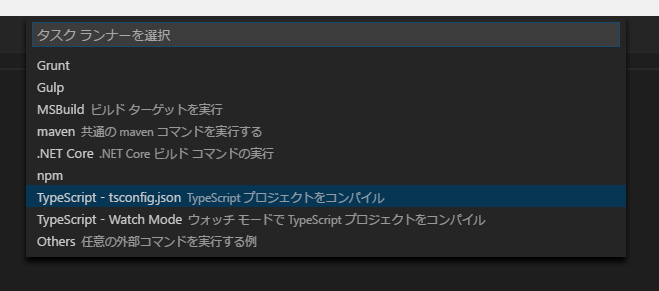
3. 次のメニューから tsconfig.json を選択
いろいろありますが、今回は tsconfig.json を選択します。
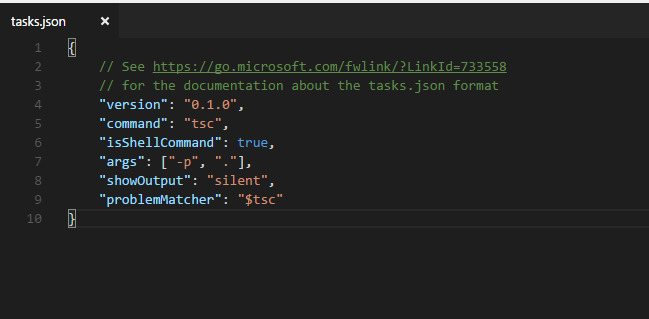
4. .vscode/tasks.json が作成されます
タスクランナーの作成コマンドを実行します。
2.2. tsconfig.json を作成する
端末で以下を実行してください。
端末> .\node_modules\.bin\tsc --init
tsconfig.json が生成されます。
{
    "compilerOptions": {
        "module": "commonjs",
        "target": "es5",
        "noImplicitAny": false,
        "sourceMap": false
    }
}
内容は必要に応じて適宜編集してください。
今回は以下のように指定しました。
{
    "compilerOptions": {
        "module": "commonjs",
        "target": "es6",
        "noImplicitAny": false,
        "sourceMap": true,
        "watch" : true
    },
    "include": [
        "*.ts"
    ],
    "exclude": [
        "node_modules"
    ]
}
"watch" : true の指定で "file" または "include" で指定したファイルを監視して再トランスパイルをかけてくれます。
TypeScript限定であれば、gulp とかよりもお手軽かと思われます。
その他設定値に関しては以下などを参考にしてください。
2.3. tslint.json を作成する
tslintの設定ファイルを生成します。
端末> .\node_modules\.bin\tslint --init
初期値は以下のようになりました。
{
    "jsRules": {
        "class-name": true,
        "comment-format": [
            true,
            "check-space"
        ],
        "indent": [
            true,
            "spaces"
        ],
        "no-duplicate-variable": true,
        "no-eval": true,
        "no-trailing-whitespace": true,
        "no-unsafe-finally": true,
        "one-line": [
            true,
            "check-open-brace",
            "check-whitespace"
        ],
        "quotemark": [
            true,
            "double"
        ],
        "semicolon": [
            true,
            "always"
        ],
        "triple-equals": [
            true,
            "allow-null-check"
        ],
        "variable-name": [
            true,
            "ban-keywords"
        ],
        "whitespace": [
            true,
            "check-branch",
            "check-decl",
            "check-operator",
            "check-separator",
            "check-type"
        ]
    },
    "rules": {
        "class-name": true,
        "comment-format": [
            true,
            "check-space"
        ],
        "indent": [
            true,
            "spaces"
        ],
        "no-eval": true,
        "no-internal-module": true,
        "no-trailing-whitespace": true,
        "no-unsafe-finally": true,
        "no-var-keyword": true,
        "one-line": [
            true,
            "check-open-brace",
            "check-whitespace"
        ],
        "quotemark": [
            true,
            "double"
        ],
        "semicolon": [
            true,
            "always"
        ],
        "triple-equals": [
            true,
            "allow-null-check"
        ],
        "typedef-whitespace": [
            true,
            {
                "call-signature": "nospace",
                "index-signature": "nospace",
                "parameter": "nospace",
                "property-declaration": "nospace",
                "variable-declaration": "nospace"
            }
        ],
        "variable-name": [
            true,
            "ban-keywords"
        ],
        "whitespace": [
            true,
            "check-branch",
            "check-decl",
            "check-operator",
            "check-separator",
            "check-type"
        ]
    }
}
(あんまり詳しくないのでひとまずデフォルトで)内容は適宜修正してください。
2.4. HelloWorld.ts を作成する。
ひとまずトランスパイルができることを確認します。
class Startup {
public static main(): number {
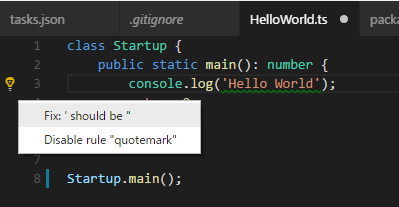
console.log('Hello World');
return 0;
}
}
Startup.main();
今回は watch で指定してるので、tsファイルの更新時にトランスパイルをしてくれます。
手動でやる場合は、Ctrl + Shift + B でビルドタスクを実行できます。
class Startup {
    static main() {
        console.log('Hello World');
        return 0;
    }
}
Startup.main();
//# sourceMappingURL=HelloWorld.js.map
トランスパイルして、HelloWorld.js が生成されました。(一応実行結果も確認)
端末> node .\HelloWorld.js
Hello World
TSLintも以下のような感じで動いています。自動修正もしてくれるみたいですね。
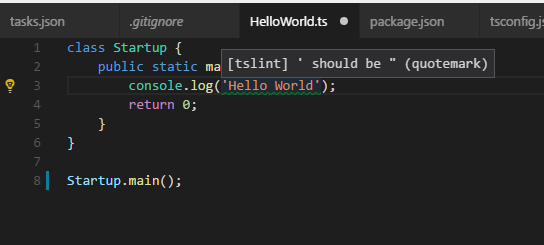
ひとまず一通りの環境作成は以上です。
3. もっと詳細な使用方法
TODO: @types を利用した Vue.js あたりを使ったサンプルを作成しようかと思ってたんですが、記事が長くなってきたので分割します。
参考
TypeScript Programming with Visual Studio Code
Node.js and Visual Studio Code Tutorial