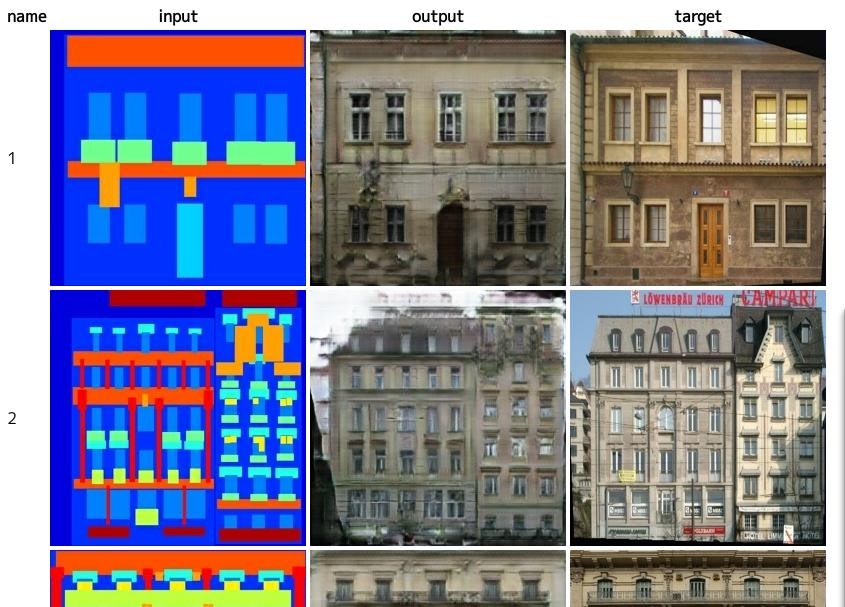
pix2pixのTensorFlow実装であるpix2pix-tensorflowをGoogle Cloud Machine Learning(GCML)で動作するようにするまでの手順を記録しておきます。
ファイル入出力周りをtf.gfileに置き換え
GCMLではファイルの入出力をCloud Storageに対して行うので、Python自前のファイルI/O関連メソッドをtf.gfileに置き換えます。
diff --git a/pix2pix.py b/pix2pix.py
index 20ba819..3d1b1c2 100644
--- a/pix2pix.py
+++ b/pix2pix.py
@@ -13,6 +13,11 @@ import collections
 import math
 import time

+os.path.exists = tf.gfile.Exists
+glob.glob = tf.gfile.Glob
+os.makedirs = tf.gfile.MakeDirs
+open = tf.gfile.Open
+
 parser = argparse.ArgumentParser()
 parser.add_argument("--input_dir", help="path to folder containing images")
 parser.add_argument("--mode", required=True, choices=["train", "test", "export"
])
エディタでメソッドを書き換える手間を惜しんで、既存のメソッドをtf.gfileの相当するものに置き換えています。
注意点
今回の対象コードでは問題ありませんが、tf.gfile.Openでは新規ファイルを開く時、mode='a'で作成しようとすると失敗します(1.0.1で確認)。その場合、mode='w'にしておく必要があります。
パッケージ化
サブディレクトリ作成
taskというサブディレクトリを作り、そちらにメインのコードを移動します。パッケージの作法として"_init_.py"ファイルも必要なので、それを作成します。
$ mkdir task
$ touch task/__init__.py # 空ファイルで良い
$ mv pix2pix.py task/
注意点
単一のコードで完結していない場合、パッケージ化に伴う名前空間の変更を考慮した修正が必要になります。
仮にpix2pix.pyがmodel.pyを参照していたようなケースの場合、pix2pix.pyの中の"import model"という部分を"from task import model"に書き換える必要があります。今回はpix2pix.py単体で処理が完結しているので、その必要はありません。
setup.pyの作成
パッケージ化に必要なsetup.pyファイルを作成します。
# -*- coding: utf-8 -*-
#
from setuptools import setup

if __name__ == '__main__':
    setup(name='task',
          packages=['task'])
ローカルでの動作テスト
修正した結果が正しく動作するかをローカルで確認します。データセットは既にダウンロード済みであるとします。
$ gcloud ml-engine local train --module-name=task.pix2pix \
 --package-path=task/ -- \
 --mode train --output_dir /path/to/trained_facades \
 --input_dir /path/to/facades/train --max_epochs 200 \
 --which_direction BtoA'
aspect_ratio = 1.0
batch_size = 1
beta1 = 0.5
checkpoint = None
display_freq = 0
flip = True
gan_weight = 1.0
input_dir = /path/to/facades/train
l1_weight = 100.0
lab_colorization = False
lr = 0.0002
max_epochs = 200
max_steps = None
mode = train
ndf = 64
ngf = 64
output_dir = /path/to/trained_facades
output_filetype = png
progress_freq = 50
save_freq = 5000
scale_size = 286
seed = 1398609485
summary_freq = 100
trace_freq = 0
which_direction = BtoA
examples count = 400
parameter_count = 57183616
progress  epoch 1  step 50  image/sec 0.3  remaining 4224m
discrim_loss 0.573411
gen_loss_GAN 0.376408
gen_loss_L1 0.146523
途中経過の出力がされればうまく動いているとみて良いでしょう。
クラウド上にジョブを投げる
あとは実際のジョブをsubmitするだけです。バケットと訓練データが既にCloud Storage上にあるものとします。
$ gcloud ml-engine jobs submit training pix2pix_1 \
 --module-name=task.pix2pix \
 --staging-bucket gs://your-bucket \
 --region us-central1 \
 --scale-tier BASIC_GPU \ # GPUインスタンスを使う
 --package-path=task/ -- \
 --mode train --output_dir gs://your-bucket/output \
 --input_dir gs://your-bucket/facades/train \
--max_epochs 200 --which_direction BtoA
Job [pix2pix_1] submitted successfully.
Your job is still active. You may view the status of your job with the command

  $ gcloud ml-engine jobs describe pix2pix_1

or continue streaming the logs with the command

  $ gcloud ml-engine jobs stream-logs pix2pix_1
jobId: pix2pix_1
state: QUEUED
ログを確認する
先の出力の通り、gloudコマンドを実行すればログを閲覧できます。終了するまで待ちましょう。
$ gcloud ml-engine jobs stream-logs pix2pix_1
(中略)
INFO    2017-05-18 18:11:39 +0900       master-replica-0                progress
  epoch 25  step 200  image/sec 4.7  remaining 248m
INFO    2017-05-18 18:11:39 +0900       master-replica-0                discrim_
loss 0.648207
INFO    2017-05-18 18:11:39 +0900       master-replica-0                gen_loss
_GAN 2.13424
INFO    2017-05-18 18:11:39 +0900       master-replica-0                gen_loss_L1 0.318083
INFO    2017-05-18 18:11:39 +0900       master-replica-0                progress  epoch 25  step 250  image/sec 4.7  remaining 247m
結果をローカルにコピー
Cloud Storage上に保存された結果をローカルにコピーします。
$ cd /your/data/path
$ gsutil cp -r gs://your-bucket/output .
評価
結果を確認するため、評価データを処理します。
$ python task/pix2pix.py --mode test \
 --checkpoint /your/data/path/output \
--input_dir /path/to/facades/val \
 --output_dir /your/data/path/test
$ firefox /your/data/path/test/index.html
ソースコード
https://github.com/knok/pix2pix-tensorflow (gcmlブランチ)
リソースについて
今回の処理では訓練に5時間程度かかりました。支払いは800円程度に収まっています。今回は400枚のデータという非常に少ない内容だったのですが、他のデータセット、例えばedges2shoesだと5万画像ぐらいあるので、かかるコストも10倍以上になると思われます。
今後
今回ベースにしたコードはきちんと作法にしたがって書かれているので、GCMLでの並列実行も少ない修正で可能になっています。いずれその方法についても書きます。
