前提
Githubに登録するためのSSH鍵の作成手順を想定しています。
CentOS6.5で検証しているプロセスとなります(MacOSでも同様のプロセスで作成できます)。
SSH鍵の作成
ssh-keygenで秘密鍵・公開鍵ペアを作成
$ ssh-keygen
Generating public/private rsa key pair.
Enter file in which to save the key (/home/vagrant/.ssh/id_rsa): github_rsa    <----- 今回はgithub用のSSH鍵を作成しているので、それとわかる名前を付けています。
Enter passphrase (empty for no passphrase):	<----- 今回はパスワードはなしでOKのため、何も入力せずに「Enter」。
Enter same passphrase again:     <----- 確認を求められますが、今回は設定していないので、何も入力せずに「Enter」。
Your identification has been saved in github_rsa.
Your public key has been saved in github_rsa.pub.
The key fingerprint is:
6f:09:a6:35:2d:34:e6:82:95:89:41:7d:a7:58:1b:92 vagrant@localhost.localdomain
The key's randomart image is:
+--[ RSA 2048]----+
|   .o. .         |
|     oEo+ .      |
|    . +=+=       |
|     o.+oo       |
|    . . S .      |
|       = = .     |
|      .   +      |
|         .       |
|                 |
+-----------------+
作成されたキーペアを確認
$ ls -la | grep github
-rw-------  1 vagrant vagrant 1675 11月 20 12:18 2014 github_rsa
-rw-r--r--  1 vagrant vagrant  411 11月 20 12:18 2014 github_rsa.pub
SSH鍵を配置
.sshディレクトリにSSH鍵を移動します
$ mkdir -p ~/.ssh		<----- ホームディレクトリに.sshディレクトリを作成
$ mv github_rsa* ~/.ssh     <----- .sshディレクトリに作成したキーペアを移動
ssh-agentに作成した鍵を登録
下記フローをすることで、先ほど作成したssh鍵を有効な鍵として利用できるようになります。
$ eval $(ssh-agent)		<----- ssh-agentを(念のため)起動
$ ssh-add ~/.ssh/github_rsa	<----- ssh-addで作成した鍵をssh-agentへ登録
sshの設定をconfigファイルに記述
$ touch ~/.ssh/config
$ vi ~/.ssh/config    <----- .ssh/configファイルに下記五行を追記
+ Host github
+     HostName github.com
+     Identityfile ~/.ssh/github_rsa
+     Port 22
+     User git
.ssh/configファイルのパーミッションを変更
$ chmod 700 ~/.ssh/config <---- .ssh/configファイルの持ち主のみに読み書き実行権限を付与する
GithubにSSH鍵を登録
Githubへアクセス
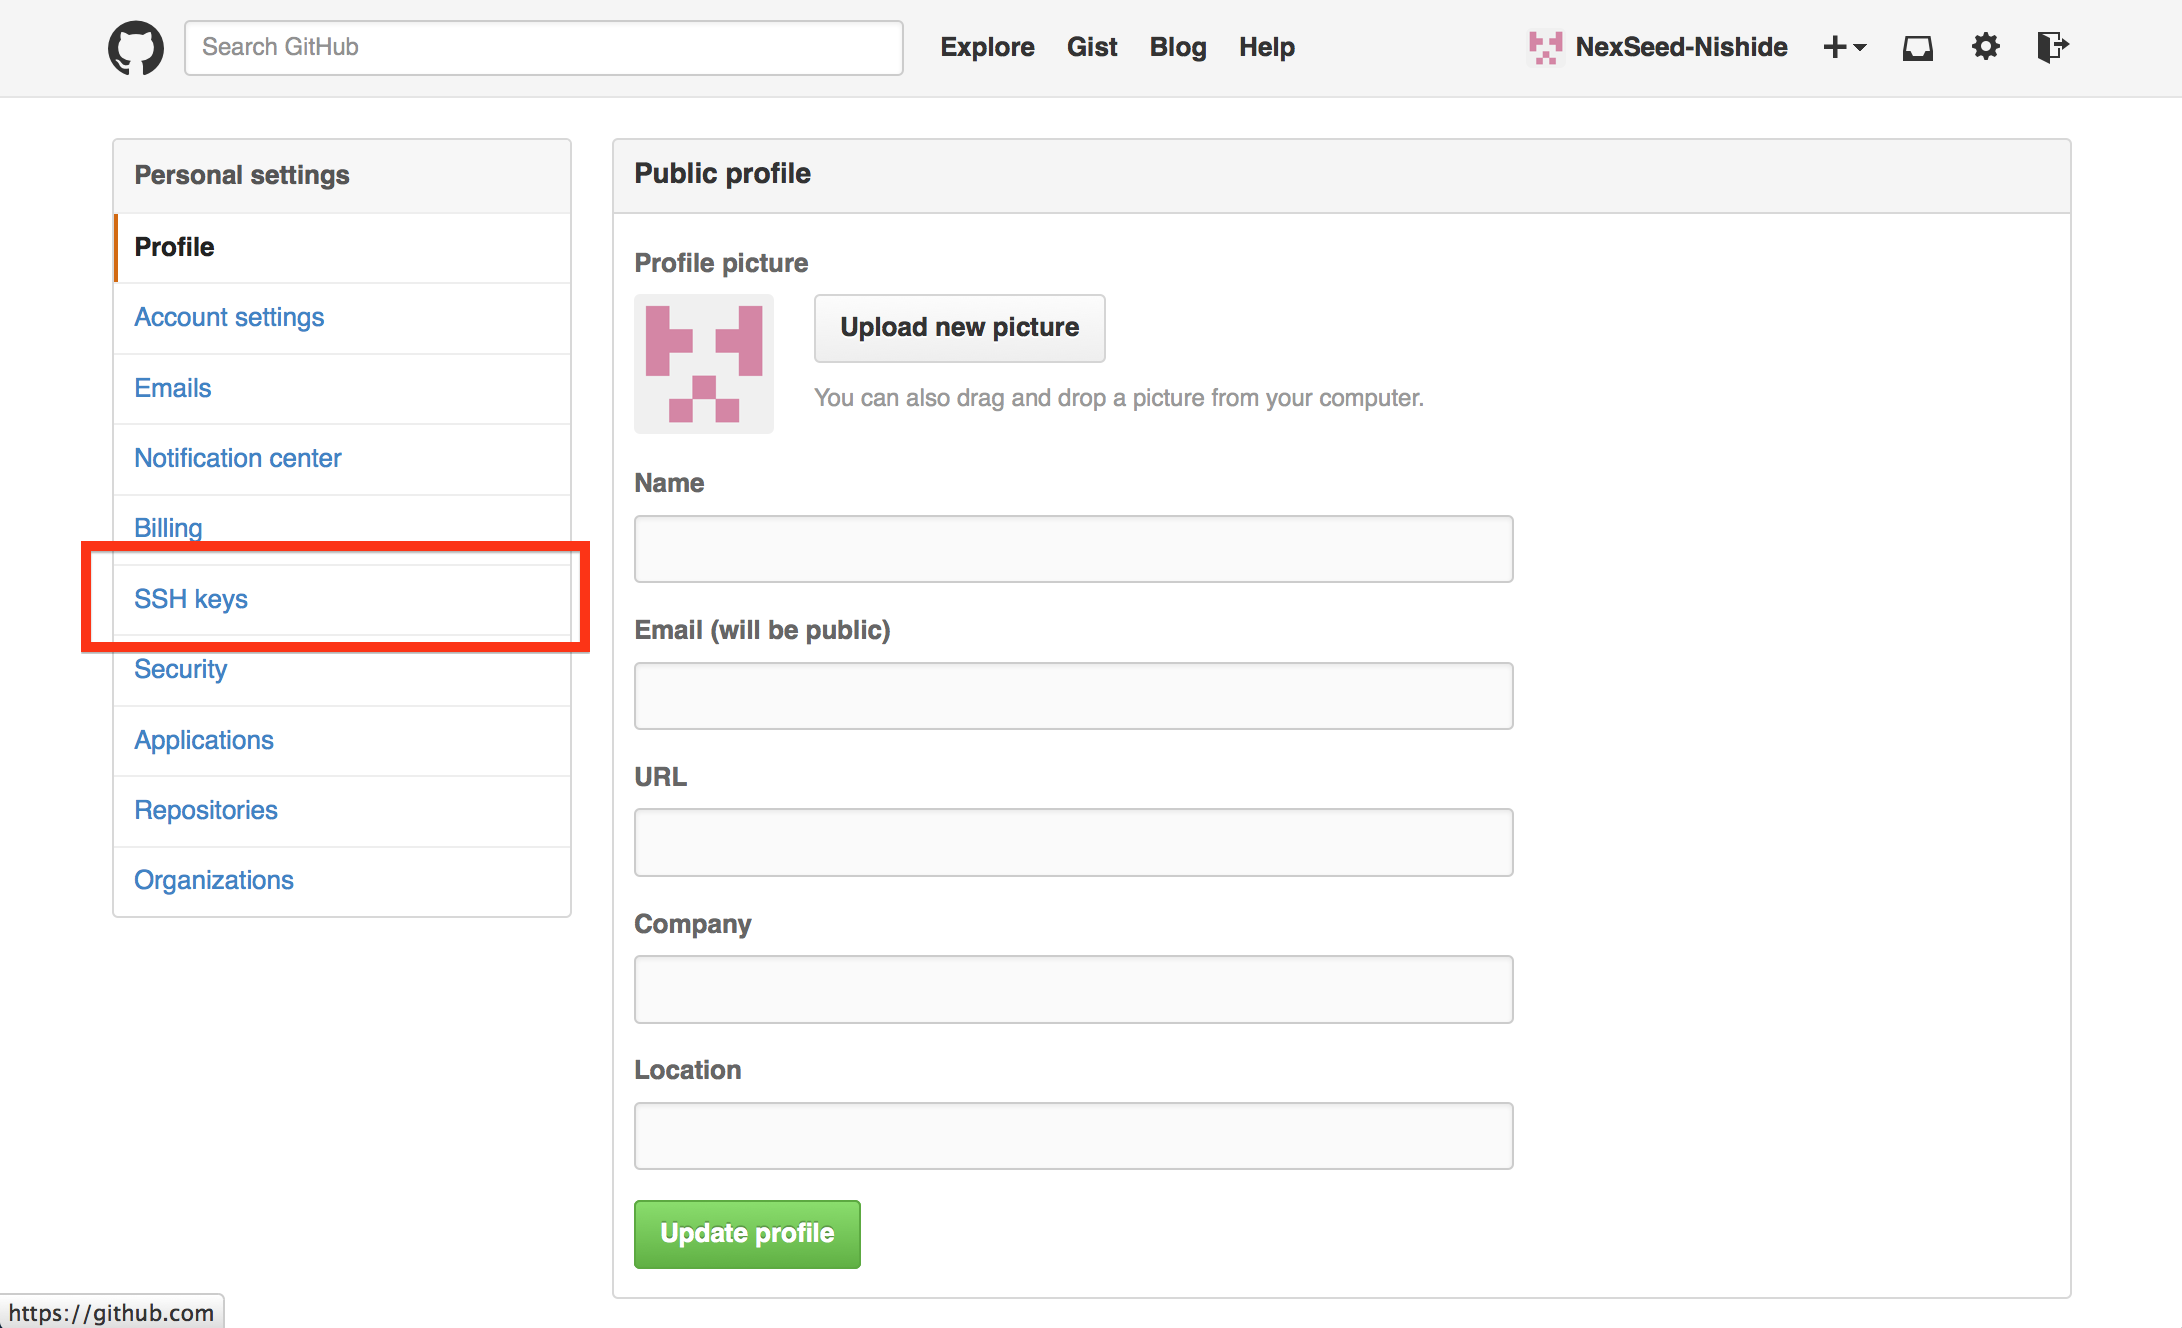
Githubの設定画面へ遷移
SSH鍵の設定画面へ遷移
左カラムの「SSH keys」をクリックして、SSH鍵の設定画面へ遷移します。
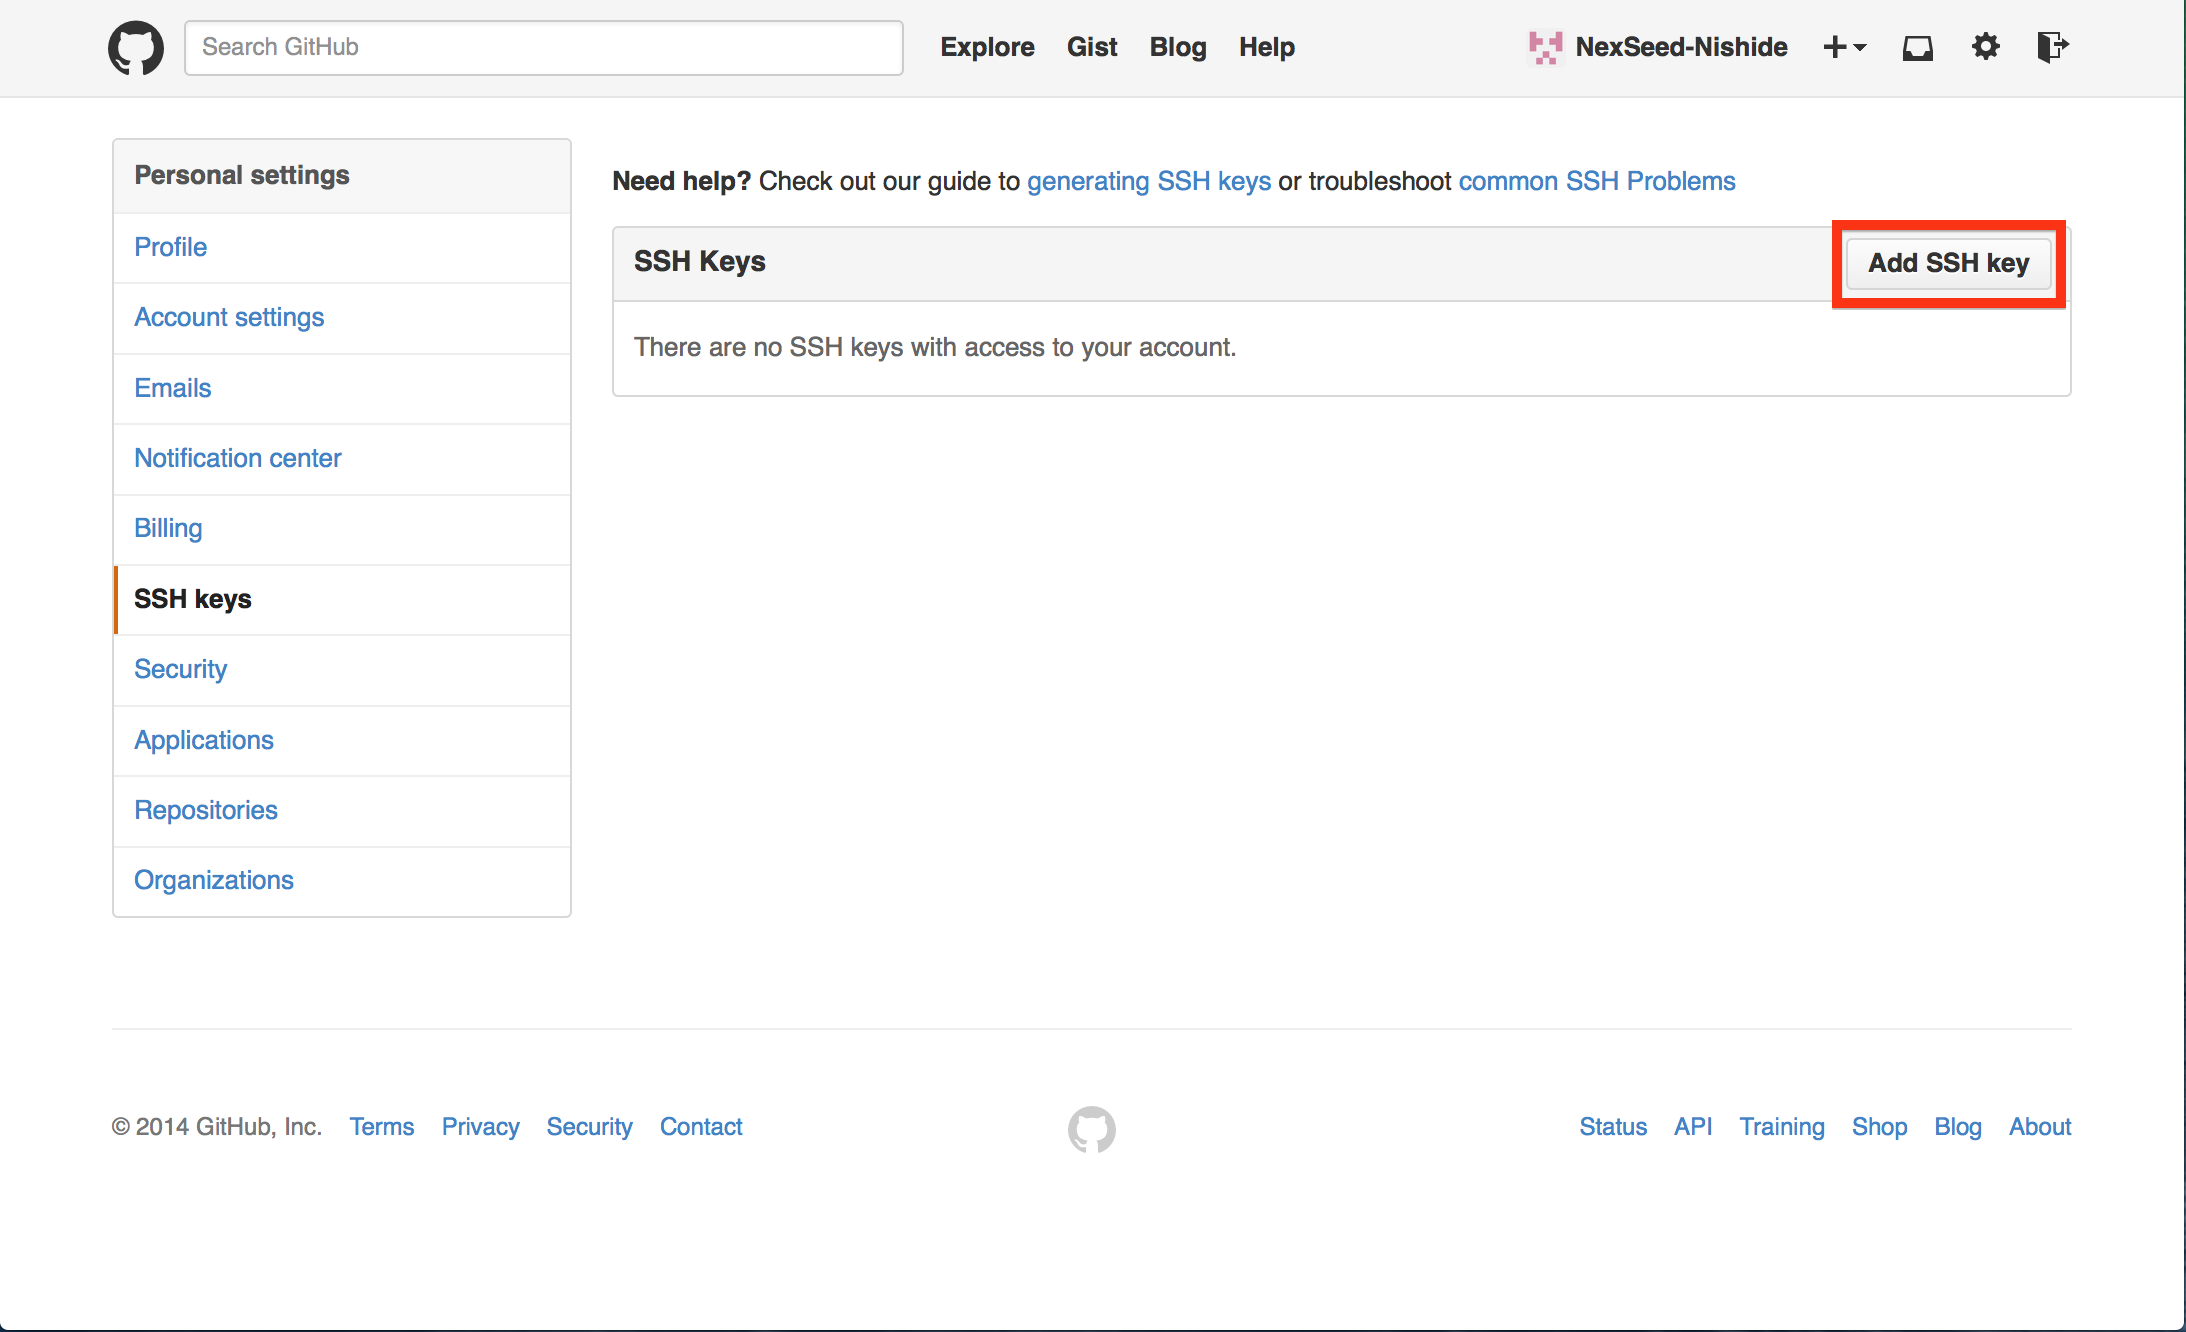
SSH鍵の登録を開始
下記画面右上の「Add SSH key」をクリックして、SSH鍵の登録画面を表示します。
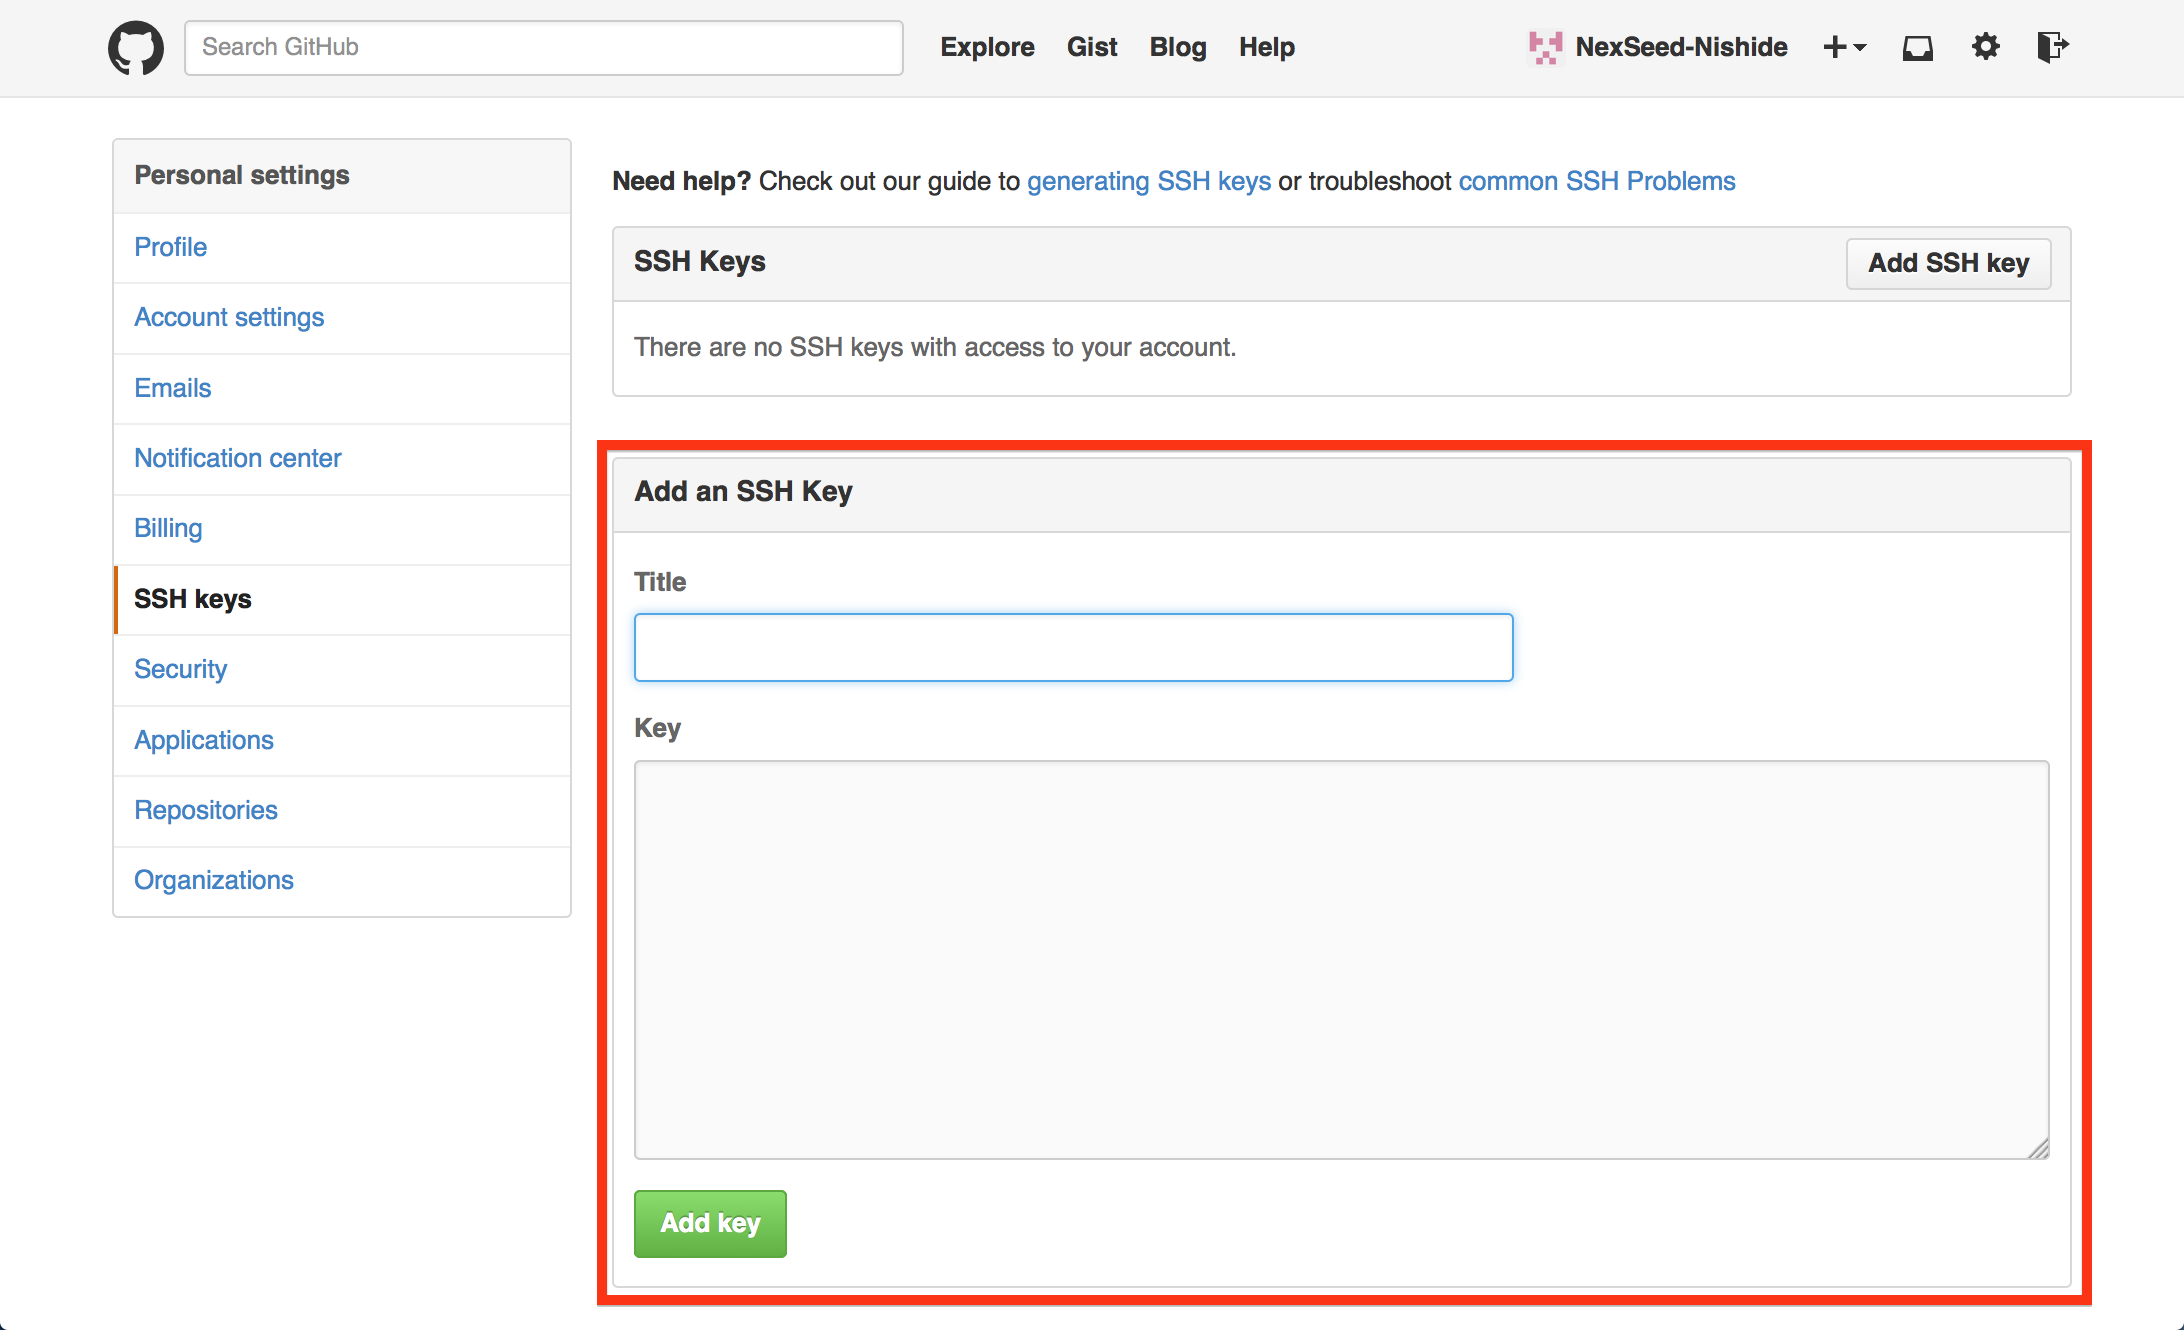
SSH鍵登録画面
すると下記のようにSSH鍵を登録する画面が表示されます。
SSH公開鍵情報をコピー
下記のようにコマンドラインでcatコマンドを利用し、先に作成した公開鍵の内容を表示しコピーします。
$ cat ~/.ssh/github_rsa.pub
SSH鍵情報をGithubへ登録
下記のように、Titleに任意のタイトルを入力し、Keyのところへ先ほどコピーした公開鍵の文字列をペーストし、「Add key」をクリックして公開鍵情報をGithubに登録します。
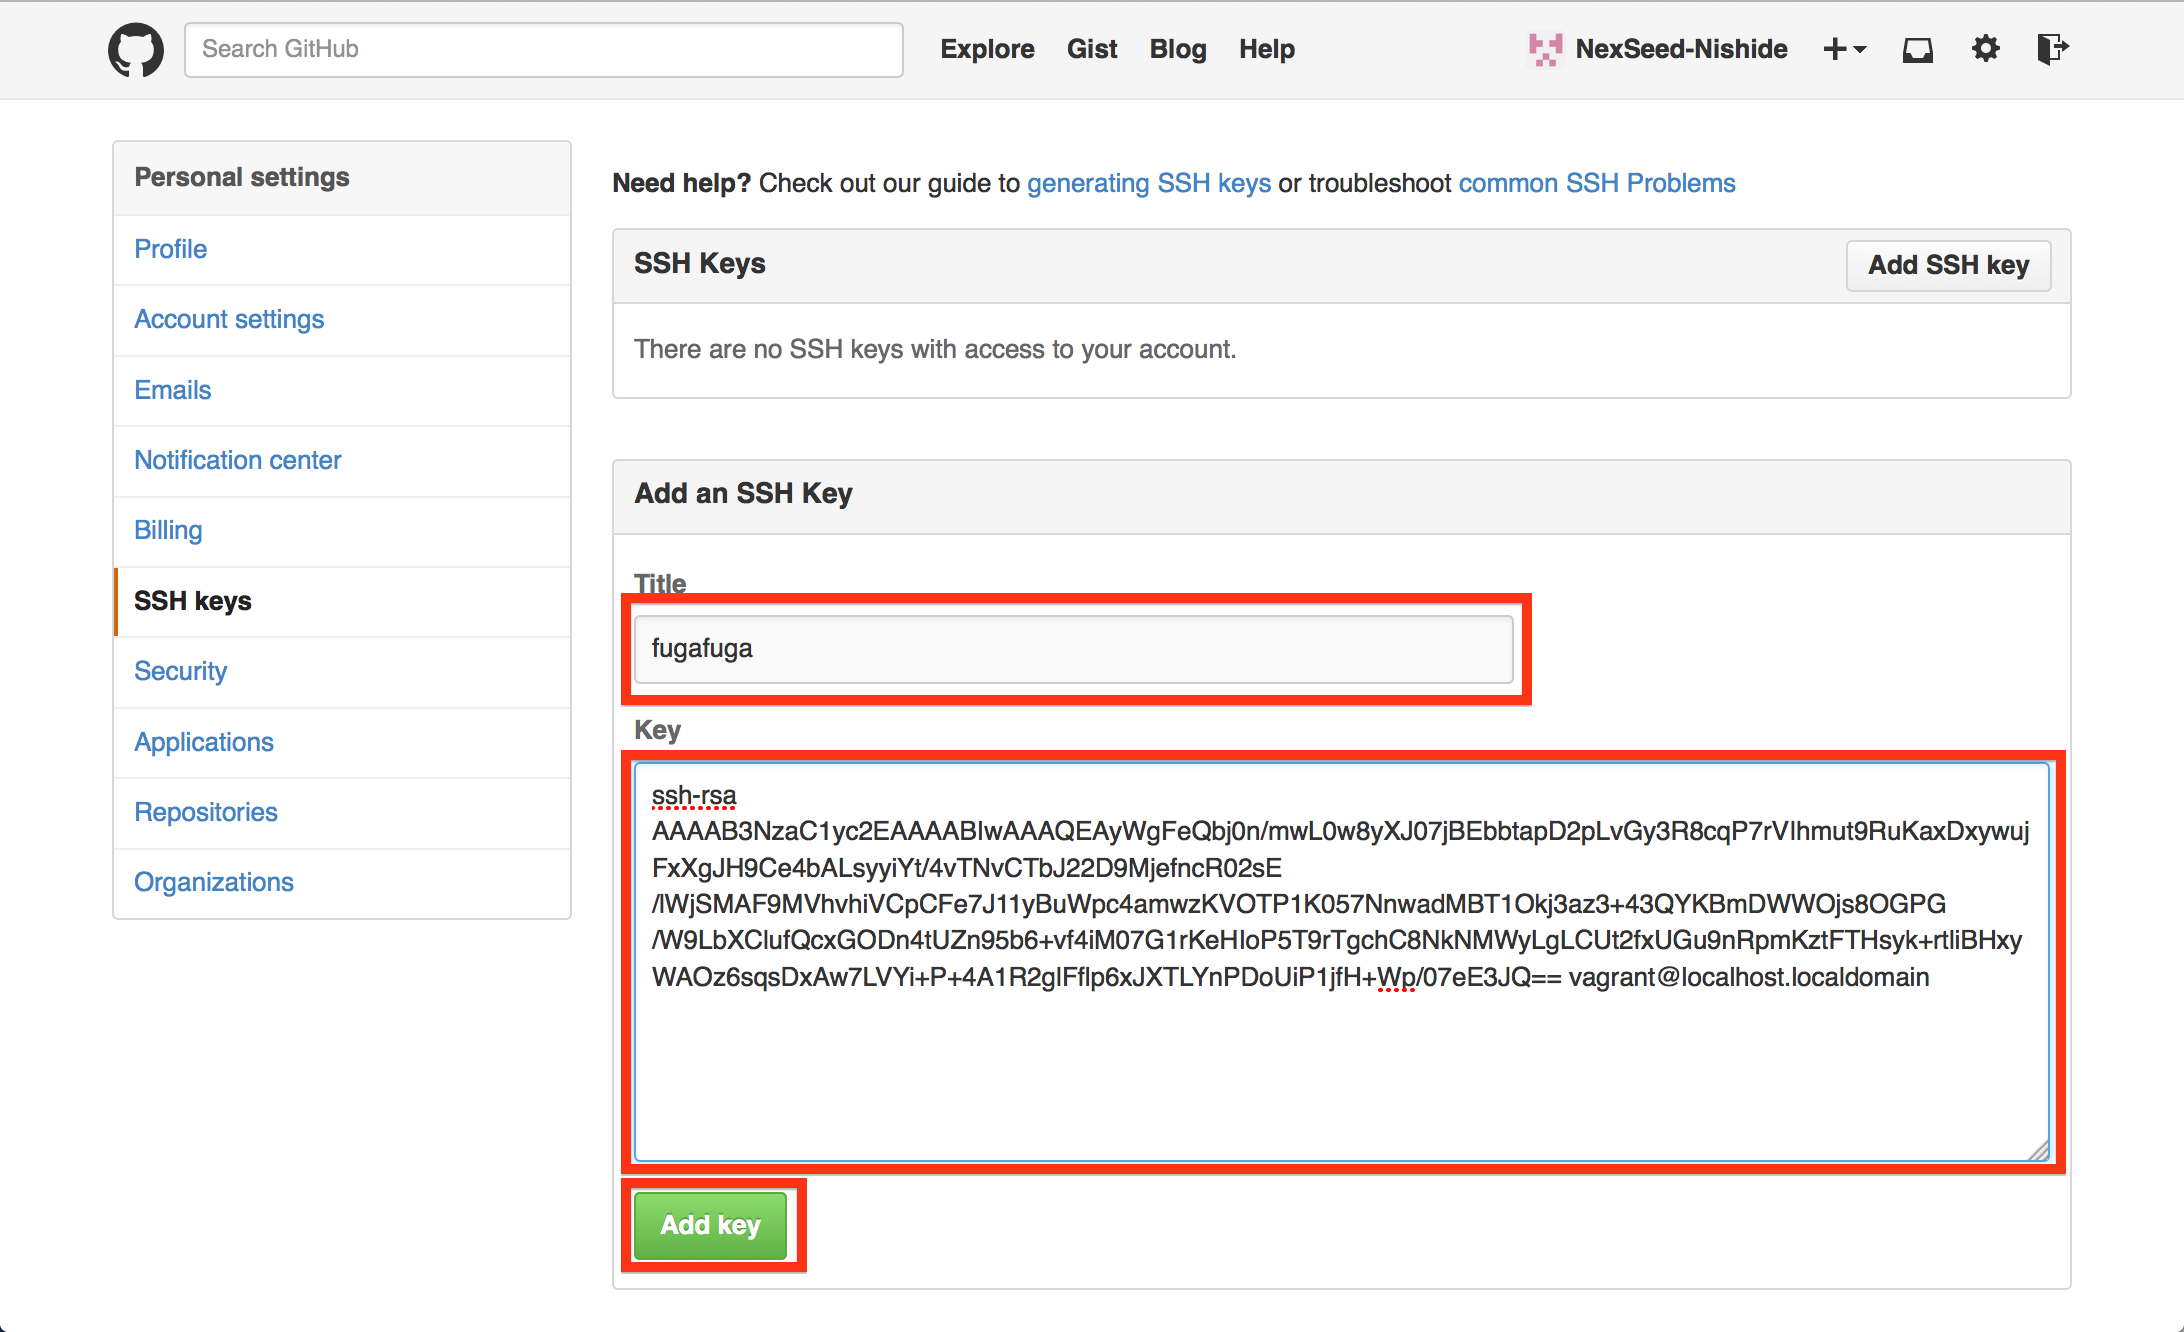
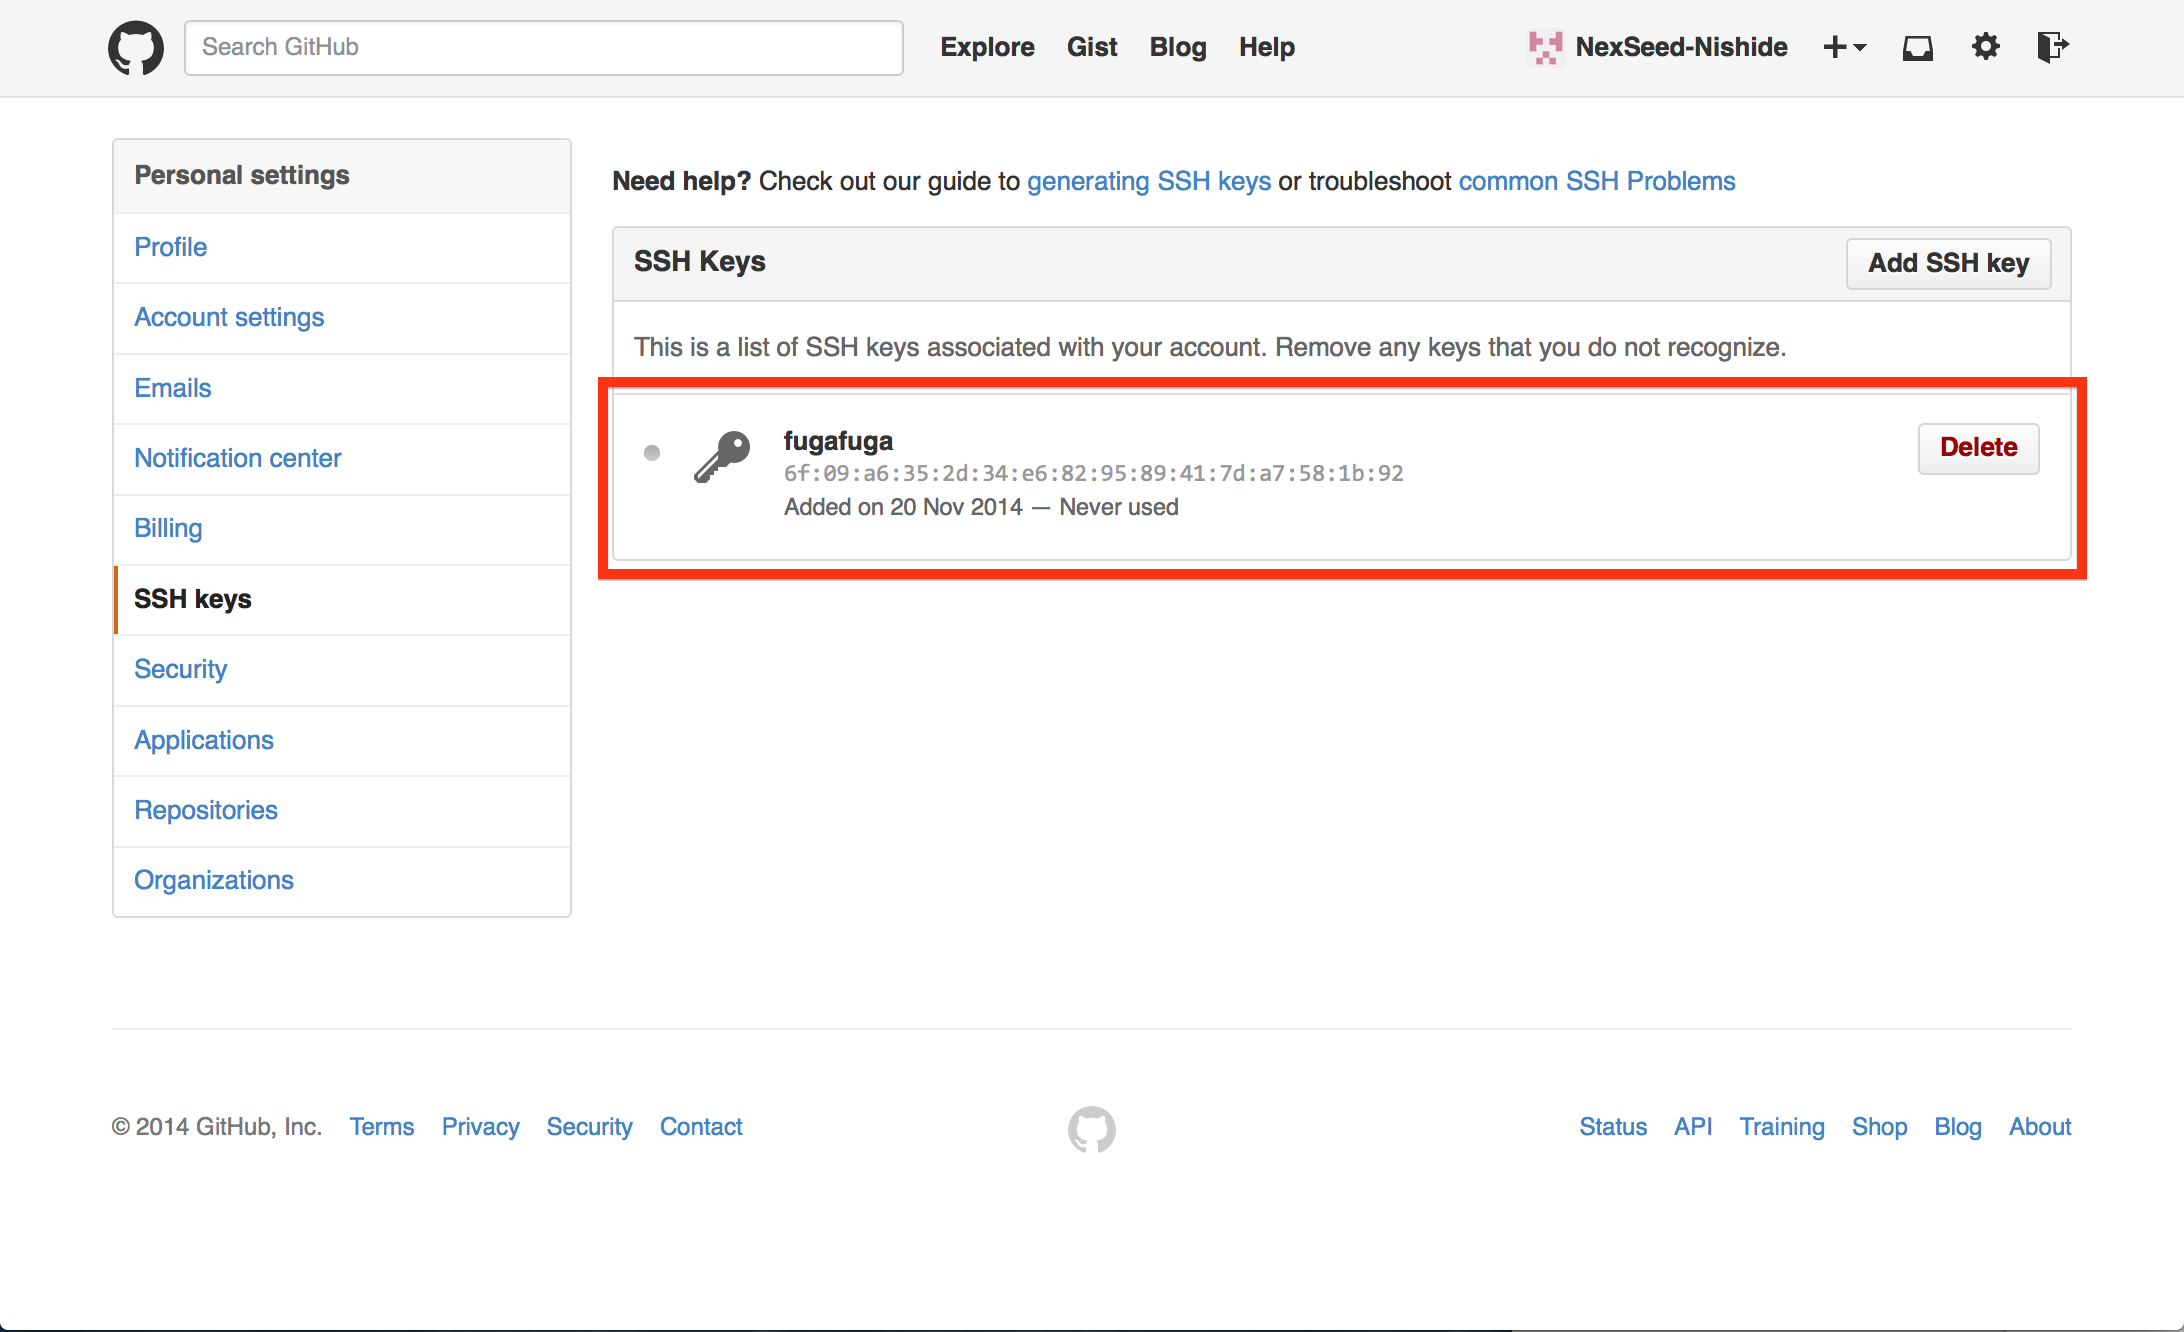
公開鍵の登録を確認
すると下記のように、公開鍵の設定画面に戻り、登録した公開鍵情報が確認できます。
まとめ
ここまででSSH鍵の作成と有効化、そしてGithubへのSSH鍵の登録のプロセスは終了です。
これによって、SSHによるリモートリポジトリとローカルリポジトリの連携が可能になります。
また別記事で、Github上へリポジトリの作成を行い、ローカルのリポジトリと連携させる手順についてまとめたいと思います。


