一人(+α)アドベントカレンダー6日目。...1日空いた分は英訳で埋める予定。
Kotlin+RoboVMで挑むクロスプラットフォーム開発試行錯誤。
本日は、ようやくにRoboVM上のKotlinで、iOSのUIを書く。
実行結果:
1) 方針
Kotlinのバージョンは、当座、1.0.0-beta-2423で。
1.0を前に、Kotlin Stdlibのバージョンが盛んに上がっている。11/25にrobovm on kotlinコンテストが始まった当時の1.0.0-beta-2423 betaバージョンからすでに、約2週間で三回バージョンアップしている。
1.0.0-beta-3595 beta    (Dec, 2015)
1.0.0-beta-3594 beta    (Dec, 2015)
1.0.0-beta-3593 beta    (Dec, 2015)
そのためか、RoboVMでプロジェクトを立ち上げた際に、右側にKotlinを設定するように注意が出るようになっている。
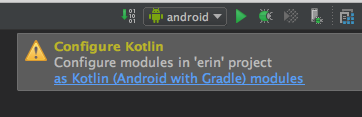
が、バージョンを下手に上げるとライブラリの依存が解決できずにコンパイルが通らなくなるので注意。。
Kotlinのバージョンは、当座、1.0.0-beta-2423でいくことにした。
XCodeはいったん忘れる。
XCodeの学習コストを割く時間がないため、iOSアプリのコードをKotlinで書くことに慣れる目的も兼ねて、すべてKotlinで書く。
必要な準備作業は、Main.ktにおいて、didFinishLaunchingのタイミングでwindowを自ら初期化すること:
import org.robovm.apple.foundation.NSAutoreleasePool
import org.robovm.apple.uikit.* // UIApplication,UIApplicationDelegateAdapter, UIApplicationLaunchOptions etc.


class Main : UIApplicationDelegateAdapter() {

    override fun didFinishLaunching(application: UIApplication?, launchOptions: UIApplicationLaunchOptions?): Boolean {

        // windowを自ら初期化
        window.setRootViewController(MyViewController())
        window.setBackgroundColor(UIColor.blue())
        window.makeKeyAndVisible()
        addStrongRef(window)
        return true
    }

    companion object {
        @JvmStatic fun main(args: Array<String>) {
            val pool = NSAutoreleasePool()
            UIApplication.main<UIApplication, Main>(args, null, Main::class.java)
            pool.release()
        }
    }
}
2) class MyViewControllerをごりごり書く。
kotlinコードでViewControllerを完結させるためには、おおまかに以下のステップを踏めば良い(用語は適当)。
① UI部品の生成ロジックを定義
② UIオブジェクトを生成
③ UI要素を画面に配置
やっつけ感満載だが、、とりあえずのコードは以下:
import org.robovm.apple.uikit.* // UILabel,UIViewController etc.
import org.robovm.apple.coregraphics.CGRect
import org.robovm.apple.uikit.UIControl
import org.robovm.apple.uikit.UIControl.OnTouchUpInsideListener

class MyViewController : UIViewController() {

    private val counterStore = CounterStore()

//① UI部品の生成ルーチン定義
    // 1-1:ラベル生成

    fun genLabel (horizon:Int, str:String) : UILabel{
        val lbl = UILabel(CGRect(0.0, 10.0+horizon, 300.0, 40.0))
        lbl.setText(str)
        lbl.setTextColor(UIColor.white())
        lbl.setTextAlignment(NSTextAlignment.Center)
        return lbl
    }

    // 1-2:TextField + Buttonを生成
    data class TfWithBtn (val field : UITextField, val button : UIButton)

    fun genTfWithBtn (horizon:Int, fieldStr:String, buttonStr:String) : TfWithBtn {

        val cg1 = CGRect(10.0, 10.0+horizon, 180.0, 48.0)
        val cg2 = CGRect(200.0, 20.0+horizon, 100.0, 38.0)

        val textField = UITextField(cg1)
        textField.setContentVerticalAlignment(UIControlContentVerticalAlignment.Center)
        textField.setBorderStyle(UITextBorderStyle.RoundedRect)
        textField.setClearsOnBeginEditing(true)
        textField.text = fieldStr

        val button  = UIButton(cg2)
        title = buttonStr+"設定"
        button.setTitle(title, UIControlState.Normal)
        button.setTitleColor(UIColor.black(), UIControlState.Normal)
        button.setBackgroundColor(UIColor.cyan())
        button.layer.cornerRadius = 10.0        // 角丸ボタン
        button.layer.borderWidth = 1.0         // ボーダーの線の太さ

        button.addOnTouchUpInsideListener(object:OnTouchUpInsideListener {
            override fun onTouchUpInside(c:UIControl, e:UIEvent) { onClicked(textField) }
        })

        return TfWithBtn(textField,button)
    }


    fun setTfWithBtn (t:TfWithBtn) {
        getView().addSubview(t.field)
        getView().addSubview(t.button)
    }

    //1-3 振る舞いを定義
    private fun onClicked(textField:UITextField) {

        var name = textField?.getText() ?: "なし"
        labels[0]!!.text =  "${counterStore.get()}回目"
        labels[1]!!.text =  "入力 : ${name} です。"
    }

// ②  UIオブジェクトを生成(今回は配列で持つ)
    val labels = arrayOf(
            genLabel( 0, "テキストフィールド入力テスト"),
            genLabel( 30, "以下の文字を入力")
    )
    val TfBtns = arrayOf(
            genTfWithBtn(120, "Kotlin","言語"),
            genTfWithBtn(180, "iOS","環境"),
            genTfWithBtn(240, "お試し","付記")
    )

    override fun viewDidLoad() {
//  ③UI要素を画面に配置
        labels.forEach { t ->
            getView().addSubview(t)
        }
        TfBtns.forEach{ t ->
            setTfWithBtn(t)
        }
    }


}
kotlin的なところは、data classを使っていることくらい。
何をしているかの見通しは良いのではないか。
...どなたか、SwiftのいけてるUIライブラリをkotlinで使うことにチャレンジして欲しい。
なお、共通ロジックのところも若干書き換えている:
class CounterStore {
    private var count: Int = 0

    fun add(num: Int) {
        count += num
    }

    fun get(): Int {
        count += 1
        return count
    }
}
3) 実行
実行したい環境を選んで実行する。
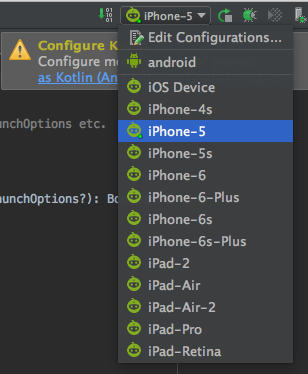
コンパイル&ビルドは結構遅い(環境:MacBookAir)がしばらく待っていると、エミュレータが立ち上がる。
4)次回
共通ロジックのところに、okhttp等を使った通信を書く。