やりたいこと
リモート拠点(たとえば自宅やクラウド)にあるサーバーにVPNで接続したいとき、ありますよね?
そういうときには、オープンソースのVyOSを使って簡単にVPNサーバーの設定をしてしまいましょう
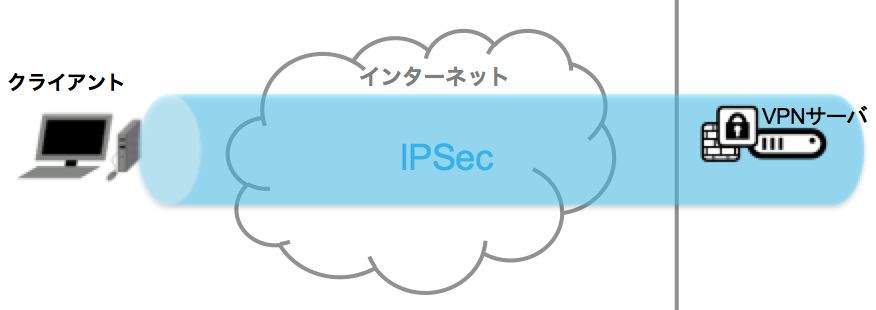
こんなイメージです

IPSec VPNの設定
今回はdesktop-to-site型のリモート接続を設定します
認証方式にはいくつかありますが、今回はL2TP/IPsecのVPNを設定します
では、どんな設定があるかみていきます
vpn ipsecの設定内容
●IPSecを張りたいインターフェースを指定
後でグローバルIPを指定しますので、グローバルIPを持っているインターフェースですね
set vpn ipsec ipsec-interfaces interface eth1
●NATに関わる設定
NATトラバーサルはONにすることが必須になっています
set vpn ipsec nat-traversal enable
ここにはclient ip poolとなる(クライアントに割り当てる)サブネットを記載しておきます
set vpn ipsec nat-networks allowed-network 192.168.1.0/24
vpn l2tpの設定内容
●アドレス設定
先ほどのサブネットの中からクライアントに割り当てるアドレス範囲を指定できます
set vpn l2tp remote-access client-ip-pool start 192.168.1.101
set vpn l2tp remote-access client-ip-pool stop 192.168.1.110
outside-addressにはVPNサーバーのグローバルIPを指定します
(outside-nexthopにはゲートウェイを指定していますが、必須ではありません)
set vpn l2tp remote-access outside-address X.X.X.X
set vpn l2tp remote-access outside-nexthop X.X.X.Y
●認証設定
事前共有鍵を設定します(ここではTESTSECRET)
set vpn l2tp remote-access ipsec-settings authentication mode pre-shared-secret
set vpn l2tp remote-access ipsec-settings authentication pre-shared-secret TESTSECRET
ユーザー名とパスワードを設定します(ここではTESTUSER:TESTPASS)
set vpn l2tp remote-access authentication mode local
set vpn l2tp remote-access authentication local-users username TESTUSER password TESTPASS
実際に接続するには、ここで設定した事前共有鍵、ユーザー名、パスワードをクライアント側で接続設定をする必要があります
クライアントの設定は下記リンクの「Configure Remote Access VPN Service on a Vyatta Appliance」を参考にしてください
その他、設定でできること
ログの設定
set vpn ipsec logging log-modes all
クライアント側IPアドレスの固定
set vpn l2tp remote-access authentication local-users username TESTUSER static-ip 192.168.1.105
ユーザーの無効化
set vpn l2tp remote-access authentication local-users username TESTUSER disable
まとめ
VyOSでのIPSec VPNサーバーとしての設定は簡単でしたよね?
さらにどんな設定内容かがわかっていれば、いざという時にすぐ対応できますね
クライアントへのIPアドレスの割り当て、ユーザー接続可否の設定、ファイアウォールを上手く組み合わせれば、ユーザーごとにアクセス先を制御することもできそうですね
また、ファイアウォールを設定している場合は、以下を必要に応じて開けてください
- Internet Key Exchange (IKE) - User Datagram Protocol (UDP) port 500
- Encapsulating Security Payload (ESP) - Internet Protocol (IP) 50
- IPsec NAT-T - UDP port 4500
今回の設定内容
vyos@vyos# show vpn
 ipsec {
     ipsec-interfaces {
         interface eth1
     }
     nat-networks {
         allowed-network 192.168.1.0/24 {
         }
     }
     nat-traversal enable
 }
 l2tp {
     remote-access {
         authentication {
             local-users {
                 username TESTUSER {
                     password TESTPASS
                 }
             }
             mode local
         }
         client-ip-pool {
             start 192.168.1.101
             stop 192.168.1.110
         }
         ipsec-settings {
             authentication {
                 mode pre-shared-secret
                 pre-shared-secret TESTSECRET
             }
         }
         outside-address X.X.X.X
         outside-nexthop X.X.X.Y
     }
 }
参考リンク
Brocade 5600 vRouter Remote Access VPN Reference Guide
http://www.brocade.com/content/dam/common/documents/content-types/configuration-guide/brocade-5600-vrouter-ravpn-3.5r6-v01.pdf
Configure Remote Access VPN Service on a Vyatta Appliance
http://www.rackspace.com/knowledge_center/article/configure-remote-access-vpn-service-on-a-vyatta-appliance
NAT traversal - Wikipedia
https://ja.wikipedia.org/wiki/NAT_traversal