GitHubからBitBucketに移行できるもの
- ソースコード
- Issue
- Wiki
移行できないもの
- PullRequest
ソースコード
BitBucketのナビゲーションバーから、「リポジトリ」->「リポジトリのインポート」を選択。
「古いリポジトリ」、「新規リポジトリ」の欄を埋める。
※privateリポジトリの場合は、認証が必要なのでチェックマークをいれて認証。
「リポジトリのインポート」ボタンを押したら完了。
Issue
issueを移行するライブラリをクローンする。
git clone https://github.com/sorich87/github-to-bitbucket-issues-migration.git
cd github-to-bitbucket-issues-migration
bundle install
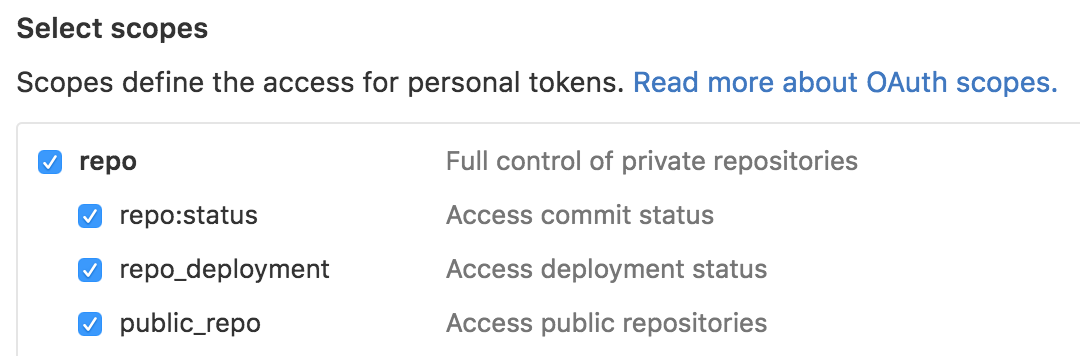
リポジトリにアクセスするためのトークンを生成する。アクセストークンは、GitHubの「Settings」->「Personal access tokens」->「Generate new token」から生成できる。必要な権限は下図のように、リポジトリ権限だけあればよい。
下記コマンドを実行してissueのデータをダンプする。
a. 個人リポジトリの場合
bundle exec ruby cli.rb -t {your_access_token} -r {repository_name}
b. 組織リポジトリの場合
bundle exec ruby cli.rb -t {your_access_token} --organization {your_organization}
Issueのインポート
BitBucketのリポジトリで「インポート & エクスポート」欄が存在しない場合は、課題管理欄で「課題トラッカーなし」となっているのを「非公開/公開トラッカー」に変更する。
「設定」->「インポート & エクスポート」を選択。
先ほどダンプしたzipファイルを選択し、「インポート開始」を選択。
「ユーザ名(メールアドレス)」と「パスワード」を入力して実行。
Wiki
BitBucketのリポジトリ上で、「設定」->「Wiki」で「Wikiを使用しない」ではなく「非公開/公開Wiki」に変更する。
git clone https://github.com/{account_name}/{repository_name}.wiki.git
cd {repository_name}.wiki
git remote rm origin
git remote add origin https://{account_name}@bitbucket.org/{account_name}/{repository_name}.git/wiki
git push -f origin master
PullRequest
今のところ対応予定はないとのこと。