iTunes APIとは
登録不要で使えて、例えば、
https://itunes.apple.com/search?term=beatles&country=JP&lang=ja_jp&media=music
で、「beatles」を検索すると、
{
  "resultCount":50,
  "results": [
    {
      "wrapperType":"track",
      "kind":"song",
      "artistId":136975,
      "collectionId":458032395,
      "trackId":458032429,
      "artistName":"ビートルズ",
      "collectionName":"1",
      "trackName":"Let It Be",
      "collectionCensoredName":"1",
      "trackCensoredName":"Let It Be",
      "artistViewUrl":"https://itunes.apple.com/jp/artist/bitoruzu/id136975?uo=4",
      "collectionViewUrl":"https://itunes.apple.com/jp/album/let-it-be/id458032395?i=458032429&uo=4",
      "trackViewUrl":"https://itunes.apple.com/jp/album/let-it-be/id458032395?i=458032429&uo=4",
      "previewUrl":"http://a1770.phobos.apple.com/us/r1000/059/Music4/v4/cf/b4/36/cfb43624-f3e0-269f-f81a-911f9876732c/mzaf_4722855266064184302.plus.aac.p.m4a",
      "artworkUrl30":"http://is5.mzstatic.com/image/pf/us/r30/Features/85/fe/95/dj.kfrgxzbp.30x30-50.jpg",
      "artworkUrl60":"http://is4.mzstatic.com/image/pf/us/r30/Features/85/fe/95/dj.kfrgxzbp.60x60-50.jpg",
      "artworkUrl100":"http://is1.mzstatic.com/image/pf/us/r30/Features/85/fe/95/dj.kfrgxzbp.100x100-75.jpg",
      "collectionPrice":2000.00,
      "trackPrice":250.00,
      "releaseDate":"2000-11-13T08:00:00Z",
      "collectionExplicitness":"notExplicit",
      "trackExplicitness":"notExplicit",
      "discCount":2,
      "discNumber":1,
      "trackCount":27,
      "trackNumber":26,
      "trackTimeMillis":230773,
      "country":"JPN",
      "currency":"JPY",
      "primaryGenreName":"ロック"
    }, {
      ...
    }, {
      ...
    }
  ]
}
が返ってきます。
今回は、
- trackName(曲や動画のタイトル)
- artistName(アーティスト名)
- artworkUrl100(アートワーク画像URL)
- previewUrl(曲や動画の試聴用データURL)
あたりを使って、iOSアプリを作ってみます。
CocoaPodsをインストールする
CocoaPodsは、Objective-CやSwiftで書かれたライブラリを管理するために広く使われているツールです。AFNetworkingのインストールもこれを使います。すでにインストールされている場合は飛ばしてください。
https://cocoapods.org
$ sudo gem install cocoapods
プロジェクトを作成する
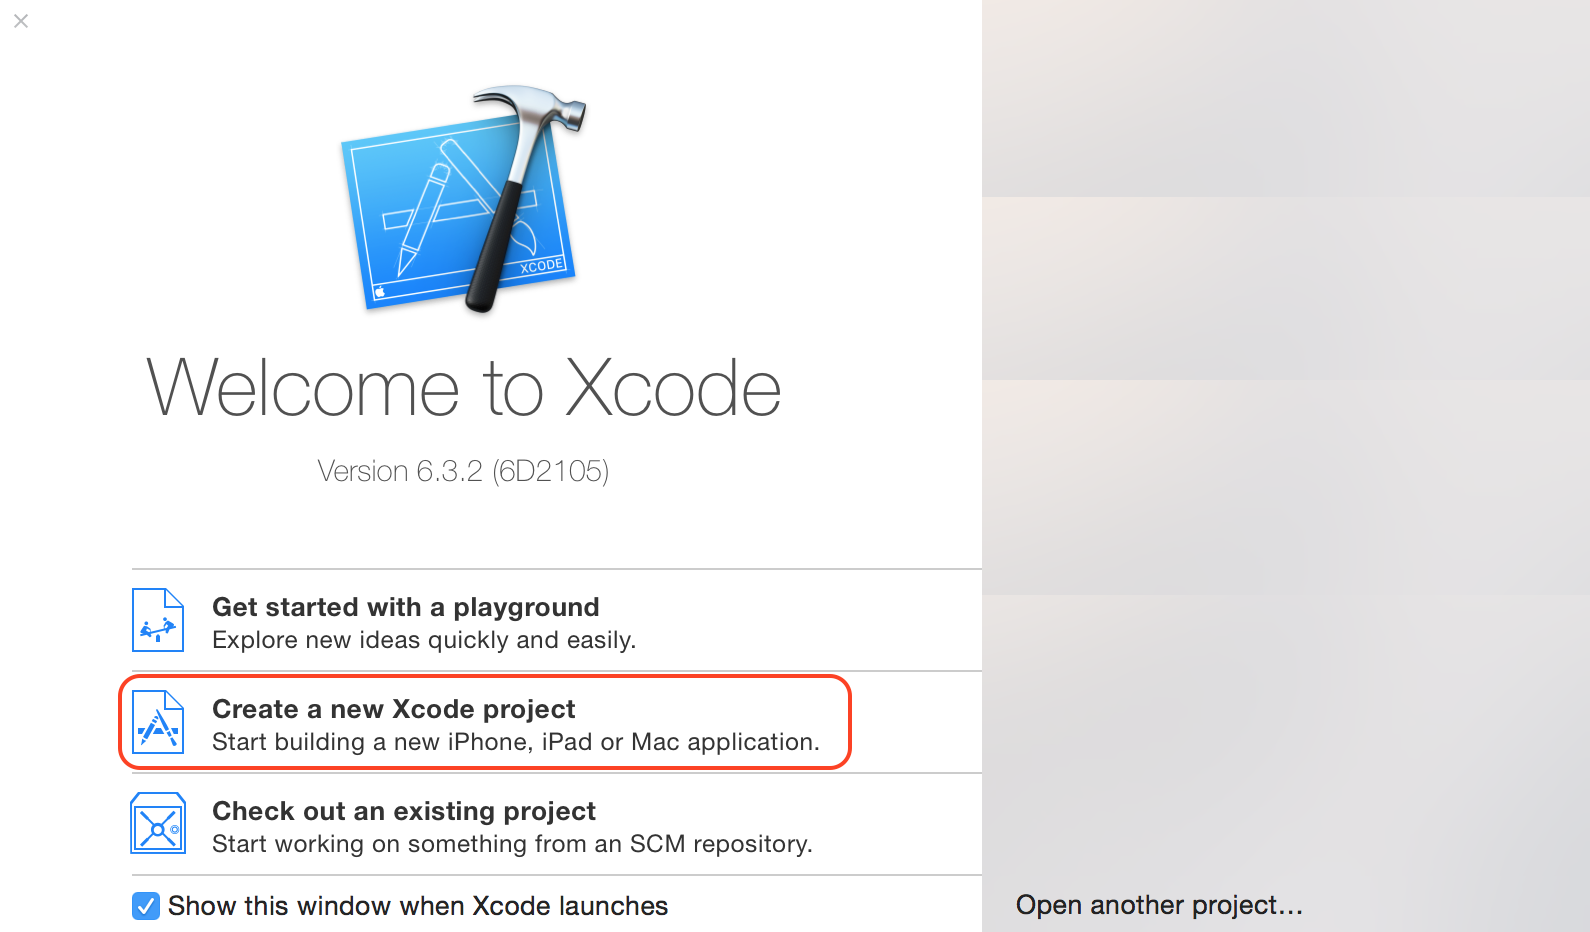
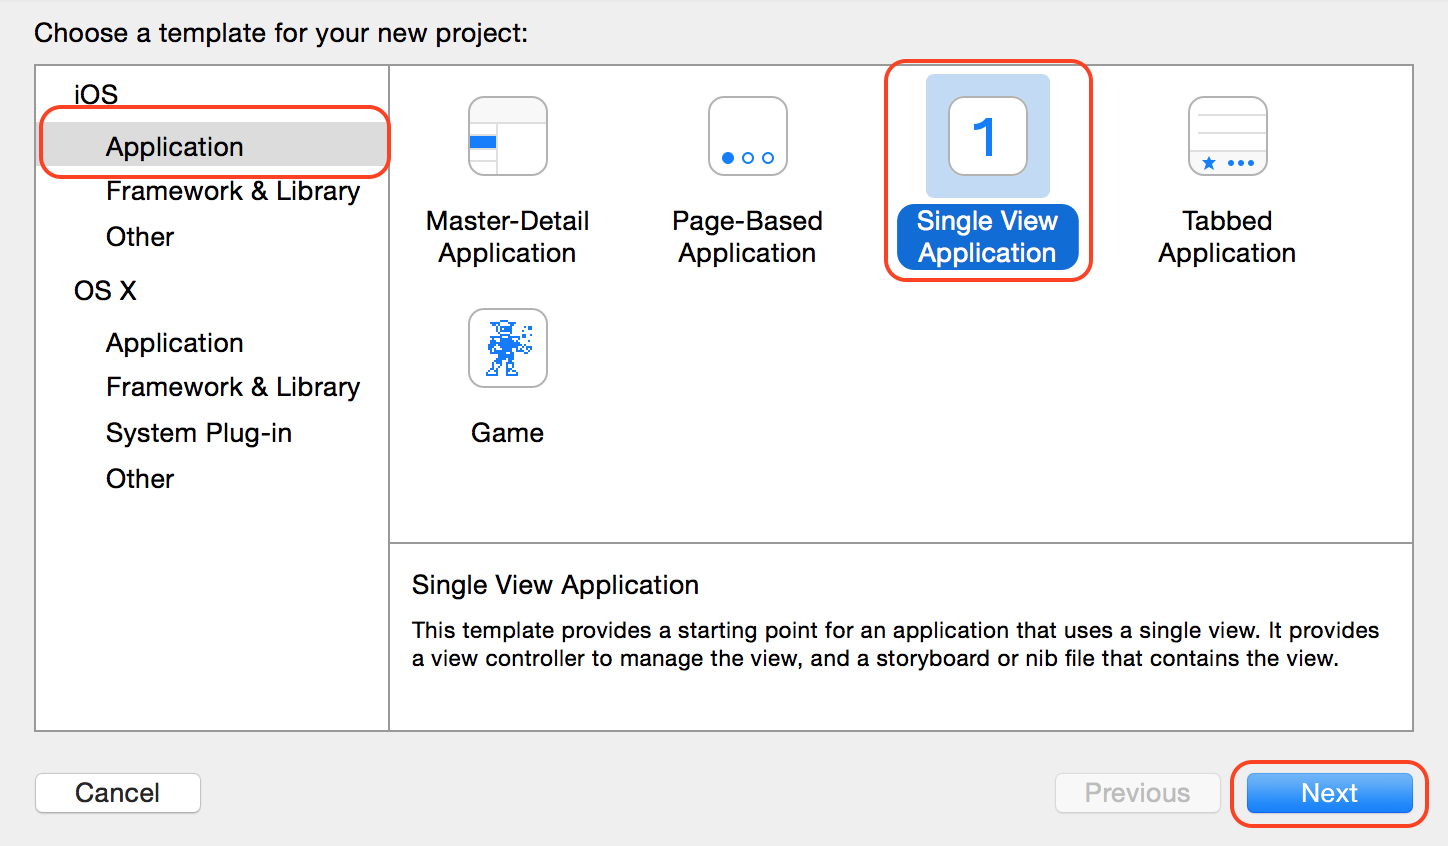
Xcodeを開きます。以下のWelcome to Xcodeな画面が表示される場合はCreate a new Xcode Project、表示されない場合はメニューバーからFile > New > Project...。
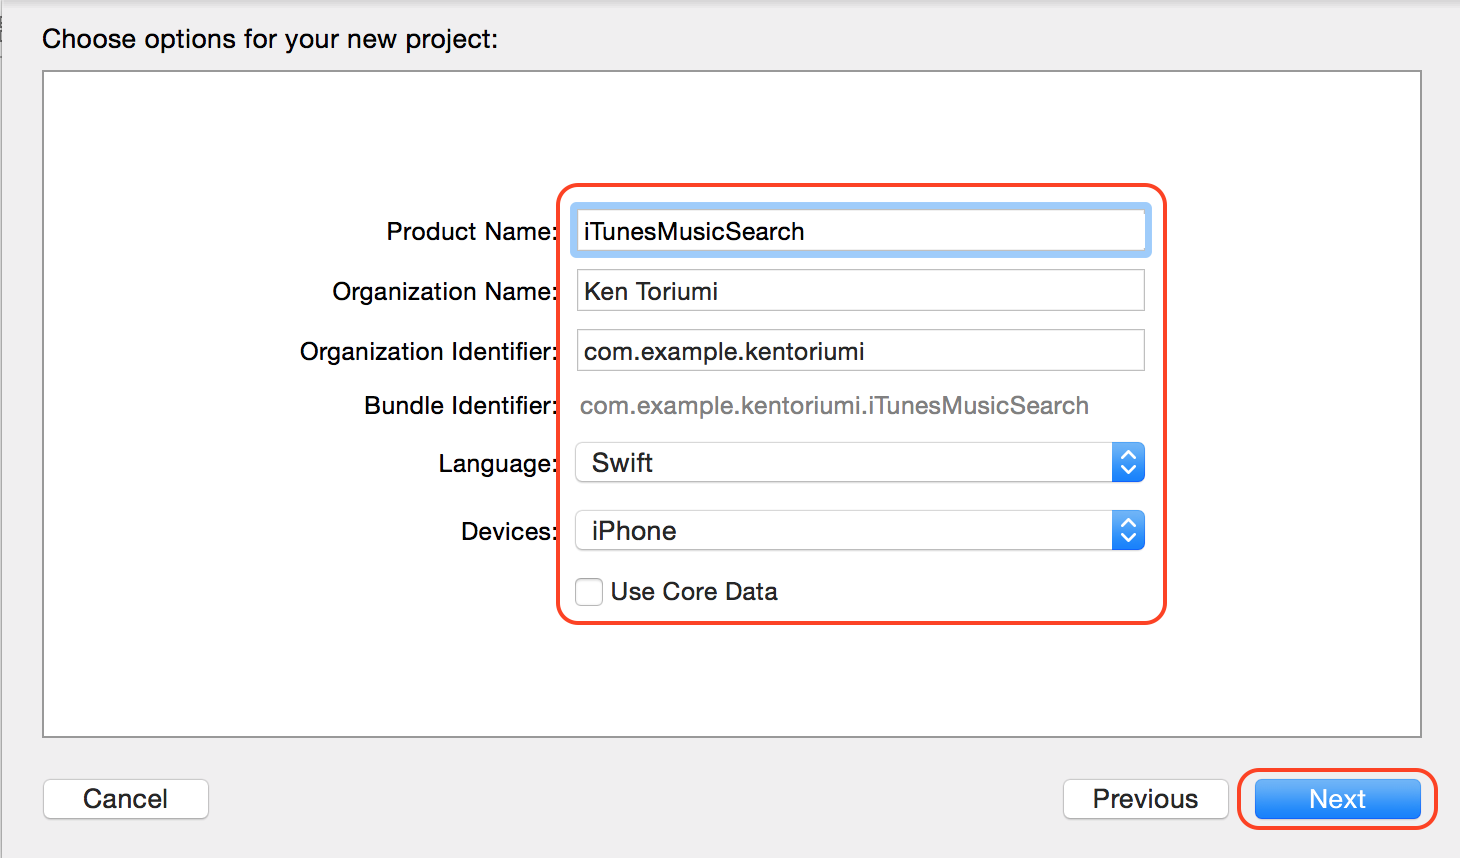
Product Nameはアプリ名です。Organization Nameは個人名や会社名です。Organization Identifierは、世界でユニークな識別子を書く必要があり、普通は会社やサービスのドメインの逆順ですが、サンプルなので適当でOKです。Languageは今回はSwiftを使います。Devicesは今回はiPhoneを使いますが、Universalを使うとiPhoneとiPadを両方対応したアプリになります。Core DataはローカルDBの一種で今回は使いません。
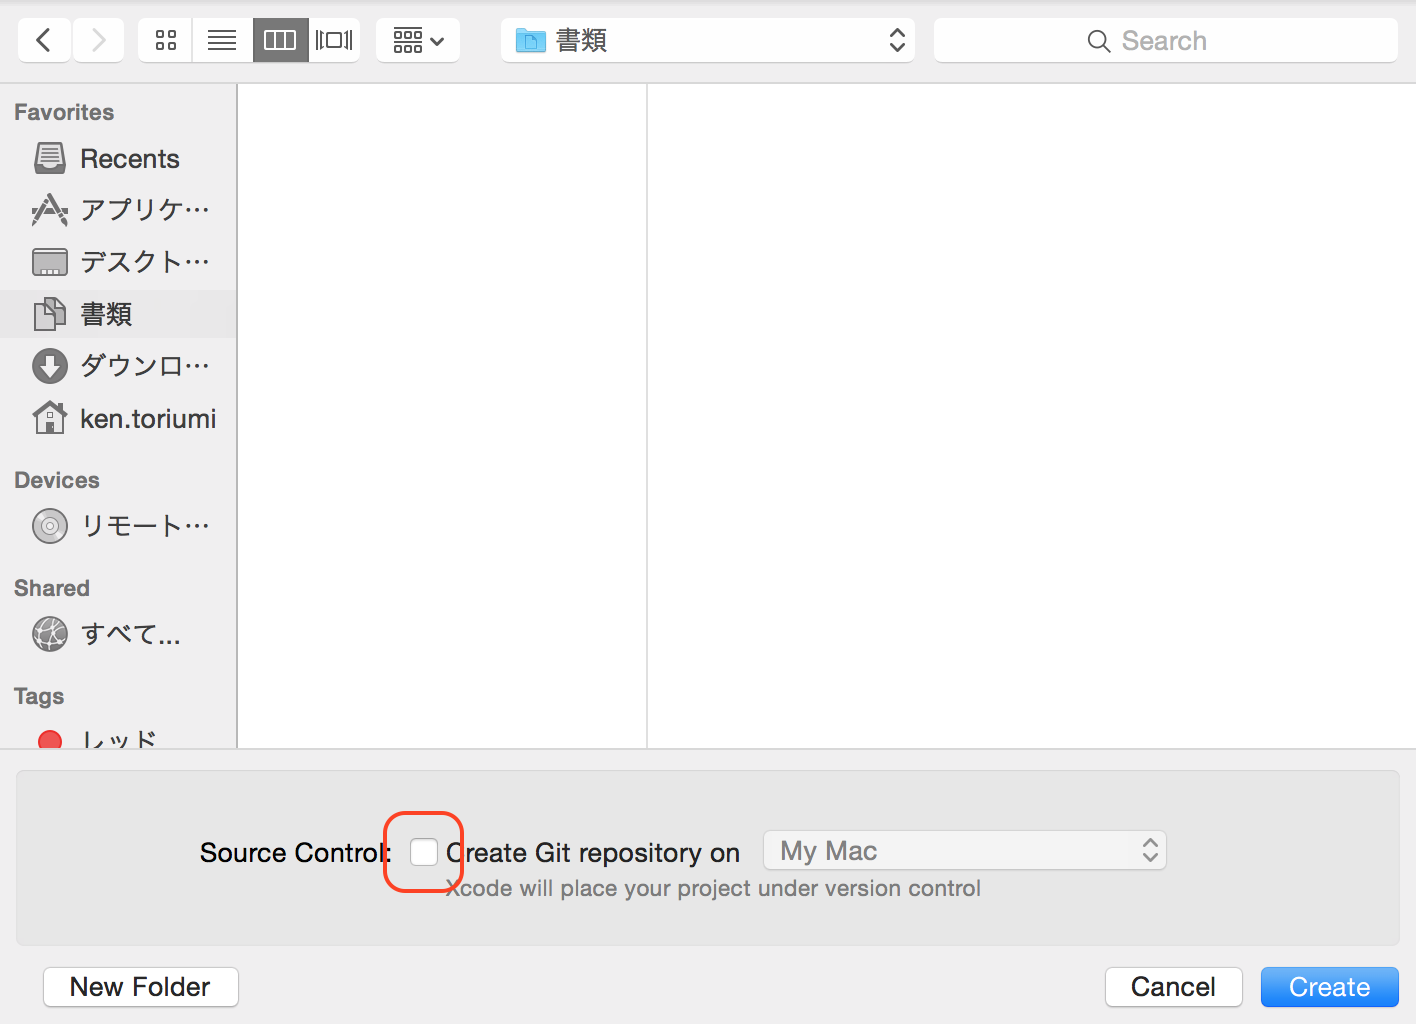
適当な場所に保存してください。後でターミナルやFinderでプロジェクトディレクトリまで移動しますので、場所を覚えておいてください。
AFNetworkingをインストールする
Podfileを作成する
File > New > File... > iOS Other > Emptyから、プロジェクトディレクトリ直下にPodfileをCreate。
Podfileに設定を書く
platform :ios, "8.0"
pod 'AFNetworking', '~> 2.0'
pod 'AFNetworkActivityLogger', '~> 2.0'
インストールする
$ cd プロジェクトディレクトリ
$ pod install
xcworkspaceファイルからプロジェクトを開き直す
Xcodeを閉じます。Finderでプロジェクトディレクトリに移動して、xcworkspaceファイルを開きます。
プロジェクトを作成するとxcodeprojファイルが作成され、pod installするとxcworkspaceファイルが作成されます。CocoaPodsでライブラリ管理しているプロジェクトは、xcodeprojファイルではなく、xcworkspaceファイルから開きます。
AFNetworkingを設定する
Objective-Cのクラスを使うために、bridge headerを設定する
File > New > File... > iOS Source > Objective-C Fileから、適当なObjective-Cのファイルを作ると、bridge headerを自動設定できます(Yesを選択)。自分で名付けたファイルの他に、プロジェクト名-Bridging-Header.hが作成されて、これがbridge headerです。作ったObjective-Cのファイル(hファイルとmファイル)は不要なので、fn + deleteで消しちゃっていいです(Move to Trashを選択)。手動でやってもいいけど、やり方を忘れるので、この方法が楽です。
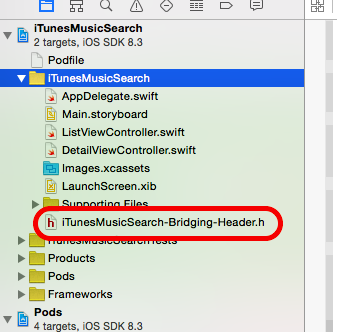
bridge headerにimportを書く
プロジェクト名-Bridging-Header.hを開いて、以下を書きます。
# import <AFNetworking.h>
# import <UIImageView+AFNetworking.h>
# import <AFNetworkActivityLogger.h>
ログを出力する設定を書く
AppDelegate.swiftを開いて、以下を書きます。application:didFinishLaunchingWithOptions:は、アプリの起動が終わったら呼ばれるところです。
func application(application: UIApplication, didFinishLaunchingWithOptions launchOptions: [NSObject: AnyObject]?) -> Bool {
    AFNetworkActivityLogger.sharedLogger().level = .AFLoggerLevelDebug
    AFNetworkActivityLogger.sharedLogger().startLogging()
    return true
}
iTunes APIと通信して、結果を一覧画面に表示する
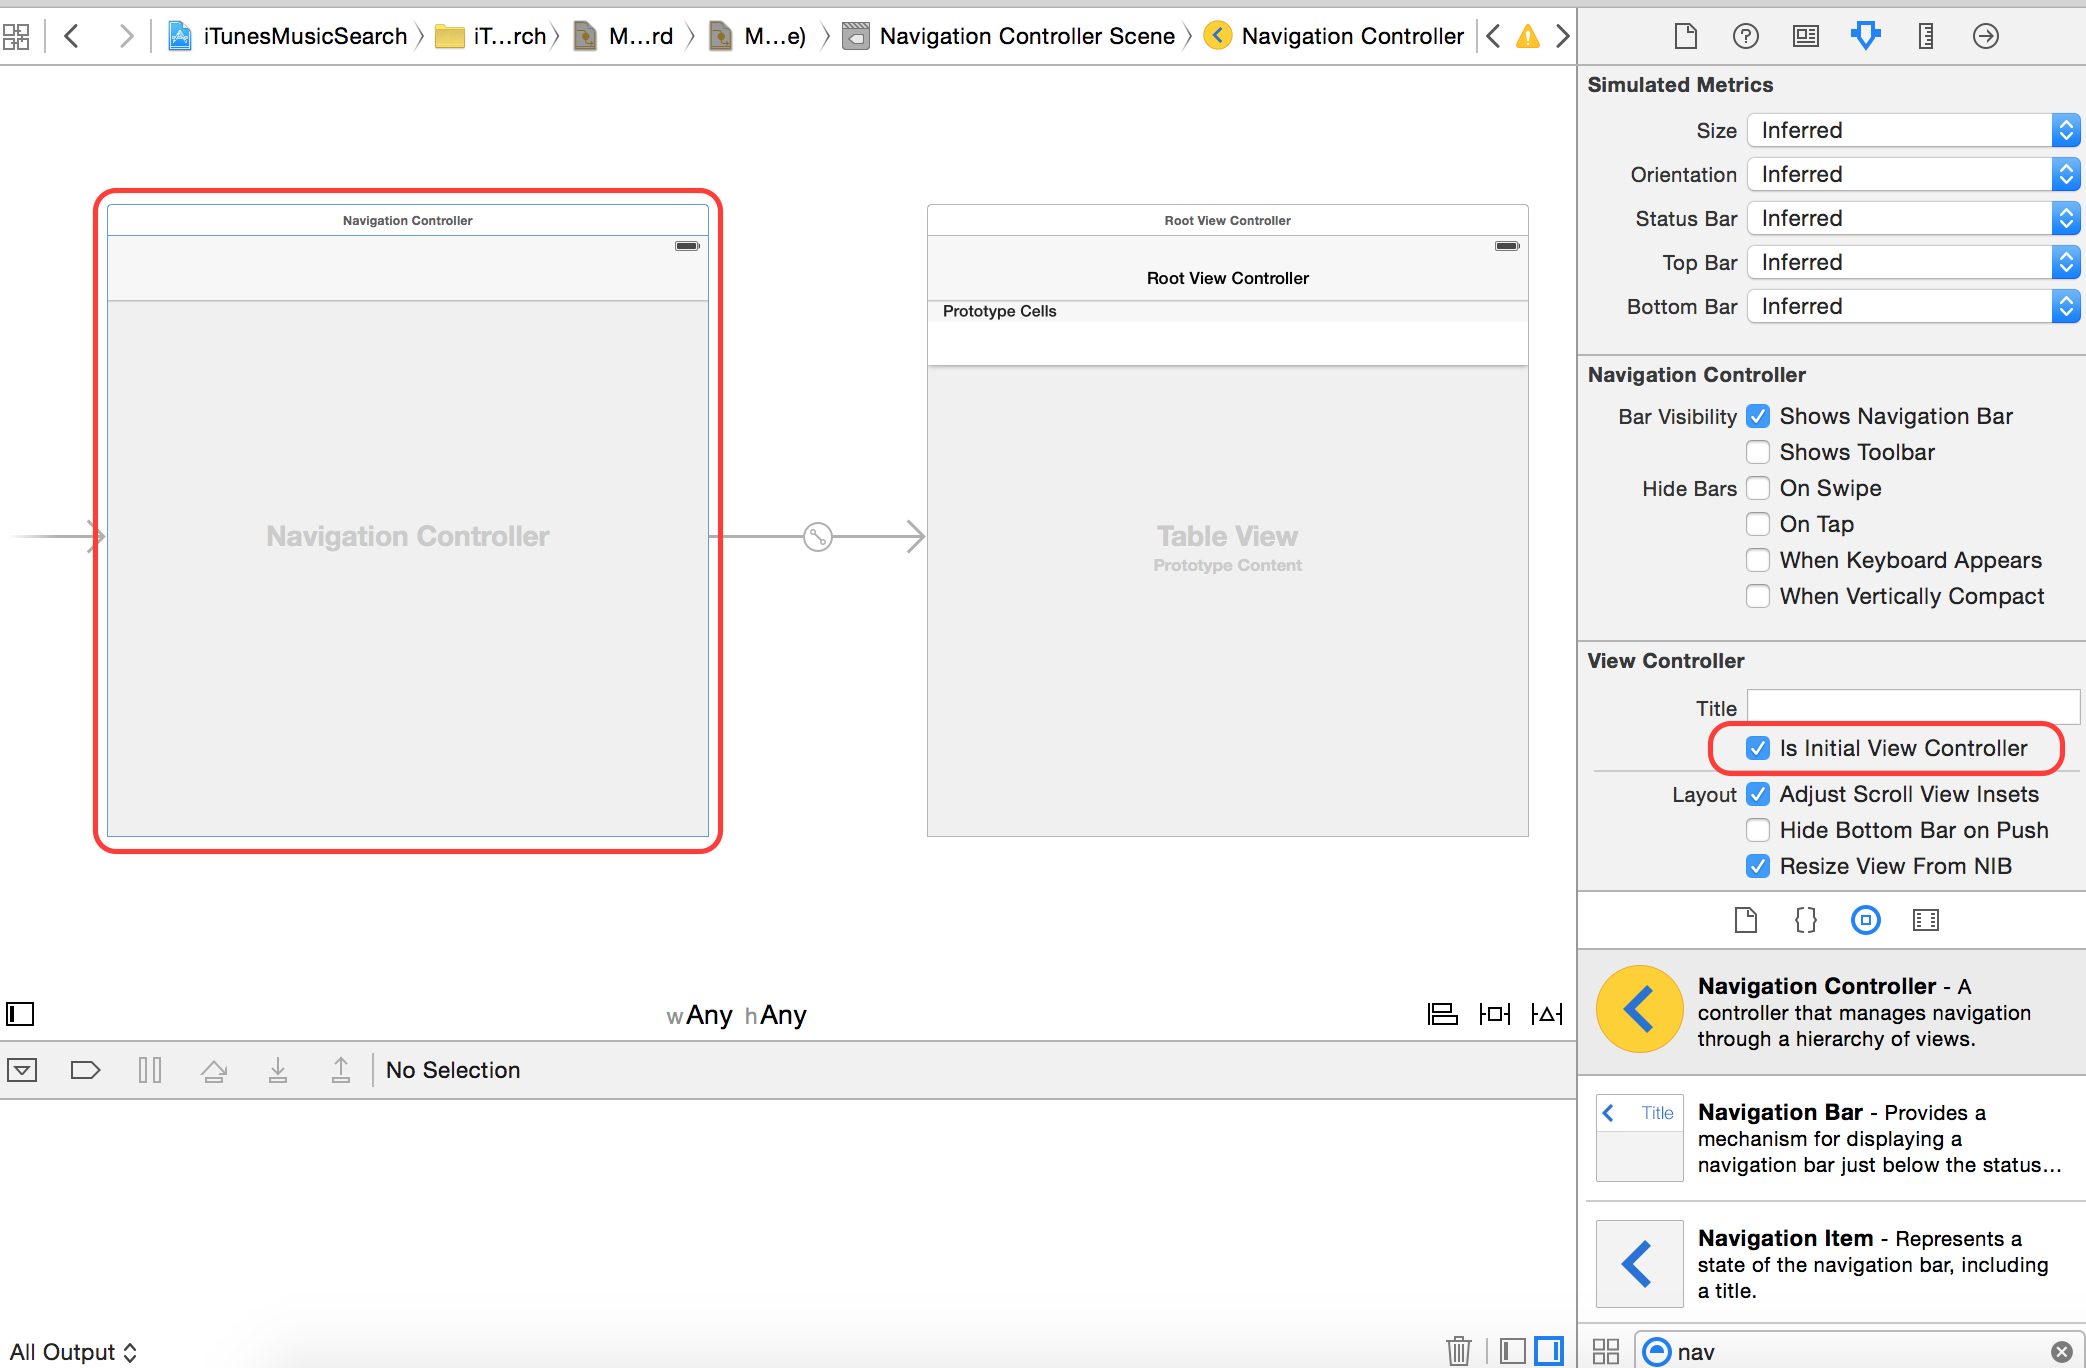
StoryboardにUINavigationControllerとUITableViewControllerを追加する
Main.storyboardを開きます。もともと書かれているViewControllerは消しちゃってください(放置しててもいいですけど)。
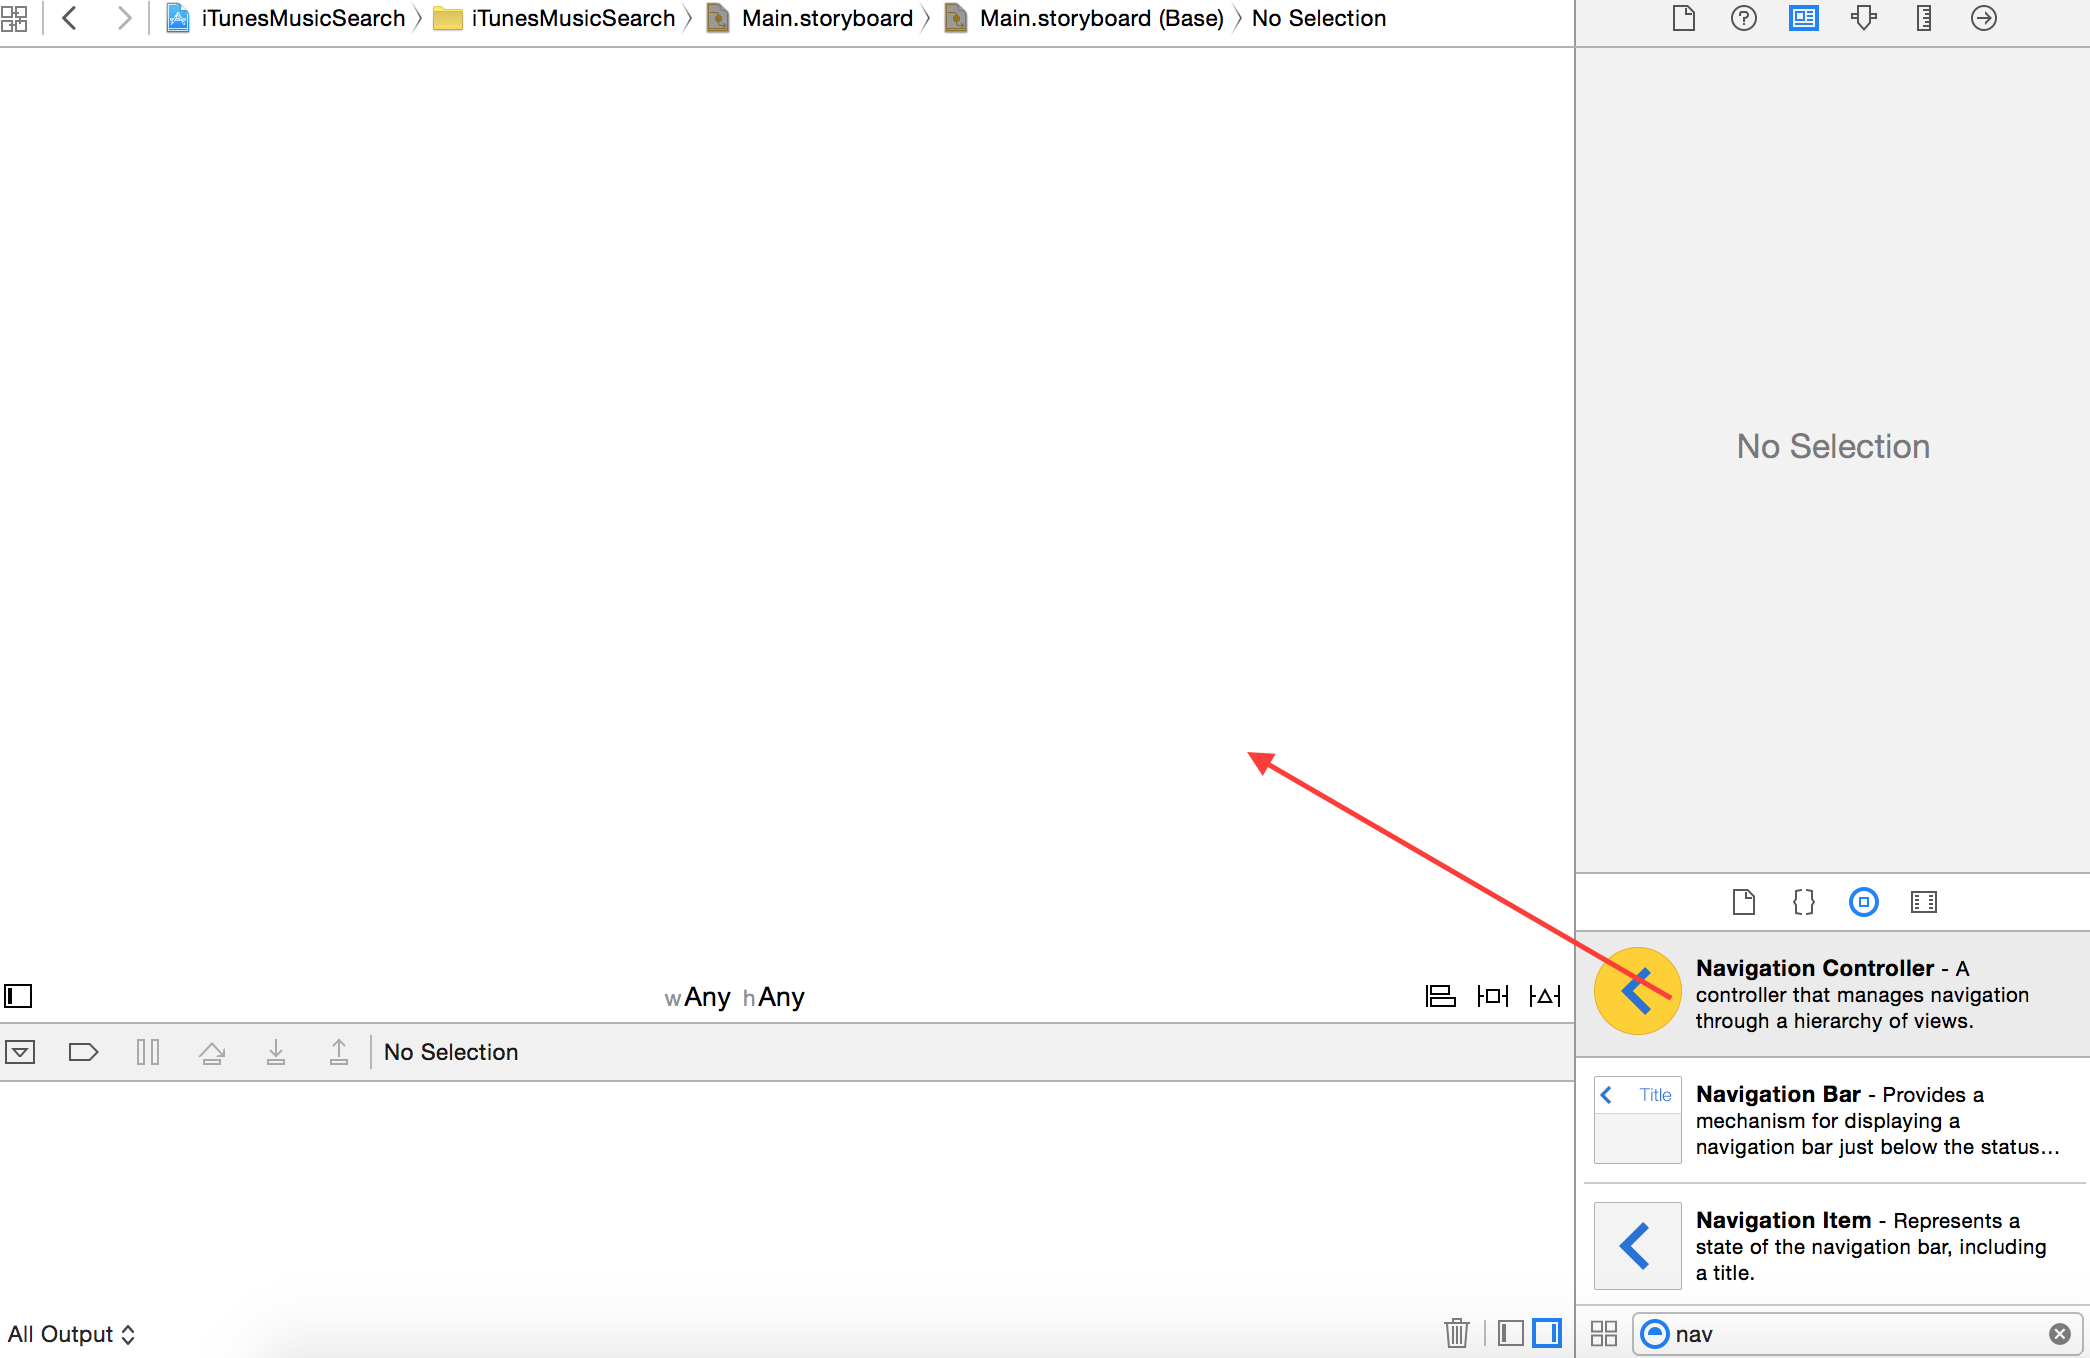
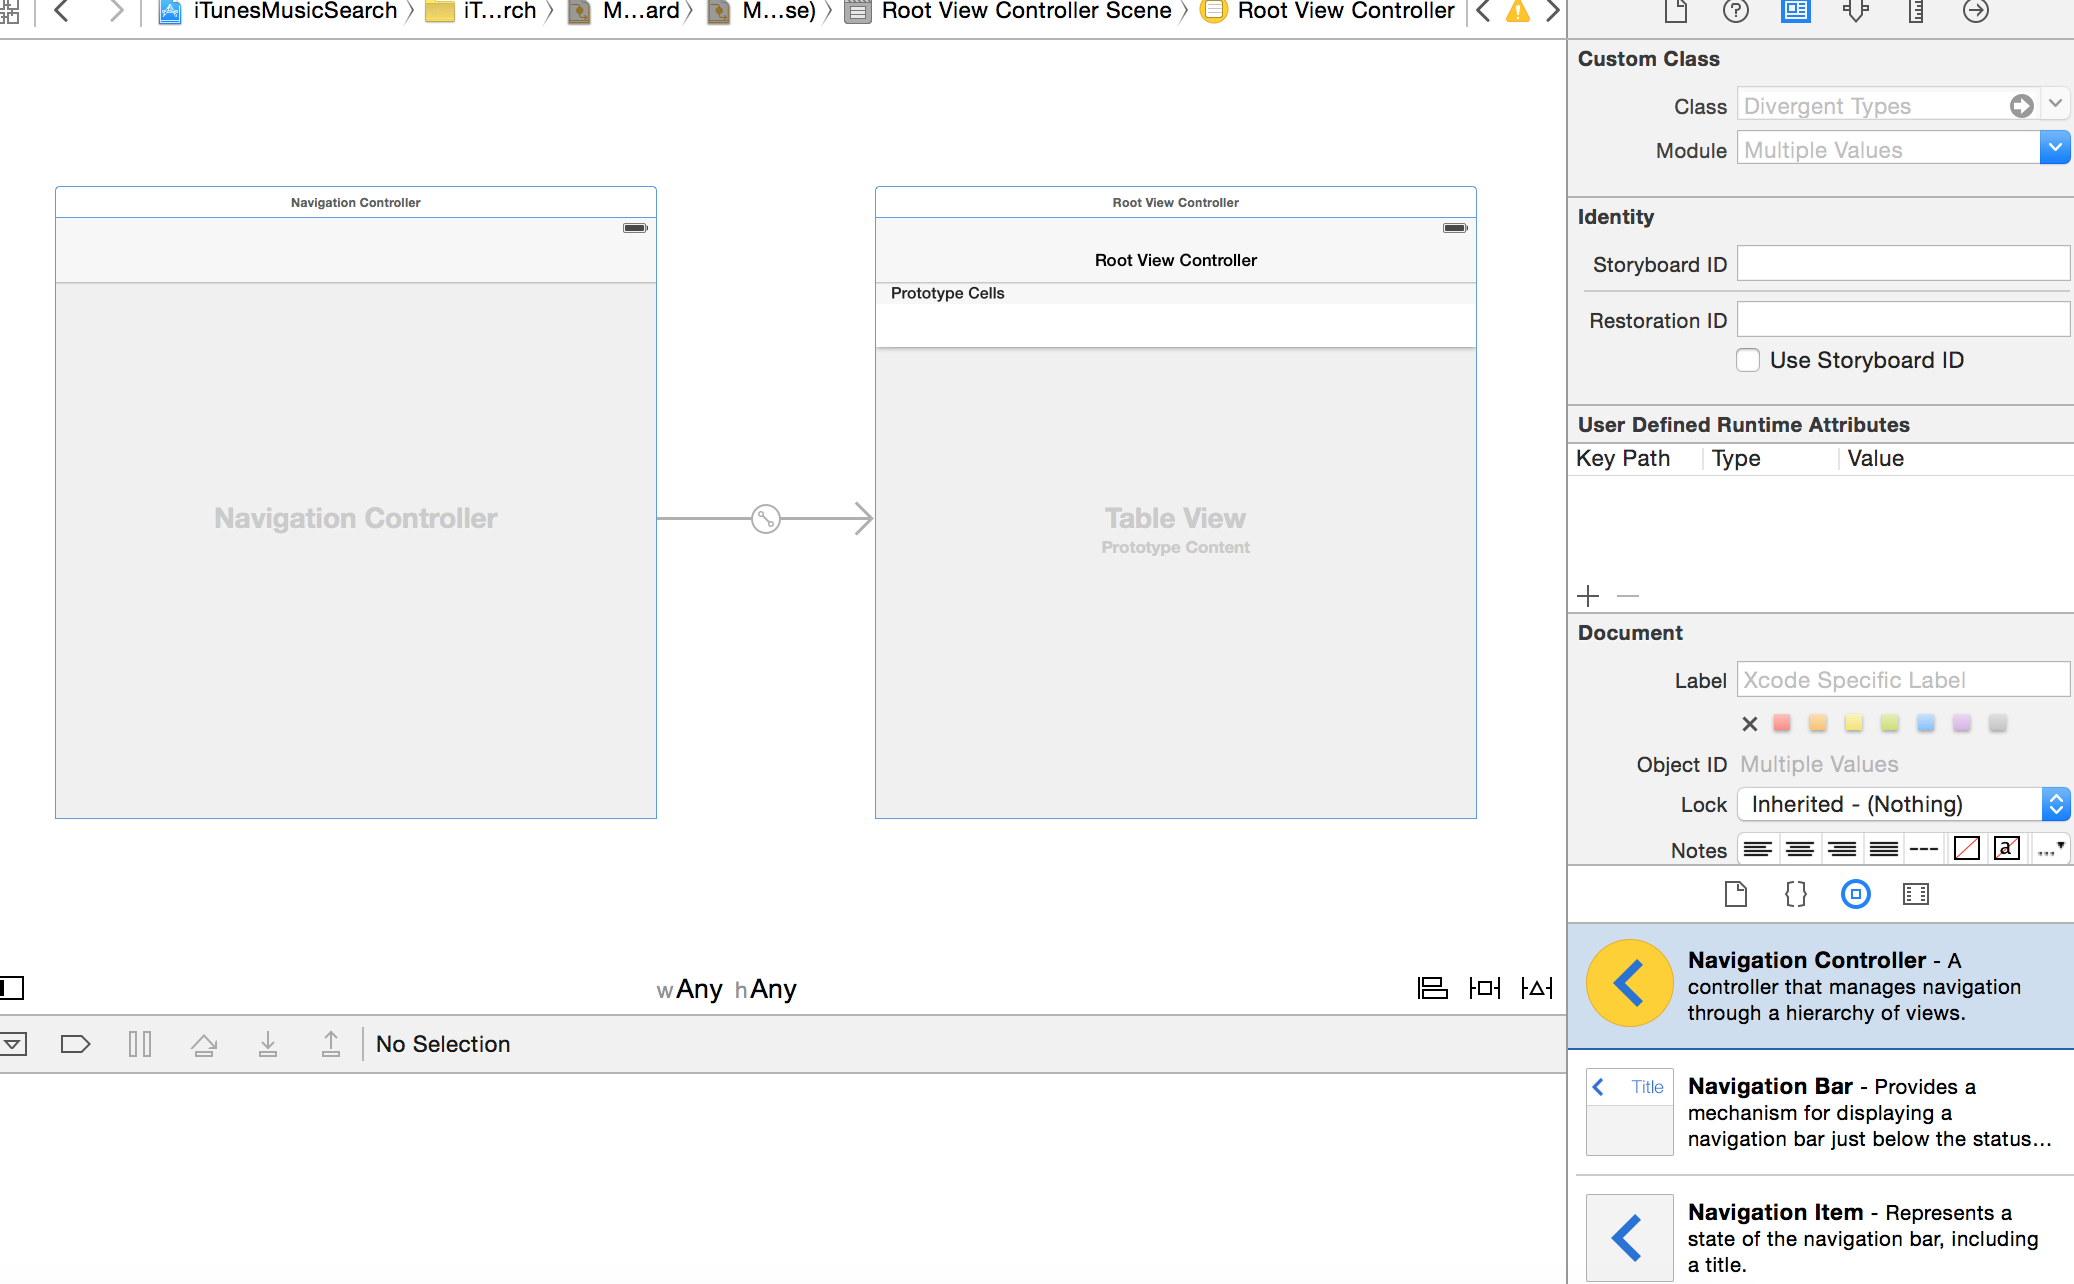
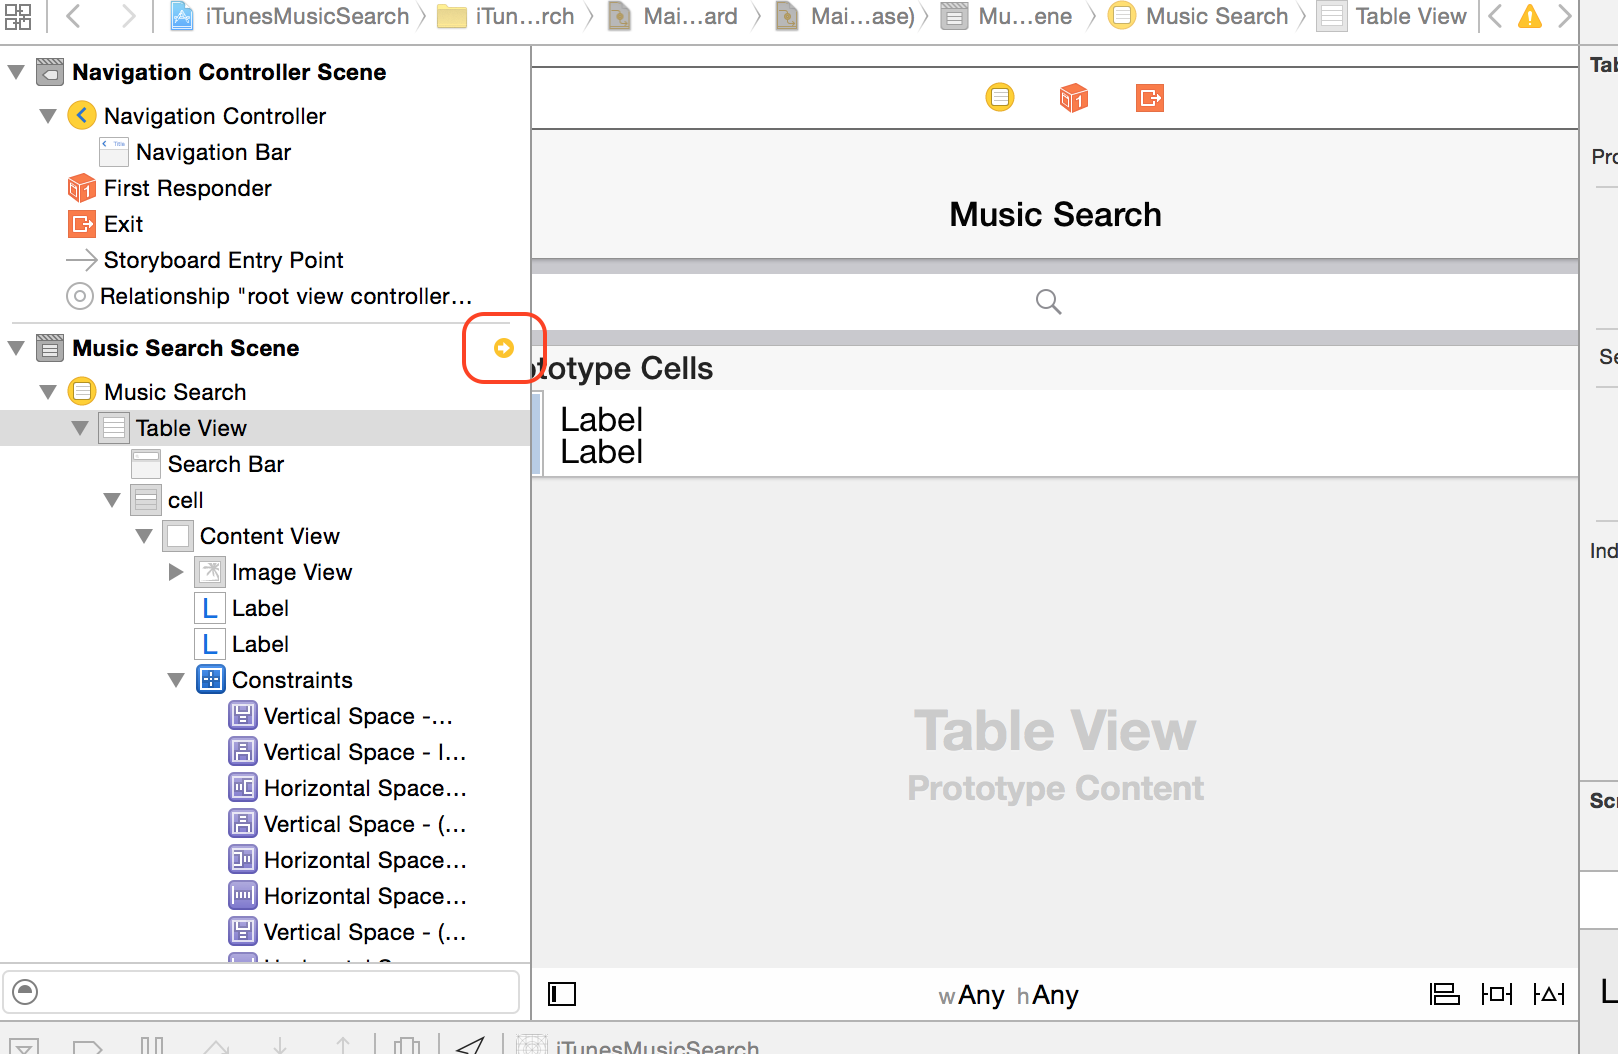
NavigationControllerを選択して、Initial View Controllerに設定します。Initial View Controllerは、このStoryboardにおける最初のViewControllerになります。左端に、切れた矢印が付いているのがInitial View Controllerです。
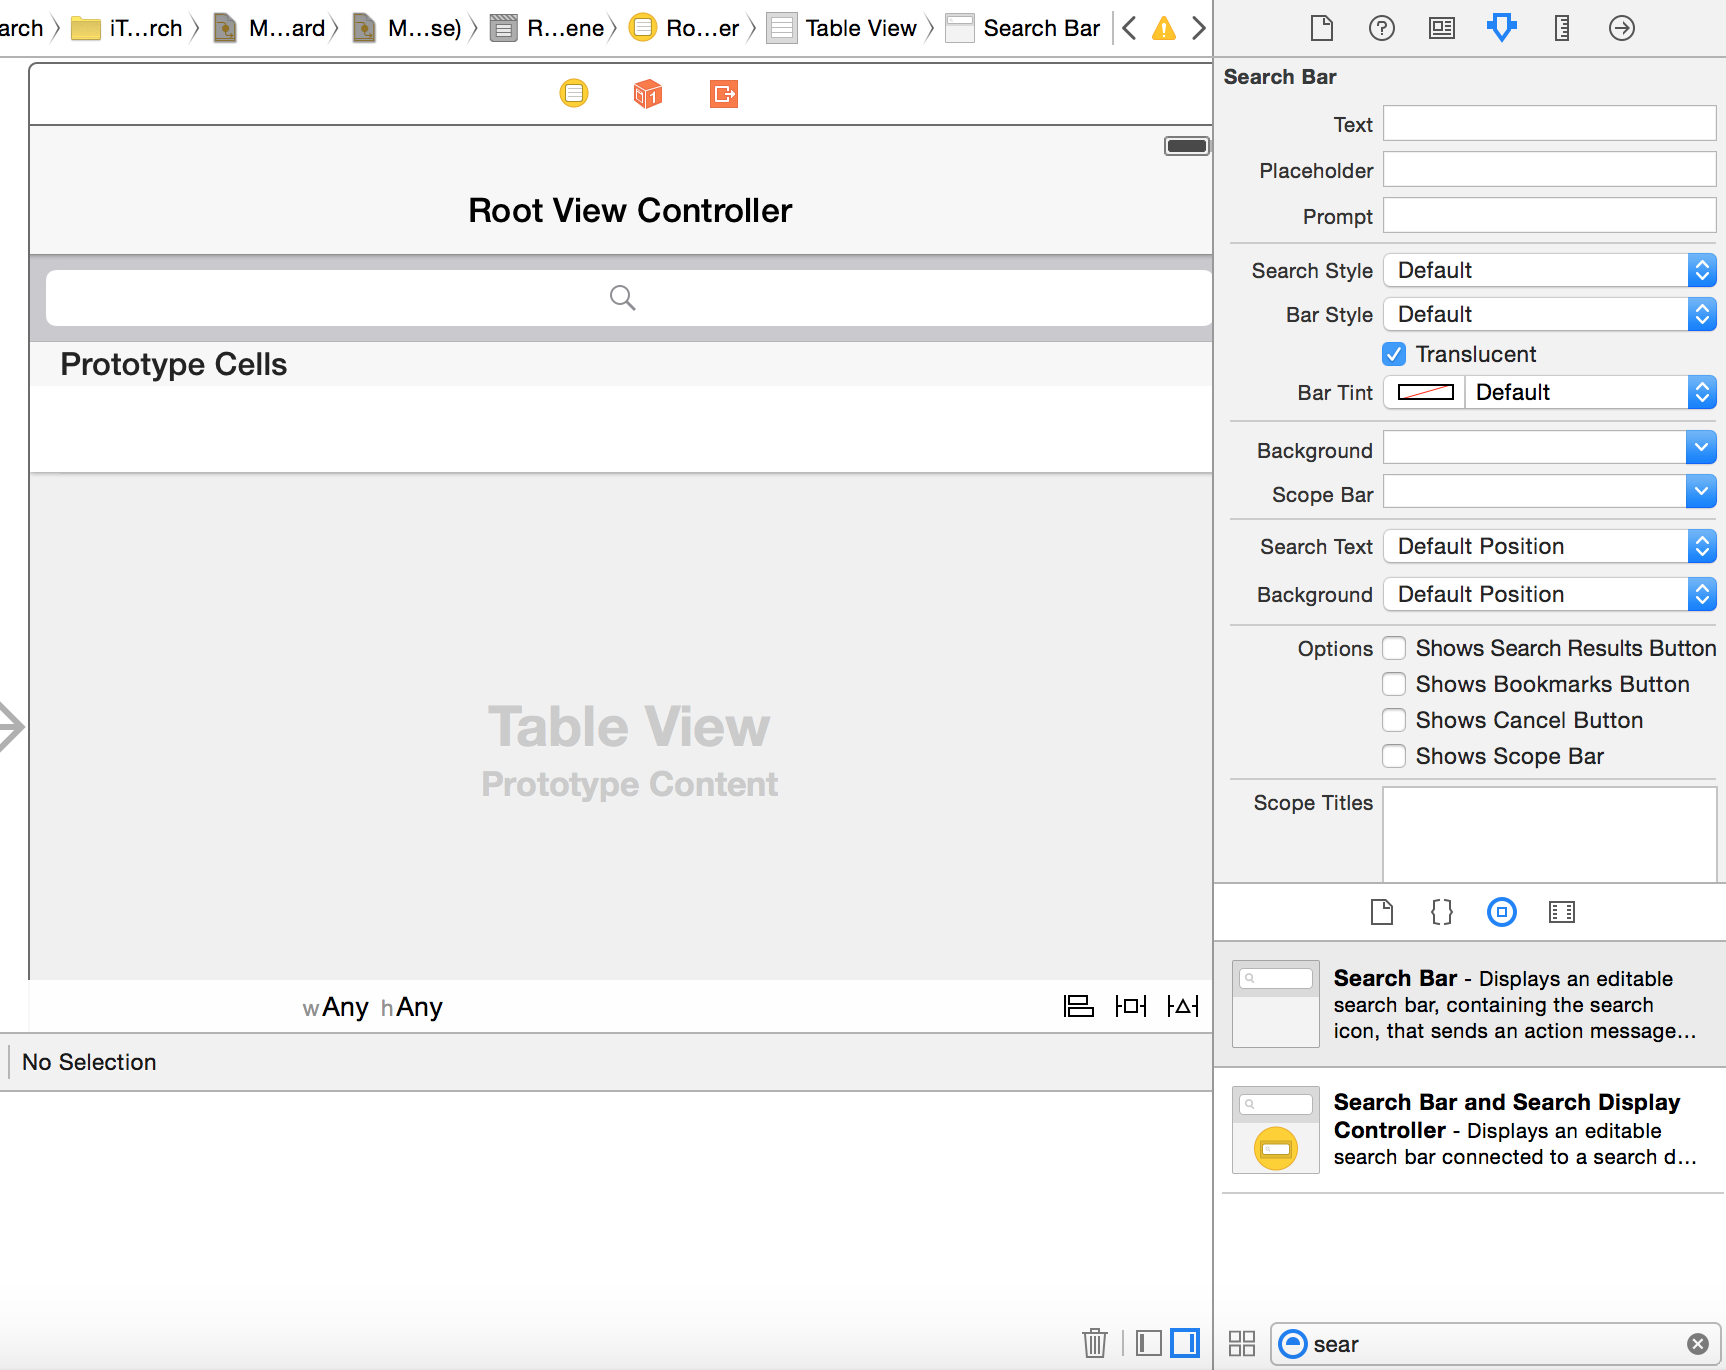
UITableViewControllerにUISearchBarを追加する

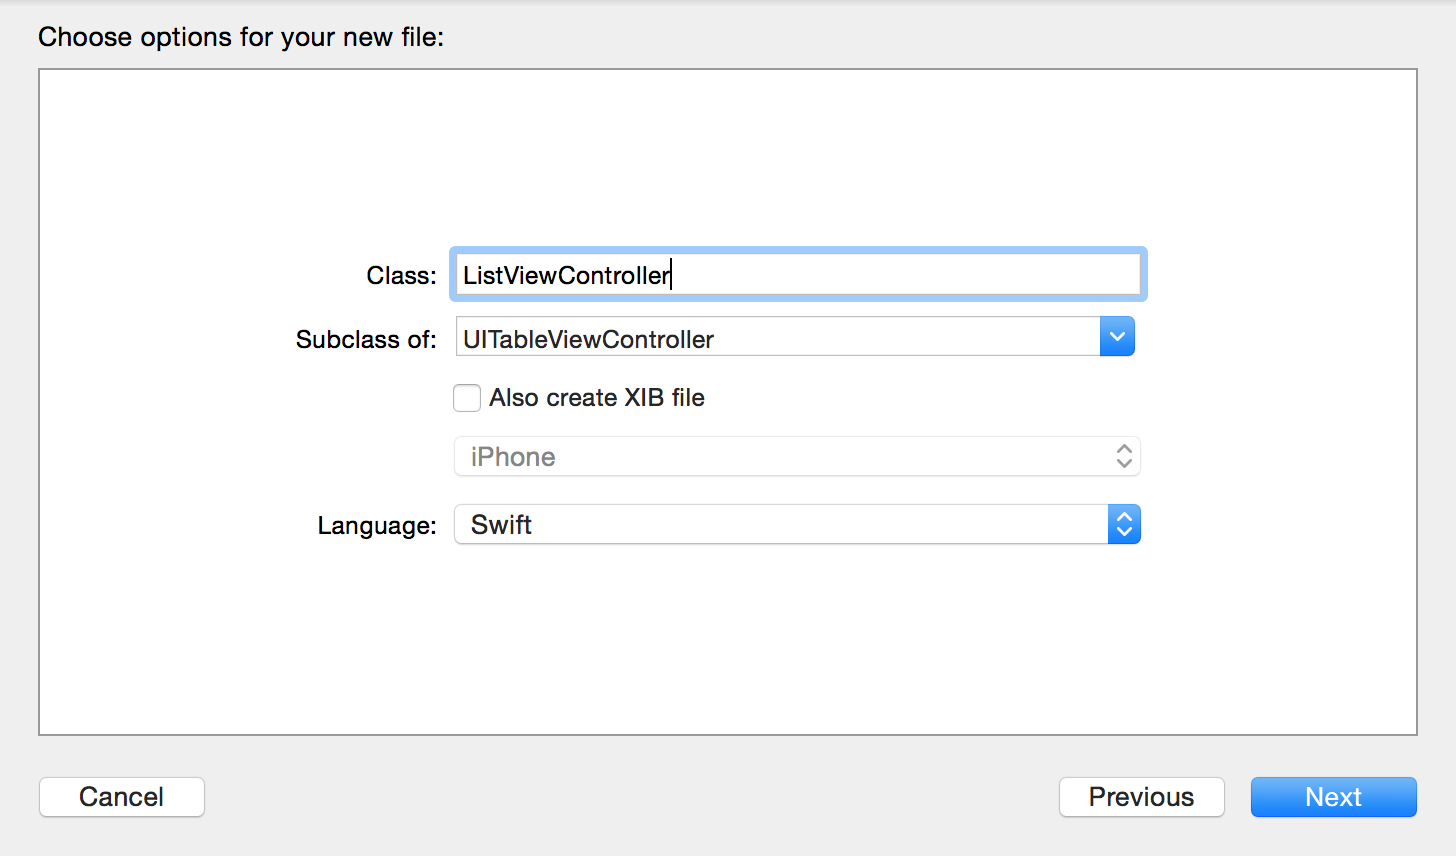
ListViewControllerを作る
File > New > File... > iOS Source > Cocoa Touch Classから作成します。
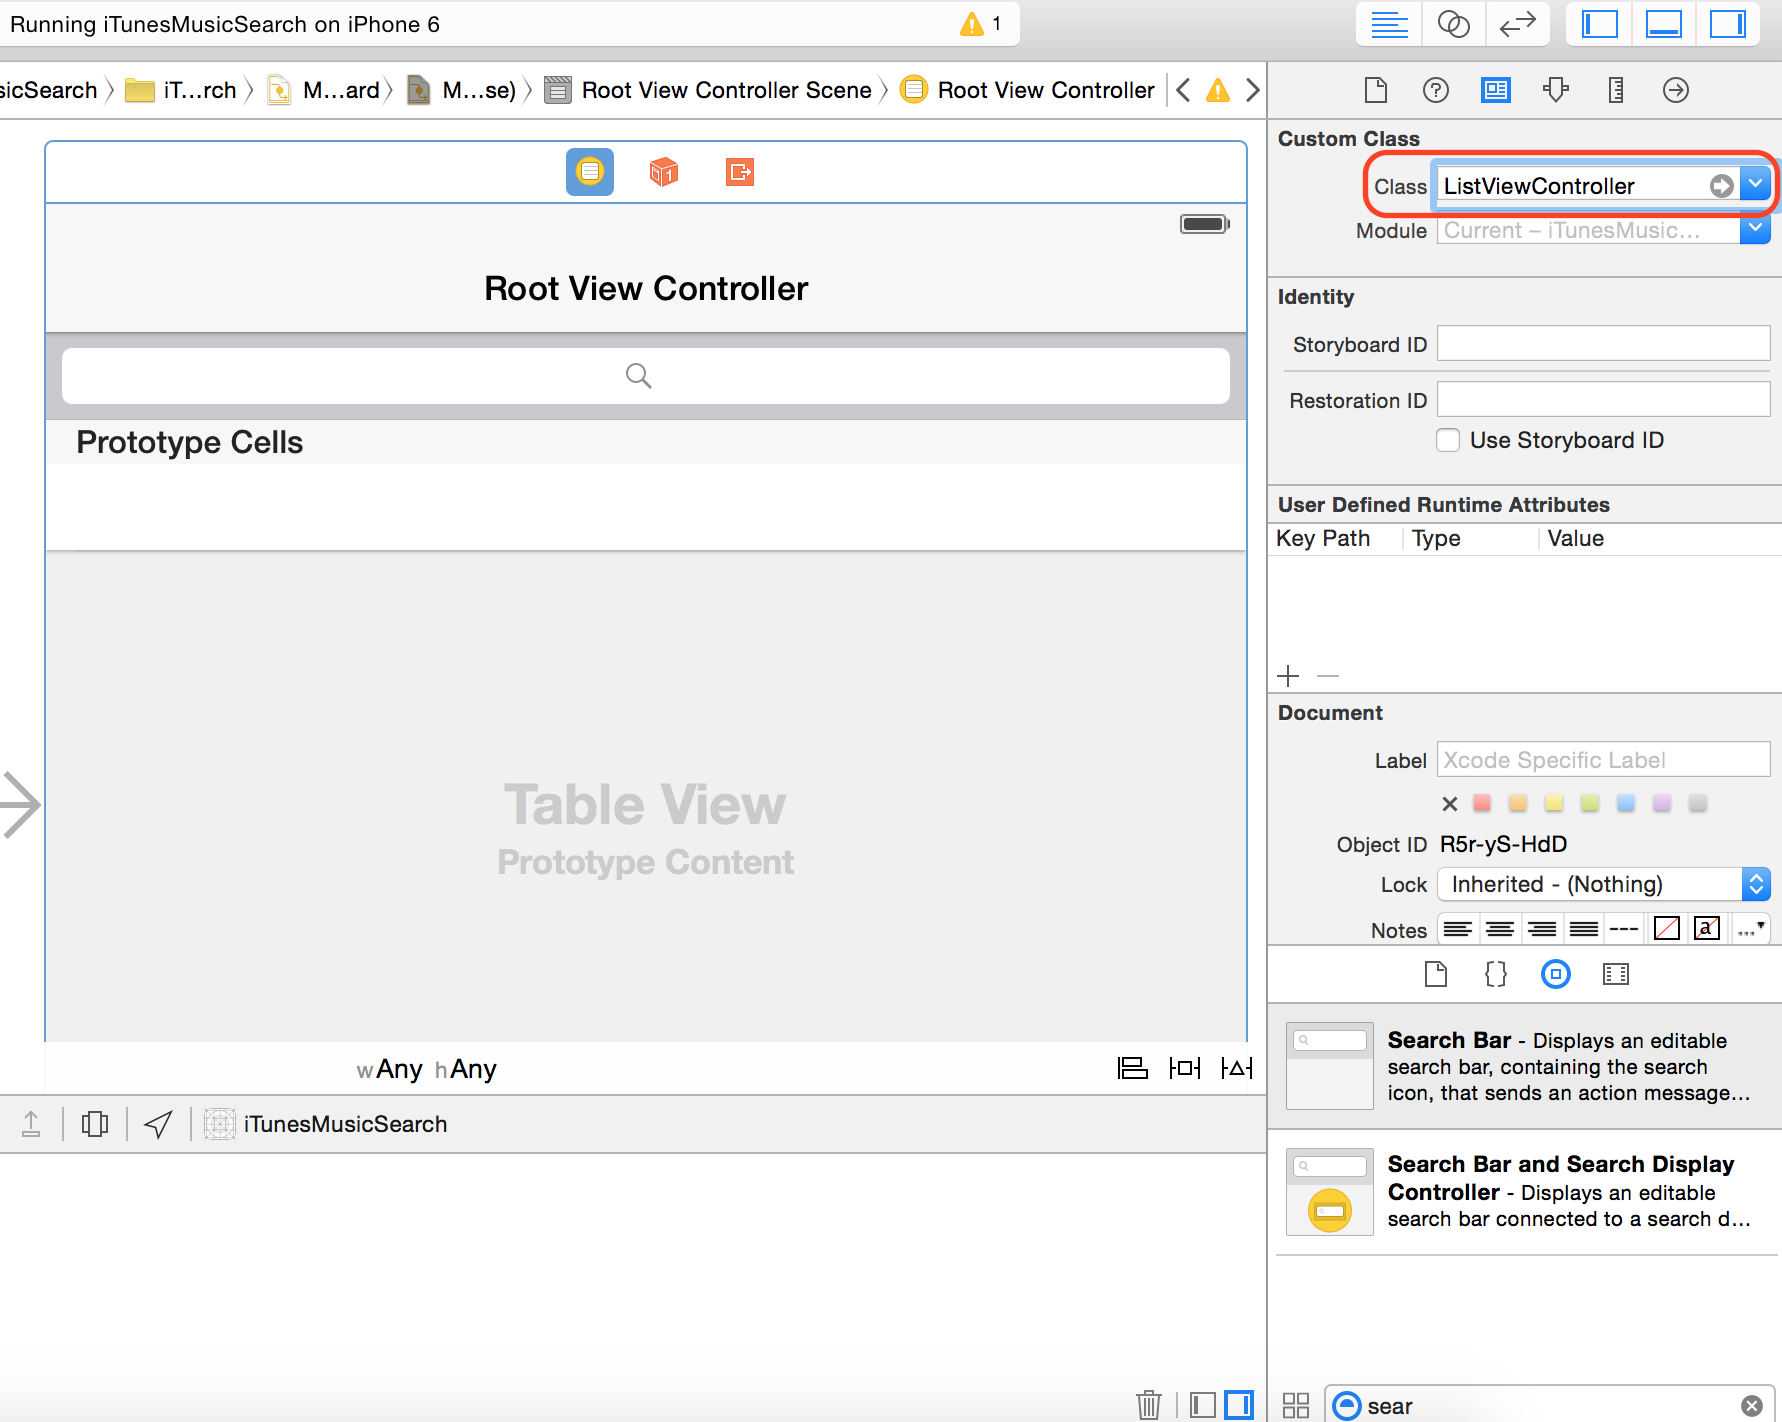
Main.storyboardを開いて、ListViewControllerをUITableViewControllerのCustom Classに設定します。
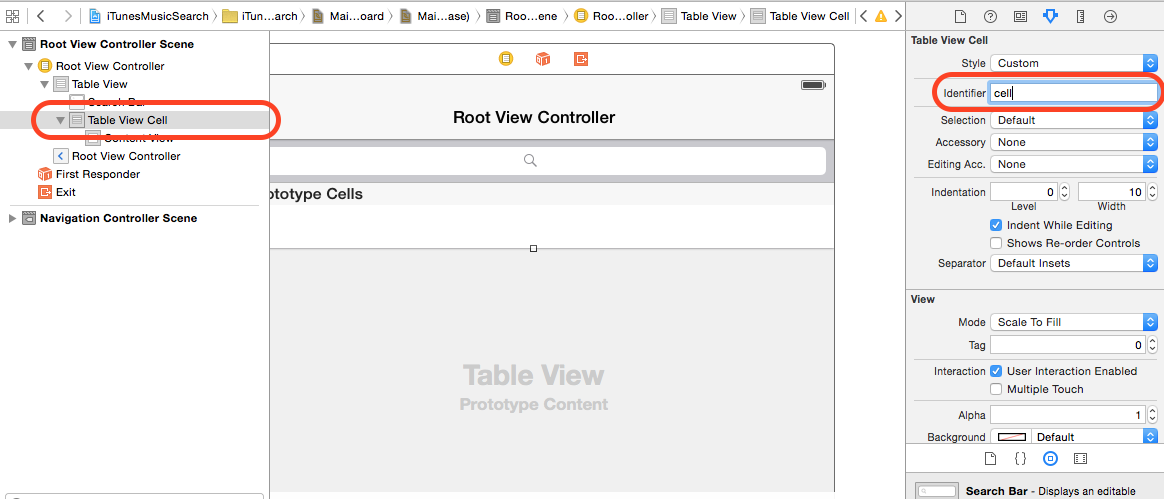
CellのreuseIdentifierを設定する
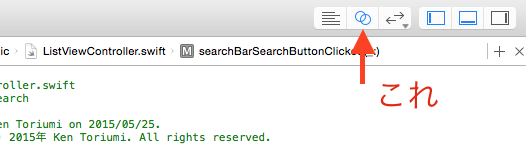
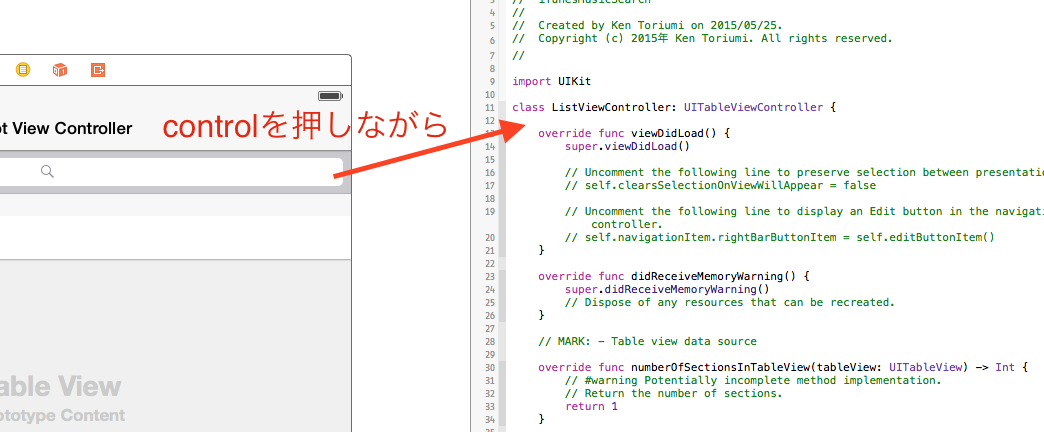
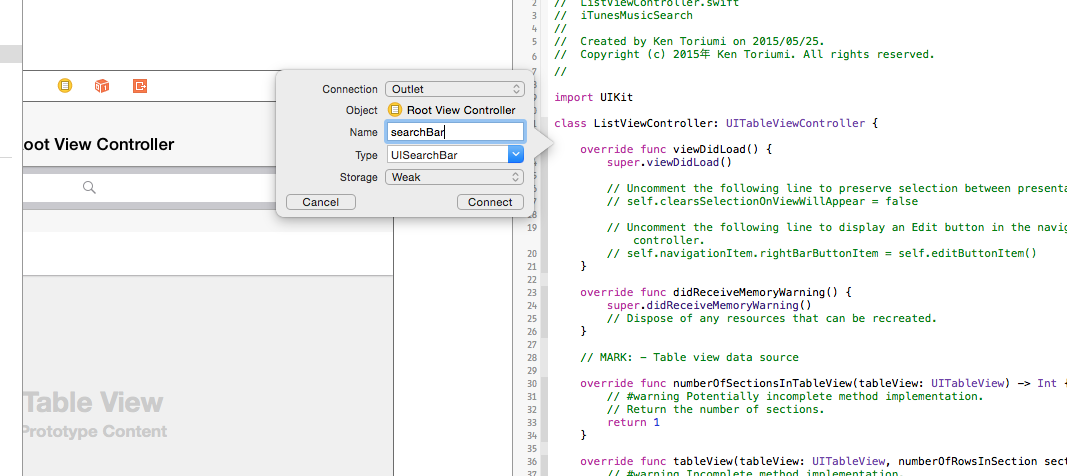
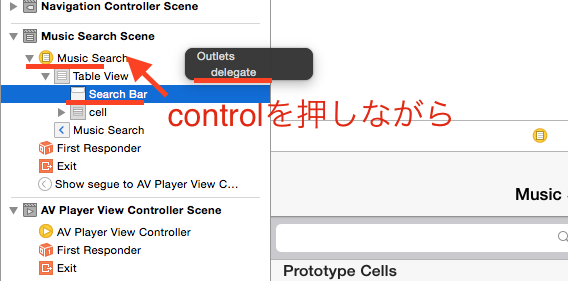
ListViewControllerにUISearchBarのoutletを繋ぐ
これを押して、Editorを2ペイン表示にします。左ペインにStoryboardを表示しているときは、右ペインに対応するViewController or Viewのソースファイルが表示されます。
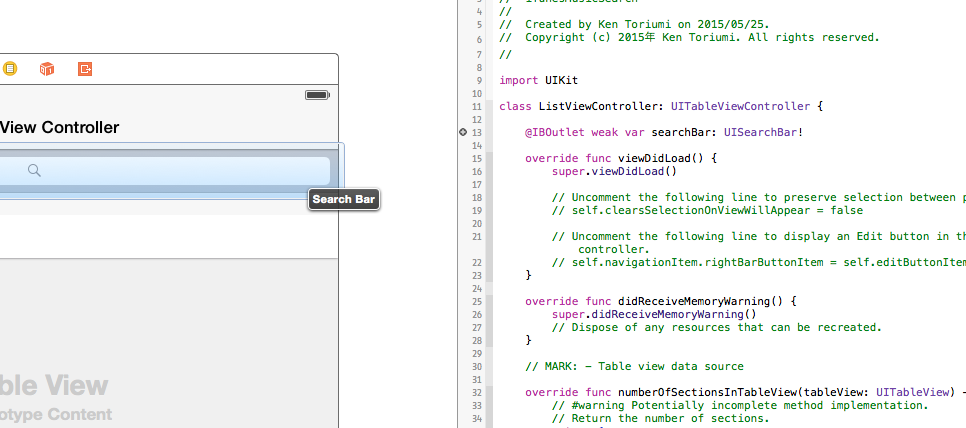
黒ポチにマウスオーバーすると、outletしてるViewがハイライトします。
ListViewControllerに検索結果を覚えておくプロパティを追加する
ListViewController.swiftを開いて、以下を追加します。
class ListViewController: UITableViewController {

    private var results: [NSDictionary]?
}
UISearchBarDelegateを使って、検索の処理を実装する
ListViewController.swiftの一番下に以下を追加します。
extension ListViewController: UISearchBarDelegate {

    // searchBarのSearchボタンをタップしたときの処理
    func searchBarSearchButtonClicked(searchBar: UISearchBar) {
        searchBar.resignFirstResponder() // キーボードを閉じる

        // url encode 例. スピッツ > %83X%83s%83b%83c
        let text = searchBar.text.stringByAddingPercentEncodingWithAllowedCharacters(NSCharacterSet.URLQueryAllowedCharacterSet())
        if let text = text {
            AFHTTPSessionManager().GET(
                "https://itunes.apple.com/search?term=\(text)&country=JP&lang=ja_jp&media=music",
                parameters: nil,
                success: { (task: NSURLSessionDataTask!, response: AnyObject!) -> Void in
                    if let data = response as? NSDictionary, results = data["results"] as? [NSDictionary] {
                        self.results = results
                        self.tableView.reloadData() // 再描画
                    }
                },
                failure: nil)
        }
    }
}
ListViewControllerをUISearchBarのdelegateに設定する
検索結果を表示する処理(UITableViewDetaSource)を実装する
ListViewController.swiftには、同じメソッドがすでに書かれていますので、そこに追加してください。コメントアウトされている場合は、コメントを外して書きます(「/*」と「*/」を消します)。
セクション数(Contactでいうところの「あ」「か」「さ」などにあたる部分)は1つだけ使います。
   override func numberOfSectionsInTableView(tableView: UITableView) -> Int {
        // #warning Potentially incomplete method implementation.
        // Return the number of sections.
        return 1
    }
行数は検索結果の個数です。検索結果がない場合(まだ検索していない場合)は0です。
    override func tableView(tableView: UITableView, numberOfRowsInSection section: Int) -> Int {
        // #warning Incomplete method implementation.
        // Return the number of rows in the section.
        return results?.count ?? 0
    }
行に表示するセルを準備します。
    override func tableView(tableView: UITableView, cellForRowAtIndexPath indexPath: NSIndexPath) -> UITableViewCell {
        let cell = tableView.dequeueReusableCellWithIdentifier("cell", forIndexPath: indexPath) as! UITableViewCell
        if let result = results?[indexPath.row] {
            cell.textLabel?.text = result["trackName"] as? String
        }
        return cell
    }
実行してみましょう

シミュレータが大きくて画面からはみ出す場合は、command + 2〜command + 5で小さくなります。command + 1で原寸に戻ります。
一覧画面のセルをカスタマイズする、画像も表示する
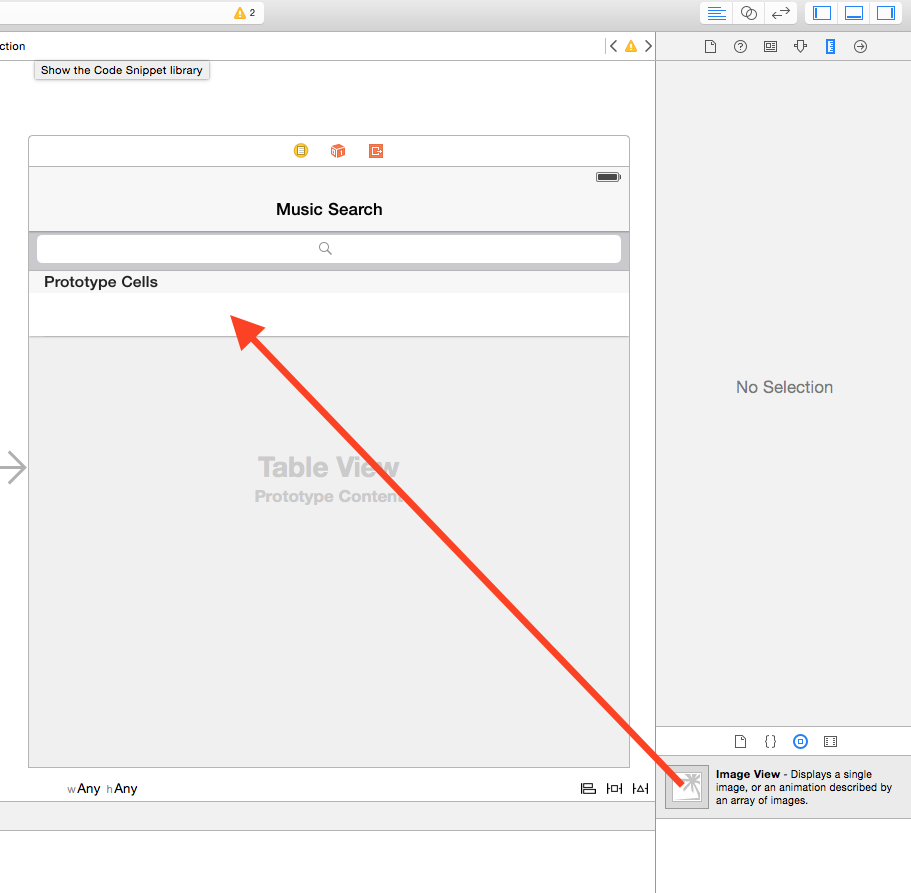
UIImageViewやUILabelをUITableViewCellに配置する
ListCellを作成する
ListViewController.swiftを開いて、一番下に追加します。新しいswiftファイルを作ってもいいです。
class ListCell: UITableViewCell {
}
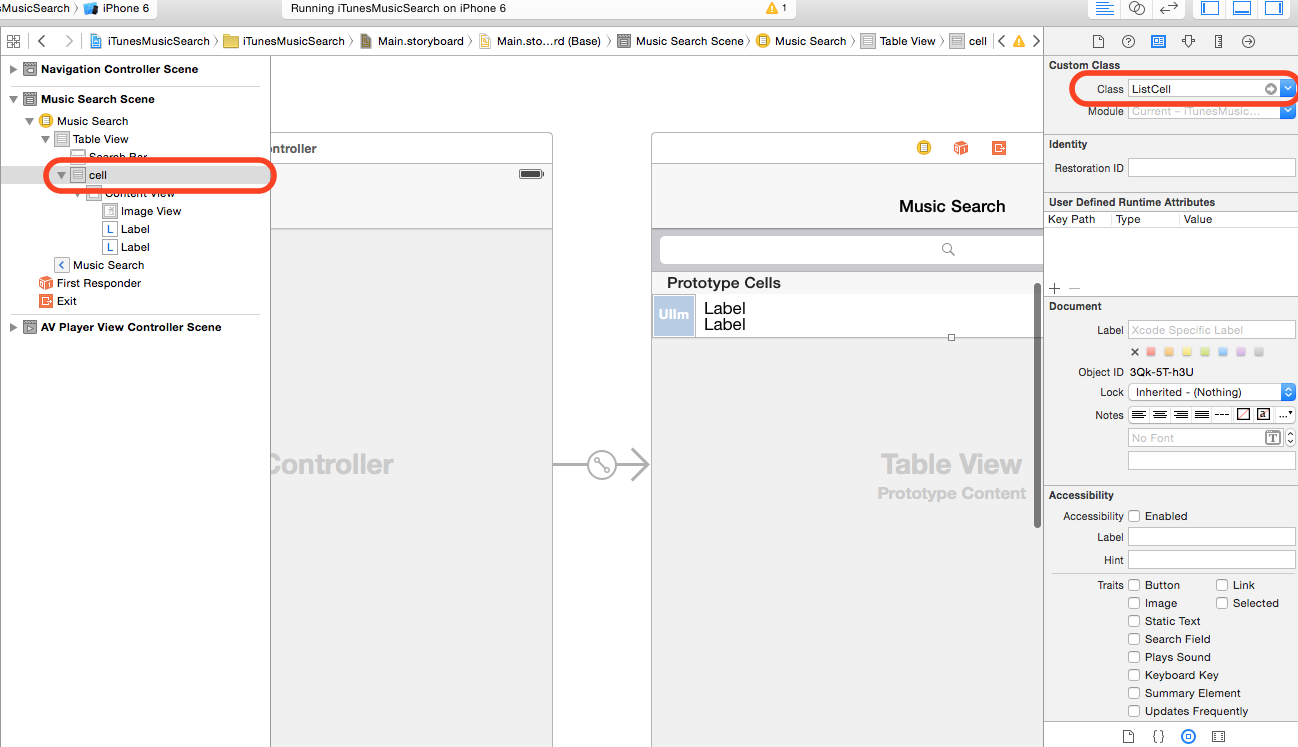
Main.storyboardを開いて、ListCellをUITableViewCellのCustom Classに設定します。
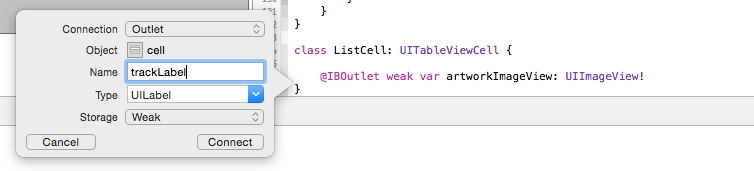
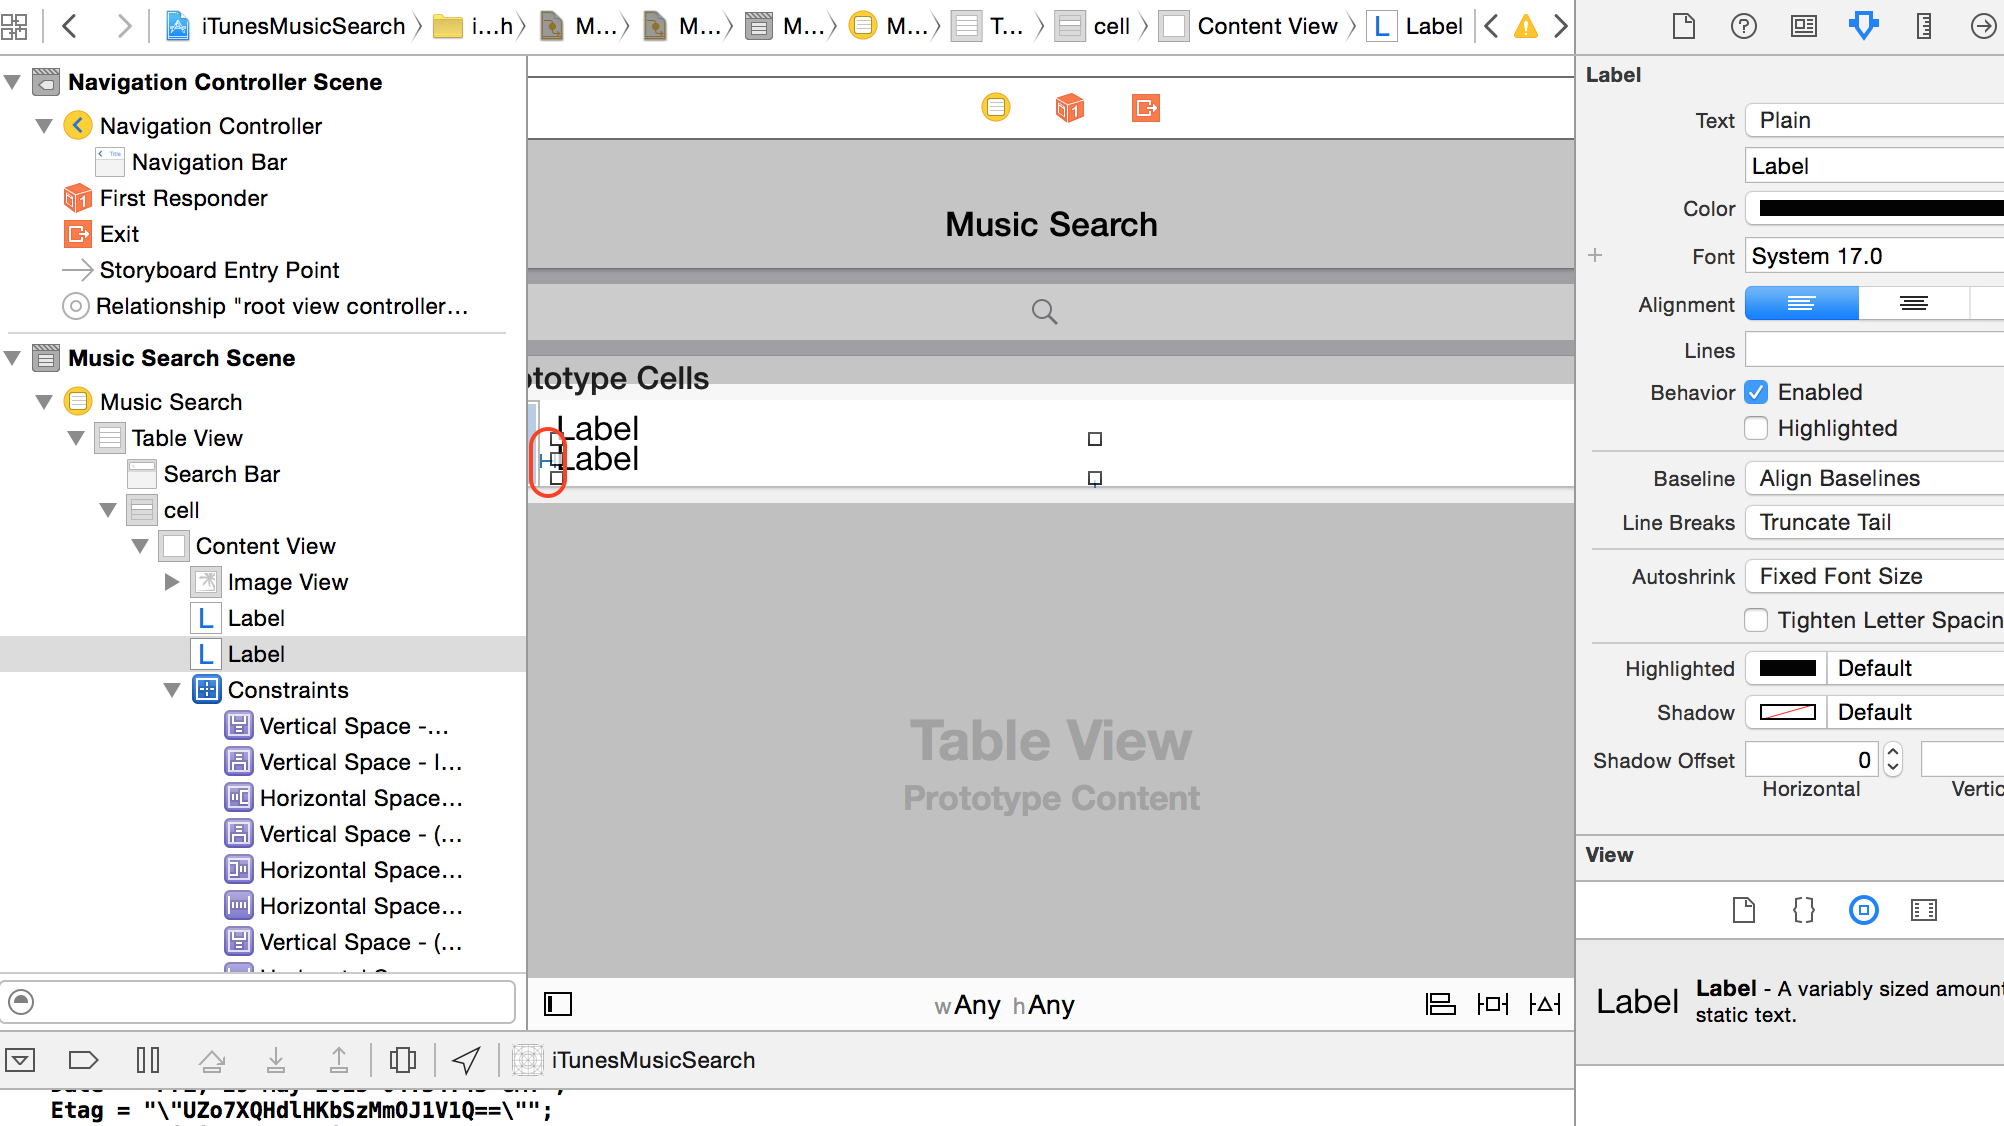
ListCellにUIImageViewやUILabelのoutletを繋ぐ
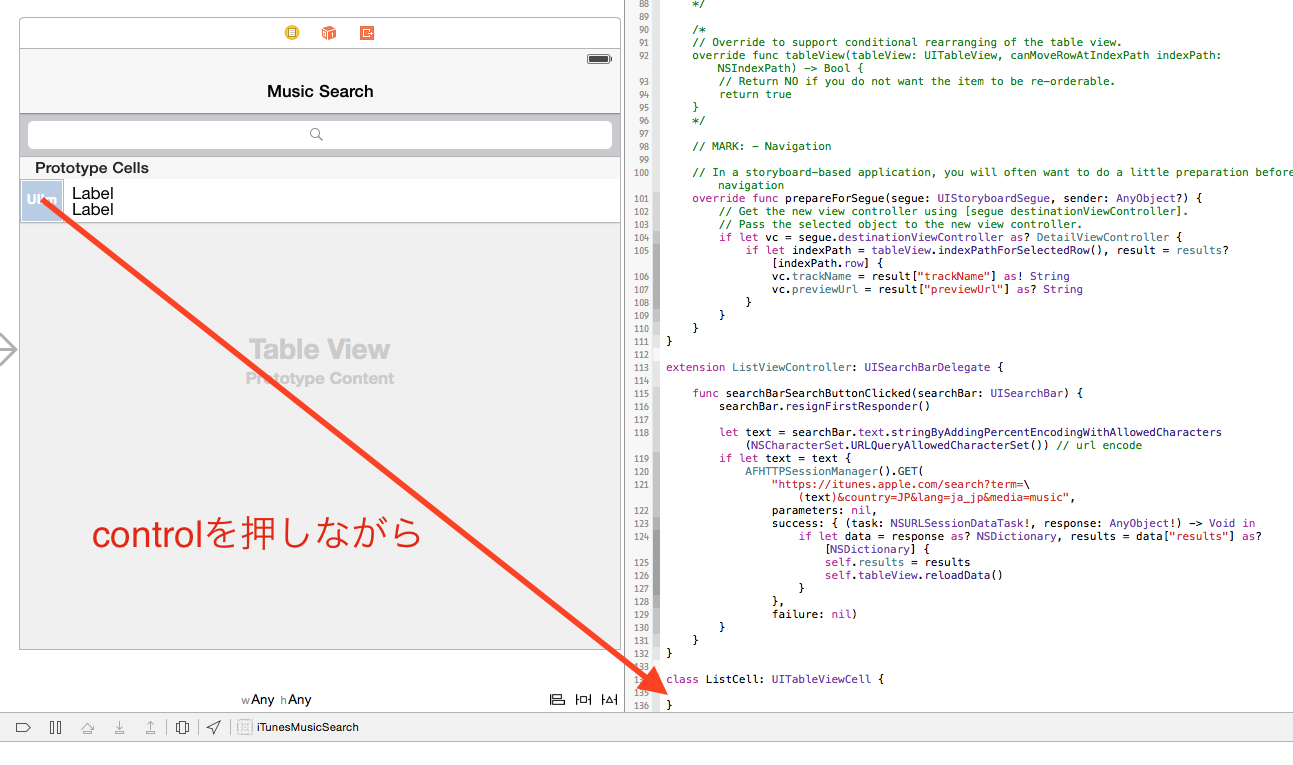
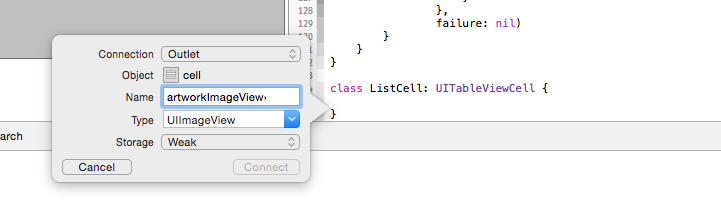
残り2つも同様に。


セルを準備する処理も変更する
ListViewController.swiftを開いて、先ほど書いた処理のセルを準備する部分(tableView:cellForRowAtIndexPath:)を、以下の様に書き換えます。
    override func tableView(tableView: UITableView, cellForRowAtIndexPath indexPath: NSIndexPath) -> UITableViewCell {
        let cell = tableView.dequeueReusableCellWithIdentifier("cell", forIndexPath: indexPath) as! ListCell
        if let result = results?[indexPath.row] {
            if let artworkUrl = result["artworkUrl100"] as? String {
                cell.artworkImageView.setImageWithURL(NSURL(string: artworkUrl))
            } else {
                cell.artworkImageView.image = nil
            }
            cell.trackLabel.text = result["trackName"] as? String
            cell.artistLabel.text = result["artistName"] as? String
        }
        return cell
    }
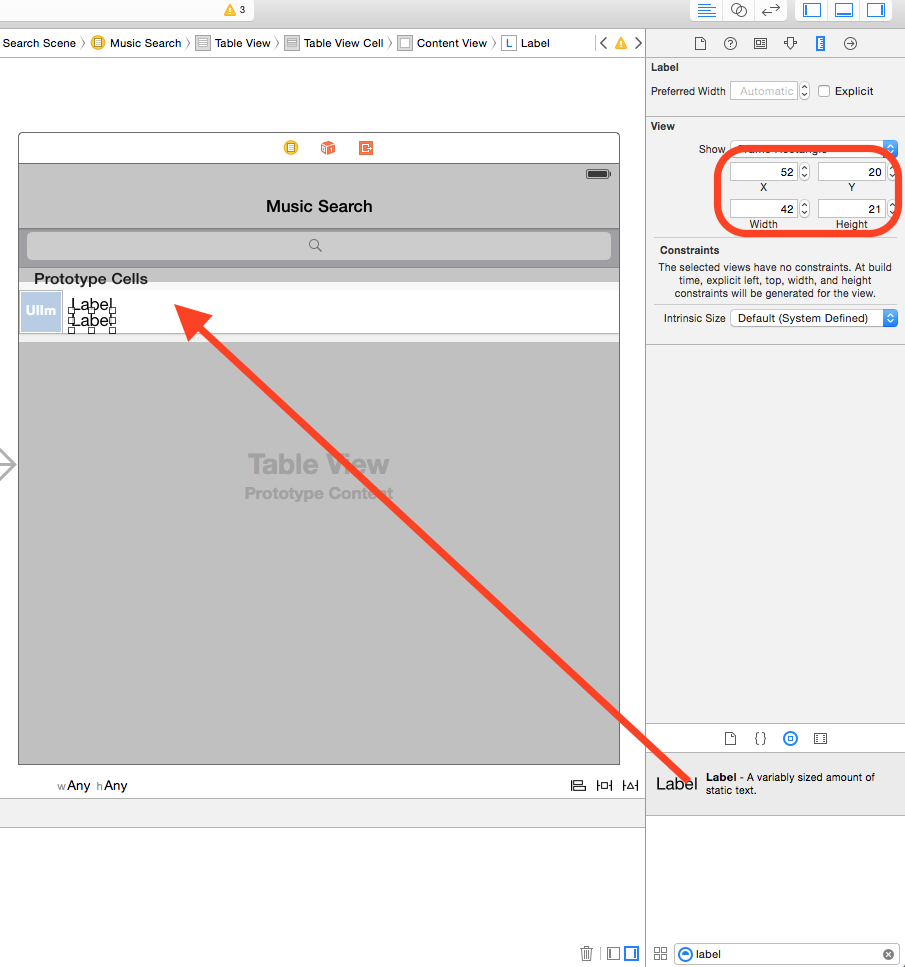
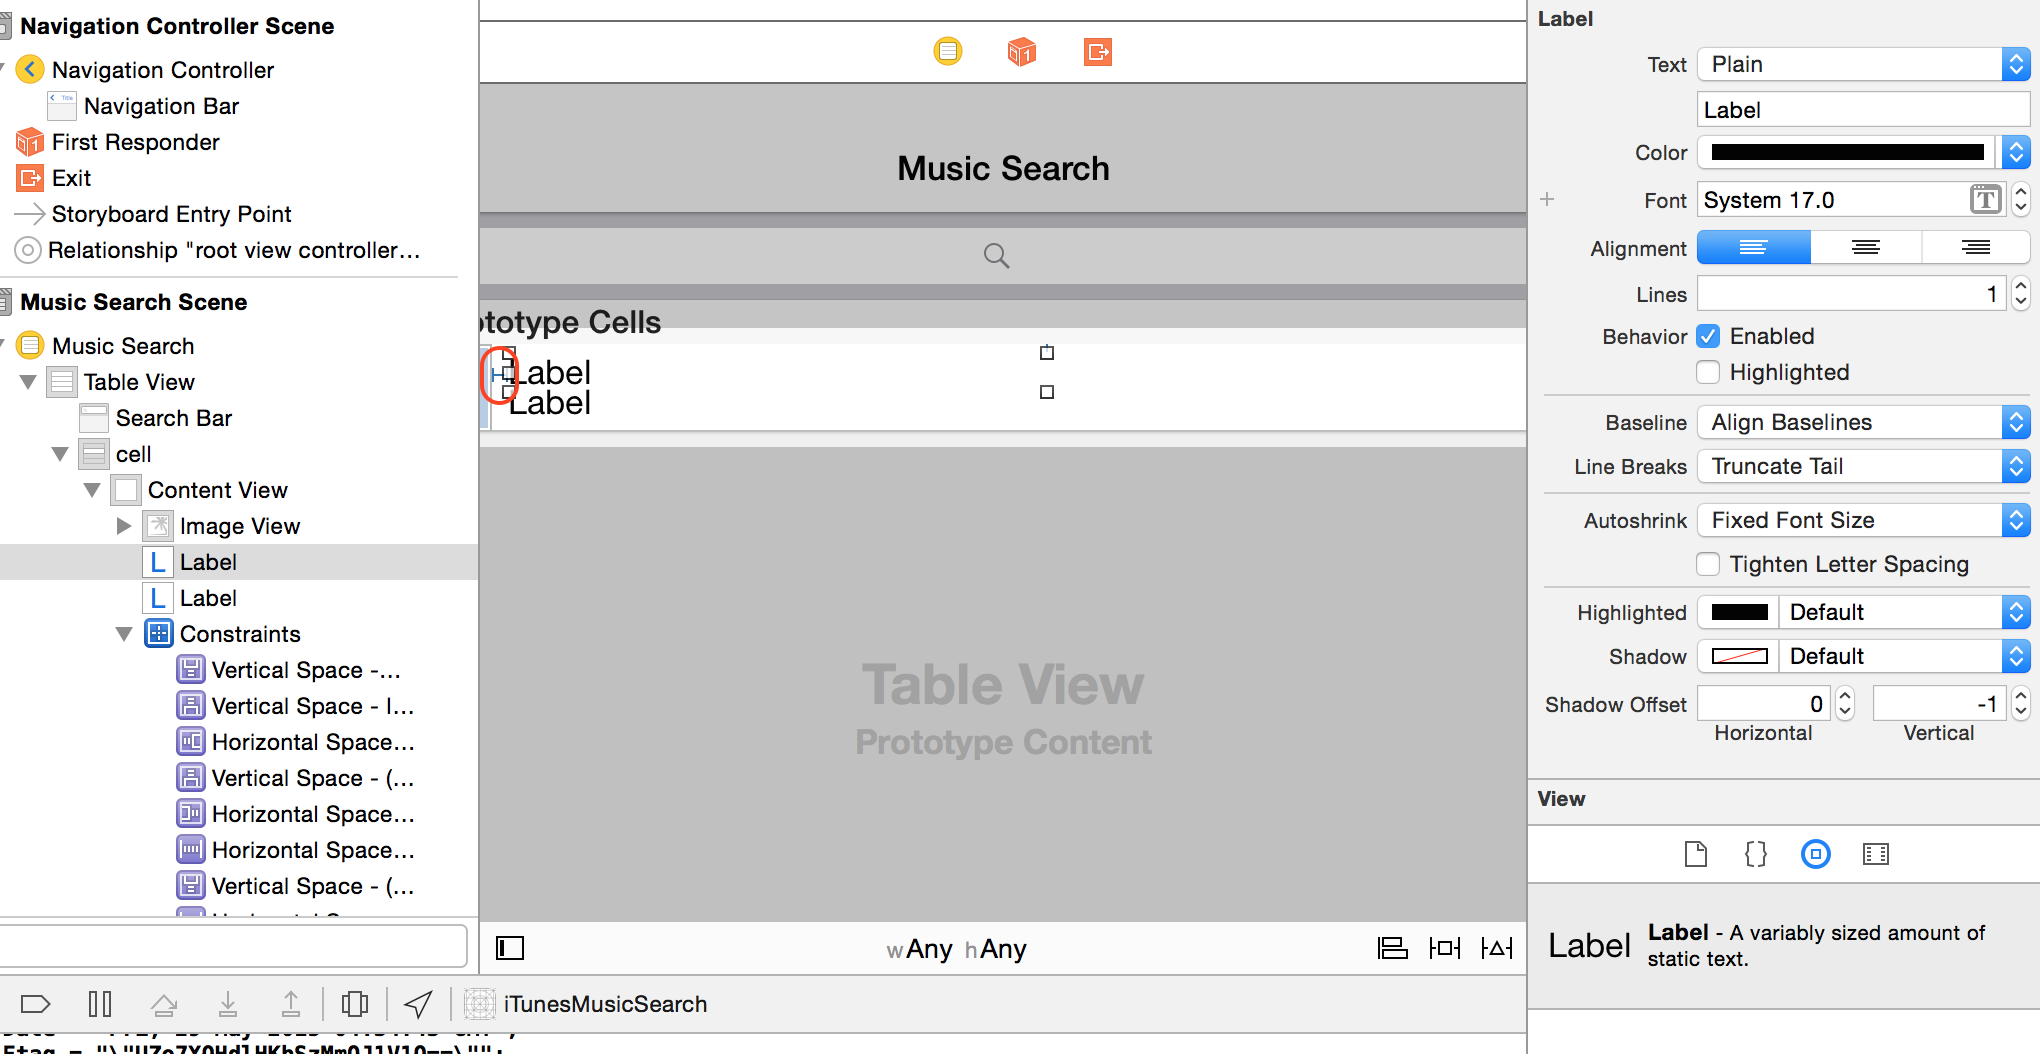
Auto Layoutを設定する
Auto Layoutを設定すると、デバイス(3.5 inch, 4 inch, 4.7 inch, 5.5 inch, iPad...)や縦横によって変わる画面サイズに合わせて、その制約に基づいて配置してくれます。
今回、設定するAuto Layoutのイメージはこんな感じです。加えて、UIImageViewの上下左は0 pxです。それ以外の記載のないところはフリーになっています。UIImageViewの位置やサイズは常に固定で、2つのUILabelの幅が伸び縮みするようになります。
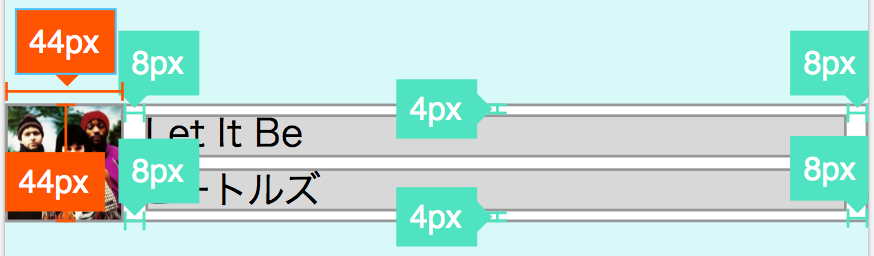
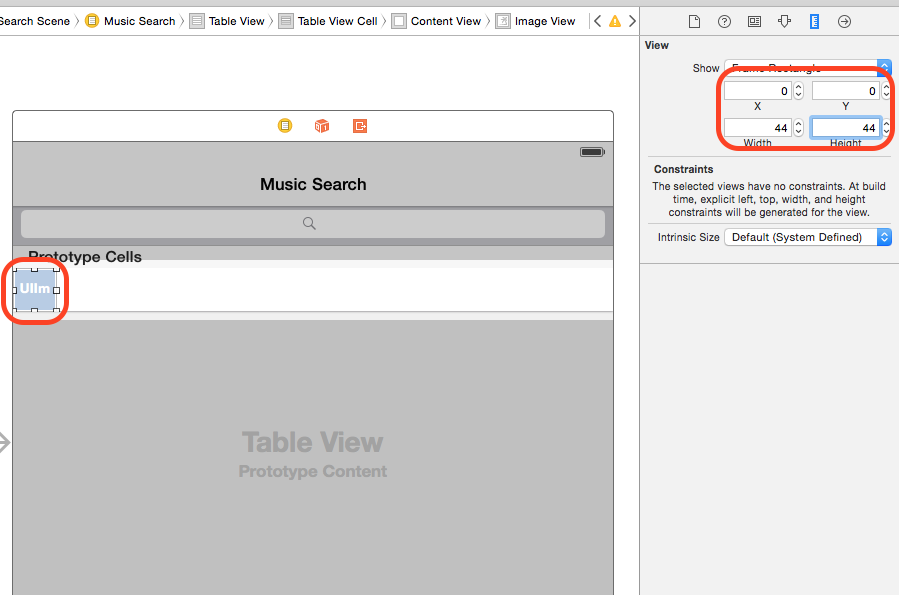
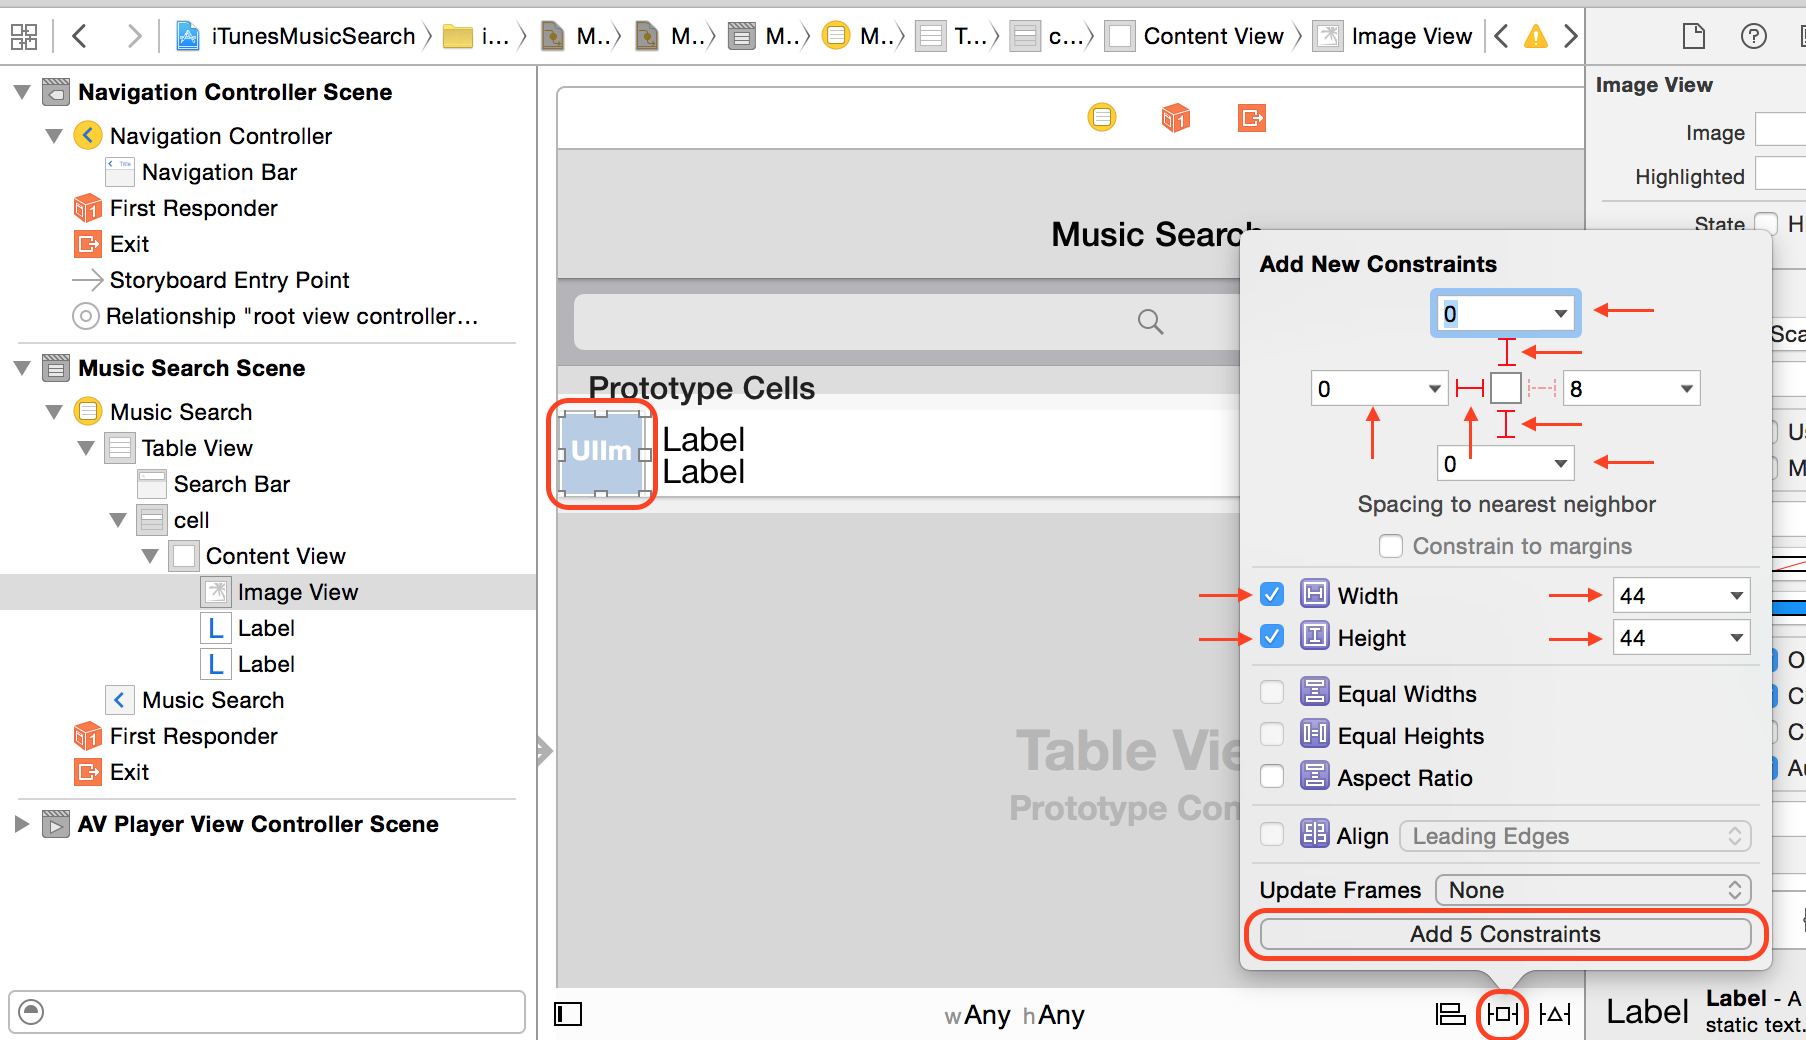
UIImageViewの上下左をCellから0 pxの距離に固定、幅と高さを44 pxに固定します。
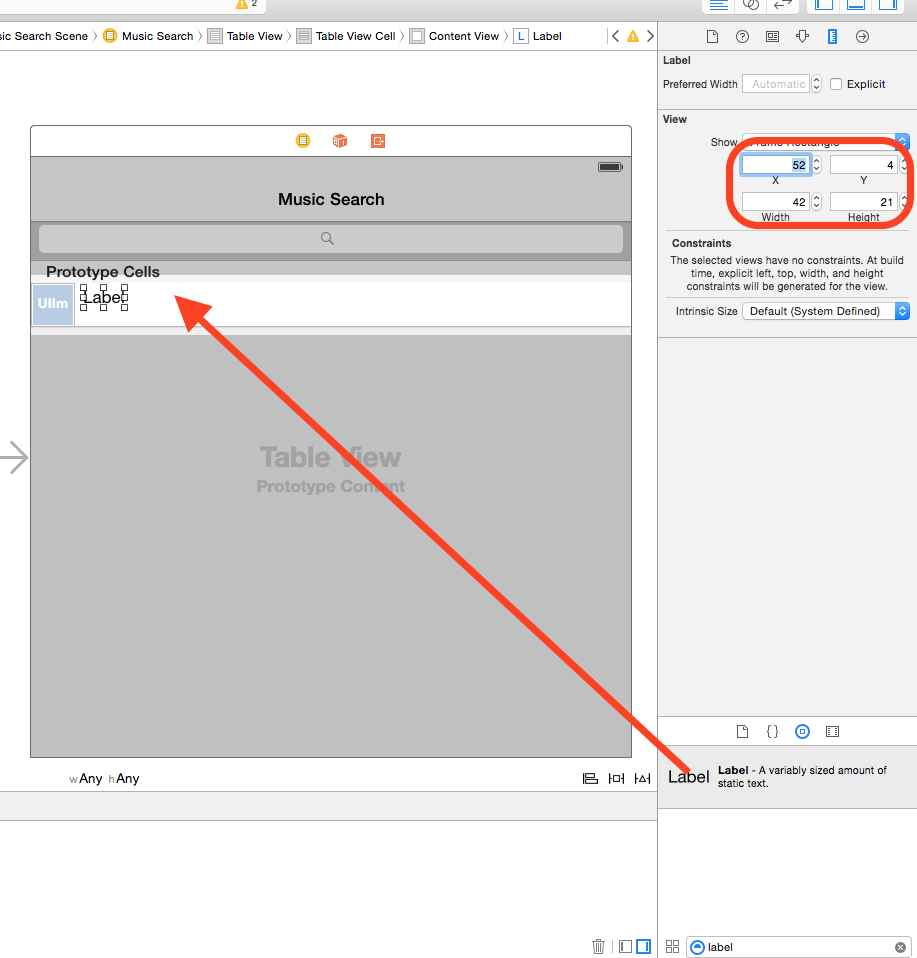
上のUILabelの上をCellから4 pxの距離に固定、右を8 pxの距離に固定します。
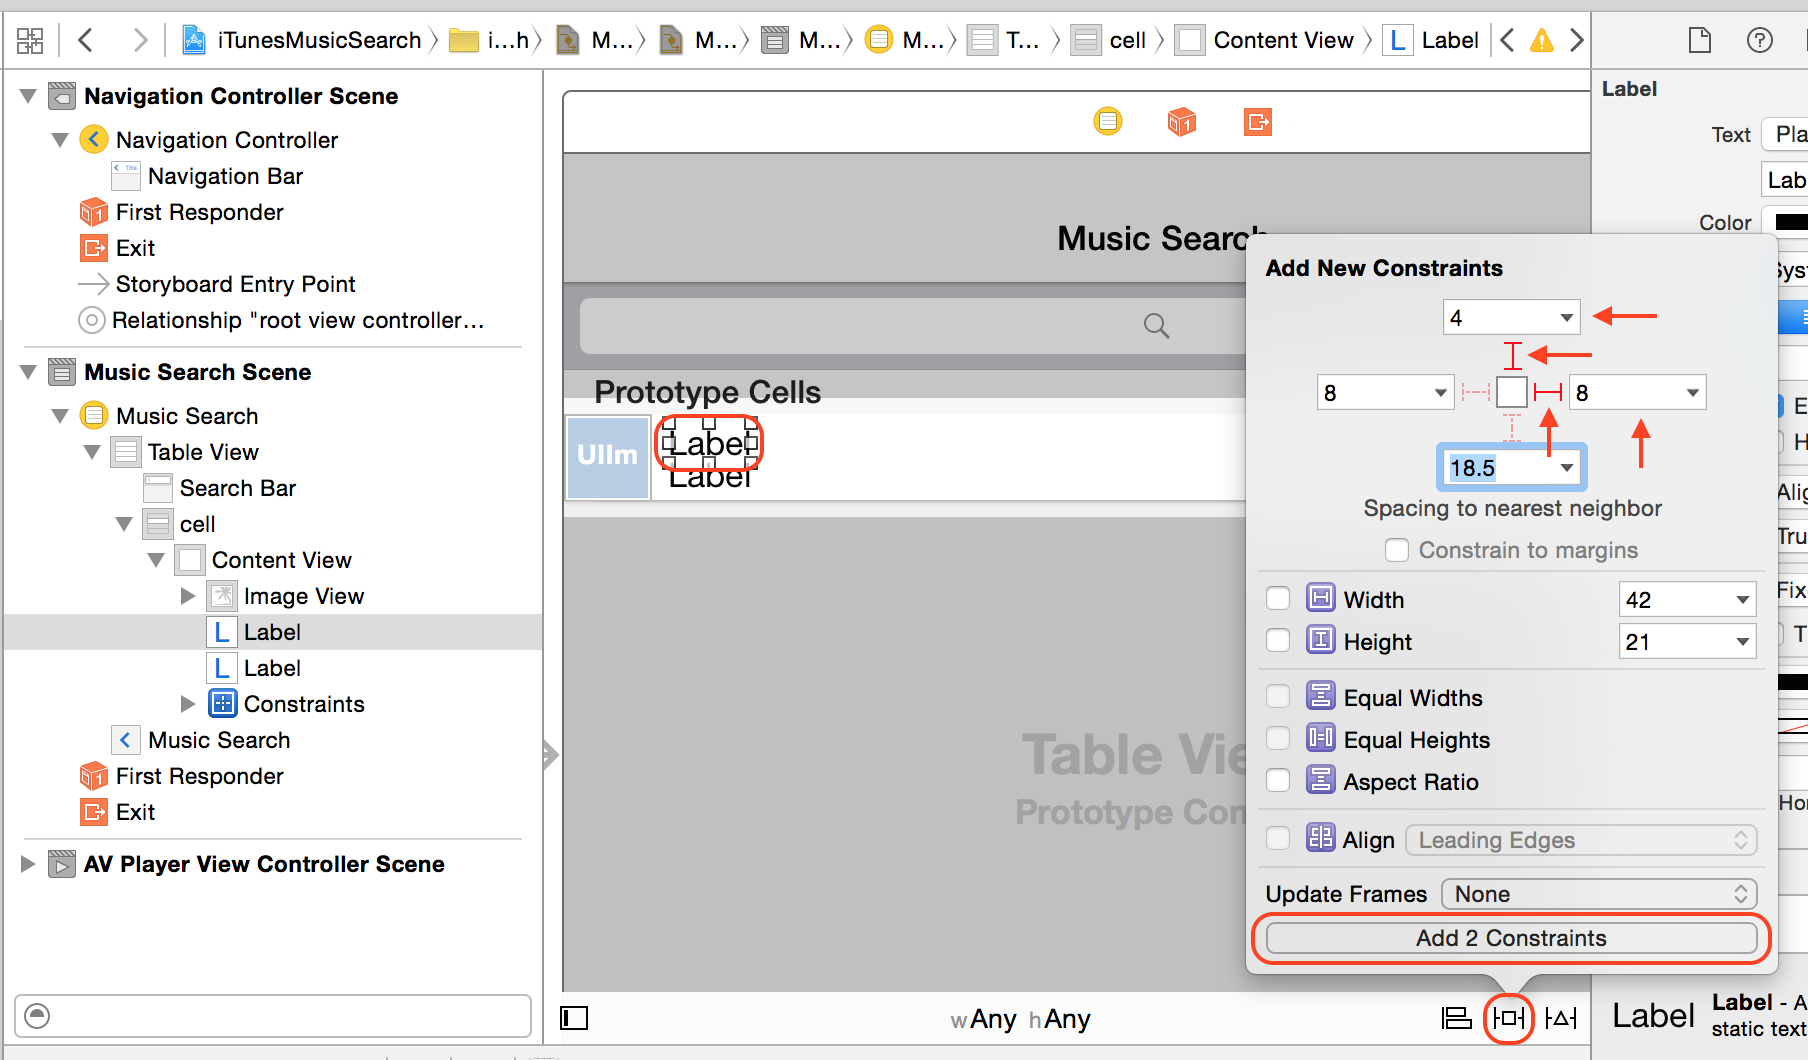
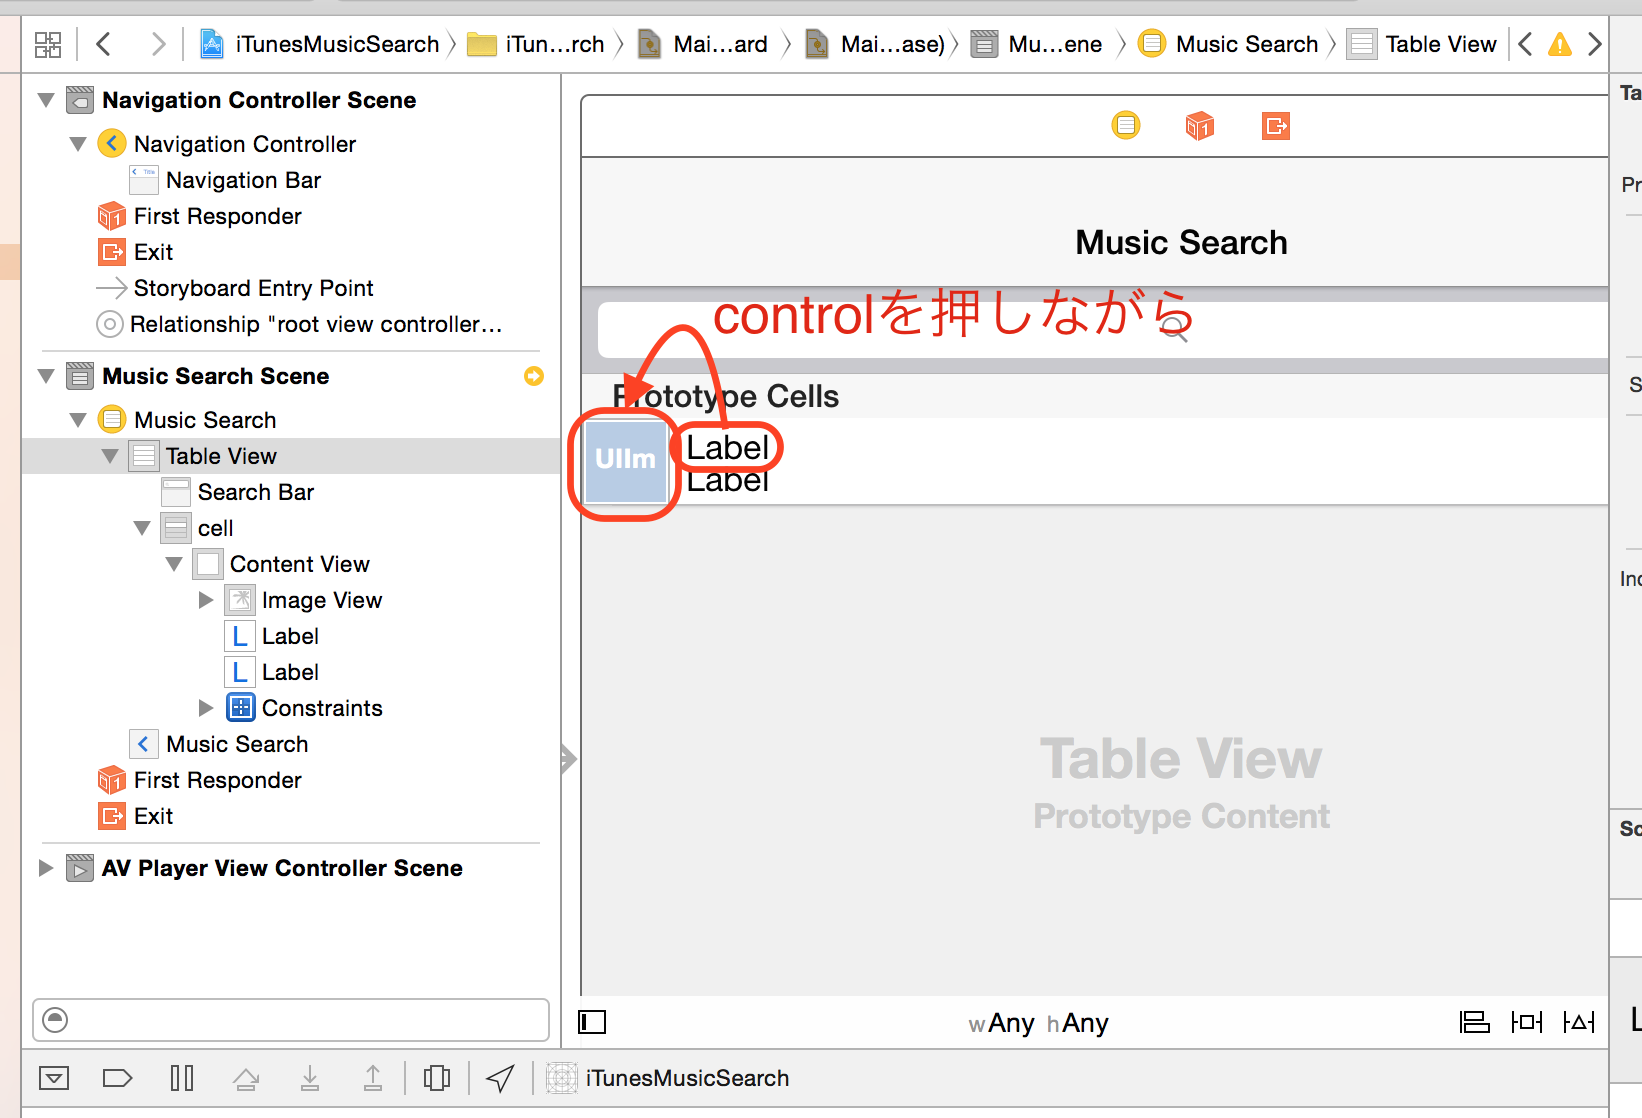
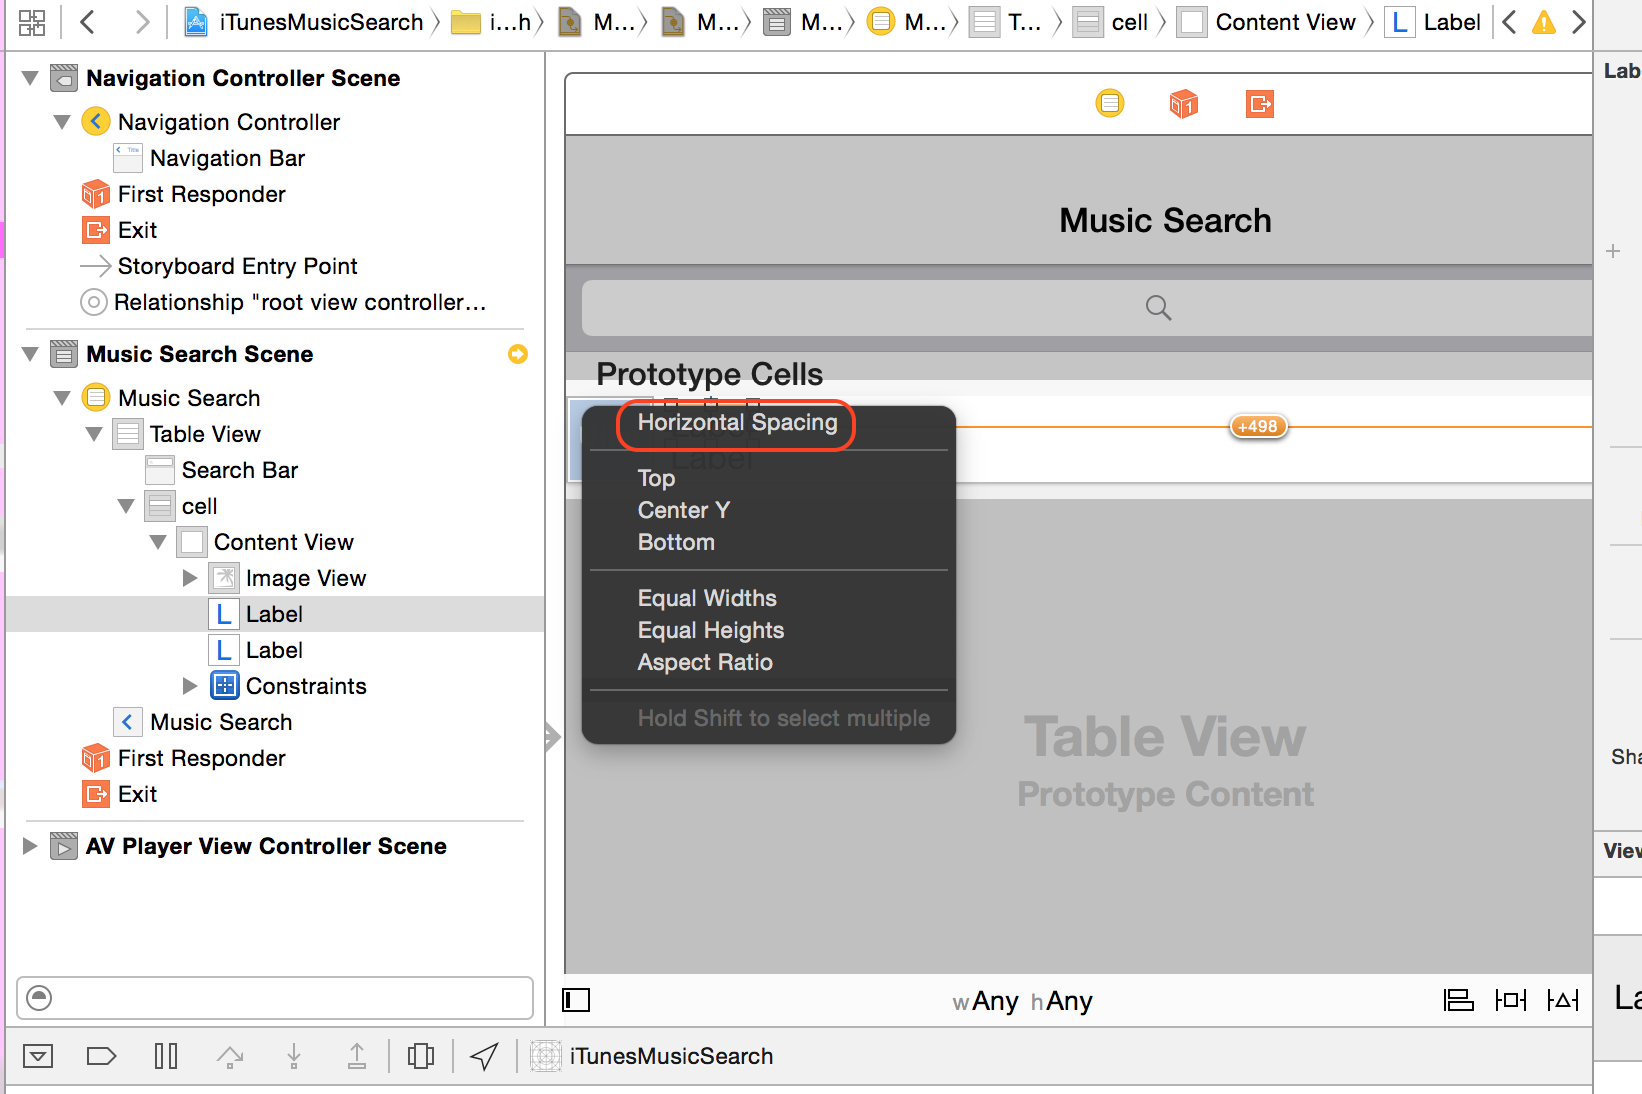
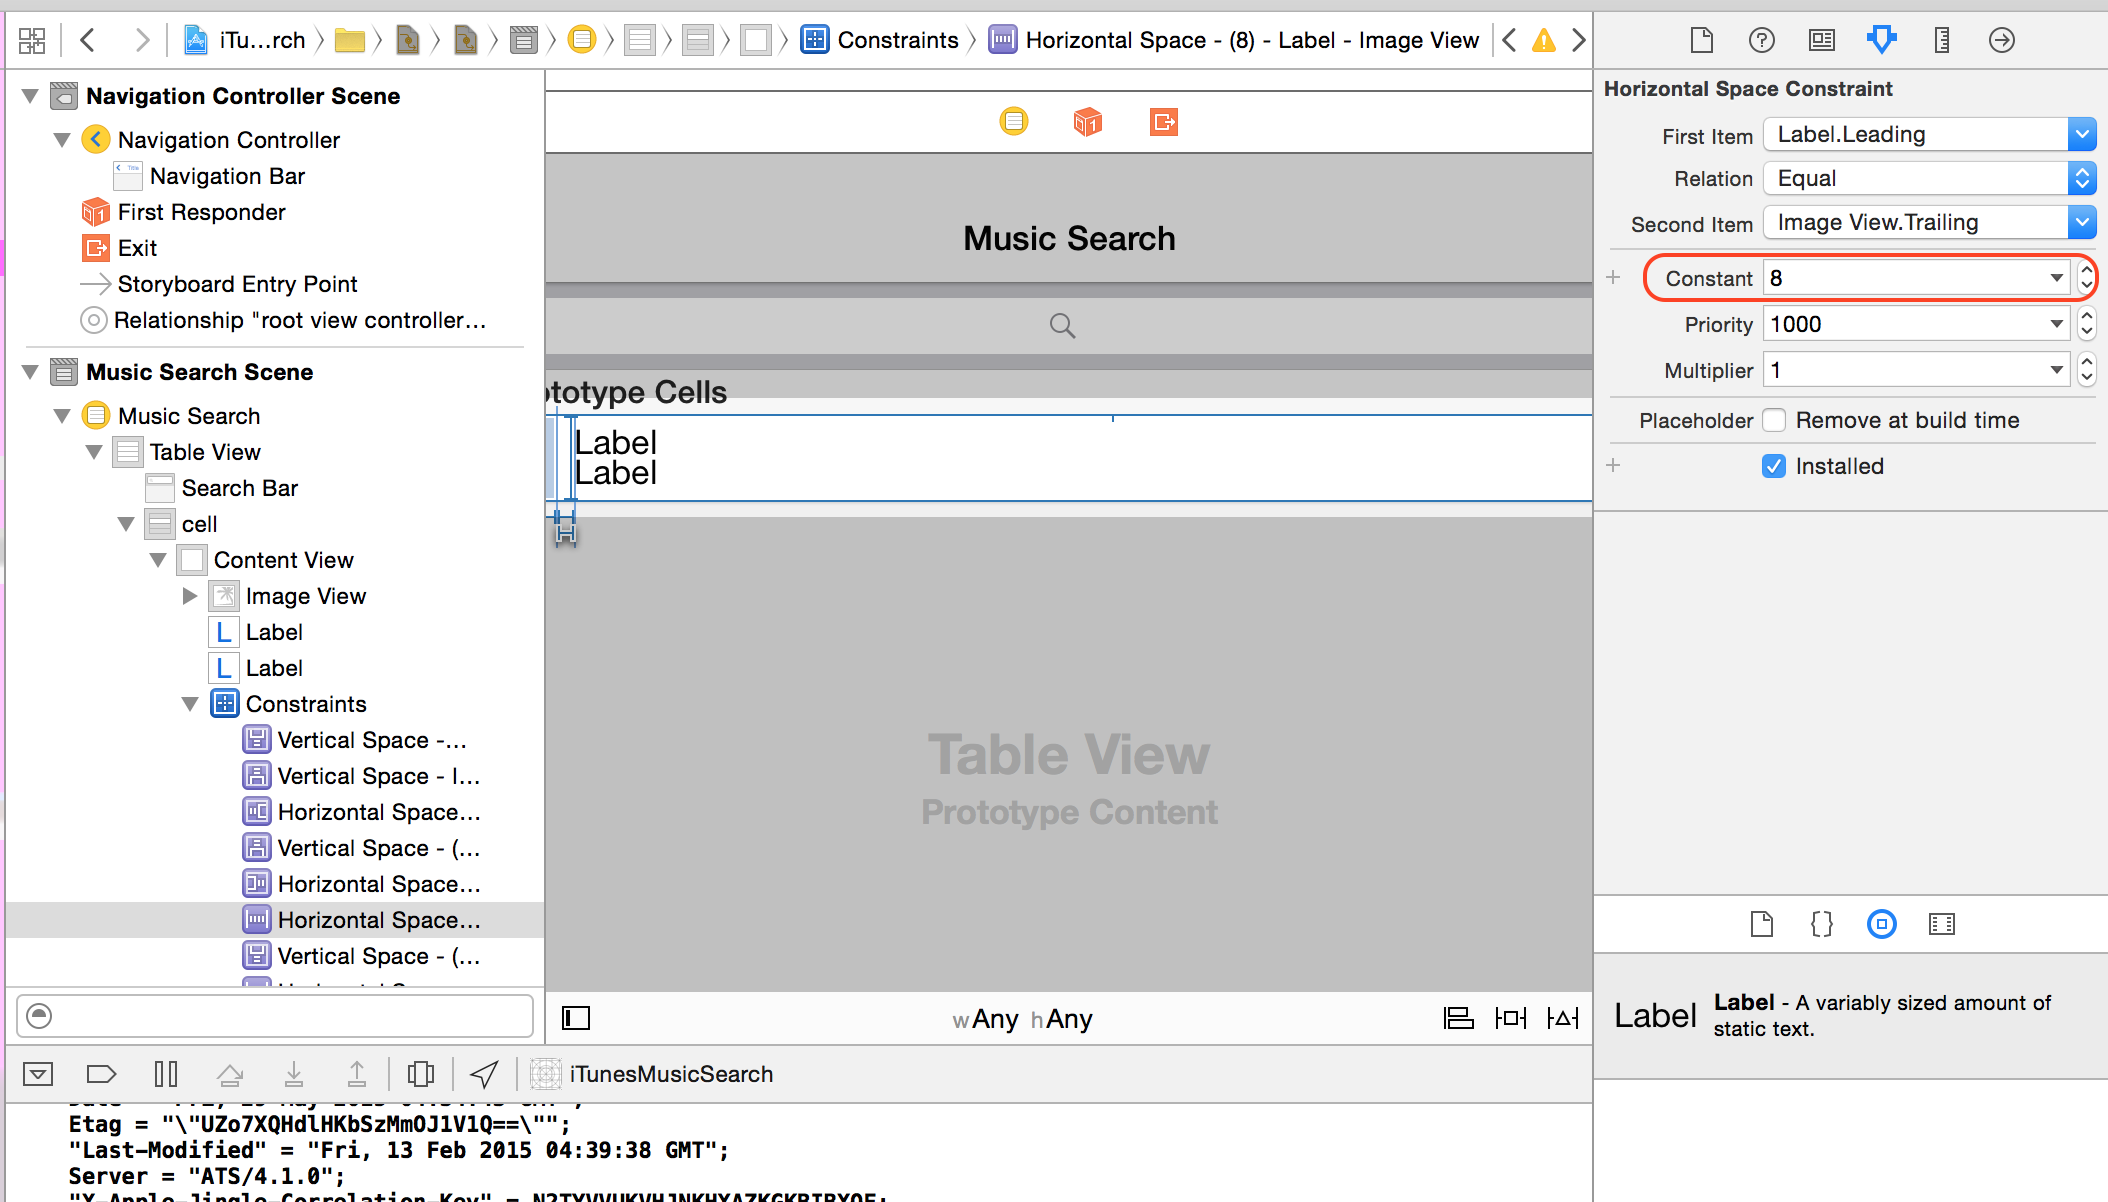
UIImageViewと上のUILabelの間の水平距離を8 pxに固定します。
下のUILabelの下をCellから4 pxの距離に固定、右を8 pxの距離に固定します。
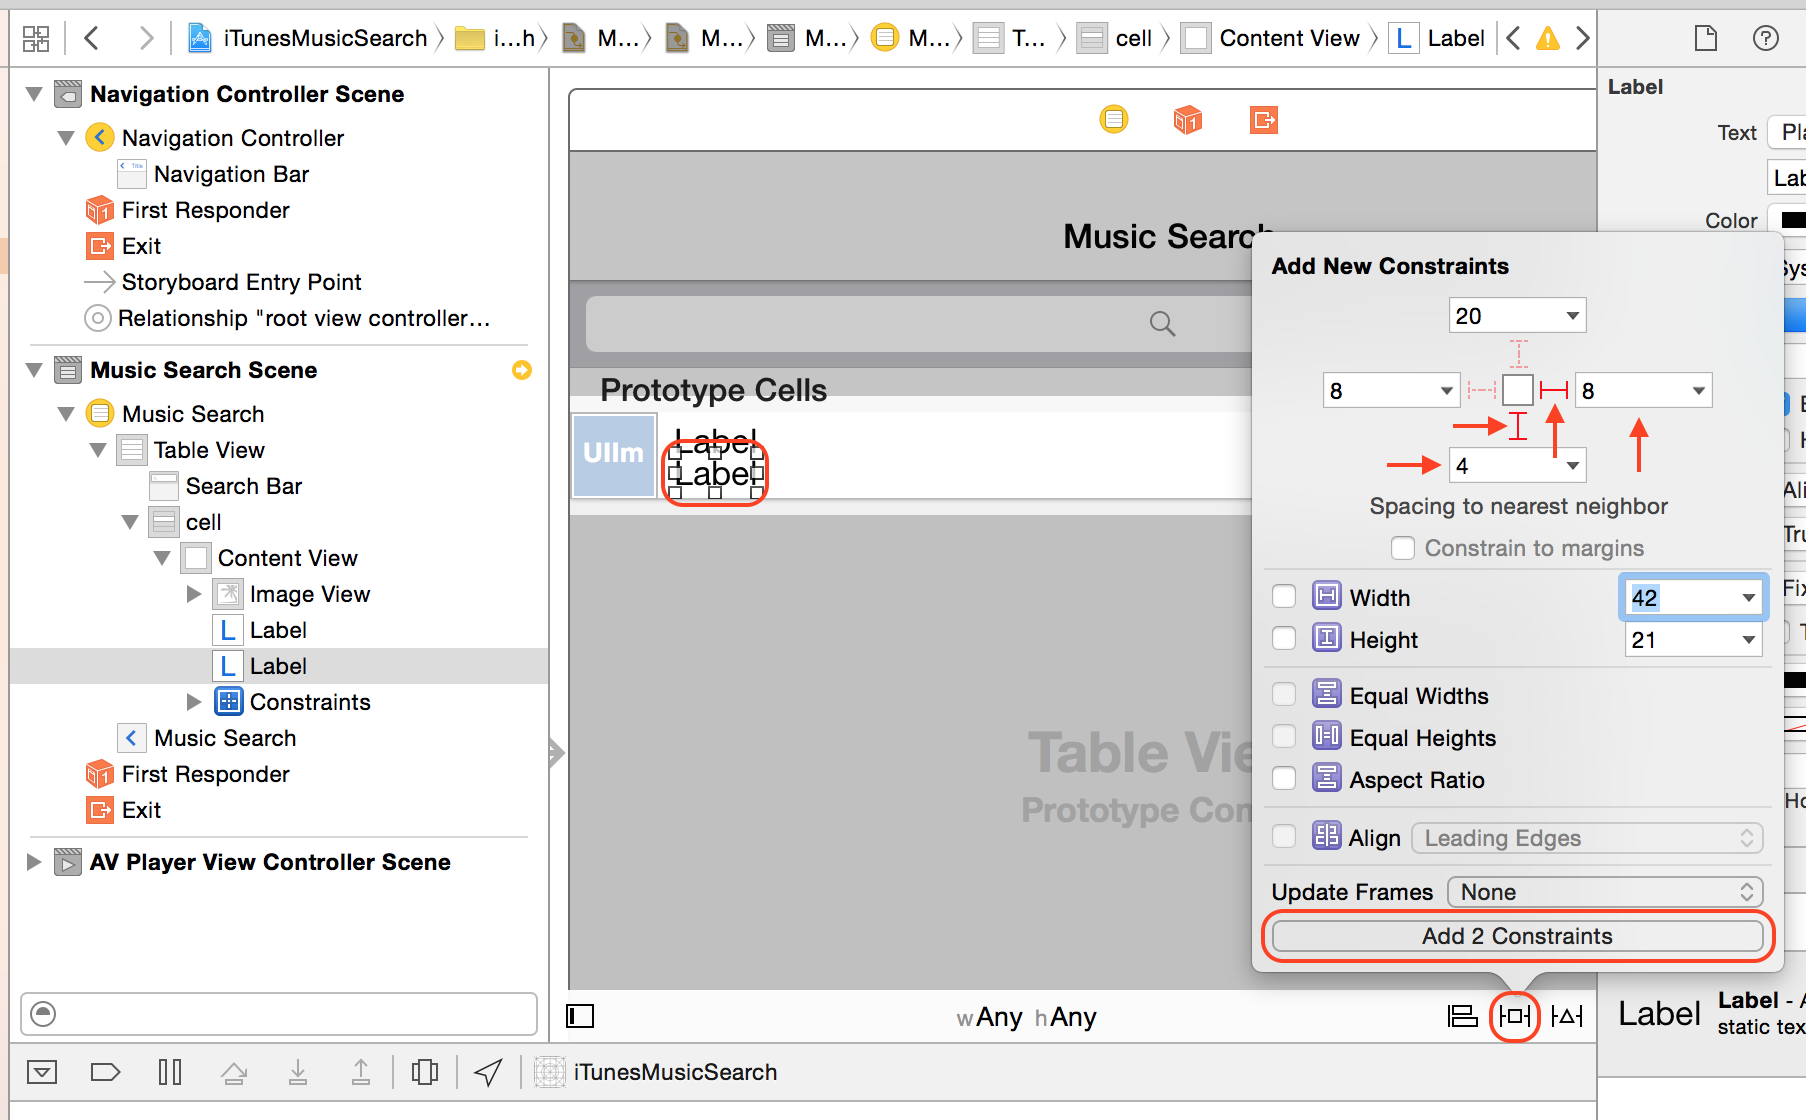
UIImageViewと下のUILabelの間の水平距離を8 pxに固定します。

Auto Layoutとプレビューに矛盾があるため、警告(黄色の矢印)が表示されています。警告をクリックして、Auto Layoutに合わせてプレビューを自動修正します。
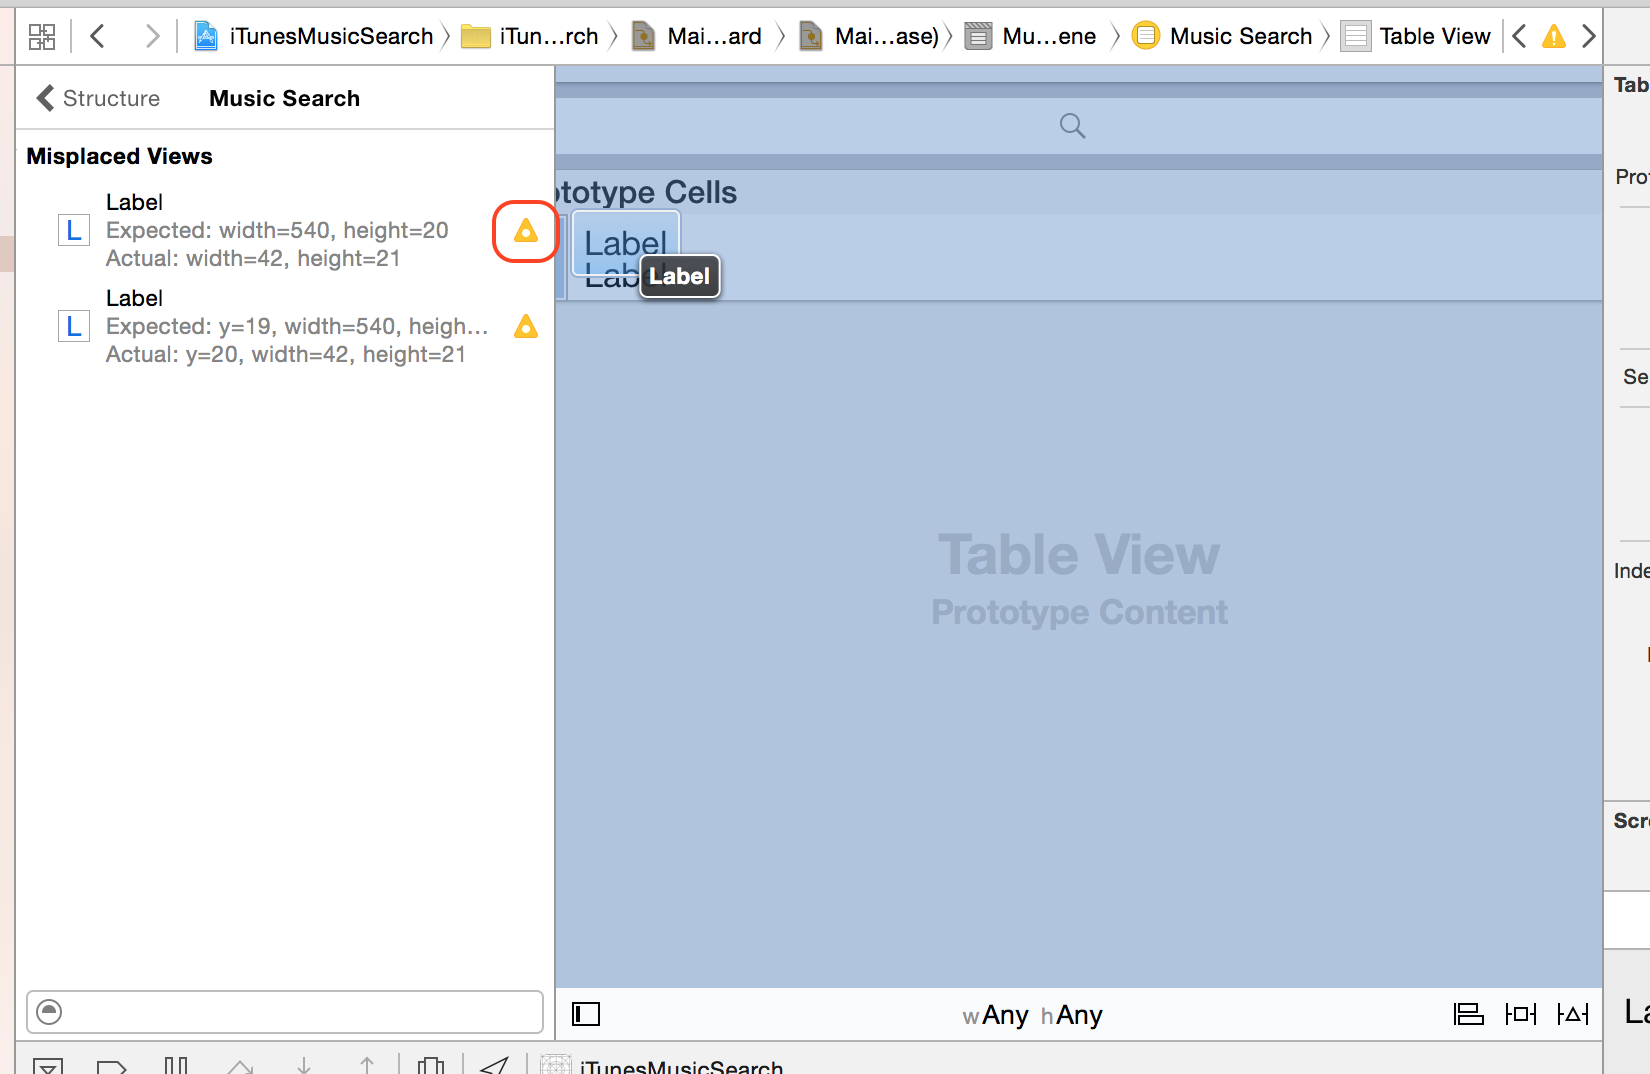
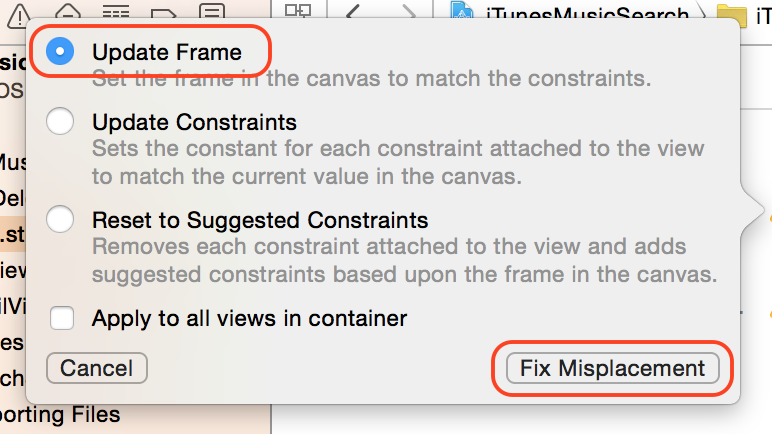
Update Frameは、Auto Layoutに合わせてプレビューを自動修正します。Update Constraintsは、プレビューに合わせてAuto Layoutを自動修正します。Update ConstraintsでAuto Layoutの方を自動修正されるとわけがわからなくなるので、自分でAuto Layoutを正しく設定した後でUpdate Frameでプレビューを自動修正させた方がいいです。
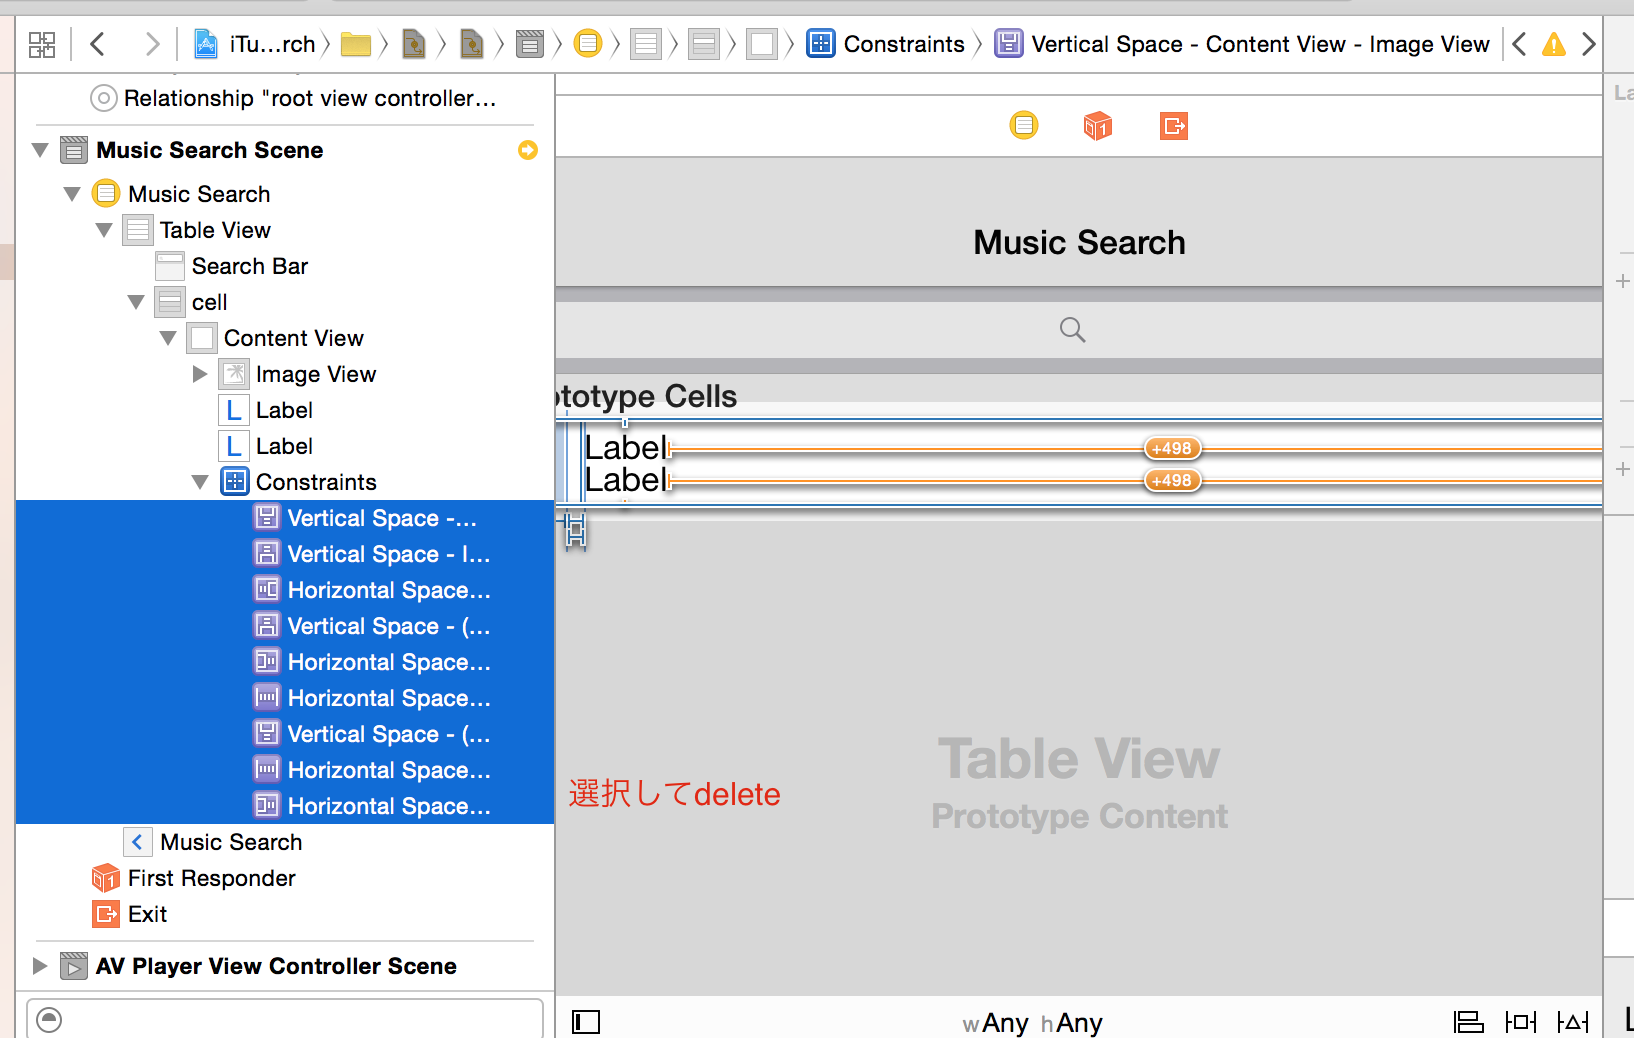
Auto Layoutが不足している、重複しているAuto Layoutがある、Auto Layout同士が矛盾している、などの場合は、警告(黄色の矢印)ではなく、エラー(赤色のバツ)が表示されます。エラーの状態によっては、Xcodeが修正案を提案してくれますが、どこが自動修正されたのかよくわからず、正しく動かない場合もあるので、自分で全て設定した方がいいです。わけがわからなくなった場合は、面倒くさいですが、一度Auto Layoutを削除して、設定し直します。
実行してみましょう
command + ←とcommand + →でシミュレータが回転します。標準設定では、逆さ位置は無効になっているので、回転して逆さにすると、直前の横のままの画面が表示されます(4方向のうち、どこを有効するかは設定可能)。
詳細画面に遷移して、試聴する
StoryboardにAVPlayerViewControllerを追加する
Main.storyboardを開きます。
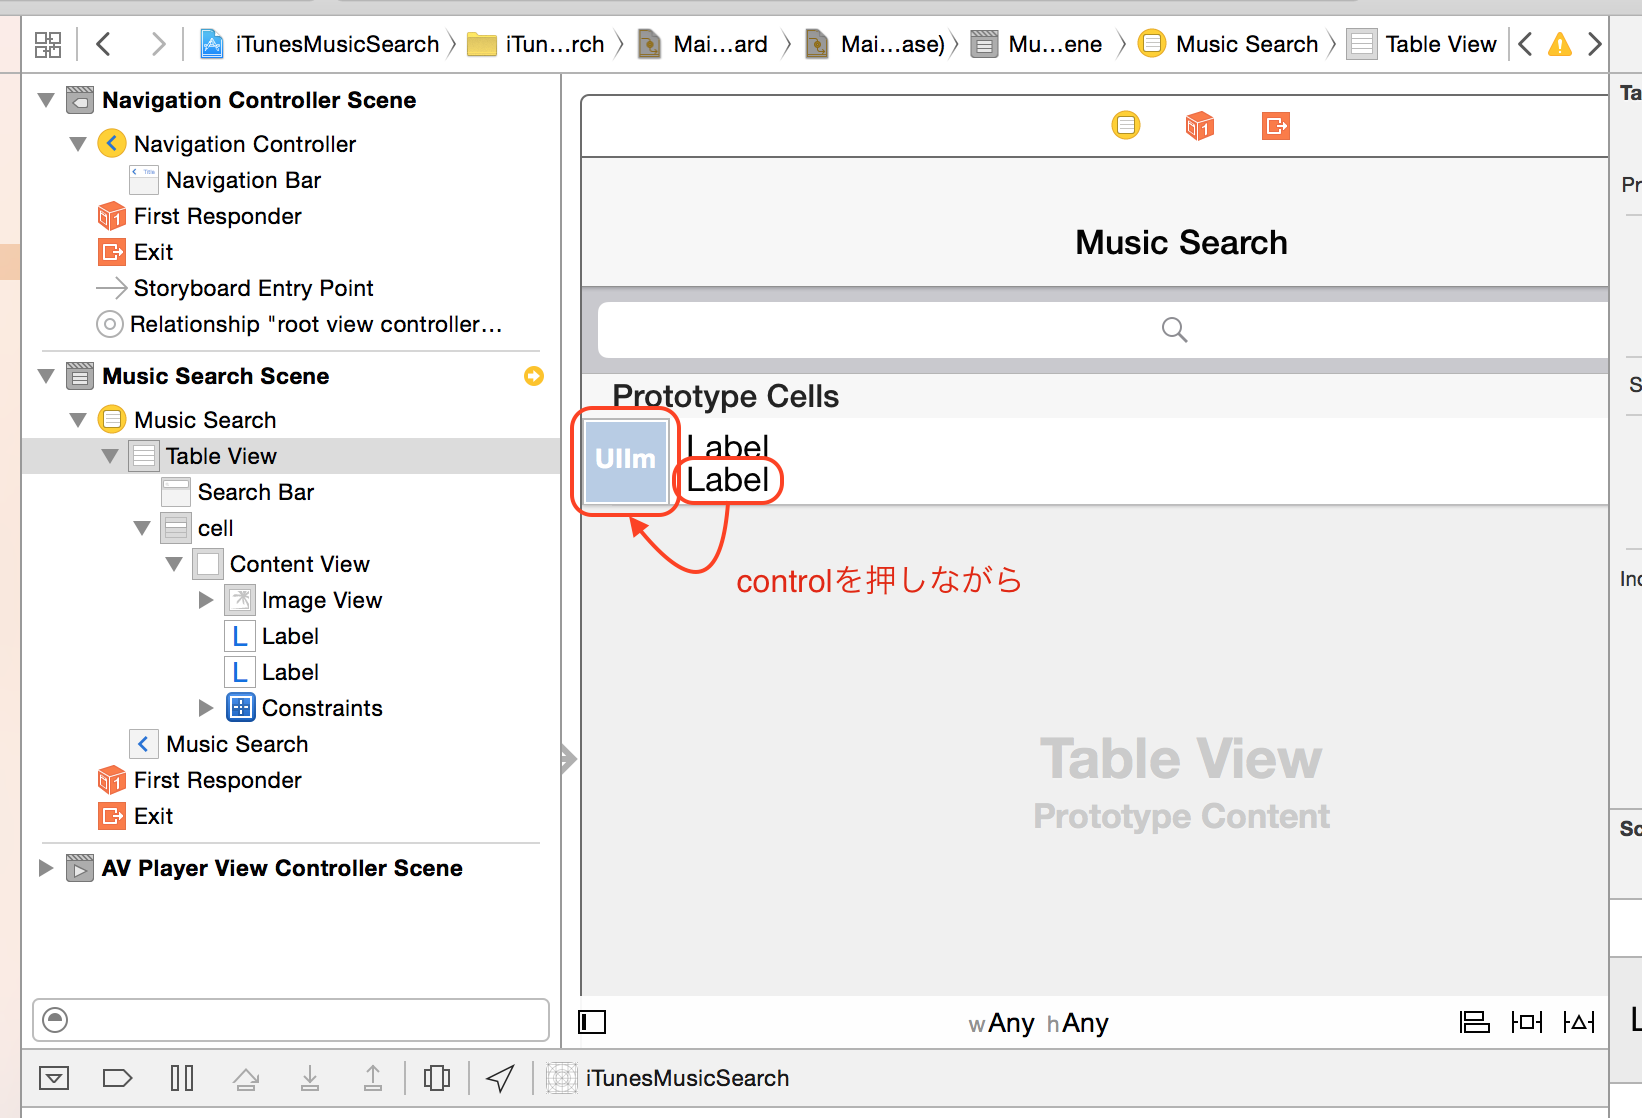
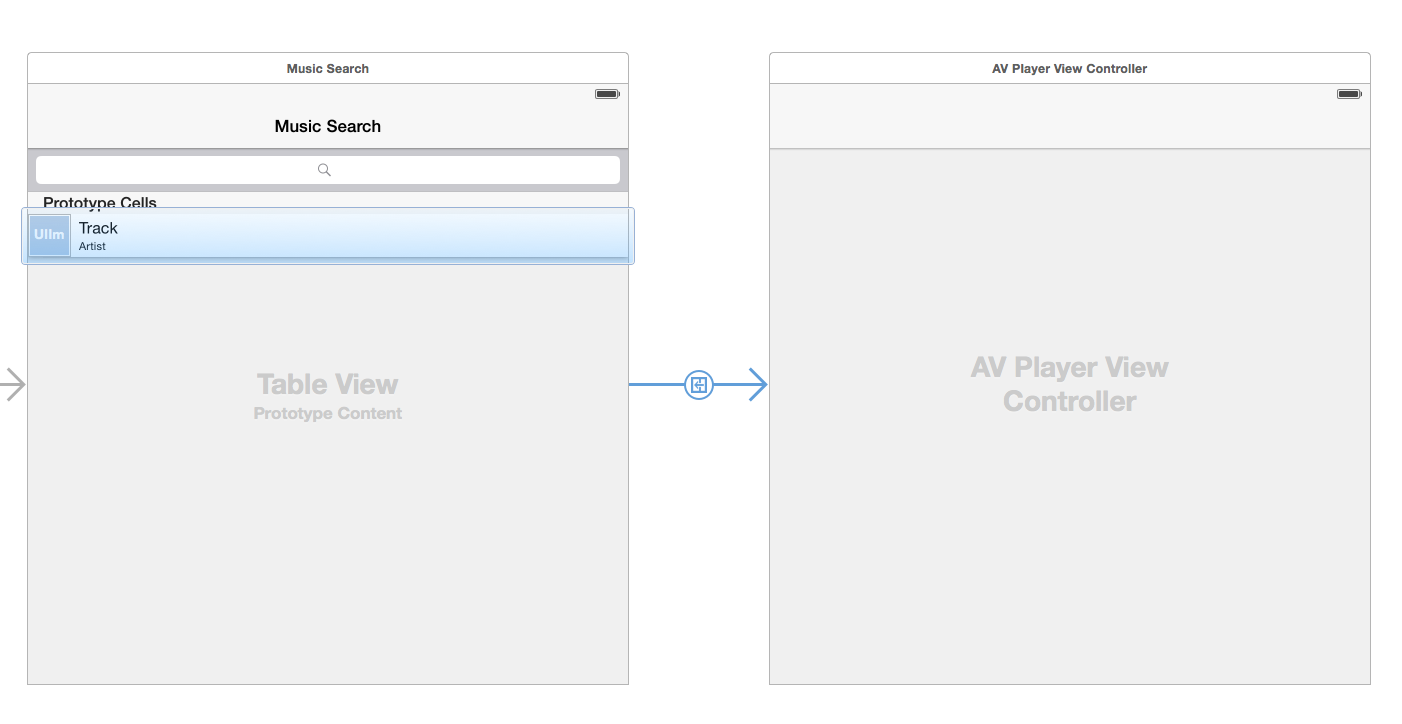
UITableViewCellからAVPlayerViewControllerへsegue(show)をつなぐ
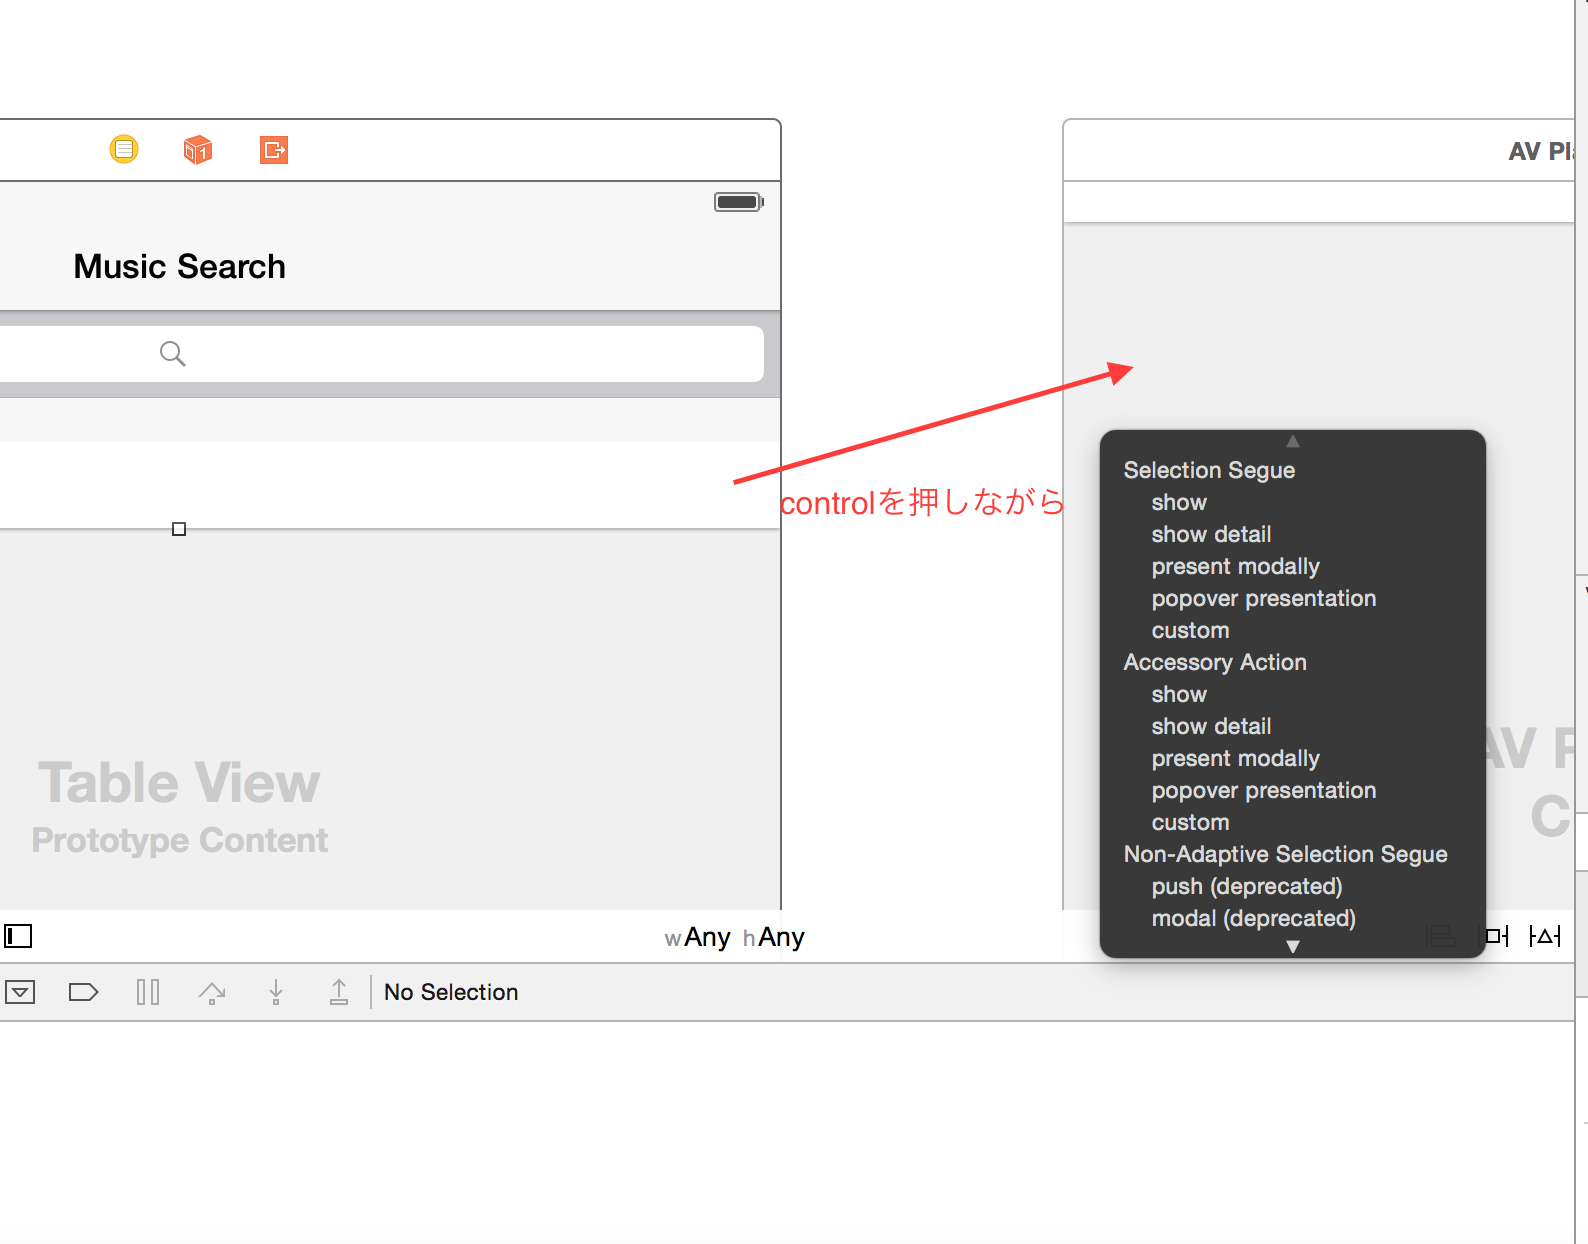
矢印をクリックしてハイライトしてるときに、同時にCell全体がハイライトされていれば正しく接続されています。UILabelなど、Cellの一部がハイライトしている場合は、矢印をdeleteで消してやり直し。
Cellが掴みづらいときは、こっちの方法でもOK。

DetailViewControllerを作る
File > New > File... > iOS Source > Cocoa Touch Classから作成します。
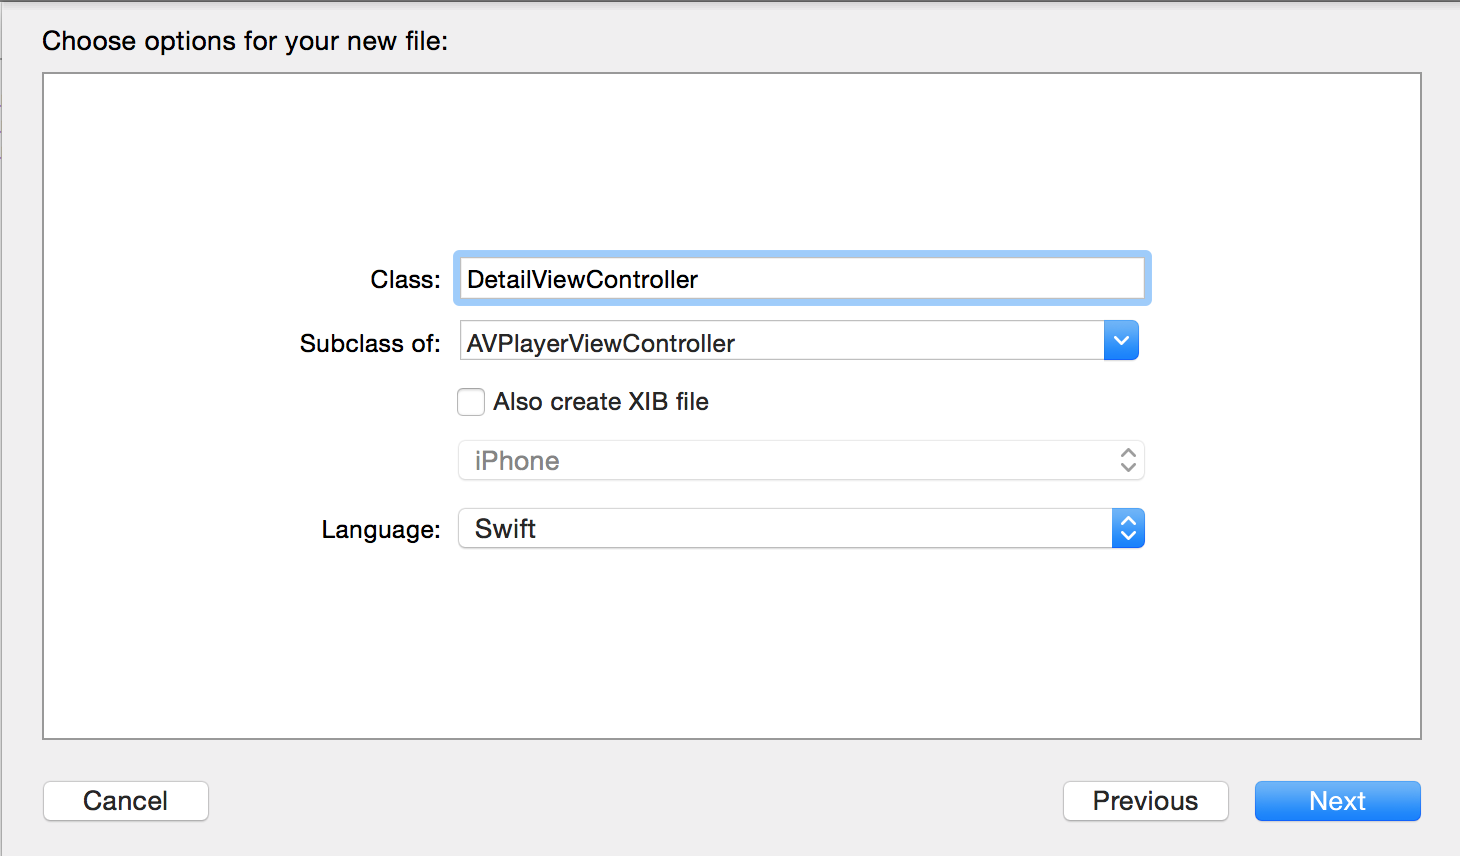
DetailViewController.swiftを開いて、AVFoundationとAVKitのimportを追加します。
import UIKit
import AVFoundation
import AVKit

class DetailViewController: AVPlayerViewController {

}
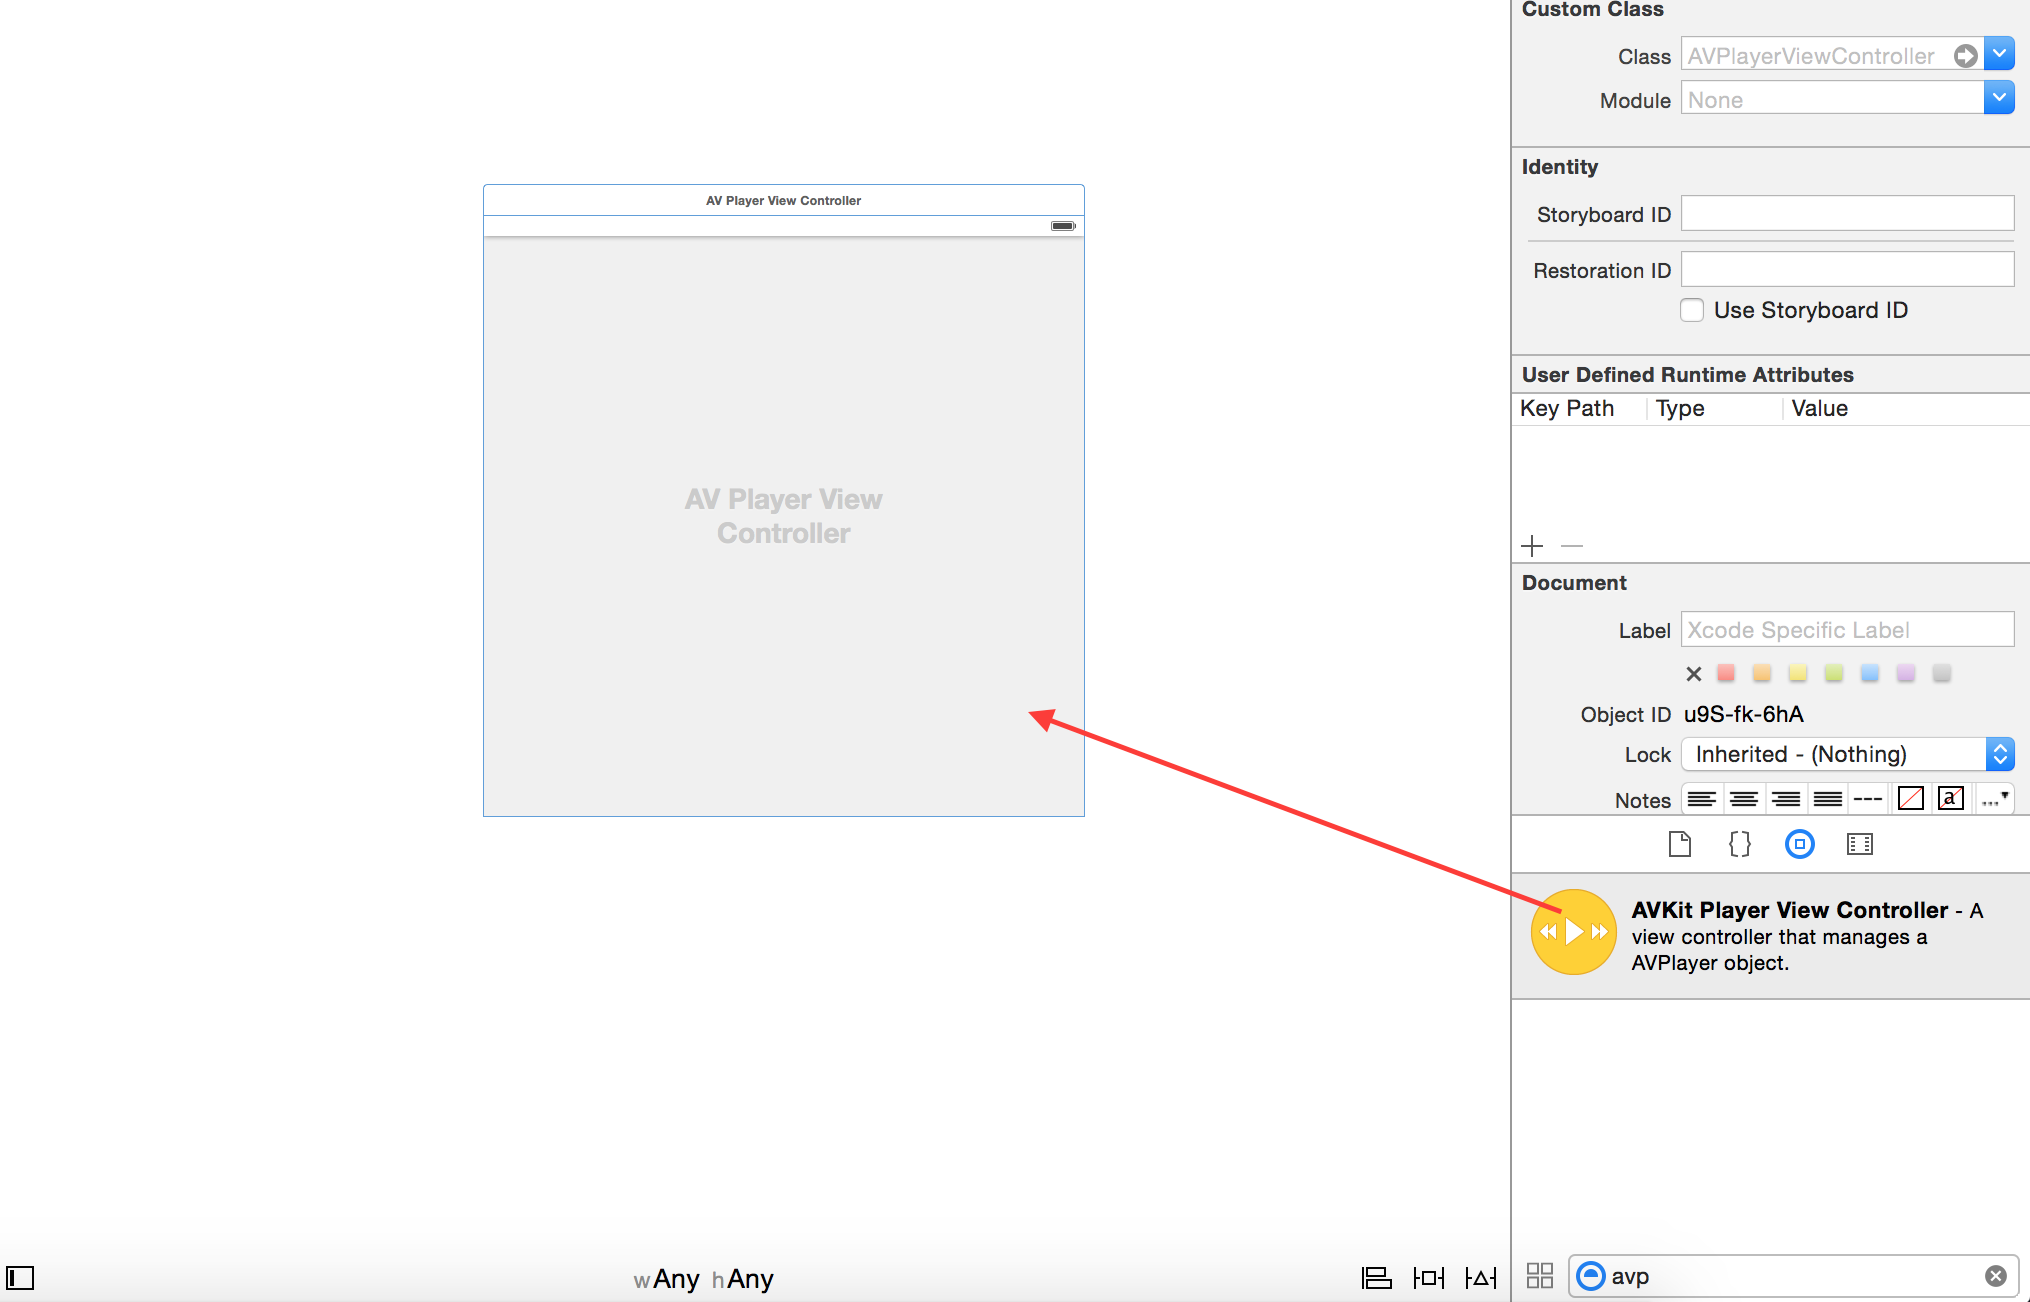
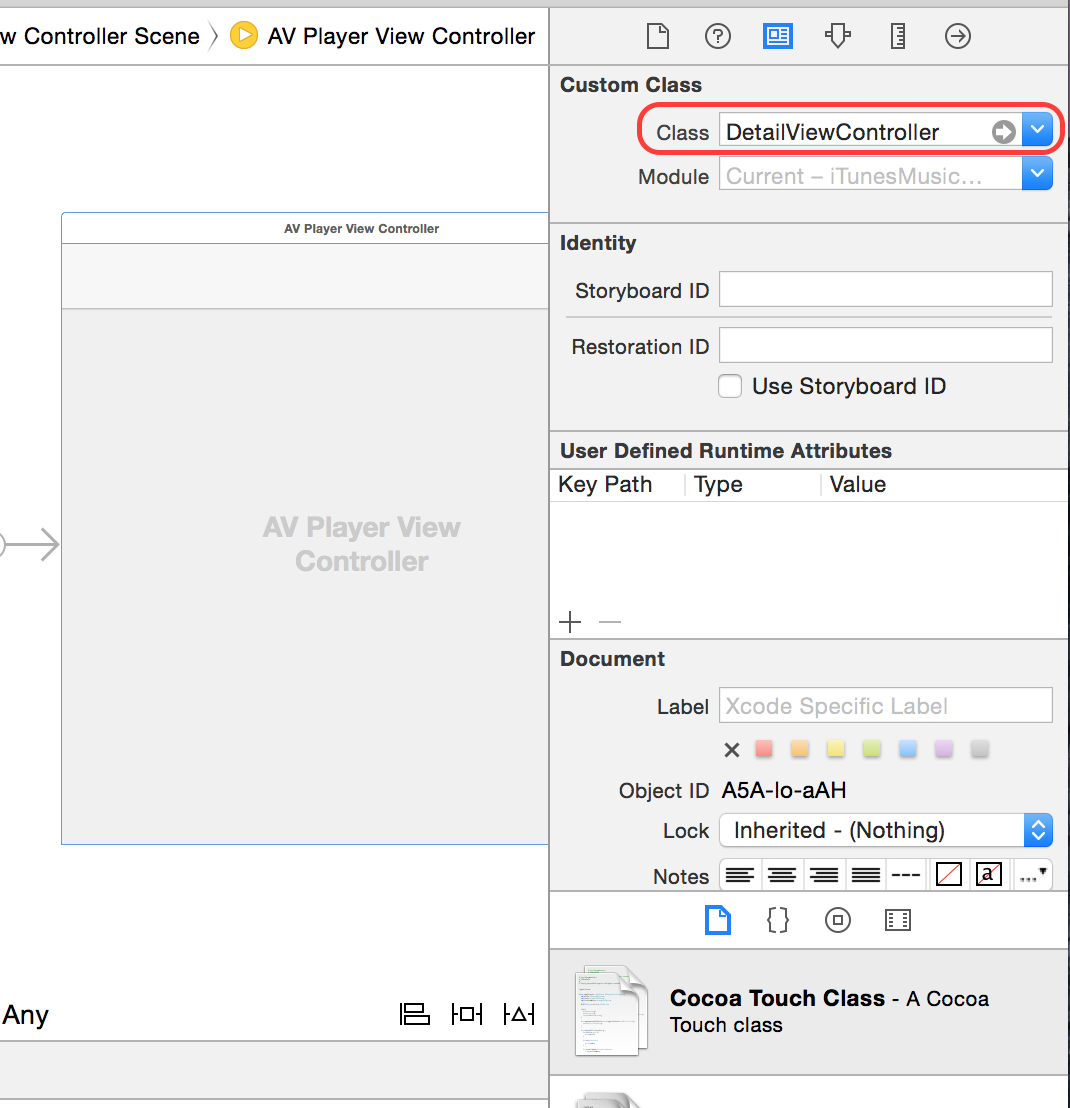
Main.storyboardを開いて、DetailViewControllerをAVPlayerViewControllerのCustom Classに設定します。
DetailViewControllerにデータを渡す
DetailViewController.swiftを開いて、以下のプロパティを追加します。
class DetailViewController: AVPlayerViewController {

    var trackName: String!
    var previewUrl: String?
}
ListViewController.swiftを開いて、ListViewControllerからDetailViewControllerのプロパティを設定します。prepareForSegue:sender:は、segue(≒ 画面遷移)が実行される前に呼ばれるところです。おそらく下の方に、もともとコメントアウトされて書かれてますので、コメントを外して書いてください(「/*」と「*/」を消します)。
override func prepareForSegue(segue: UIStoryboardSegue, sender: AnyObject?) {
    if let vc = segue.destinationViewController as? DetailViewController {
        if let indexPath = tableView.indexPathForSelectedRow(), result = results?[indexPath.row] {
            vc.trackName = result["trackName"] as! String
            vc.previewUrl = result["previewUrl"] as? String
        }
    }
}
AVPlayerを使って再生する
DetailViewController.swiftを開いて、以下を追加します。viewDidLoadは、ViewControllerの準備ができたら呼ばれるところです。
class DetailViewController: AVPlayerViewController {

    override func viewDidLoad() {
        super.viewDidLoad()

        title = trackName // title設定

        if let previewUrl = previewUrl {
            player = AVPlayer(URL: NSURL(string: previewUrl))
            player.play() // 自動再生
        }
    }
}
実行してみましょう
おわり。お疲れさまでした。
完成品はここにあります
https://codebreak.com/git/kenchan1837/iTunesMusicSearch/
CocoaPodsをインストールして、ターミナルでプロジェクトディレクトリに移動してpod installして、Finderでプロジェクトディレクトリに移動してxcworkspaceファイルからXcodeを起動して、再生ボタンを押したら動きます。