7
9

Delete article

Deleted articles cannot be recovered.

Draft of this article would be also deleted.

Are you sure you want to delete this article?

More than 5 years have passed since last update.

Python3_PyGame で2Dゲーム制作 (画像の表示)

Last updated at Posted at 2017-08-08

#Python3とPyGameでゲーム制作メモ ( part2, 画像の表示 )
前回 (Python3とPyGameでゲーム制作メモ (part1,準備編)) の続きでゲーム制作に必要な機能をメモ.仕組みや詳細な説明は省いてありますが,知りたい場合は参考文献や他の記事などを見るとその辺はしっかり理解できると思います.

####開発環境
・macOS Sierra(10.12.5)
・Python(3.6.2)
・PyGame(1.9.3)

####参考URL
・Python公式:https://www.python.org/
・PyGame公式:https://www.pygame.org/news
・PyGameドキュメント:https://www.pygame.org/docs/
・PyGame Wikipedia:https://ja.wikipedia.org/wiki/Pygame

##画像をディスプレイに表示
画像を読み込み image = pygame.image.load("./img/filename.png")
パスやファイル名は最適なものに変更してください.

メインループでそれを描画するだけ screen.blit(image,(20,50))

前回のウィンドウ表示のプログラムにこの2つを追加すれば,画像が表示される.

draw_image.py
#_*_coding:utf-8_*_                                                                                                                     
#画像を表示する                                                                                                                         
import sys
import pygame
from pygame.locals import *

pygame.init() #pygameの初期化                                                                                                           
screen = pygame.display.set_mode((400, 300)) #ウィンドウの大きさ                                                                       
pygame.display.set_caption("PyGame") #タイトルバー                                                                                      
image = pygame.image.load("./img/maru.png") #画像を読み込む(今回追加したとこ)                                                                             

# mainループ                                                                                                                           
def main():
    while True:
        screen.fill((0,0,0)) #ウィンドウの背景色                                                                                       
        #イベントの取得                                                                                                                 
        for event in pygame.event.get():
            if event.type == QUIT:
                pygame.quit() #閉じるボタンが押されたらプログラムを終了                                                                 
                sys.exit
        screen.blit(image, (20,50)) #画像を描画(今回追加したとこ)
        pygame.display.update()

if __name__ == '__main__':
    main()


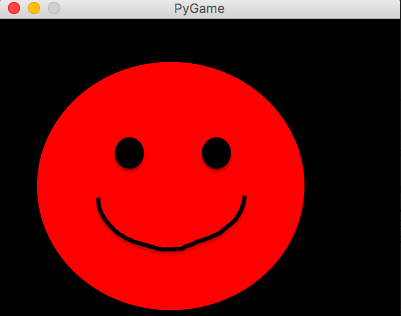
これで画像が表示される!

スクリーンショット 2017-08-08 16.31.26.png

ここで使った画像は自分で簡易的に作ったものですが,他の画像でも正しくできます.また,今回画像サイズは大きめにしてあります.


####参考文献

  1. 田中賢一郎 (2017) 「ゲームを作りながら楽しく学べるPythonプログラミング」 インプレスR&D
  2. Python3とPyGameでゲーム制作メモ (part1,準備編)
  3. Python3とPyGameでゲーム制作メモ ( part3, キー操作 )
7
9
2

Register as a new user and use Qiita more conveniently

  1. You get articles that match your needs
  2. You can efficiently read back useful information
  3. You can use dark theme
What you can do with signing up
7
9

Delete article

Deleted articles cannot be recovered.

Draft of this article would be also deleted.

Are you sure you want to delete this article?