英語: https://github.com/aurelia/documentation/blob/master/English/get-started.md
日本語: https://github.com/aurelia/documentation/blob/master/Japanese/get-started.md
Angularでも試そうかと思ったら、もう古いって言われたので、Aureliaを試していきます。次世代のJavascritフレームワークだそうです。
日本語のドキュメントがあるので、ここでは要点のみピックアップしていきます。なお環境はcloud9です。
Get Started
- 単純なアプリをつくってAueliaのコンセプトを学ぶ
- JavaScript, HTML, CSS の知識要
Configuring Your Environment
- Node.js, npm を使います
- ビルド自動化用にgulpをいれます
npm install -g gulp - クライアントサイド用パッケージマネージャーとしてjspmをいれます。
npm install -g jspm - jspmはGitを使用するため、入れてなければ入れてください。またgithubにアクセスするため
jspm registry config githubを実行してください。パスワードまたはアクセストークンは表示されませんがコピーアンドペーストで入力できました。
>jspm registry config github
Would you like to set up your GitHub credentials? [yes]:yes
     If using two-factor authentication or to avoid using your password you can generate an access token at https://github.com/settings/applications.

Enter your GitHub username:~~~~~~~
Enter your GitHub password or access token:
Would you like to test these credentials? [yes]:
ok   GitHub authentication is working successfully.
ok   Registry github configured successfully.
Setting up the Project Structure and Build
- https://github.com/aurelia/skeleton-navigation/releases からスケルトンを取得
- 解凍したフォルダ名を
navigation-appに変更 - srcフォルダ, index.html を削除
-
npm installを実行 -
jspm install -yを実行 - ここまではAurelia固有の作業はありません
Setting Up The HTML Page
- プロジェクトルートにindex.htmlを作成
- これはアプリケーション内の唯一のhtmlです
- system.jsはAureliaライブラリと自作のコードをロードします
- config.jsはjspmにより自動作成されるローダの設定です
- System.importによりaurelia-bootstrapperを読み込んでいます
- bootstrapperはaurelia-???(app)属性を検出し、該当エレメントに???(app)のview-modelとviewを適応します
- ???(app)はこの後作成します
index.html
<!doctype html>
<html>
  <head>
    <title>Aurelia</title>
    <link rel="stylesheet" type="text/css" href="jspm_packages/npm/font-awesome@4.3.0/css/font-awesome.min.css">
    <link rel="stylesheet" type="text/css" href="styles/styles.css">
  </head>
  <body aurelia-app>
    <script src="jspm_packages/system.js"></script>
    <script src="config.js"></script>
    <script>
      System.import('aurelia-bootstrapper');
    </script>
  </body>
</html>
Creating Your First Screen
- UIはviewとview-modelからなります
- viewはhtmlで書かれDOMに描画されます
- view-modelはjavascriptで書かれ、データと振る舞いを提供します
- データバインディングがviewとview-model間でなされます
- viewとview-modelの分離によりデザイナーとプログラマーがより協力しやすくなります
=
- srcフォルダを作成し、app.jsとapp.htmlを作成します
- これらはbootstrapperとaurelia-app属性により自動的に検出されます
- app.jsは新しいバージョンのjavascriptで記述されます
- view-modelを作るには、classを作成し、exportするだけです
app.js
export class Welcome{
  constructor(){
    this.heading = 'Welcome to the Aurelia Navigation App!';
    this.firstName = 'John';
    this.lastName = 'Doe';
  }

  get fullName(){
    return `${this.firstName} ${this.lastName}`;
  }

  welcome(){
    alert(`Welcome, ${this.fullName}!`);
  }
}
- viewはtemplateタグを持ちます
-
value.bind="firstName"によりinputがデータバインディングされます -
${fullName}によってテキストノードがデータバインディングされます -
submit.delegate="welcome()"によってイベントがバインディングされます
app.html
<template>
  <section>
    <h2>${heading}</h2>

    <form role="form" submit.delegate="welcome()">
      <div class="form-group">
        <label for="fn">First Name</label>
        <input type="text" value.bind="firstName" class="form-control" id="fn" placeholder="first name">
      </div>
      <div class="form-group">
        <label for="ln">Last Name</label>
        <input type="text" value.bind="lastName" class="form-control" id="ln" placeholder="last name">
      </div>
      <div class="form-group">
        <label>Full Name</label>
        <p class="help-block">${fullName}</p>
      </div>
      <button type="submit" class="btn btn-default">Submit</button>
    </form>
  </section>
</template>
cloud9上の場合、build/task/serve.jsを編集する必要があります。hostプロパティを追加しportプロパティを変更してください
  browserSync({
    open: false,
    host: process.env.IP,
    port: process.env.PORT,
-
gulp watchを実行しサーバを起動します - ブラウザからアクセスします。表示に多少時間がかかるようです。私の環境では10秒くらいかかりました。
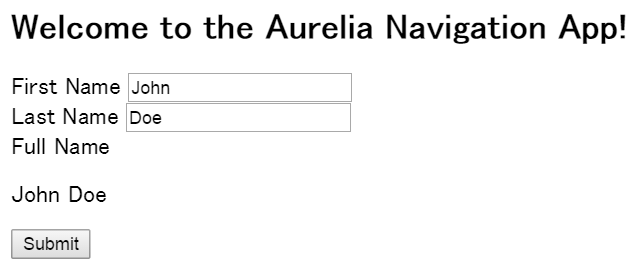
以下のような画面がでれば成功です。
切りがいいので一端切ります。次回