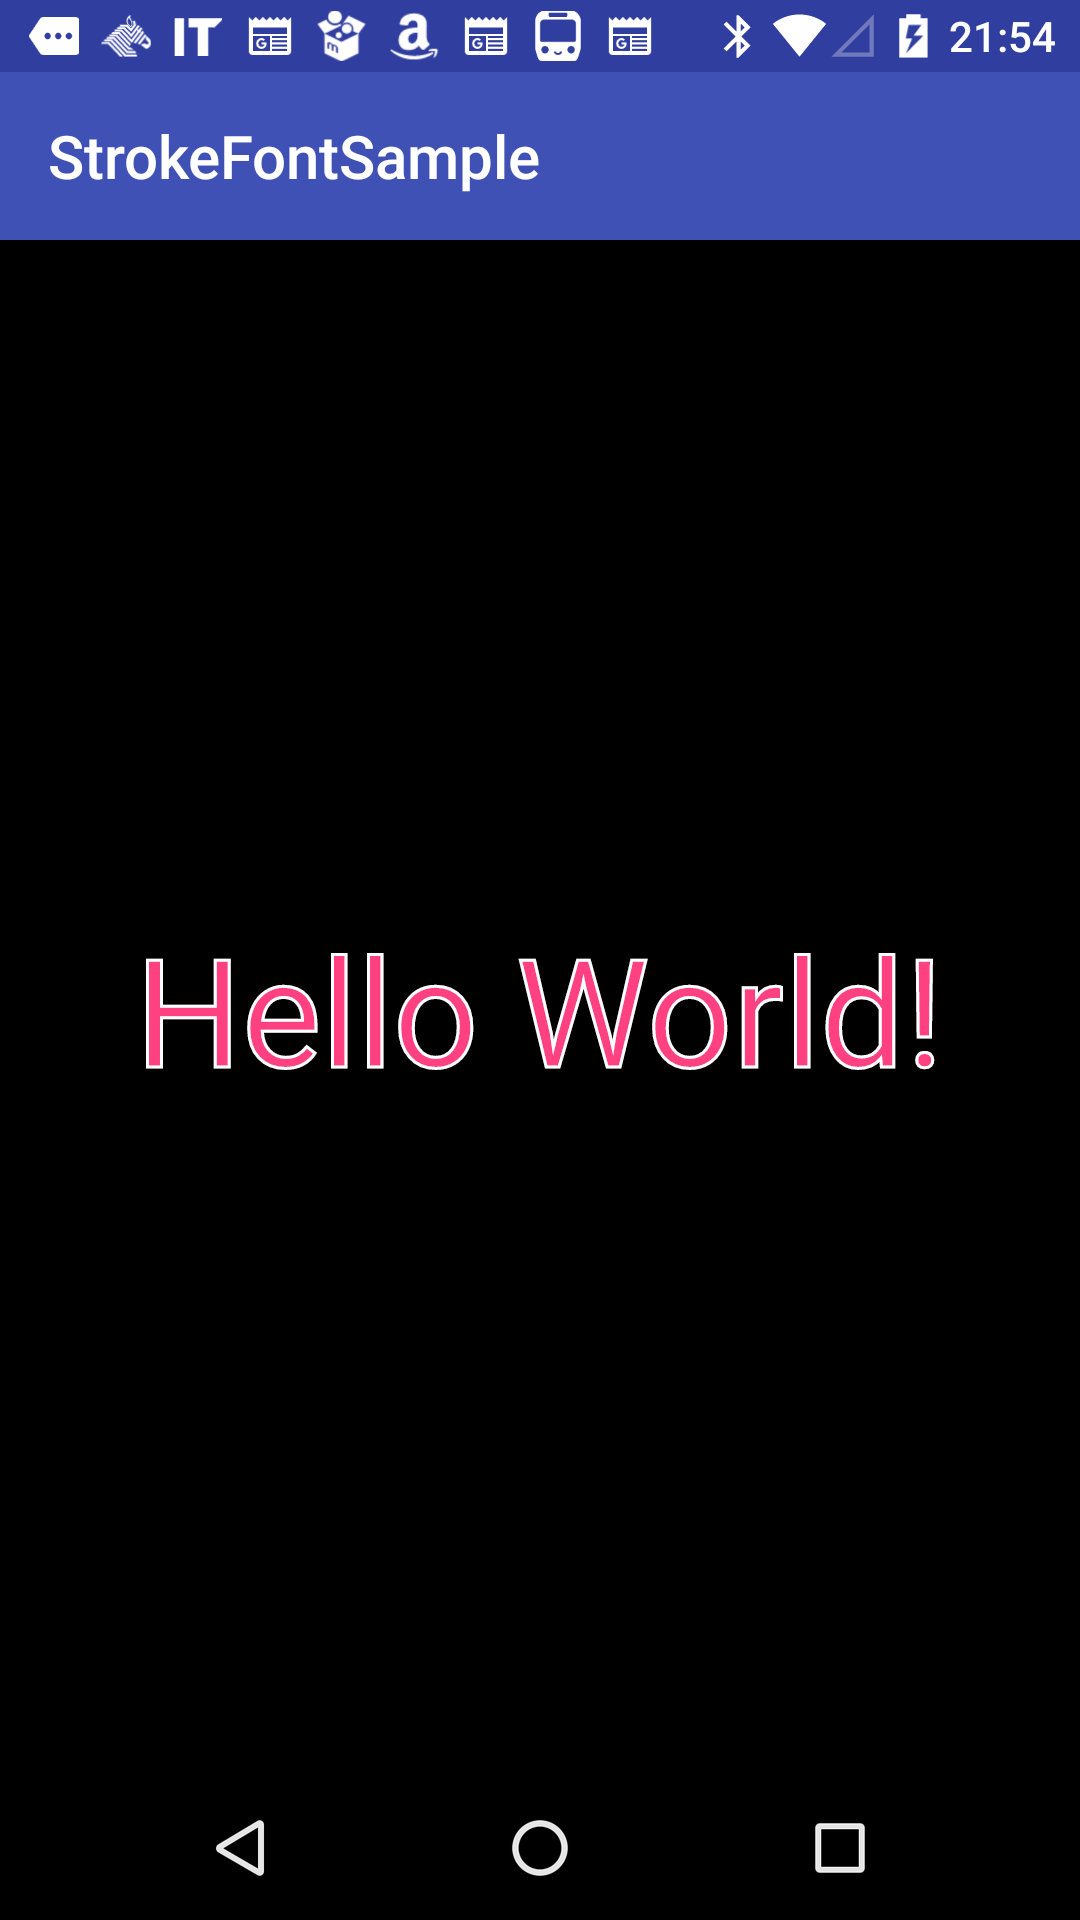
Android開発をしていて文字をこんな感じに枠で囲いたいなとなりました。

でこれが意外と曲者で日本語では勿論のこと英語でもなかなかはっきりとした解決策が出てきません。
結論から言うと
http://stackoverflow.com/questions/3182393/android-textview-outline-text
で紹介されているMagicTextViewを使うのが一番良さそうですがちょっとこのStackOverFlowの説明だけでは不親切なのでMagicTextViewを用いて枠付き文字を作る方法をご紹介します。
参考までに今回作成したgithubのrepositoryも載せておきます。
https://github.com/kazuooooo/AndroidStrokeFontSample
MagicTextViewのGitから必要なファイルを取得
MagicTextViewのgitプロジェクトはこちらから必要なファイルを取得します。
ReadMeに
Realistically, just copy MagicTextView.java & attrs.xml into your project and use them as your own.
とある通りMagicTextView.javaとattrs.xmlをコピーしてプロジェクト内に作成します。
package package_path;
import android.content.Context;
import android.content.res.TypedArray;
import android.graphics.Bitmap;
import android.graphics.BlurMaskFilter;
import android.graphics.Canvas;
import android.graphics.Color;
import android.graphics.Paint;
... 中略
<?xml version="1.0" encoding="utf-8"?>
<resources>
    <declare-styleable name="MagicTextView">
        <attr name="innerShadowColor" format="color" />
        <attr name="innerShadowRadius" format="dimension" />
        <attr name="innerShadowDx" format="dimension" />
        <attr name="innerShadowDy" format="dimension" />

        <attr name="outerShadowColor" format="color" />
        <attr name="outerShadowRadius" format="dimension" />
        <attr name="outerShadowDx" format="dimension" />
        <attr name="outerShadowDy" format="dimension" />

        <attr name="typeface" format="string" />

        <attr name="foreground" format="reference|color" />
        <attr name="background" format="reference|color" />

        <attr name="strokeWidth" format="dimension" />
        <attr name="strokeMiter" format="dimension" />
        <attr name="strokeColor" format="color" />
        <attr name="strokeJoinStyle">
            <enum name="miter" value="0" />
            <enum name="bevel" value="1" />
            <enum name="round" value="2" />
        </attr>
    </declare-styleable>
</resources>
デフォルトアプリのHelloWorldを枠付きにしてみる
上記で作成したカスタムビューMagicTextViewを用いてデフォルトのHelloWorldを枠付き文字にしてみたいと思います。
activity_main.xmlを編集
activity_main.xmlを以下のように編集します。
<?xml version="1.0" encoding="utf-8"?>
<RelativeLayout xmlns:android="http://schemas.android.com/apk/res/android"
    xmlns:tools="http://schemas.android.com/tools"
    android:layout_width="match_parent"
    android:layout_height="match_parent"
    xmlns:app="http://schemas.android.com/apk/res-auto"
    tools:context="com.example.matsumotokazuya.strokefontsample.MainActivity"
    android:background="#000000">

    <com.example.matsumotokazuya.strokefontsample.MagicTextView
        android:layout_width="wrap_content"
        android:layout_height="wrap_content"
        android:text="Hello World!"
        android:textColor="@color/colorAccent"
        android:layout_centerVertical="true"
        android:layout_centerHorizontal="true"
        app:strokeColor="#fff"
        app:strokeWidth="1dp"
        android:textSize="50dp" />
</RelativeLayout>
TextViewタグをMagicTextViewタグに書き換えてstrokeColorとstrokeWidthを設定します。
app:strokeColor="#fff"
app:strokeWidth="1dp"
このときapp名前空間に定義されているstrokeColorとstrokeWidthを使用するために
xmlns:app="http://schemas.android.com/apk/res-auto"
を追記する必要があります
これでアプリを起動してみましょう。そうするとこんなエラーが出てしまいます。

Attribute "background" already defined with incompatible format
backgroundというattributeがすでに定義されてしまっているというエラーになってしまいます。
要はMagicTextViewで定義しようとしているbackgroundが24.0.0で定義されているattributeと被ってしまっているのです。
本来ならばプルリクエストを投げるべきですが、MagicTextView自体2014年以降更新がされておらずプルリクも無視されている状況です。
そこで今回はソースを修正します(ライブラリーとしてインポートしているのでなく、自分で作成したファイルなので良しとしましょう。)
まず、重複してしまっているattrs.xmlの
<attr name="background" format="reference|color" />
をなんでもいいのですが
<attr name="mBackground" format="reference|color" />
に書き換えます。(mはmagicのm)
続いてMagicTextView.javaの88行目〜95行目のbackgroundを使用している箇所をmBackgroundに書き換えます。
if (a.hasValue(R.styleable.MagicTextView_mBackground)) {
    Drawable background = a.getDrawable(R.styleable.MagicTextView_mBackground);
    if (background != null) {
        this.setBackgroundDrawable(background);
    } else {
        this.setBackgroundColor(a.getColor(R.styleable.MagicTextView_mBackground, 0xff000000));
    }
}
これで準備完了です
できましたね!!
メンテされていない大規模なライブラリを使うのは気が引けますが、今回のように小規模なものであればそれを元にして自分で修正して使うのも悪くはないと思いました。
androidの開発はまだ1ヶ月ほどしかやってませんので間違った記載などありましたらご指導お願い致します。
