既存のAPIにほんのちょっと手を加えるだけで、
見た目もきれいで触って試せるドキュメントを簡単に作成できました。
ハマったポイントも無事解決できたので、併せて解説します。
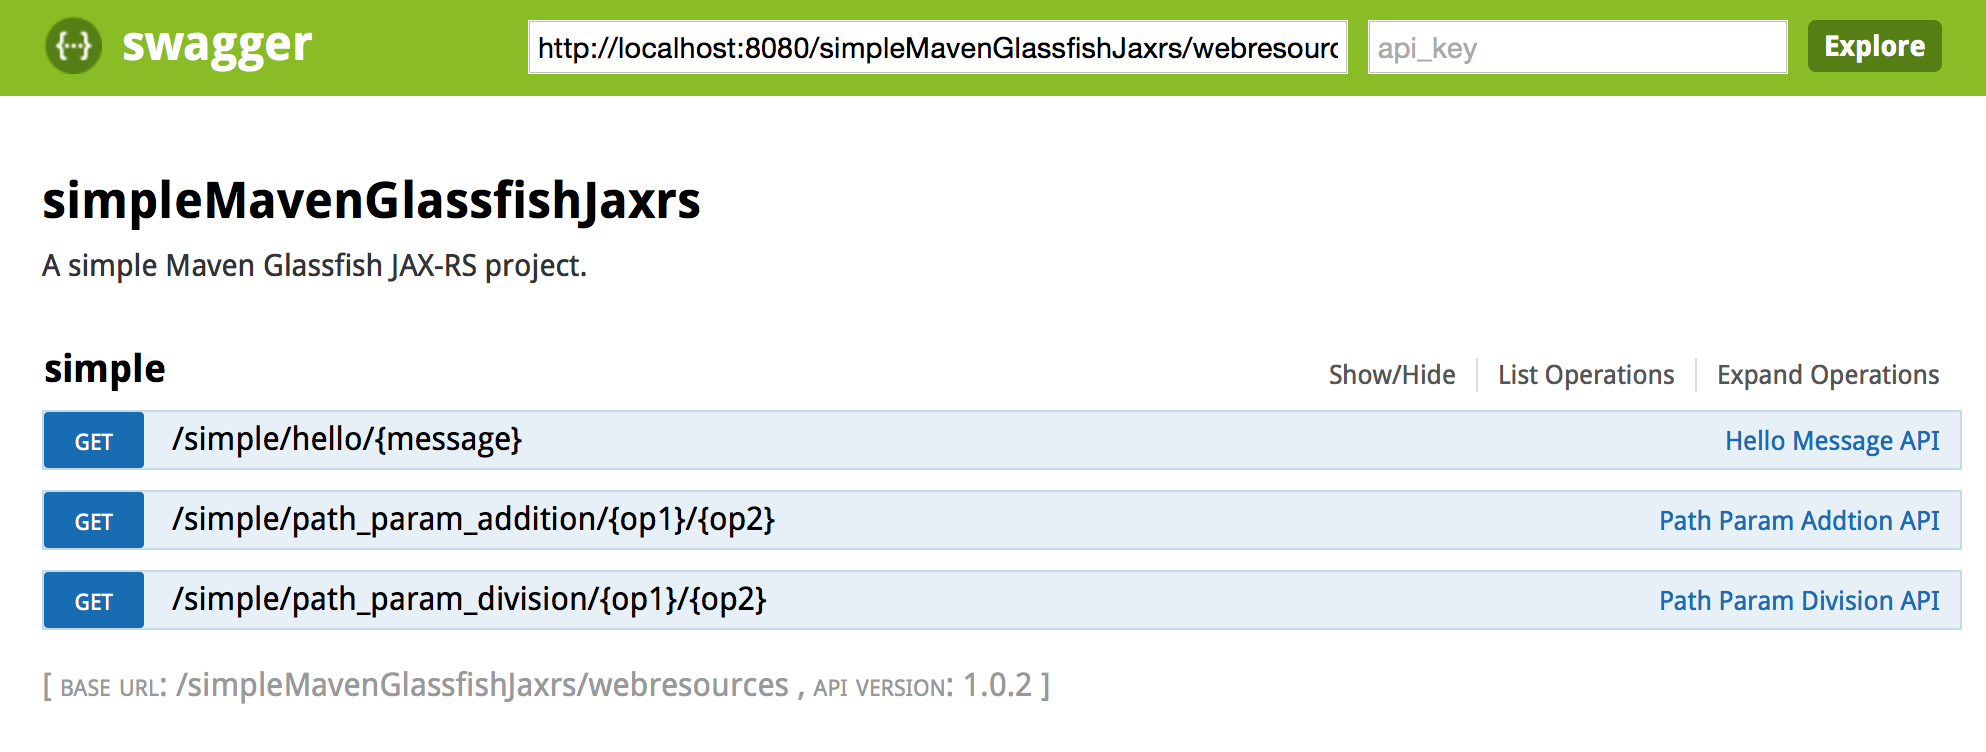
スクリーンショット: API一覧
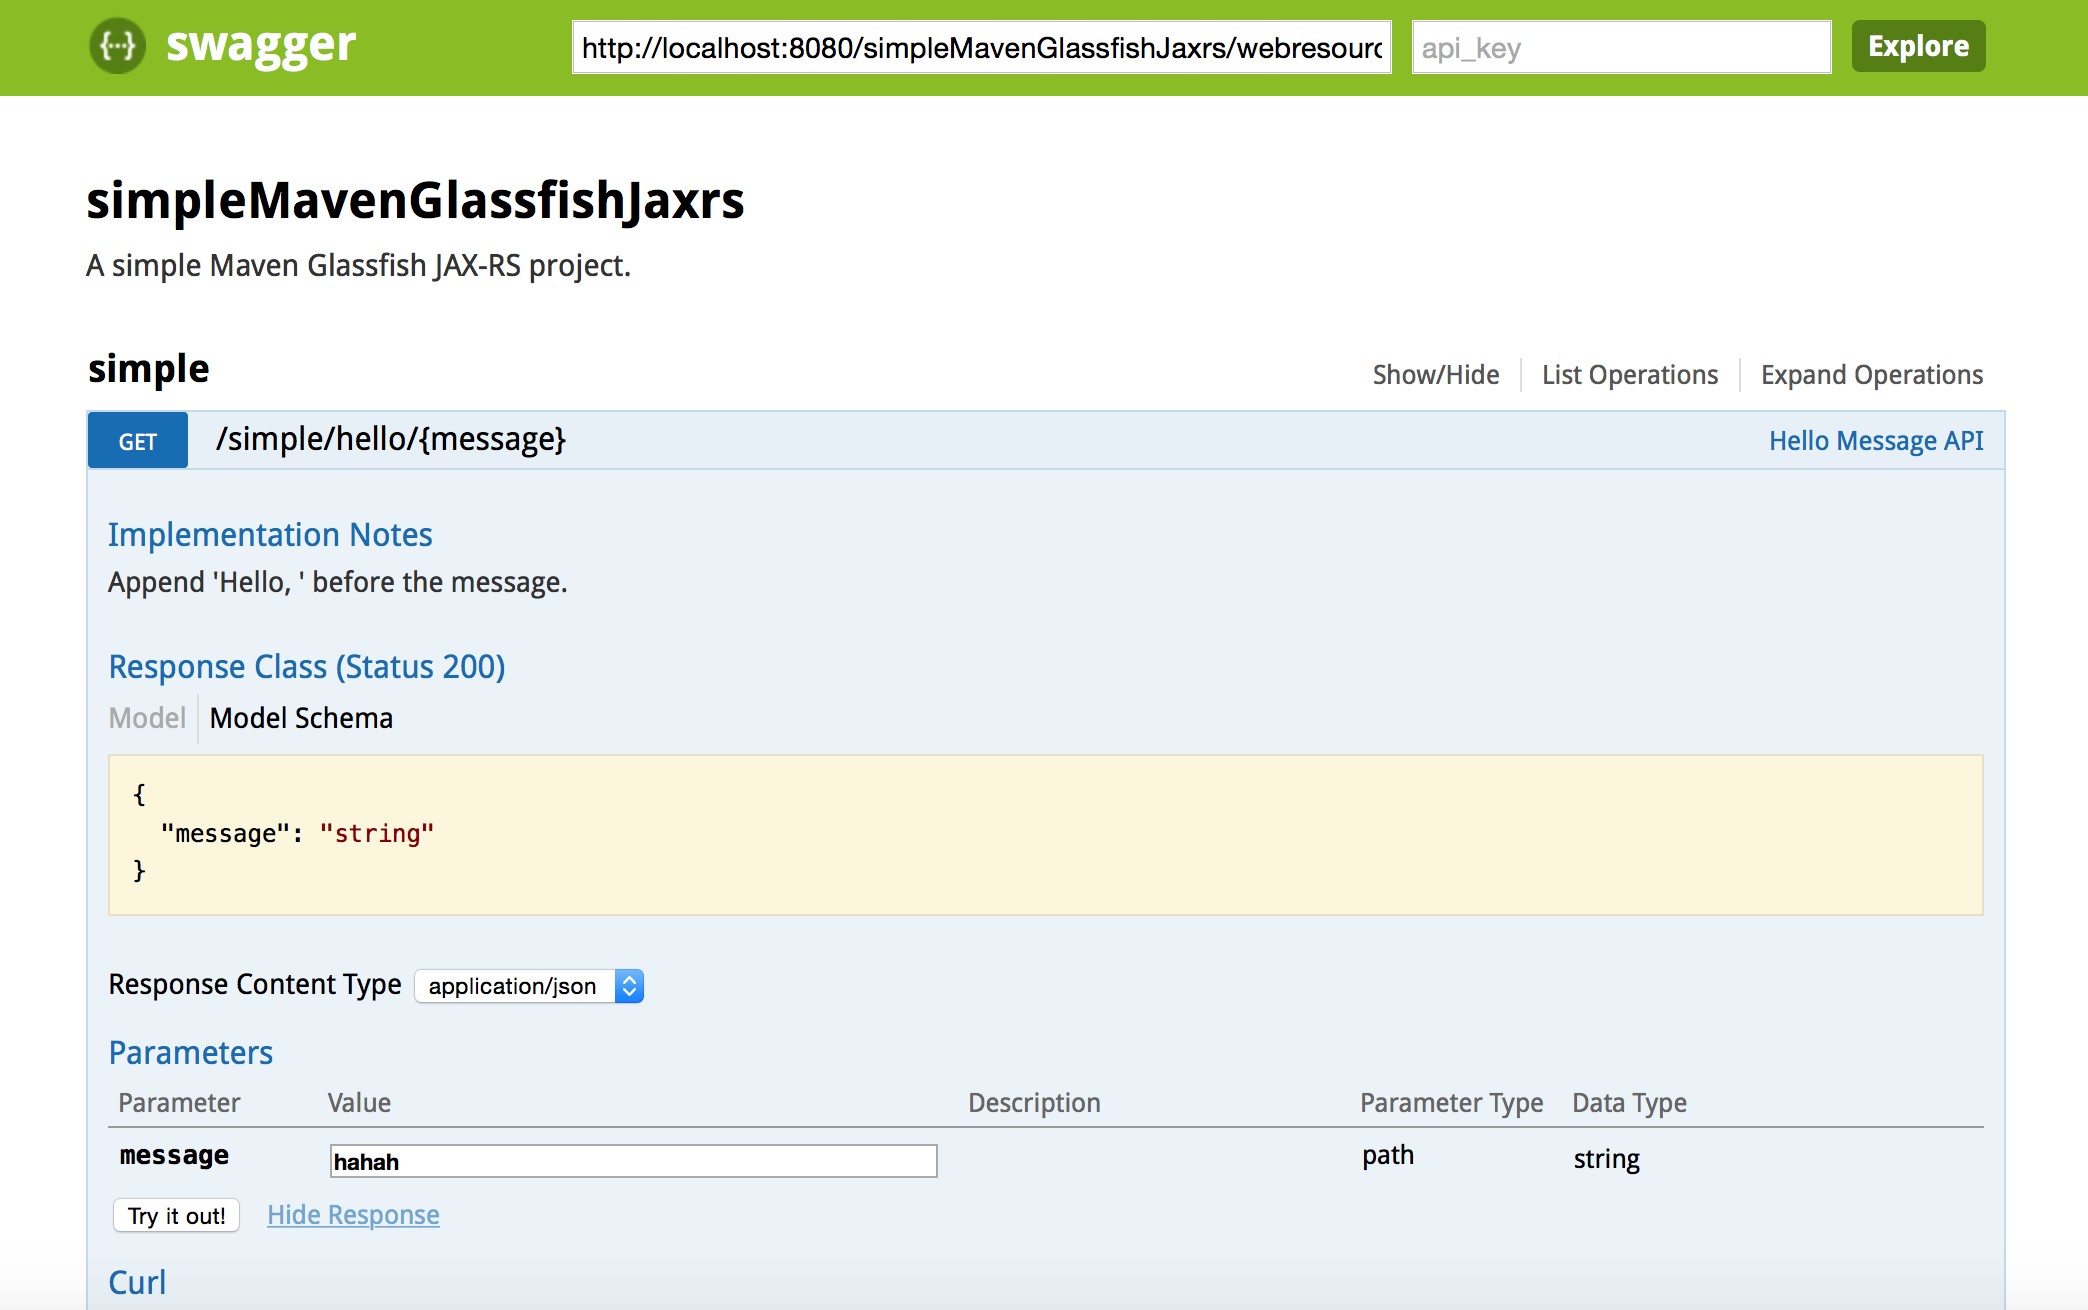
スクリーンショット: API詳細
Swagger Core Library
The goal of Swagger™ is to define a standard, language-agnostic interface to REST APIs which allows both humans and computers to discover and understand the capabilities of the service without access to source code, documentation, or through network traffic inspection.
ということで、
- 言語の種類に依存せず
- 人間にもコンピュータにも分かりやすい形で
REST APIへのインタフェースを提供してくれることを意図したライブラリです。
人間がAPIを理解するとき、ソースコードを読んだり、あるいはWikiとかにまとめたドキュメントを読んだりすると思いますが、
- そもそもソースコードを読めない人がAPIを使う必要に迫られる
- Wikiのドキュメントの更新が滞り、ドキュメントが正しいかどうか分からない
という問題は往々にして起こります。
そのような問題に対して、他にも以下のようなライブラリやサービスがソリューションを提供してくれていますが、
今回はひとまず、こちらの Swagger Core Libraryを試してみました。
Swagger UI
Swagger Core Libraryで作成したAPIの情報を、ブラウザに見やすく表示してくれるライブラリ。
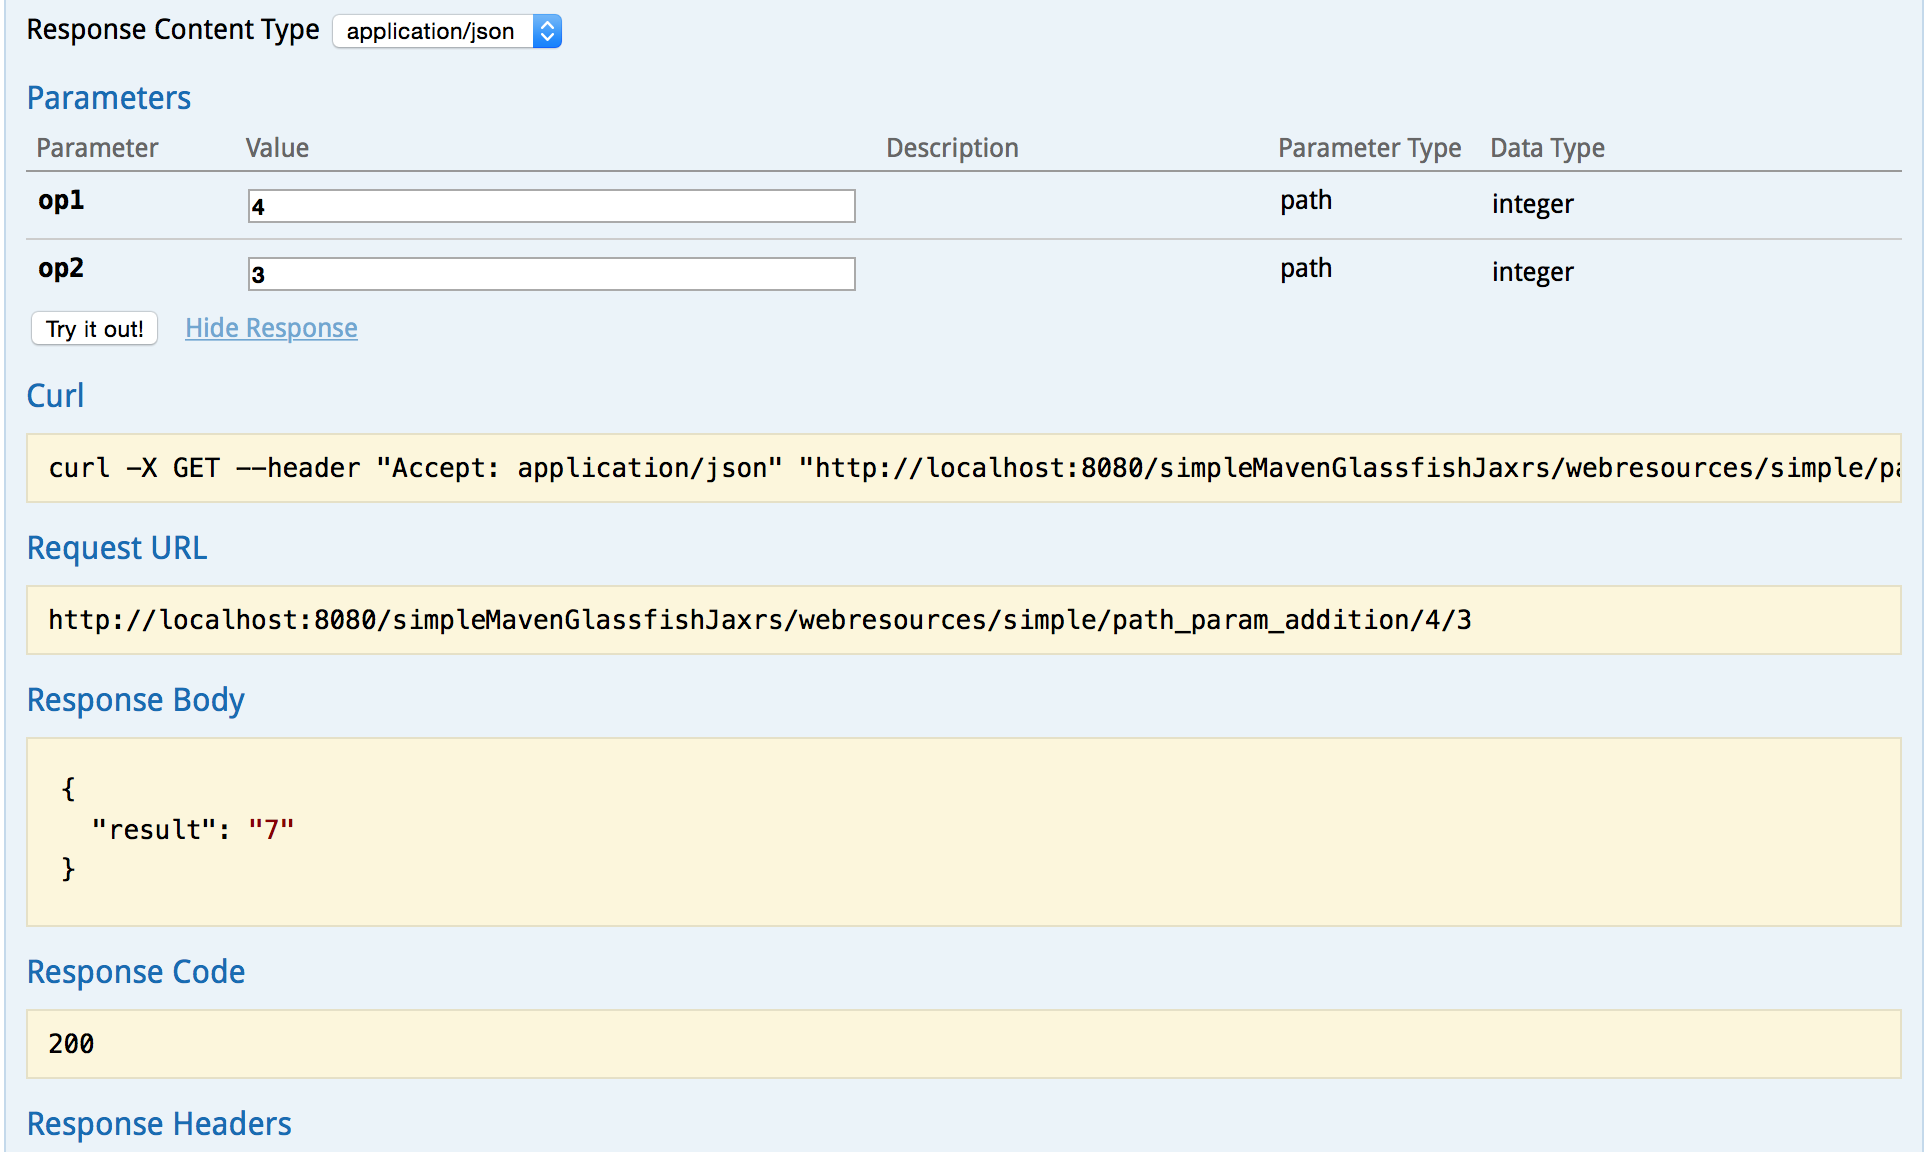
特徴的なのは、"Try it out!"でcurlコマンドが見れたり、実際のレスポンスが見れたりするところ。
コードを見なくても、
- 「ちゃんと4+3=7できてる!」
- 「というかそれ以前にAPIがきちんと動いてる!」
のを確認できるのは便利ですね。
環境
- Java EE 7
- JAX-RS 2.x (jersey-common-2.1.jar)
- NetBeans8.0.2
- GlassFish4.1
- swagger core 1.5.0
JAX-RSアプリケーション作成
NetBeansでシンプルなJAX-RSアプリケーションを作成しておきます。
例えば、こんな感じ。
New Project -> Maven -> Web Application
https://github.com/kazuhirokomoda/simpleMavenGlassfishJaxrs
pom.xmlにSwaggerの依存を追加
JAX-RS 2.xのバージョンに合わせて、swagger-jersey2-jaxrsを選択します。
サンプルアプリ作成時の最新は
http://mvnrepository.com/artifact/io.swagger/swagger-jersey2-jaxrs/1.5.0
<dependency>
  <groupId>io.swagger</groupId>
  <artifactId>swagger-jersey2-jaxrs</artifactId>
  <version>1.5.0</version>
</dependency>
Swaggerの設定と初期化、resourcesを追加
import io.swagger.jaxrs.config.BeanConfig;

@ApplicationPath("webresources")
public class ApplicationConfig extends Application {


    // "simple.maven.glassfish.jaxrs.resource"
    private static final String RESOURCE_PACKAGE = SimpleResource.class.getPackage().getName();

    public ApplicationConfig() {
        BeanConfig beanConfig = new BeanConfig();
        beanConfig.setTitle("simpleMavenGlassfishJaxrs");
        beanConfig.setDescription("A simple Maven Glassfish JAX-RS project.");
        beanConfig.setVersion("1.0.2");
        beanConfig.setSchemes(new String[]{"http"});
        beanConfig.setHost("localhost:8080"); // ex. "localhost:8002"
        beanConfig.setBasePath("/simpleMavenGlassfishJaxrs/webresources");  // ex. "/api"
        beanConfig.setPrettyPrint(true);

        beanConfig.setResourcePackage(RESOURCE_PACKAGE); // ex. "io.swagger.resources"
        beanConfig.setScan(true);
    }


    @Override
    public Set<Class<?>> getClasses() {
        Set<Class<?>> resources = new java.util.HashSet<>();
        addRestResourceClasses(resources);

        // enable Swagger
        resources.add(io.swagger.jaxrs.listing.ApiListingResource.class);
        resources.add(io.swagger.jaxrs.listing.SwaggerSerializers.class);

        return resources;
    }

    private void addRestResourceClasses(Set<Class<?>> resources) {
        ...
    }

}
こちらのリンクに沿って、Applicationをextendsしているクラスで以下の設定を行います。
web.xmlを使った方法など、別の方法もあるので、上記リンクから辿ってみてください。
- コンストラクタで基本情報の初期設定
- setScanはいちばん最後に持ってくる
- setVersionは自分のAPIのバージョンを指定するメソッドのよう
- io.swagger.jaxrs.listing.* の2クラスを追加
アノテーションを追加
@Path("/simple")
@Api(tags = {"simple"})
public class SimpleResource {

    @GET
    @Path("/hello/{message}")
    @ApiOperation(value = "Hello Message API",
            notes = "Append 'Hello, ' before the message.",
            response = HelloMessage.class)
    public HelloMessage helloMessage(@PathParam("message") String message) {
        HelloMessage helloMessage = new HelloMessage();
        helloMessage.setMessage("Hello, " + message);
        return helloMessage;
    }

    ....

}
- SimpleResourceクラス全体に@Apiを付ける
- ドキュメントを作成したい各エンドポイントに、@ApiOperationを付ける
のが最低限の構成のようです。
確認
http://localhost:8080/simpleMavenGlassfishJaxrs/webresources/swagger.json
にアクセスして、自分のAPIの情報が見れていたら成功です。
{
  "swagger" : "2.0",
  "info" : {
    "description" : "A simple Maven Glassfish JAX-RS project.",
    "version" : "1.0.2",
    "title" : "simpleMavenGlassfishJaxrs"
  },
  "host" : "localhost:8080",
  "basePath" : "/simpleMavenGlassfishJaxrs/webresources",
  "tags" : [ {
    "name" : "simple"
  } ],
  "schemes" : [ "http" ],
  "paths" : {
    "/simple/hello/{message}" : {
      "get" : {
        "tags" : [ "simple" ],
        "summary" : "Hello Message API",
        "description" : "Append 'Hello, ' before the message.",
        "operationId" : "helloMessage",
        "parameters" : [ {
          "name" : "message",
          "in" : "path",
          "required" : true,
          "type" : "string"
        } ],
        "responses" : {
          "200" : {
            "description" : "successful operation",
            "schema" : {
              "$ref" : "#/definitions/hello message"
            }
          }
        }
      }
    },
    "/simple/path_param_addition/{op1}/{op2}" : {
      "get" : {
        "tags" : [ "simple" ],
        "summary" : "Path Param Addtion API",
        "description" : "Adds two numbers.",
        "operationId" : "pathParamAddition",
        "parameters" : [ {
          "name" : "op1",
          "in" : "path",
          "required" : true,
          "type" : "integer",
          "format" : "int32"
        }, {
          "name" : "op2",
          "in" : "path",
          "required" : true,
          "type" : "integer",
          "format" : "int32"
        } ],
        "responses" : {
          "200" : {
            "description" : "successful operation",
            "schema" : {
              "$ref" : "#/definitions/path param result"
            }
          }
        }
      }
    },
    "/simple/path_param_division/{op1}/{op2}" : {
      "get" : {
        "tags" : [ "simple" ],
        "summary" : "Path Param Division API",
        "description" : "Divide the first number by the second number.",
        "operationId" : "pathParamDivision",
        "parameters" : [ {
          "name" : "op1",
          "in" : "path",
          "required" : true,
          "type" : "integer",
          "format" : "int32"
        }, {
          "name" : "op2",
          "in" : "path",
          "required" : true,
          "type" : "integer",
          "format" : "int32"
        } ],
        "responses" : {
          "200" : {
            "description" : "successful operation",
            "schema" : {
              "$ref" : "#/definitions/path param result"
            }
          }
        }
      }
    }
  },
  "definitions" : {
    "hello message" : {
      "type" : "object",
      "required" : [ "message" ],
      "properties" : {
        "message" : {
          "type" : "string",
          "description" : "message"
        }
      }
    },
    "path param result" : {
      "type" : "object",
      "required" : [ "result" ],
      "properties" : {
        "result" : {
          "type" : "string",
          "description" : "result"
        }
      }
    }
  }
}
Swagger UI
続いて、さっきのswagger.jsonをもとにドキュメンテーションのUIを作ります。
特別な設定は必要なく、
- https://github.com/swagger-api/swagger-ui をclone
- distディレクトリの中身をまるごとホスト
- 例えばhttp://localhost:8080/swagger-ui-dist など、別プロジェクト
などが分かりやすいかと思います。
dist内のindex.htmlをブラウザで開いても大丈夫そう。
スクリーンショット
http://localhost:8080/swagger-ui-dist
にアクセスして、
最上部にあるAPIのURL欄に自分のswagger.jsonまでのURLを入れると、記事冒頭のスクリーンショットが見られます!
はまった点
と、ここまでスムーズにいけば良いのですが、
自分の場合は、swagger.jsonがスカスカになるという問題がありました。
{"swagger":"2.0","info":{"version":"1.0.2"},"host":"localhost:8080/simpleMavenGlassfishJaxrs/webresources","basePath":"/simple","schemes":["http"]}
これは
Swaggerの設定と初期化、resourcesを追加
のところで、サンプルをコピペしていたのが原因だったので、
beanConfig.setResourcePackage("io.swagger.resources");
上の手順にあるように、きちんと自分のリソースクラスを指定したのですが、
private static final String RESOURCE_PACKAGE = SimpleResource.class.getPackage().getName();
....
beanConfig.setResourcePackage(RESOURCE_PACKAGE);
今度はアプリケーション自体がGlassfishにデプロイできなくなるはめに。
java.lang.NoSuchMethodError: com.fasterxml.jackson.databind.AnnotationIntrospector.findPropertyIndex(Lcom/fasterxml/jackson/databind/introspect/Annotated;)Ljava/lang/Integer;
    at io.swagger.jackson.ModelResolver.resolve(ModelResolver.java:372)
    at io.swagger.jackson.ModelResolver.resolve(ModelResolver.java:151)
    at io.swagger.converter.ModelConverterContextImpl.resolve(ModelConverterContextImpl.java:85)
    at io.swagger.jackson.ModelResolver.resolveProperty(ModelResolver.java:131)
    at io.swagger.jackson.ModelResolver.resolveProperty(ModelResolver.java:93)
    at io.swagger.converter.ModelConverterContextImpl.resolveProperty(ModelConverterContextImpl.java:65)
    at io.swagger.converter.ModelConverters.readAsProperty(ModelConverters.java:58)
    at io.swagger.jaxrs.Reader.parseMethod(Reader.java:768)
    at io.swagger.jaxrs.Reader.read(Reader.java:286)
    at io.swagger.jaxrs.Reader.read(Reader.java:169)
    at io.swagger.jaxrs.Reader.read(Reader.java:146)
    at io.swagger.jaxrs.config.BeanConfig.setScan(BeanConfig.java:170)
    ....
NetBeansでアプリケーションのDependencyを確認してもjackson-databind-2.4.2.jarが入っているし、このバージョンではfindPropertyIndexメソッドもきちんと実装されている のに・・・?
結果的には、実はアプリケーションの問題ではなかったので、Glassfishで使われているjacksonのバージョンが古いのでそれを新しくする方法で問題が解決しました。
おわりに
新規のアプリからでも、既存のアプリからでも、
手間をかけずにシンプルにAPIドキュメントを作成して、楽しく開発しましょう!
本文中以外の参考URL
試してみた系
Integrating Swagger Into JAX-RS With Java EE 6 Specification
JAX-RS の REST API ドキュメントを Swagger を使って生成する
設定
Swagger Core Jersey 2.X Project Setup 1.5