やったこと
- OS を準備して、Raspberry Pi を起動
- Raspberry Pi とシリアル通信で接続
- LED を GPIO を使って光らせてみる
使ったもの
- Raspberry Pi TypeB
- MacBook Air
- 8GのSDカード
- LEDと抵抗
- ブレッドボード
- ブレッドボード用ケーブル(オス-メス)
- USB・シリアル変換ケーブル(3.3V)
SDカードについて
以下にある動作確認がとれているSDカードを使うのが吉
RPi SD cards - eLinux.org
OS を準備して、Raspberry Pi を起動
ダウンロード
Raspbian を以下からダウンロード
http://www.raspberrypi.org/downloads
NOOBS は、起動後に画面を使って OS の選択やらセットアップやらをするので、今回はパス
取得したzipファイルを解凍
unzip
$ unzip ~/Downloads/2013-12-20-wheezy-raspbian.zip
SD カードにコピー
SDカードを入れて、コマンドラインから確認
$ df
Filesystem                512-blocks      Used     Available Capacity  Mounted on
/dev/disk1s1                15677440      4800      15672640     1%    /Volumes/NO NAME
disk1s1 が、SD カード
dd するためにアンマウントする
$ diskutil unmount /dev/disk1s1
Volume NO NAME on disk1s1 unmounted
イメージファイルを dd する
$ sudo dd if=~/Downloads/2013-12-20-wheezy-raspbian.img of=/dev/rdisk1 bs=1m
Password:
2825+0 records in
2825+0 records out
2962227200 bytes transferred in 299.545552 secs (9889071 bytes/sec)
10分そこいらでコピーが完了
SDカードを、Raspberry Pi に入れて usb を接続して起動する
Raspberry Pi とシリアル通信で接続
USB・シリアル変換ケーブル のドライバをインストール
以下からドライバを取得して、解凍。インストールする
Virtual COM Port Drivers
Mac OS X の x64 (64-bit)
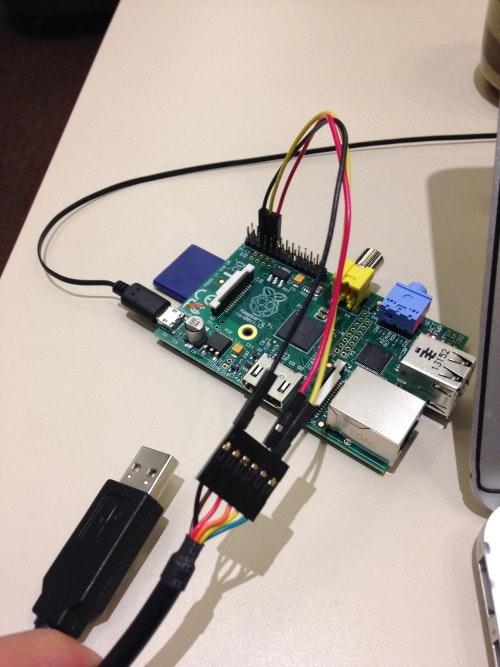
ケーブルと、Raspberry Pi を接続
以下を参考に、ケーブルと、ブレッドボード用ケーブルと、Raspberry Pi を接続する
MacとRaspberry PIをシリアル通信で接続する - foldrr's weblog
PC と接続
Raspberry Pi と、ケーブルを 接続した後 に、USB を PC につなぐ
認識されているか確認
$ ll /dev/*usb*
crw-rw-rw-  1 root  wheel   18,   5 12 30 17:22 /dev/cu.usbserial-FTGD4019
crw-rw-rw-  1 root  wheel   18,   4 12 30 17:22 /dev/tty.usbserial-FTGD4019
接続する
$ sudo screen /dev/tty.usbserial-FTGD4019 115200
user: pi
pass: raspberry
Raspbian GNU/Linux 7 raspberrypi ttyAMA0
raspberrypi login:

Linux raspberrypi 3.10.24+ #614 PREEMPT Thu Dec 19 20:38:42 GMT 2013 armv6l

The programs included with the Debian GNU/Linux system are free software;
the exact distribution terms for each program are described in the
individual files in /usr/share/doc/*/copyright.

Debian GNU/Linux comes with ABSOLUTELY NO WARRANTY, to the extent
permitted by applicable law.

NOTICE: the software on this Raspberry Pi has not been fully configured. Please run 'sudo raspi-config'
LED を GPIO を使って光らせてみる
LED の動作確認
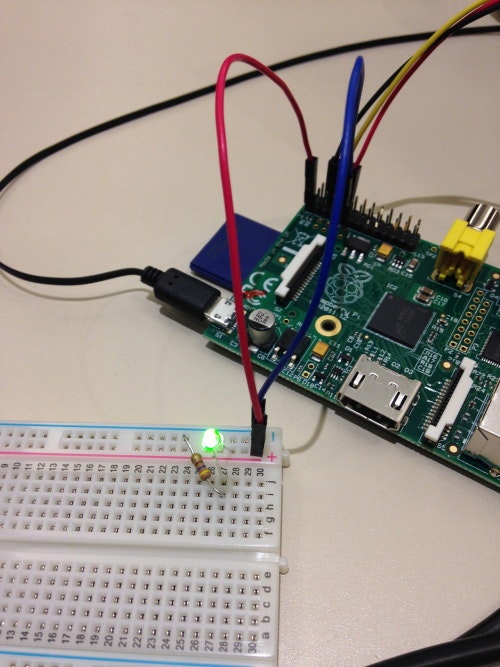
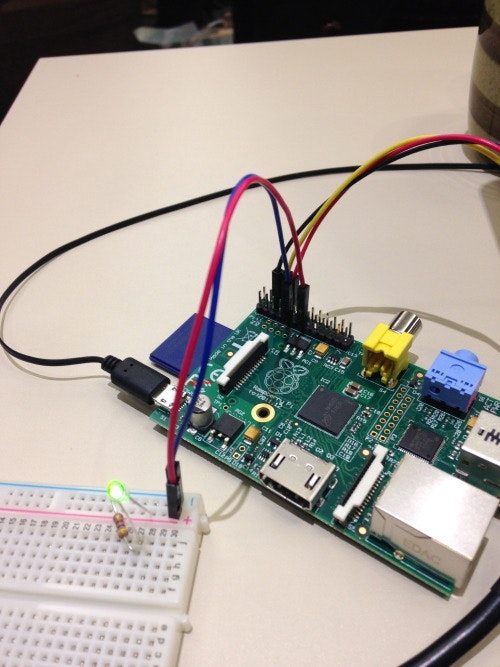
まずは、3.3V出力と、GND の間に LED を入れて光ることを確認
以下の早見シートによると、左側の一番上が、+3.3V出力、左側の上から5番目が GND
Raspberry Piブログ : Raspberry PiのGPIO早見シートを作りました
なので、+3.3V出力、LEDアノード、抵抗、GNDの順番に接続

光ることを確認
GPIO を使って、点滅させてみる
今度は、3.3V出力の代わりに、GPIO の27番に接続してみる
そして、/sys/class/gpio を使って 27番を出力ポートに指定して、ON/OFF してみる
$ sudo su
root@raspberrypi:/home/pi# echo 27 > /sys/class/gpio/export
root@raspberrypi:/home/pi# echo out > /sys/class/gpio/gpio27/direction
root@raspberrypi:/home/pi# echo 1 > /sys/class/gpio/gpio27/value
root@raspberrypi:/home/pi# echo 0 > /sys/class/gpio/gpio27/value
root@raspberrypi:/home/pi# exit
gpio27/value に 1 を渡すとLEDが点いて、0 を渡すと消えることを確認

今日はここまで
参考
コチョナナバ: Raspberry PiとRubyでLEDをチカチカさせる
raspberrypi/Raspberry PiでIO制御 - PukiWiki
