Docker with CoreOS on Vagrant
- Nginx が動く Docker コンテナの作成を行う
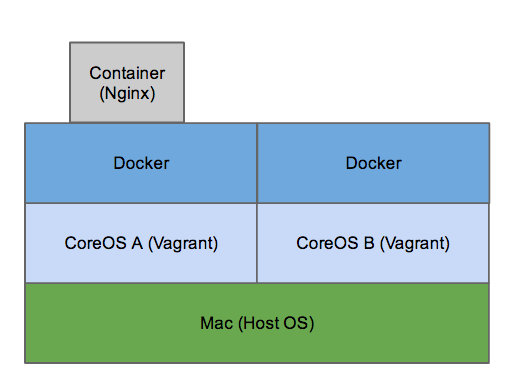
- Docker は CoreOS の上で動くものとし、CoreOS は Vagrant を介して Mac 上に立ち上げる
- 最終的に次のような構成になる
Docker とは
- 最近話題な Docker 社が開発したコンテナ型仮想化技術
- わりと最近バージョン 1.0 が発表された
- 特徴
- 起動が早い
- コンテナ仮想化は Host OS のリソースを使うため、新たに OS を用意する時間が必要ない
- 処理が早い
- ハードウェア仮想化に比べ、ハイパーバイザーの経由がないため、早い
- image の共有
- 作成した image を共有する仕組み (Docker Hub) がある
- 起動が早い
CoreOS とは
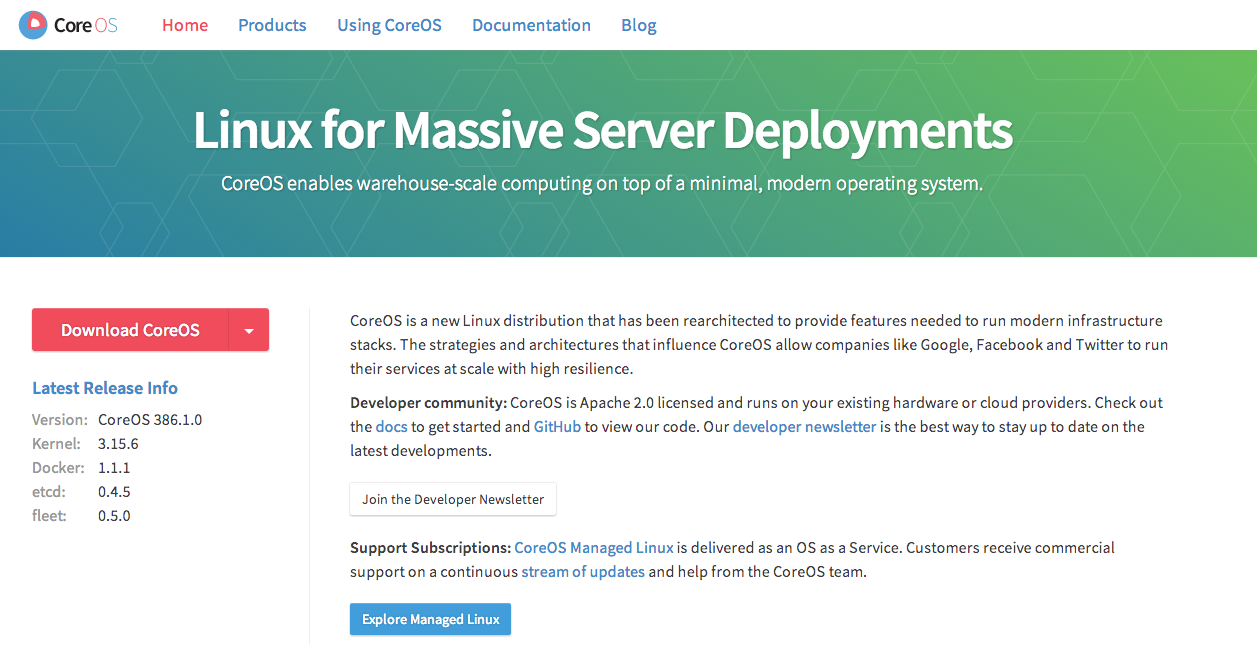
- Docker のための(?) OS
- CoreOS 入門 の説明が詳しいです
VirtualBox, Vagrant のインストール
- 任意のホスト OS に VirtualBox と Vagrant をインストールする
- Vagrant の provider には VirtualBox と VMWare があるが、今回は VirtualBox を使用する
- インストールの詳細は割愛
- ちなみに Vagrant のバージョンは 1.6.0 以上でなければならない
Vagrant リポジトリの用意
- CoreOS の Vagrantfile を Github からクローンする
$ git clone https://github.com/coreos/coreos-vagrant.git
$ cd coreos-vagrant
CoreOS の起動
- Vagrantfile を使用して CoreOS を起動する
$ vagrant up
$ vagrant status
Current machine states:

core-01                   running (virtualbox)

The VM is running. To stop this VM, you can run `vagrant halt` to
shut it down forcefully, or you can run `vagrant suspend` to simply
suspend the virtual machine. In either case, to restart it again,
simply run `vagrant up`.
- core-01 が running になっていれば無事起動しているので ssh でログインする
$ vagrant ssh
- なお、仮想マシンから抜けるには
$ exitを、仮想マシンを停止するには$ vagrant haltを入力する
複数台の仮想マシンを起動
- 下記の手順を踏むと同じ CoreOS を複数台起動することも可能
- リポジトリに含まれている config.rb.sample をリネーム(またはコピー)し、 config.rb を作成する
- config.rb を編集し、num_instances に任意の数を与える
config.rb
$num_instances=2 # 起動台数が 2 台の場合
- 再度
$ vagrant upを実行 - status を見ると 2 台起動していることが確認できる
$ vagrant status
Current machine states:

core-01                   running (virtualbox)
core-02                   running (virtualbox)

This environment represents multiple VMs. The VMs are all listed
above with their current state. For more information about a specific
VM, run `vagrant status NAME`.
- 下記コマンドで任意の一つを選択して接続できる
$ vagrant ssh core-01 -- -A
Docker の確認
- CoreOS には、デフォルトで Docker がインストールされているので確認する
$ docker -v
Docker version 1.1.1, build dc62f3c
$ docker version
Client version: 1.1.1
Client API version: 1.13
Go version (client): go1.2
Git commit (client): dc62f3c
Server version: 1.1.1
Server API version: 1.13
Go version (server): go1.2
Git commit (server): dc62f3c
Docker で Ubuntu を動かす
- Docker は様々な OS イメージを配布している Docker Hub (旧 docker index) を提供している
- Docker Hub にある image の検索や取得は各コマンドで実行できる
Ubuntu image の検索
$ docker search ubuntu
NAME               DESCRIPTION                     STARS     OFFICIAL   AUTOMATED
ubuntu             Official Ubuntu base image      442       [OK]
stackbrew/ubuntu   Official Ubuntu base image      40        [OK]
[省略]
Ubuntu image の取得
- search した結果の NAME が ubuntu の image を取得する
$ docker pull ubuntu
Pulling repository ubuntu
6ef6f1a66de1: Download complete
463ff6be4238: Download complete
195eb90b5349: Download complete
3db9c44f4520: Download complete
b9e56c8f2cf5: Download complete
ba5877dc9bec: Download complete
c5881f11ded9: Download complete
511136ea3c5a: Download complete
bac448df371d: Download complete
dfaad36d8984: Download complete
5796a7edb16b: Download complete
2abd6cab7b39: Download complete
f127542f0b61: Download complete
9bad880da3d2: Download complete
2758ea31b20b: Download complete
3af9d794ad07: Download complete
6cfa4d1f33fb: Download complete
fae16849ebe2: Download complete
0f4aac48388f: Download complete
b7c6da90134e: Download complete
25c55ec6c1ab: Download complete
209ea56fda6d: Download complete
47dd6d11a49f: Download complete
dae3606452c3: Download complete
25f11f5fb0cb: Download complete
2e64783f16a8: Download complete
ebc34468f71d: Download complete
fa5288457082: Download complete
2318d26665ef: Download complete
5561dbd1a283: Download complete
07e5ff866bfe: Download complete
取得している image 一覧の表示
$ docker images
REPOSITORY     TAG            IMAGE ID            CREATED             VIRTUAL SIZE
ubuntu         latest         ba5877dc9bec        40 hours ago        192.7 MB
ubuntu         14.04          ba5877dc9bec        40 hours ago        192.7 MB
ubuntu         trusty         ba5877dc9bec        40 hours ago        192.7 MB
ubuntu         12.04          b9e56c8f2cf5        2 days ago          103.8 MB
ubuntu         precise        b9e56c8f2cf5        2 days ago          103.8 MB
ubuntu         utopic         6ef6f1a66de1        2 days ago          194.1 MB
ubuntu         14.10          6ef6f1a66de1        2 days ago          194.1 MB
ubuntu         12.10          c5881f11ded9        4 weeks ago         172.1 MB
ubuntu         quantal        c5881f11ded9        4 weeks ago         172.1 MB
ubuntu         13.04          463ff6be4238        4 weeks ago         169.4 MB
ubuntu         raring         463ff6be4238        4 weeks ago         169.4 MB
ubuntu         13.10          195eb90b5349        4 weeks ago         184.6 MB
ubuntu         saucy          195eb90b5349        4 weeks ago         184.6 MB
ubuntu         10.04          3db9c44f4520        3 months ago        183 MB
ubuntu         lucid          3db9c44f4520        3 months ago        183 MB
その他のコマンド
# 任意のイメージ詳細情報表示
$ sudo docker inspect REPOGITORY:TAG
# 任意のイメージ削除
$ sudo docker rmi REPOGITORY:TAG
Docker コンテナを操作
# ubuntu の latest バージョンで bash を起動する
$ docker run -it ubuntu:latest /bin/bash
# exit で bash を終了する
- 上記コマンドで bash を起動し、docker で作成した ubuntu にログインする
- docker 内で exit を入力するとログアウトする
- しかし、プロセスは生きたままになる
- 次のコマンドでプロセス(コンテナ)操作ができる
# docker コンテナ一覧を表示する
$ docker ps -a
# docker コンテナを起動
$ docker start [CONTAINER ID]
# 起動しているコンテナにアタッチ
$ docker attach [CONTAINER ID]
# docker コンテナを停止する
$ docker stop [CONTAINER ID]
# docker コンテナの削除
$ docker rm [CONTAINER ID]
Dockerfile を作成して Nginx をインストール
- 以下、CoreOS 上で操作
$ pwd
/home/core
# 任意のディレクトリを作成し、Dockerfile を用意する
$ mkdir create_nginx_docker
$ cd create_nginx_docker
$ touch Dockerfile
Dockerfile
# Getting Base Image
FROM ubuntu:latest

# Author Info
MAINTAINER kasaharu

# build 時に実行すること
RUN apt-get update
RUN apt-get install -y vim
RUN apt-get install -y curl
RUN touch /etc/apt/sources.list.d/nginx.list
RUN echo "deb http://nginx.org/packages/ubuntu/ precise nginx" >> /etc/apt/sources.list.d/nginx.list
RUN echo "deb-src http://nginx.org/packages/ubuntu/ precise nginx" >> /etc/apt/sources.list.d/nginx.list
RUN curl http://nginx.org/keys/nginx_signing.key | apt-key add -
RUN apt-get update
RUN apt-get install -y nginx

# Port
EXPOSE 22 80

# コンテナを実行した時のコマンド
CMD ["echo", "running!"]
- 事前に CoreOS 側の IP アドレスを確認しておく
- Dockerfile のある場所でビルド
$ docker build -t kasaharu/nginx_on_ubuntu:latest .
- Dockerfile の最後に記載した CMD ["echo", "running!"] が出力されれば OK
- image 一覧を確認
$ docker images
REPOSITORY     TAG                 IMAGE ID            CREATED             VIRTUAL SIZE
kasaharu       nginx_on_ubuntu     aebd7f7c585b        51 seconds ago      269.6 MB
- ビルドしたコンテナを起動
# -p オプションで port fording できる (CoreOS の 8080 ポートを Ubuntu の 80 ポートにフォワード)
$ docker run -it -p 8080:80 kasaharu/nginx_on_ubuntu:latest /bin/bash
# コンテナ上で nginx のバージョン確認
/# nginx -v
nginx version: nginx/1.6.0
# コンテナ上で nginx を起動
/# /etc/init.d/nginx start
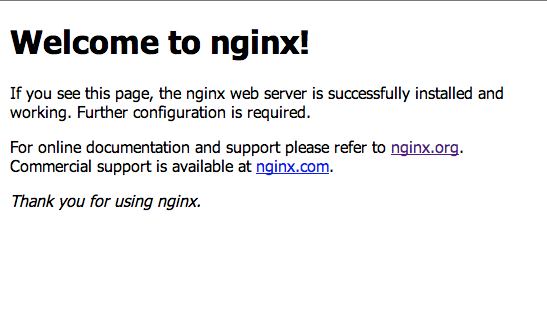
- ブラウザから [CoreOS の IP]:8080 で Welcome to nginx! が確認できる
Docker Hub に Push
- 作成した image を Docker Hub に Push
- CoreOS 上で操作
$ docker login
Username: kasaharu
Password:
Email: xxx@hoge.com
Login Succeeded
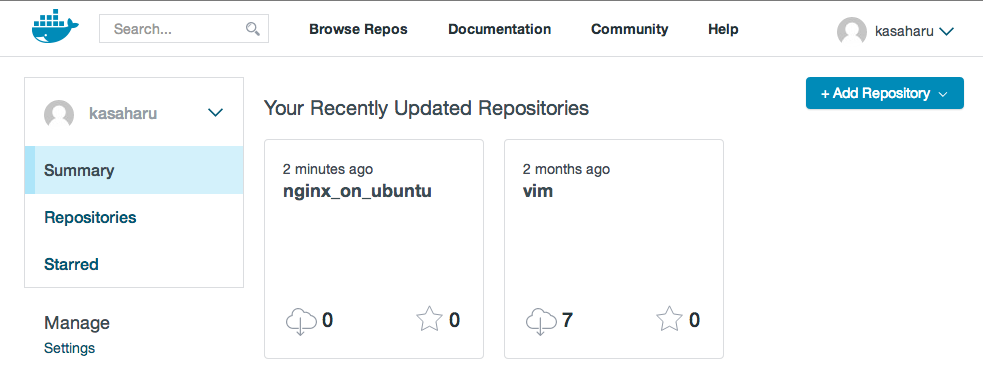
$ docker push kasaharu/nginx_on_ubuntu
- Docker Hub で確認
別の CoreOS を立ち上げ image を Pull
# core-02 にログイン
$ vagrant ssh core-02 -- -A
- 以下、CoreOS 内で操作
# image がひとつもないことを確認
$ docker images
REPOSITORY     TAG         IMAGE ID         CREATED         VIRTUAL SIZE
# 先ほど作った image を取得
$ docker pull kasaharu/nginx_on_ubuntu
# 取得した image を実行
$ docker run -it -p 8080:80 kasaharu/nginx_on_ubuntu:latest /bin/bash
# コンテナ上で
/# /etc/init.d/nginx start
- 先ほどと同様に [CoreOS の IP]:8080 で Welcome to nginx! が確認できる
