はじめに
今まではサーバーサイドの開発が主だったのですが、思い立ってRubyMotionを始めて見ました。
プロジェクトの開始
プロジェクトの開始はmotion createコマンドで行います。
motion create sample
これで初期のファイルが作成されます。
Create sample
Create sample/.gitignore
Create sample/app/app_delegate.rb
Create sample/Gemfile
Create sample/Rakefile
Create sample/resources/Default-568h@2x.png
Create sample/spec/main_spec.rb
app/app_delegate.rb
class AppDelegate
  def application(application, didFinishLaunchingWithOptions:launchOptions)
    true
  end
end
初めてのビルド
プロジェクトディレクトリに移動してrakeコマンドでビルドしてみます。
cd sample
rake
ビルドされて、自動的にシミュレーターが立ち上がります。
     Build ./build/iPhoneSimulator-7.1-Development
   Compile ./app/app_delegate.rb
    Create ./build/iPhoneSimulator-7.1-Development/sample.app
      Link ./build/iPhoneSimulator-7.1-Development/sample.app/sample
    Create ./build/iPhoneSimulator-7.1-Development/sample.app/PkgInfo
    Create ./build/iPhoneSimulator-7.1-Development/sample.app/Info.plist
      Copy ./resources/Default-568h@2x.png
    Create ./build/iPhoneSimulator-7.1-Development/sample.dSYM
  Simulate ./build/iPhoneSimulator-7.1-Development/sample.app
(main)>
なにもコードを追加していないので、真っ黒なシミュレーターが現れます。
外部ライブラリの利用 Gem編
RubyMotionは外部のライブラリを用いることも容易です。
CRubyのライブラリをそのまま使えるわけではありませんが、RubyMotion用Gemも豊富に用意されています。
使いたいライブラリをGemfileに追記しましょう。
今回はProMotionを使用してみます。
Gemfile
source 'https://rubygems.org'

gem 'ProMotion'
Gemfileに依存関係を記述したらbundle installコマンドでライブラリをインストールします。
グローバルに入れない場合はbundle install --path vendor/bundleなど、インストールパスを指定しましょう。
Rakeファイルにbundlerを使う設定がなされていれば、bundle exec rakeとしなくともrakeコマンドだけでタスクを実行できます。
Rakefile
# -*- coding: utf-8 -*-
$:.unshift("/Library/RubyMotion/lib")
require 'motion/project/template/ios'

begin
  require 'bundler'
  Bundler.require
rescue LoadError
end

Motion::Project::App.setup do |app|
  # Use `rake config' to see complete project settings.
  app.name = 'sample'
end
ProMotionをつかってみる
bundlerでProMotionをインストールできたので、
画面を作ってみます。
app/app_delegate.rb
class AppDelegate < PM::Delegate
  def on_load(app, options)
    open RootScreen.new(nav_bar: true)
  end
end
app/screens/root_screen.rb
class RootScreen < PM::Screen
  title "Root Screen"

  def on_load
    set_nav_bar_button :right, title: "Help", action: :open_help_screen
  end

  def open_help_screen
    open HelpScreen
  end
end
app/screens/help_screen.rb
class HelpScreen < PM::TableScreen
  title "Table Screen"

  def table_data
    [{
      title: "Help",
      cells: [
        { title: "About this app", action: :tapped_about },
        { title: "Log out", action: :log_out }
      ]
    }]
  end

  def tapped_about(args={})
    open AboutScreen
  end

  def log_out
    # Log out!
  end
end
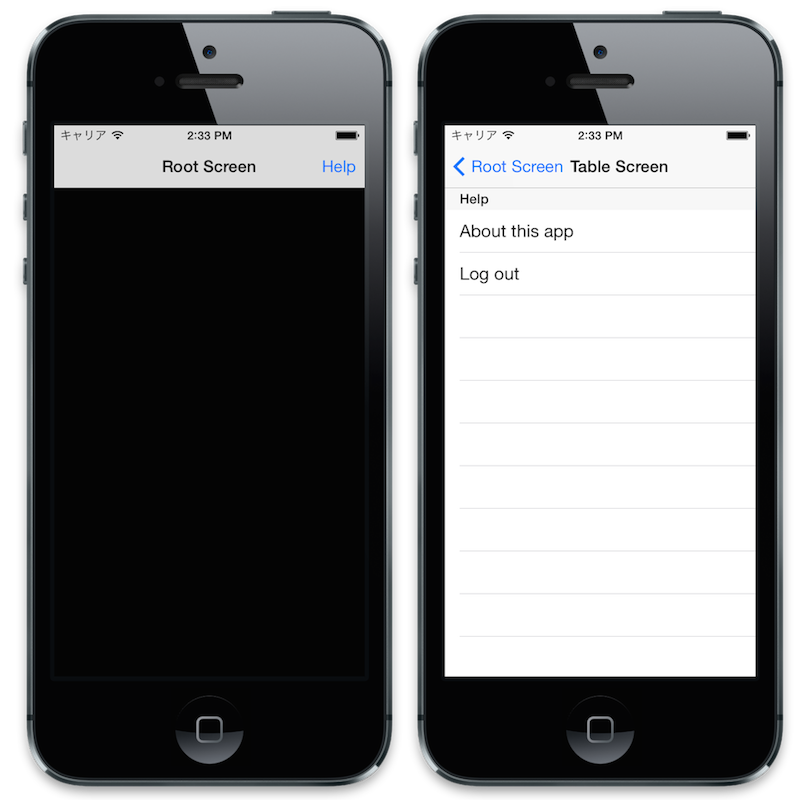
これでrakeすれば、画面のあるアプリが立ち上がります。
すこしアプリ開発っぽくなってきましたね。
CocoaPodsの利用
RubyMotionでもCocoaPodsで管理されているライブラリも利用することが可能です。
Gemfileにmotion-cocoapodsを追加します。
Gemfile
source 'https://rubygems.org'

gem 'ProMotion'
gem 'motion-cocoapods'
Rakefileの中でapp.podsブロックにてCocoaPodsライブラリとの依存関係を記述します。
Rakefile
# -*- coding: utf-8 -*-
$:.unshift("/Library/RubyMotion/lib")
require 'motion/project/template/ios'

begin
  require 'bundler'
  Bundler.require
rescue LoadError
end

Motion::Project::App.setup do |app|
  # Use `rake config' to see complete project settings.
  app.name = 'sample'

  app.pods do
    pod 'AFNetworking'
  end
end
rakeタスクにpod:installが追加されているので、CocoaPods管理ライブラリをインストールできます。
(初めてCocoaPodsを使う場合は先にbundle exec pod setup)
rake pod:install
これでvendor/Pods以下にインストールされ、ビルド時にリンクされるようになります。