はじめに
この記事では認証のプラグインであるdeviseをJSON APIで利用しやすく拡張することを目的としています。
deviseにはトークンによる認証機能もありましたが、現在デフォルトでは削除されています。
公式wiki How To: Simple Token Authentication ExampleにはTokenAuthenticatableが削除された経緯や、自分で実装する場合のサンプルへのリンクがありますが、気になる箇所があったため、自分で実装した物をまとめます。
本サンプルアプリケーションのソースコードはgithub.com/k-shogo/devise_api_sampleで公開しています。
記事公開時の環境は以下の物になります。
Ruby version              2.1.2-p95 (x86_64-darwin13.0)
RubyGems version          2.2.2
Rack version              1.5
Rails version             4.1.6
JavaScript Runtime        Node.js (V8)
サンプルアプリケーション
deviseの認証をweb, apiどちらからでも使用できるようにするサンプルアプリケーションを作成します。
今回は単純なノートアプリを題材とします。何はともあれrails newから始めましょう。
rails new devise_api_sample
認証の他に認可も行いたいので、Gemfileにdeviseとcancancanを追記します。
# Authentication
gem 'devise'
# Authorization
gem 'cancancan'
他にも、本サンプルでは
haml-rails,semantic-ui-sass,jquery-turbolinks,simple_form,active_link_toを使用しています。
bundle installと./bin/rake db:createを忘れずに。
ログインするユーザーを準備
deviseでログインするユーザーのモデルを準備しましょう。
同時にcancancanのabilityも用意しておきます。
フォーム生成を楽にするために最初にsimple_formの準備をしています。
./bin/rails g simple_form:install
./bin/rails g devise:install
./bin/rails g devise user
./bin/rails g devise:views users
./bin/rails g cancan:ability
トークン認証の機能のために、deviseで生成したマイグレーションにauthentication_tokenカラムを追加します。
class DeviseCreateUsers < ActiveRecord::Migration
  def change
    create_table(:users) do |t|
      ## Database authenticatable
      t.string :email,              null: false, default: ""
      t.string :encrypted_password, null: false, default: ""

      ## Recoverable
      t.string   :reset_password_token
      t.datetime :reset_password_sent_at

      ## Rememberable
      t.datetime :remember_created_at

      ## Trackable
      t.integer  :sign_in_count, default: 0, null: false
      t.datetime :current_sign_in_at
      t.datetime :last_sign_in_at
      t.string   :current_sign_in_ip
      t.string   :last_sign_in_ip

      ## Confirmable
      # t.string   :confirmation_token
      # t.datetime :confirmed_at
      # t.datetime :confirmation_sent_at
      # t.string   :unconfirmed_email # Only if using reconfirmable

      ## Lockable
      # t.integer  :failed_attempts, default: 0, null: false # Only if lock strategy is :failed_attempts
      # t.string   :unlock_token # Only if unlock strategy is :email or :both
      # t.datetime :locked_at

      ## 認証トークン
      t.string :authentication_token

      t.timestamps

      t.index :email,                unique: true
      t.index :reset_password_token, unique: true
      # t.index :confirmation_token,   unique: true
      # t.index :unlock_token,         unique: true
      t.index :authentication_token, unique: true
    end

  end
end
viewをカスタマイズするために生成したので、
config/initializers/devise.rbにてconfig.scoped_views = trueとしておきます。
ノートモデルを作る
ユーザーと関連するノートのモデルを作成します。
サンプルなので、タイトルと本文があるシンプルなモデルです。
./bin/rails g scaffold note user:references title:string body:text
必要なマイグレーションは用意できたので、./bin/rake db:migrate します。
次にapp/models/ability.rbでノートに関しての認可を設定します。
class Ability
  include CanCan::Ability

  def initialize(user)
    can :manage, Note, user: user if user
  end
end
abilityを設定したら、
app/controllers/notes_controller.rbにload_and_authorize_resourceを追加して、アクセスコントロールします。
class NotesController < ApplicationController
  load_and_authorize_resource
  before_action :set_note, only: [:show, :edit, :update, :destroy]

  # accessible_byでアクセスを制限
  def index
    @notes = Note.accessible_by(current_ability)
  end

  def show
  end

  def new
    @note = Note.new
  end

  def edit
  end

  def create
    # ノートの作成者を設定
    @note = Note.new(note_params.merge(user: current_user))

    respond_to do |format|
      if @note.save
        format.html { redirect_to @note, notice: 'Note was successfully created.' }
        format.json { render :show, status: :created, location: @note }
      else
        format.html { render :new }
        format.json { render json: @note.errors, status: :unprocessable_entity }
      end
    end
  end

  def update
    respond_to do |format|
      if @note.update(note_params)
        format.html { redirect_to @note, notice: 'Note was successfully updated.' }
        format.json { render :show, status: :ok, location: @note }
      else
        format.html { render :edit }
        format.json { render json: @note.errors, status: :unprocessable_entity }
      end
    end
  end

  def destroy
    @note.destroy
    respond_to do |format|
      format.html { redirect_to notes_url, notice: 'Note was successfully destroyed.' }
      format.json { head :no_content }
    end
  end

  private
    # Use callbacks to share common setup or constraints between actions.
    def set_note
      @note = Note.find(params[:id])
    end

    # Never trust parameters from the scary internet, only allow the white list through.
    def note_params
      params.require(:note).permit(:user_id, :title, :body)
    end
end
ほぼデフォルトのままですが、indexでは自分が作成したノートだけを返すように, createではノートと作成者が関連付くように変更しています。
見た目を調整
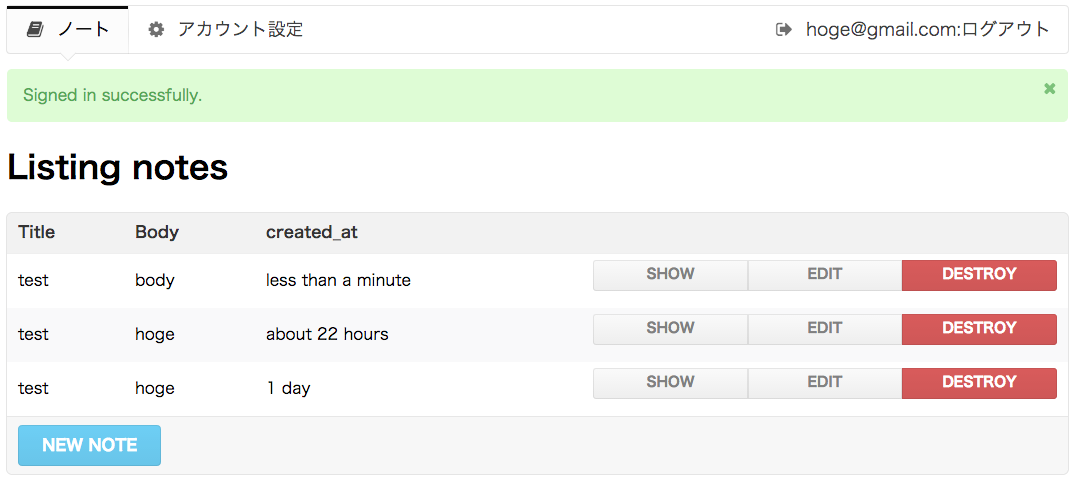
ブラウザで動作確認したいので、ログイン/ログアウト出来るようにメニューバーを追加しておきます。
!!!
%html
  %head
    %title DeviseApiUse
    = stylesheet_link_tag    'application', media: 'all', 'data-turbolinks-track' => true
    = javascript_include_tag 'application', 'data-turbolinks-track' => true
    = csrf_meta_tags
  %body
    = render 'menu'
    #messages
      = semantic_message
    = yield
.ui.pointing.menu.large
  - if can? :namage, Note
    = active_link_to notes_path, class: 'item' do
      = semantic_icon(:book)
      ノート
  - if user_signed_in?
    = active_link_to edit_user_registration_path, class: 'item' do
      = semantic_icon(:setting)
      アカウント設定
  .right.menu
    - if user_signed_in?
      = link_to destroy_user_session_path, method: :delete, class: 'item' do
        = semantic_icon(:sign, :out)
        #{current_user.email}:ログアウト
    - else
      = active_link_to new_user_session_path, class: 'item' do
        = semantic_icon(:sign, :in)
        ログイン
simple_formのsemantic-ui対応やフラッシュメッセージ用helper, メッセージ削除用js等はオマケ要素なのでgithubを参照してください。
画面はこんな感じになりました。
アクセストークン発行画面
ユーザーの設定画面に、アクセストークン発行機能を追加します。
まずはユーザーモデルapp/models/user.rbにトークン発行の機能を持たせます。
class User < ActiveRecord::Base
  # Include default devise modules. Others available are:
  # :confirmable, :lockable, :timeoutable and :omniauthable
  devise :database_authenticatable, :registerable,
         :recoverable, :rememberable, :trackable, :validatable

  # 認証トークンはユニークに。ただしnilは許可
  validates:authentication_token, uniqueness: true, allow_nil: true
  has_many :notes

  # 認証トークンが無い場合は作成
  def ensure_authentication_token
    self.authentication_token || generate_authentication_token
  end

  # 認証トークンの作成
  def generate_authentication_token
    loop do
      old_token = self.authentication_token
      token = SecureRandom.urlsafe_base64(24).tr('lIO0', 'sxyz')
      break token if (self.update!(authentication_token: token) rescue false) && old_token != token
    end
  end

  def delete_authentication_token
    self.update(authentication_token: nil)
  end

end
トークン管理用のコントローラーapp/controllers/authentication_tokens_controller.rbを追加します。
class AuthenticationTokensController < ApplicationController
  before_action :authenticate_user!

  def update
    token = current_user.generate_authentication_token
    render json: {token: token}.to_json
  end

  def destroy
    current_user.delete_authentication_token
    render nothing: true
  end
end
config/routes.rbにresource :authentication_token, only: [:update, :destroy]を追加します。
ユーザーが自分でアクセストークンを発行できるように、ユーザーの設定画面にアクセストークン発行ボタンをつけます。
%h2
  Edit #{resource_name.to_s.humanize}
= simple_form_for(resource, as: resource_name, url: registration_path(resource_name), html: { method: :put }) do |f|
  = f.error_notification
  .form-inputs
    = f.input :email, required: true, autofocus: true
    - if devise_mapping.confirmable? && resource.pending_reconfirmation?
      %p
        Currently waiting confirmation for: #{resource.unconfirmed_email}
    = f.input :password, autocomplete: "off", hint: "leave it blank if you don't want to change it", required: false
    = f.input :password_confirmation, required: false
    = f.input :current_password, hint: "we need your current password to confirm your changes", required: true
  .form-actions
    = f.button :submit, "Update"

%h3 authentication token
.ui.form.segment
  .field
    %input{placeholder: 'authentication token', readonly: true, type: 'text', value: resource.authentication_token, id: 'authentication_token'}

  = link_to authentication_token_path, method: :put, remote: true, id: 'generate_authentication_token', class: 'ui button green' do
    = semantic_icon :refresh
    generate authentication token

  = link_to authentication_token_path, method: :delete, remote: true, id: 'delete_authentication_token', class: 'ui button red'do
    = semantic_icon :remove
    delete authentication token

%h3 Cancel my account
%p
  Unhappy? #{link_to "Cancel my account", registration_path(resource_name), data: { confirm: "Are you sure?" }, method: :delete}
= link_to "Back", :back
アクセストークン発行ボタンはremote設定にしたので、押下したときの動作をapp/assets/javascripts/authentication_token.js.coffeeで定義します。
$ ->
  $('#generate_authentication_token')
    .on 'ajax:complete', (event, ajax, status) ->
      response = $.parseJSON(ajax.responseText)
      $('#authentication_token').val response.token
  $('#delete_authentication_token')
    .on 'ajax:complete', (event, ajax, status) ->
      $('#authentication_token').val ''
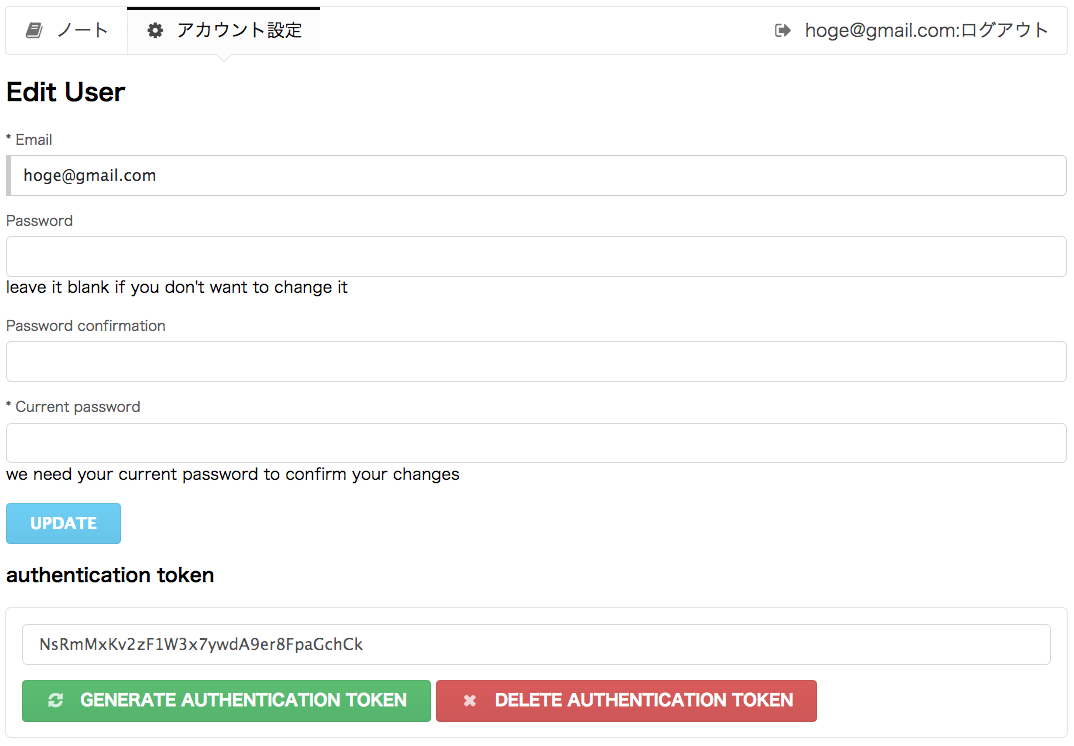
これで、設定画面で"generate authentication token"を押すとアクセストークンが発行されます。
アクセストークンによる認証
トークンの発行が出来るようになったので、続いてトークンによる認証の機構を追加します。
今回はapp/controllers/application_controller.rbに追加します。
class ApplicationController < ActionController::Base
  protect_from_forgery with: :exception
  # json でのリクエストの場合CSRFトークンの検証をスキップ
  skip_before_action :verify_authenticity_token,     if: -> {request.format.json?}
  # トークンによる認証
  before_action      :authenticate_user_from_token!, if: -> {params[:email].present?}

  # 権限無しのリソースにアクセスしようとした場合
  rescue_from CanCan::AccessDenied do |exception|
    respond_to do |format|
      format.html { redirect_to main_app.root_url, alert: exception.message }
      format.json { render json: {message: exception.message}, status: :unauthorized }
    end
  end

  # トークンによる認証
  def authenticate_user_from_token!
    user = User.find_by(email: params[:email])
    if Devise.secure_compare(user.try(:authentication_token), params[:token])
      sign_in user, store: false
    end
  end
end
これで、リクエストパラメーターにemailとtokenが含まれていた場合に、トークンによってユーザーを認証出来るようになりました。
deviseのjson API対応
ここまででトークンによる認証は実装しましたが、
このままだとwebでユーザー登録 & トークン発行後にしかAPIが利用できません。
そこでユーザー登録もAPIで利用できるようにするために、config/application.rbでdeviseがjsonのリクエストにも対応できるように設定します。
module DeviseApiUse
  class Application < Rails::Application
    # 中略
    config.to_prepare do
      DeviseController.respond_to :html, :json
    end
  end
end
なお、rails 4.2 release notesにクラスレベルのrespond_toは削除されたので、respondersを追加してね、とあるので今後少し注意かもしれません。
respond_with and the corresponding class-level respond_to have been moved to the responders gem.
To use the following, add gem 'responders', '~> 2.0' to your Gemfile:
APIでのログイン時、アクセストークンが無い場合に生成して返すように、ログインの動作を拡張します。
これでユーザー登録もAPIで利用可能になりました。
APIでのログイン時、ユーザー情報のJSONを返すのですが、
ユーザーがトークンを発行していない場合は改めてトークン発行APIを叩く必要があります。
そこで、APIでのログイン時のみ、「トークンが発行されていない場合は作成する」ように拡張します。
deviseのコントローラーを拡張するので、
config/routes.rbでdeviseのルーティングをカスタマイズし、独自コントローラーに向くようにします。
Rails.application.routes.draw do
  resources :notes
  resource :authentication_token, only: [:update, :destroy]

  devise_for :users, controllers: { sessions: "sessions"  }
  root to: 'home#index'
end
Devise::SessionsControllerを継承したapp/controllers/sessions_controller.rbでログイン時の動作を拡張します。
class SessionsController < Devise::SessionsController
  def create
    super do |resource|
      resource.ensure_authentication_token if request.format.json?
    end
  end
end
Devise::SessionsControllerのcreateにはブロックを渡せるので、それによってAPIでのログイン時にトークンが無い場合には発行してからレスポンスを返すようにしています。
APIのリクエストを試してみる
最後にAPIでのリクエストを試してみます。
ユーザー登録
リクエスト
curl -v -H "Accept: application/json" -H "Content-type: application/json" -X POST -d '{"user":{"email":"hoge@gmail.com","password":"hogehoge","password_confirmation":"hogehoge"}}' "http://localhost:3000/users.json"
レスポンス
{"id":11,"email":"hoge@gmail.com","authentication_token":null,"created_at":"2014-09-14T10:10:56.054Z","updated_at":"2014-09-14T10:10:56.057Z"}
ログイン(アクセストークンの取得)
リクエスト
curl -v -H "Accept: application/json" -H "Content-type: application/json" -X POST -d '{"user":{"email":"hoge@gmail.com","password":"hogehoge"}}' "http://localhost:3000/users/sign_in.json"
レスポンス
{"id":11,"email":"hoge@gmail.com","authentication_token":"jLJyLg_o3crPPhfUoCrA4kzdrHxP31Fc","created_at":"2014-09-14T10:10:56.054Z","updated_at":"2014-09-14T10:11:45.007Z"}
リソースへのアクセス
ノート作成リクエスト
curl -v -H "Accept: application/json" -H "Content-type: application/json" -X POST -d '{"note":{"title":"test","body":"hoge"}}' "http://localhost:3000/notes.json?email=hoge@gmail.com&token=jLJyLg_o3crPPhfUoCrA4kzdrHxP31Fc"
レスポンス
{"id":11,"user_id":11,"title":"test","body":"hoge","created_at":"2014-09-14T10:13:20.355Z","updated_at":"2014-09-14T10:13:20.355Z"}
ノート一覧リクエスト
curl -v -H "Accept: application/json" -H "Content-type: application/json" "http://localhost:3000/notes.json?email=hoge@gmail.com&token=jLJyLg_o3crPPhfUoCrA4kzdrHxP31Fc"
レスポンス
[{"id":11,"user_id":11,"title":"test","body":"hoge","url":"http://localhost:3000/notes/11.json"}]
アクセストークンの更新
リクエスト
curl -v -H "Accept: application/json" -H "Content-type: application/json" -X PUT -d '' "http://localhost:3000/authentication_token.json?email=hoge@gmail.com&token=jLJyLg_o3crPPhfUoCrA4kzdrHxP31Fc"
レスポンス
{"id":11,"email":"hoge@gmail.com","authentication_token":"WNRPupEy9f5CWiQE71kFQQEHut5DZxBc","created_at":"2014-09-14T10:10:56.054Z","updated_at":"2014-09-14T10:16:57.923Z"}
アクセストークンの削除
リクエスト
curl -v -H "Accept: application/json" -H "Content-type: application/json" -X DELETE "http://localhost:3000/authentication_token.json?email=hoge@gmail.com&token=WNRPupEy9f5CWiQE71kFQQEHut5DZxBc"
まとめ
これでweb, APIどちらでもdeviseを利用できるようになりました。