Tango Unity SDKにパッケージされているExamplesのソースコードを読んで、サンプルアプリを作ります。
今回は、床(平面)を認識してマーカーを配置するExperimentalFloorFindingです。
ソースコードの解析
以下の3ファイルを解析・改変します。
ソースコードのライセンスは、[Apache License 2.0]
(http://www.apache.org/licenses/LICENSE-2.0)です。
- TangoSDK/Examples/ExperimentalFloorFinding/Scripts/TangoFloorFindingUIController.cs
- TangoPrefabs/Scripts/TangoPointCloud.cs
- TangoPrefabs/Scripts/TangoPointCloudFloor.cs
床(平面)の高さを求める
GUIの"Find Floor"ボタンがトリガになります。ボタン押下時に、m_pointCloud.FindFloor()を呼び出しています。
public void OnGUI()
{
    GUI.color = Color.white;

    if (!m_findingFloor)
    {
        if (GUI.Button(new Rect(Screen.width - 220, 20, 200, 80), "<size=30>Find Floor</size>"))
        {
            if (m_pointCloud == null)
            {
                Debug.LogError("TangoPointCloud required to find floor.");
                return;
            }

            m_findingFloor = true;
            m_marker.SetActive(false);
            m_tangoApplication.SetDepthCameraRate(TangoEnums.TangoDepthCameraRate.MAXIMUM);
            m_pointCloud.FindFloor();
        }
    }
    else
    {
            GUI.Label(new Rect(0, Screen.height - 50, Screen.width, 50), "<size=30>Searching for floor position. Make sure the floor is visible.</size>");
    }
}
FindFloor()ではm_findFloorWithDepthにtrueをセットしています。
public void FindFloor()
{
    m_floorFound = false;
    m_findFloorWithDepth = true;
    m_floorPlaneY = 0.0f;
}
pointCloudを取得するたびにOnTangoPointCloudAvailable()がcallされ、フラグを立てたことで_FindFloorWithDepth()が実行されます。
pointCloudについては、前回の記事を参照ください。
public void OnTangoPointCloudAvailable(TangoPointCloudData pointCloud)
{
    ...
        // Try to find the floor using this set of depth points if requested.
        if (m_findFloorWithDepth)
        {
            _FindFloorWithDepth();
        }
    ...
}
_FindFloorWithDepth()がメインの処理になります。
private const int RECOGNITION_THRESHOLD = 1000;
private const int NOISE_THRESHOLD = 500;
private const float SENSITIVITY = 0.02f;

private void _FindFloorWithDepth()
{
    m_numPointsAtY.Clear();
    m_nonNoiseBuckets.Clear();

    // Count each depth point into a bucket based on its world position y value.
    for (int i = 0; i < m_pointsCount; i++)
    {
        Vector3 point = m_points[i];
        if (!point.Equals(Vector3.zero))
        {
            // Group similar points into buckets based on sensitivity.
            float roundedY = Mathf.Round(point.y / SENSITIVITY) * SENSITIVITY;
            if (!m_numPointsAtY.ContainsKey(roundedY))
            {
                m_numPointsAtY.Add(roundedY, 0);
            }

            m_numPointsAtY[roundedY]++;

            // Check if the y plane is a non-noise plane.
            if (m_numPointsAtY[roundedY] > NOISE_THRESHOLD && !m_nonNoiseBuckets.Contains(roundedY))
            {
                m_nonNoiseBuckets.Add(roundedY);
            }
        }
    }

    // Find a plane at the y value. The y value must be below the camera y position.
    m_nonNoiseBuckets.Sort();
    for (int i = 0; i < m_nonNoiseBuckets.Count; i++)
    {
        float yBucket = m_nonNoiseBuckets[i];
        int numPoints = m_numPointsAtY[yBucket];
        if (numPoints > RECOGNITION_THRESHOLD && yBucket < Camera.main.transform.position.y)
        {
            // Reject the plane if it is not the lowest.
            if (yBucket > m_nonNoiseBuckets[0])
            {
                return;
            }

            m_floorFound = true;
            m_findFloorWithDepth = false;
            m_floorPlaneY = yBucket;
            m_numPointsAtY.Clear();
            m_nonNoiseBuckets.Clear();
        }
    }
}
行っている処理はシンプルで、pointCloudから高さ(y座標)が同じpointの数を数えて、
- 一定数同じ高さのpointがある(平面である)
- カメラより位置が低い
の条件を満たす高さ(m_floorPlaneY)を求めています。
前半のループでは丸めた値をm_numPointsAtYでカウントしています。元の値はmm(ミリメートル)より細かい精度なので、SENSITIVITYで丸めています。SENSITIVITY = 0.02fは、0.02m = 2cmの精度です。
m_nonNoiseBucketsには、同じ高さのpointがNOISE_THRESHOLDを超えたときだけ、高さの値が格納されます。この配列が求める高さの候補になります。
後半の処理では、m_nonNoiseBucketsをソートした後、ループしているのですが、結局、一番小さい値以外は除外しているので、あまり意味はないような気もします。
if文の条件式で、point数がRECOGNITION_THRESHOLDより大きく、高さがカメラよりも低い場合、値をm_floorPlaneYにセットしています。
RECOGNITION_THRESHOLDとNOISE_THRESHOLDを別に定義している理由は、よくわかっていません。
マーカーを配置する
TangoPointCloudFloorのy座標がm_floorPlaneYで更新されます。
public void Update()
{
    // If the point cloud has found the floor, adjust the position accordingly.
    if (m_pointCloud.m_floorFound)
    {
        m_floorFound = true;
        if (transform.position.y != m_pointCloud.m_floorPlaneY)
        {
            transform.position = new Vector3(0.0f, m_pointCloud.m_floorPlaneY, 0.0f);
            foreach (Transform t in transform)
            {
                t.gameObject.SetActive(true);
            }
        }
        ...
    }
    else
    {
        m_floorFound = false;
        m_depthTriggered = false;
    }
}
UIControllerに戻って、TangoPointCloudFloorが更新された後の処理を行います。
画面の中心方向にRayCastを伸ばして、Floorと衝突した点にマーカーを移動しています。
public void Update()
{
    ...

    if (!m_findingFloor)
    {
        return;
    }

    // If the point cloud floor has found a new floor, place the marker at the found y position.
    if (m_pointCloudFloor.m_floorFound && m_pointCloud.m_floorFound)
    {
        m_findingFloor = false;

        // Place the marker at the center of the screen at the found floor height.
        m_marker.SetActive(true);
        Vector3 target;
        RaycastHit hitInfo;
        if (Physics.Raycast(Camera.main.ScreenPointToRay(new Vector3(Screen.width / 2.0f, Screen.height / 2.0f)), out hitInfo))
        {
            // Limit distance of the marker position from the camera to the camera's far clip plane. This makes sure that the marker
            // is visible on screen when the floor is found.
            Vector3 cameraBase = new Vector3(Camera.main.transform.position.x, hitInfo.point.y, Camera.main.transform.position.z);
            target = cameraBase + Vector3.ClampMagnitude(hitInfo.point - cameraBase, Camera.main.farClipPlane * 0.9f);
        }
        else
        {
            // If no raycast hit, place marker in the camera's forward direction.
            Vector3 dir = new Vector3(Camera.main.transform.forward.x, 0.0f, Camera.main.transform.forward.z);
            target = dir.normalized * (Camera.main.farClipPlane * 0.9f);
            target.y = m_pointCloudFloor.transform.position.y;
        }

        m_marker.transform.position = target;
        ...
    }
}
サンプルアプリの作成
マーカーの変更
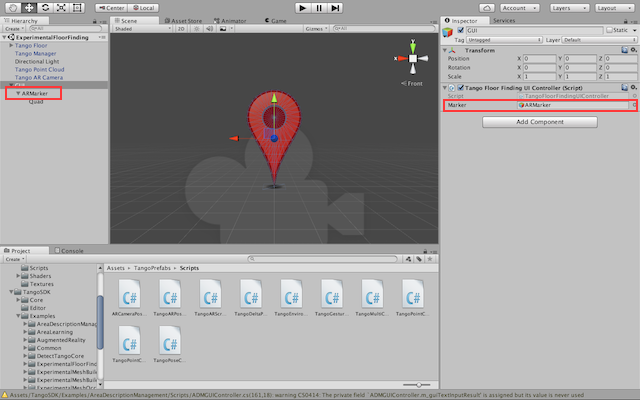
GUIに紐付いているARMarkerを任意のGameObjectに変更するだけでOKです。
スクリーンショットの赤枠部分です。
マーカーの向きを変更
マーカーの位置を更新する際に、LookAtでカメラの方向を向くようにしました。
public void Update()
{
    ...

    if (m_pointCloudFloor.m_floorFound && m_pointCloud.m_floorFound)
    {
        ...

        m_marker.transform.position = target;
        m_marker.transform.LookAt (Camera.main.transform.position); // 追加
        ...
    }
}
テスト
まとめ
コメントが多めに書かれているので、基礎を理解して処理の流れを追えれば、読み解くのは難しくないと思います。
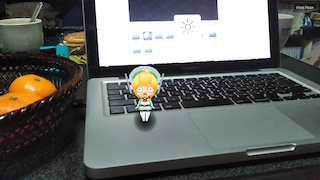
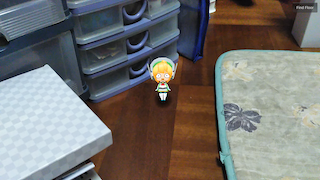
ARの静止画ではそれっぽく見えていますが、サンプルアプリを動かした感触では、実用レベルでの精度は改めて評価する必要があるかなと。
_FindFloorWithDepth()のロジックには改良の余地がありそうです。
【2017/1/12追記】
マーカーの配置に関しては、AreaLearningを用いることで、マーカー座標のズレを補正する方法があり、そちらの処理を採用した方が精度が上がります。
おわりに
今回のサンプルでは、クエリちゃん SD版モデルを使用しました。