環境
- mac
- Raspberry Pi2 Model B
- Raspbian JESSIE
- デジタル温度センサ(1wire)DS18B20+
- python3.5.4
1.温度センサーの準備
1wireのセンサーを使うので、RaspberryPiの/etc/modulesに以下を追記する
w1-gpio
w1-therm
/boot/config.txtに以下を追記する
dtoverlay=w1-gpio-pullup
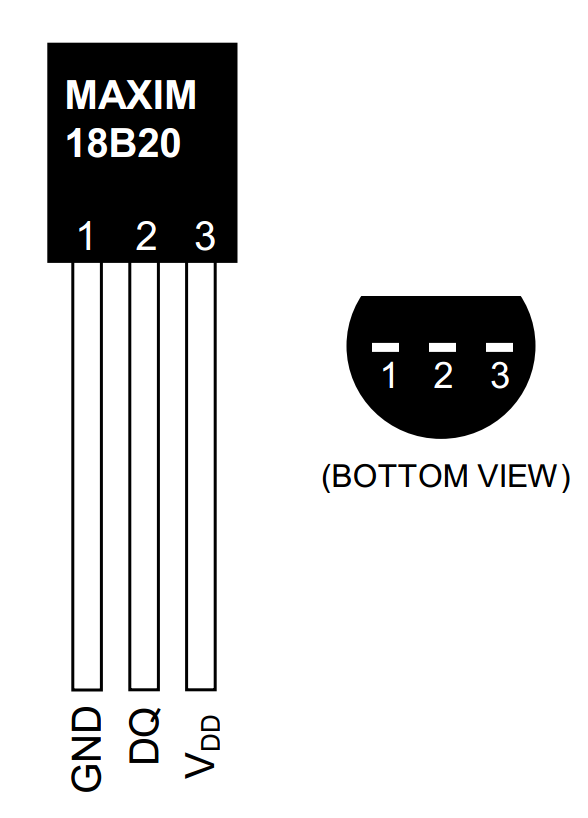
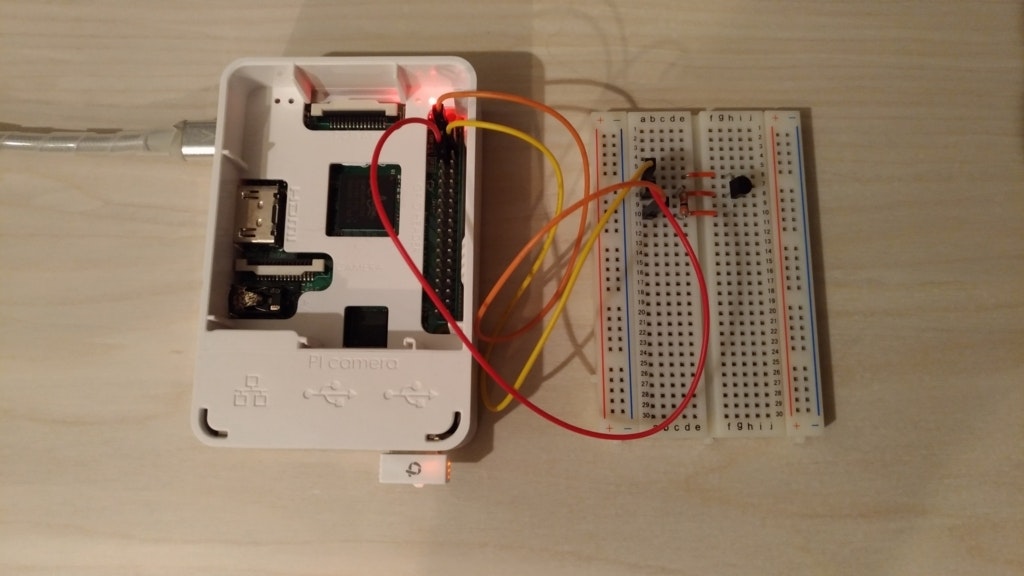
センサーの接続は、
- センサーの1番ピン(GND)をRaspberryPiの6番ピン(GND)
- センサーの2番ピン(DQ)をRaspberryPiの7番ピン(GPIO4)
- センサーの3番ピン(VDD)をRaspberryPiの1番ピン(3.3V)
にします。
センサーの2番ピンと3番ピンをプルアップ抵抗でつなげています
参考:http://blog.livedoor.jp/victory7com/archives/33399310.html
接続の確認はlsmodコマンドで。うまく接続できていれば、以下のようになります。
pi@raspberrypi:~/Documents/work$ lsmod | grep w1
w1_therm                6401  0
w1_gpio                 4818  0
wire                   32619  2 w1_gpio,w1_therm
取得した温度は「/sys/bus/w1/devices/28-XXXXXXXX/w1_slave」に書き出されます。
(28-XXXXXXXXのXXXXは、お使いの端末ごとにかわります)
pi@raspberrypi:~/Documents/work$ cat /sys/bus/w1/devices/28-00000723fabd/w1_slave
b1 01 4b 46 7f ff 0f 10 8d : crc=8d YES
b1 01 4b 46 7f ff 0f 10 8d t=27062
「t=」の値を1000で割った値が現在の温度です。
2.IFTTTの準備
IFTTTにアクセスしてMy Appletから、レシピを作っていきます。
「this」には「Webhooks」を設定、「that」には「line」を設定します
設定後、 https://ifttt.com/services/maker_webhooks/settings にアクセスして、記載されているURLにアクセスして、キーを有効にします。
- eventは、Webhooks設定時に設定したイベント名
- valueは、LINEに送りたい値
「You can also try it with curl from a command line.」に続くcurlのコマンドを実行することで、設定したLINEの宛先に送信します
3.pythonで結合する
RaspberryPiで、pythonで温度を取得して、IFTTTで設定したWebhooksのURLをリクエストして、LINEに室温を送信します。
温度を取得するライブラリをインストールします
pip install w1thermsensor
取得と送信は以下のようなコードで
from w1thermsensor import W1ThermSensor
import urllib.request, json

sensor = W1ThermSensor(W1ThermSensor.THERM_SENSOR_DS18B20, "(センサーのデバイス名)")
temperature_in_celsius = sensor.get_temperature()

url = "https://maker.ifttt.com/trigger/(Webhooksのイベント名)/with/key/(Webhooksのキー)"
method = "POST"
headers = {"Content-Type" : "application/json"}

obj = {"value1" : temperature_in_celsius}
json_data = json.dumps(obj).encode("utf-8")

request = urllib.request.Request(url, data=json_data, method=method, headers=headers)
with urllib.request.urlopen(request) as response:
  response_body = response.read().decode("utf-8")
THERM_SENSOR_DS18B20は使用しているセンサーの型番に合わせてください。
センサーのデバイス名は28−XXXXXXXXのXXXX部分です。
あとはこれをクーロンなどに設定すれば、室温を定期的に取得できます。