はじめに
先日、Qiitaに「devise でメールアドレスのみでユーザー登録を行い、パスワードを後から設定する方法」という記事が投稿されていました。
devise でメールアドレスのみでユーザー登録を行い、パスワードを後から設定する方法 - Qiita
上記の記事で紹介されているDevise confirmableは僕もよく使っています。
ただ、ユーザー登録のフローは手作業でテストしようとすると、毎回新しいユーザーを登録しなければならず手間がかかります。
このように気軽に動作確認できない操作は自動化テストで動作確認できるようにしておくことが望ましいです。
そこでこの記事ではDevise confirmable用のテストをRSpecで書く方法を紹介します。
使用するサンプルアプリケーション
@necojackarc さんが作成されたサンプルアプリを使います。
今回作成したテストコード
今回作成したテストコードは僕のリポジトリに置いてあります。
Special bonus! 解説動画をアップしました
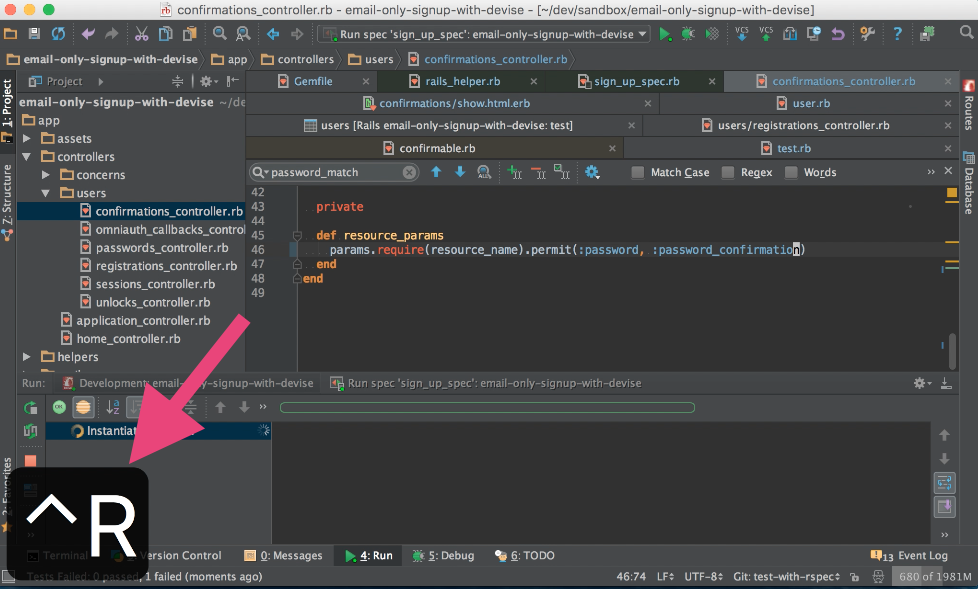
実際にテストを書いていく様子をYouTubeにアップしました。
本記事とあわせてこちらの動画も見てもらうと、何をどうやっているのかがより理解しやすくなるはずです。
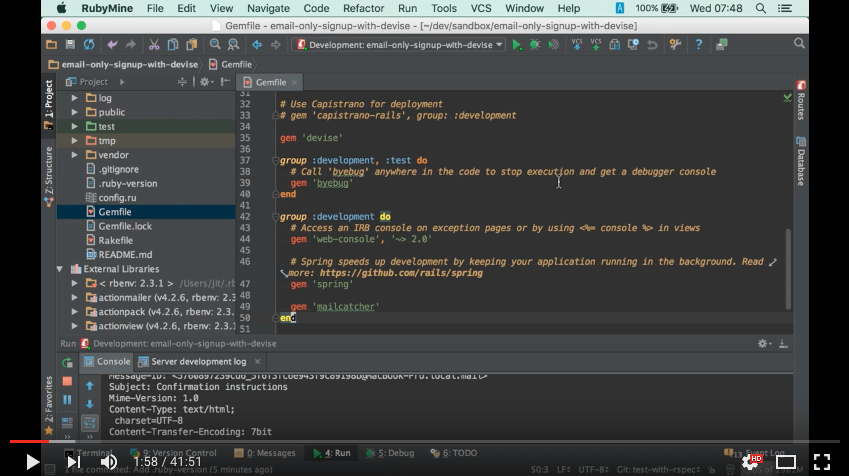 Devise confirmable用のテスト(フィーチャスペック)を書く - YouTube
また、IDEとしてRubyMineを使っているので、RubyMineを使ってみたい方、もしくはRubyMineをもっと使いこなしたいと思っている方にも参考になると思います。
動画の中ではショートカットキーが表示されます!
今回はどんなショートカットを使っているのかわかりやすくするために、画面にショートカットキーを表示しています。
もしかするとあなたの知らないRubyMineのショートカットキーが登場するかもしれませんよ?
それでは以下が手順です。
1. RSpec + Capybaraのセットアップ
元のサンプルアプリにはRSpecがセットアップされていないので、まずRSpecのセットアップをします。
また、フィーチャスペックを書くのでCapybaraも使います。
RSpecやCapybaraのセットアップ手順はネット等でよく紹介されているはずなので、ここでは省略します。
(前述の動画の中ではセットアップの手順も紹介しているので、動画を見てもらうのも一つの手です)
2. test.rb の変更
テスト環境で使用するホスト名を設定します。
ホスト名を指定しないとメール送信時にエラーが起きます。
Rails.application.configure do
  # ...

  config.action_mailer.default_url_options = { host: 'localhost:3000' }
end
3. database_rewinder のセットアップ
Devise confirmable は after_commit のコールバックでメールを送信します。
しかし、RSpecのデフォルトのトランザクション設定は use_transactional_fixtures = true になっており、テストの最後にロールバックするので、テスト実行中はコミットされません。
よって、そのままだとパスワード設定用のメールが送信されない、という問題があります。
そこでまず、rails_helper.rb でトランザクションを使わないように設定を変更します。
RSpec.configure do |config|
  # ...

  config.use_transactional_fixtures = false

  # ...
end
これでテスト実行中にもコミットされるようになり、メール送信もできるようになります。
しかし、今度はテスト実行中に作成したデータがデータベース内に残ったままになる、という問題が起きます。
そこで次に、database_rewinder というgemを使って、テスト終了時にデータを削除するようにします。
まずはgemをインストールします。
group :test do
  # ...
  gem 'database_rewinder'
end
bundle install したら、rails_helper.rb に以下の設定を追加します。
RSpec.configure do |config|
  # ...

  config.before(:suite) do
    DatabaseRewinder.clean_all
  end

  config.after(:each) do
    DatabaseRewinder.clean
  end

  # ...
end
なお、database_rewinder の代わりに database_cleaner を使うのもOKです。
4. 元のアプリの不具合を修正する
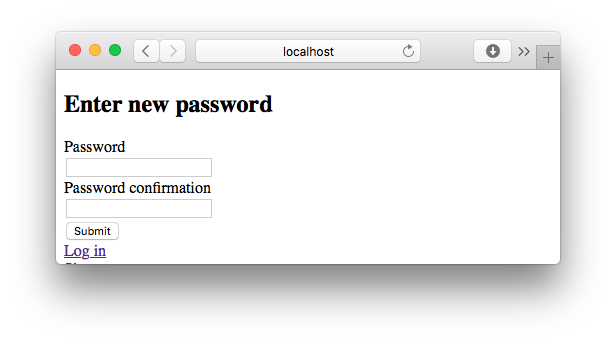
元のサンプルアプリにはパスワードが未入力でもパスワード設定ができてしまう、という不具合があるのでそれを修正します。
これは不具合ではなく、意図的にバリデーションを外していたそうです。(参考)
が、ここでは最低限のバリデーションを追加することにします。
(バリデーションの追加はこちらのWikiページを参考にしています。)
 # app/models/user.rb

 class User < ActiveRecord::Base
   # Include default devise modules. Others available are:
   # :lockable, :timeoutable and :omniauthable
   devise :confirmable, :database_authenticatable, :registerable,
          :recoverable, :rememberable, :trackable, :validatable

   def password_required?
     super if confirmed?
   end

+  def password_match?
+    self.errors[:password] << "can't be blank" if password.blank?
+    self.errors[:password_confirmation] << "can't be blank" if password_confirmation.blank?
+    self.errors[:password_confirmation] << "does not match password" if password != password_confirmation
+    password == password_confirmation && !password.blank?
+  end
 end
 # app/controllers/users/confirmations_controller.rb

 class Users::ConfirmationsController < Devise::ConfirmationsController
   # ...

   def confirm
     confirmation_token = params[resource_name][:confirmation_token]
     self.resource = resource_class.find_by_confirmation_token!(confirmation_token)

-    if resource.update(confirmation_params)
+    if resource.update(confirmation_params) && resource.password_match?
       self.resource = resource_class.confirm_by_token(confirmation_token)
       set_flash_message :notice, :confirmed
       sign_in_and_redirect resource_name, resource
     else
       render :show
     end
   end

   # ...

   def confirmation_params
-    params.require(resource_name).permit(:password)
+    params.require(resource_name).permit(:password, :password_confirmation)
   end
 end
 # app/views/users/confirmations/show.html.erb
  <h2>Enter new password</h2>

 <%= form_for(resource, as: resource_name, url: confirmation_path(resource_name)) do |f| %>
   <%= f.hidden_field :confirmation_token %>

   <%= devise_error_messages! %>

   <div class="field">
     <%= f.label :password %>
     <% if @minimum_password_length %>
     <em>(<%= @minimum_password_length %> characters minimum)</em>
     <% end %><br />
-    <%= f.password_field :password, autocomplete: "off" %>
+    <%= f.password_field :password, autocomplete: "off" %><br />
+    <%= f.label :password_confirmation %><br />
+    <%= f.password_field :password_confirmation, autocomplete: "off" %>
   </div>

   <div class="actions">
     <%= f.submit "Submit" %>
   </div>
 <% end %>

 <%= render "users/shared/links" %>
5. テスト(フィーチャスペック)を書く
さて、ここまで準備ができたらいよいよテストを書きます。
spec/features というディレクトリを作り、その中に sign_up_spec.rb というファイルを作ります。
このファイルにテストを書きます。
require 'rails_helper'

feature 'Sign up' do
  background do
    ActionMailer::Base.deliveries.clear
  end

  def extract_confirmation_url(mail)
    body = mail.body.encoded
    body[/http[^"]+/]
  end

  scenario 'メールアドレスのみでユーザー登録を行い、パスワードを後から設定する' do
    visit root_path
    expect(page).to have_http_status :ok

    click_link 'Sign up'
    fill_in 'Email', with: 'foo@example.com'
    expect { click_button 'Sign up' }.to change { ActionMailer::Base.deliveries.size }.by(1)
    expect(page).to have_content 'A message with a confirmation link has been sent to your email address'

    mail = ActionMailer::Base.deliveries.last
    url = extract_confirmation_url(mail)
    visit url
    expect(page).to have_content 'Enter new password'

    # 登録に失敗する場合
    click_button 'Submit'
    expect(page).to have_content "Password can't be blank"
    expect(page).to have_content "Password confirmation can't be blank"

    fill_in 'Password', with: '12345678'
    fill_in 'Password confirmation', with: '123456789'
    click_button 'Submit'
    expect(page).to have_content 'Password confirmation does not match password'

    # 登録に成功する場合
    fill_in 'Password', with: '12345678'
    fill_in 'Password confirmation', with: '12345678'
    click_button 'Submit'
    expect(page).to have_content 'Your email address has been successfully confirmed.'

    click_link 'Log out'
    expect(page).to have_content 'Signed out successfully.'

    click_link 'Log in'
    fill_in 'Email', with: 'foo@example.com'
    fill_in 'Password', with: '12345678'
    click_button 'Log in'
    expect(page).to have_content 'Signed in successfully.'
  end
end
では、ここからテストコードの内容を順に説明していきます。
5-1. テストの実行前に送信メールをクリアする
詳しくは後述しますが、テストコード内で送信メールをチェックする部分があります。
予期せぬトラブルを避けるため、テスト実行前に送信メールのリストを空っぽにしておきます。
background do
  ActionMailer::Base.deliveries.clear
end
ただし、これは書かなくても今回のテストコードには影響はありません。(念のため実行しているだけです)
5-2. トップページにアクセスする
ここからあとは scenario ブロック内のコードを説明していきます。
なお、フィーチャスペックを書く場合は画面の表示内容に大きく依存するので、画面とコードを同時に見ていった方が理解しやすいです。
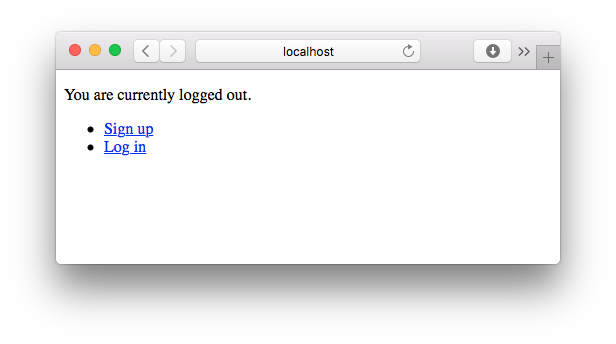
以降の説明では「画面 => テストコード」の順に説明を入れていきます。
まず最初に、トップページにアクセスしてエラーが起きないことを検証しています。
# トップページにアクセス
visit root_path
# HTTPステータスコードに異常がないことを検証する
expect(page).to have_http_status :ok
ここではHTTPステータスコードをチェックしましたが、以下のようにページに特定の文字列が含まれることを検証するのもよいと思います。
visit root_path
expect(page).to have_content 'You are currently logged out.'
5-3. メールアドレスを入力して、パスワード設定メールを送信する
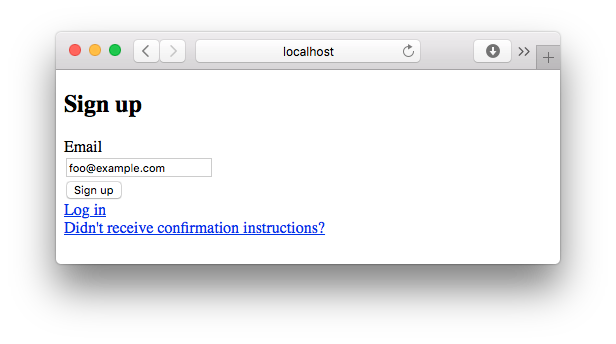
次にメールアドレスを入力して、パスワード設定メールを送信します。
# Sign upのリンクをクリック
click_link 'Sign up'
# メールアドレスを入力
fill_in 'Email', with: 'foo@example.com'
# Sign upボタンをクリック。その際、送信メールのリストが1件増えることを検証する
expect { click_button 'Sign up' }.to change { ActionMailer::Base.deliveries.size }.by(1)
# 画面上に「送信成功」のメッセージが表示されていることを検証する
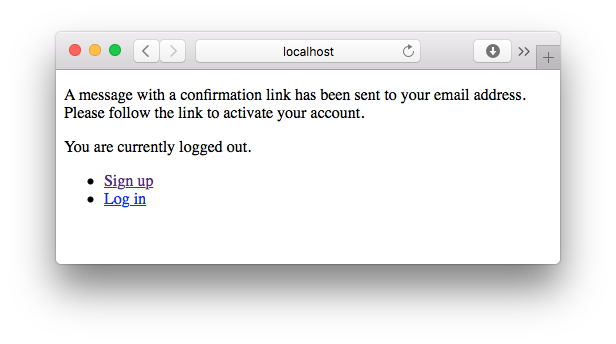
expect(page).to have_content 'A message with a confirmation link has been sent to your email address'
ポイントは以下の部分です。
expect { click_button 'Sign up' }.to change { ActionMailer::Base.deliveries.size }.by(1)
RSpecの change マッチャを使って、ボタンクリック後に送信メールが1件増えていることを検証しています。
ここでエラーが出る場合は何らかの理由でメールの送信に失敗していることになります。
5-4. パスワード設定画面にアクセスする
2016.6.17追記:もっとシンプルにテストが書けました!
この項ではメール本文からURLを抜き出す方法を説明していますが、以下のようにするともっと簡単にURLを取得することができます。
# 改善前 (メール本文からURLを抜き出す)
mail = ActionMailer::Base.deliveries.last
url = extract_confirmation_url(mail)
visit url
expect(page).to have_content 'Enter new password'

# 改善後 (Userのインスタンスからconfirmation_tokenを取り出す)
user = User.last
token = user.confirmation_token
visit users_confirmation_path(confirmation_token: token)
expect(page).to have_content 'Enter new password'
このあとの説明や解説動画の中では改善前のコードを説明していますが、実際にテストを書く場合は改善後のコードを使うことをオススメします。
(追記ここまで)
さて、おそらくここが一番特殊な部分です。
画面だけでなく、メールの送信内容も載せておきます。
<p>Welcome foo@example.com!</p>

<p>You can confirm your account email through the link below:</p>

<p><a href="http://localhost:3000/users/confirmation?confirmation_token=rxjBHEkJ5AvyQ7Ms1tYx">Confirm my account</a></p>
def extract_confirmation_url(mail)
  body = mail.body.encoded
  body[/http[^"]+/]
end

# 最後に送信されたメールを取得
mail = ActionMailer::Base.deliveries.last
# メール本文からパスワード設定画面のURLを抽出
url = extract_confirmation_url(mail)
# パスワード設定画面を開く
visit url
# 正しく開いたことを検証する
expect(page).to have_content 'Enter new password'
パスワード設定画面にアクセスするためには confirmation_token をURLに含める必要があります。
しかし、(おそらく)このtokenはランダムに発行されるため、テストコード内にtokenを決め打ちで書いておくことができません。
そこで、送信したメールからパスワード設定画面のURLを引っこ抜きます。
それをやっているのが以下のメソッドです。
def extract_confirmation_url(mail)
  body = mail.body.encoded
  body[/http[^"]+/]
end
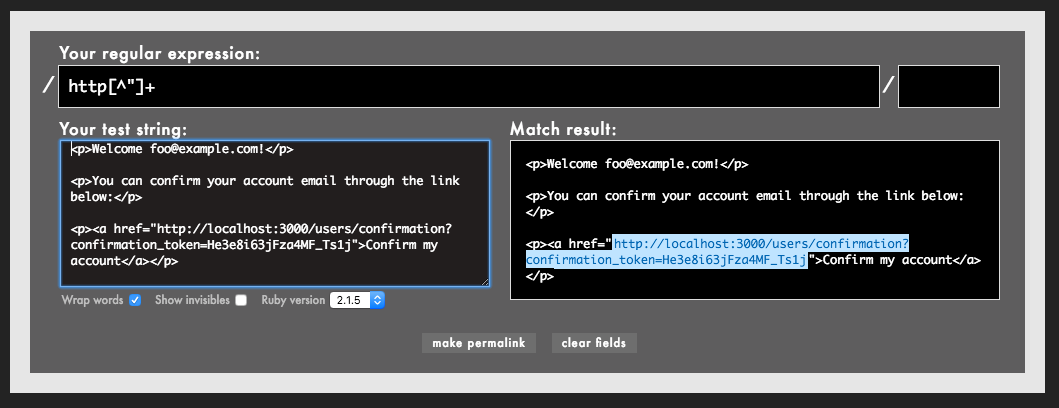
ここでは単純にメール内に含まれるURLっぽい文字列を抜き出しているだけです。
Rubularで確認してみると、何をやっているのかがわかるはずです。
ただし、メール内に複数のURLが含まれている場合はもう少し厳密な正規表現( http[^"]+users\/confirmation[^"]+ など)を指定する必要が出てきそうです。
5-5. パスワードを設定する(失敗する場合もテストする)
パスワード設定画面にアクセスしたあとは、パスワードがちゃんと登録できるかどうかをテストします。
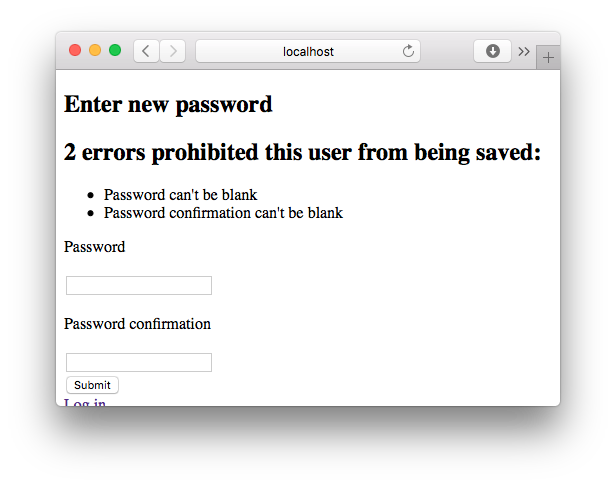
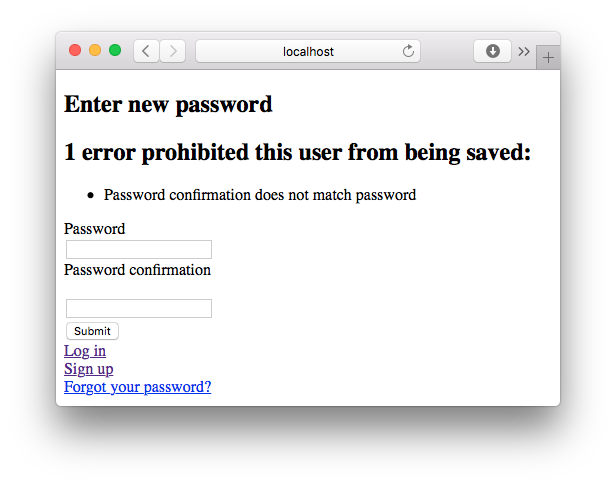
正常に登録できる場合だけでなく、パスワードを未入力で登録しようとした場合や、確認用パスワードが一致しない場合もテストしています。
細かい内容はコード内のコメントを参照してください。
# 登録に失敗する場合
# 何も入力せずにSubmitボタンをクリック
click_button 'Submit'
# 画面にエラーメッセージが表示されることを検証する
expect(page).to have_content "Password can't be blank"
expect(page).to have_content "Password confirmation can't be blank"

# 一致しない確認パスワードを入力する
fill_in 'Password', with: '12345678'
fill_in 'Password confirmation', with: '123456789'
# Submitボタンをクリック
click_button 'Submit'
# 画面にエラーメッセージが表示されることを検証する
expect(page).to have_content 'Password confirmation does not match password'

# 登録に成功する場合
# パスワードと確認用パスワードを正しく入力する
fill_in 'Password', with: '12345678'
fill_in 'Password confirmation', with: '12345678'
# Submitボタンをクリック
click_button 'Submit'
# パスワードの設定が正常に完了したことを検証する
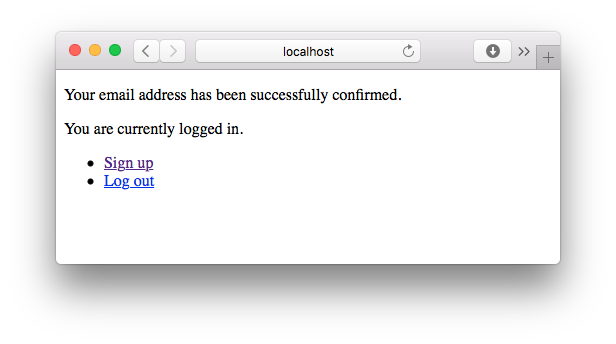
expect(page).to have_content 'Your email address has been successfully confirmed.'
5-6. ログアウトとログインも検証する
ユーザー登録(Sign up)のフローを確認するだけであれば、ここまでの内容だけで十分なのですが、ついでにログアウトとログインができることも検証しておきましょう。
# Log outリンクをクリック
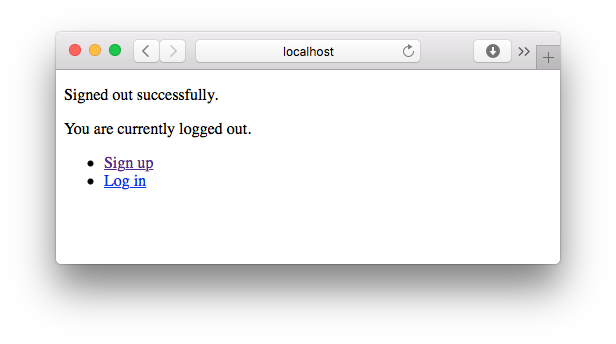
click_link 'Log out'
# ログアウトメッセージが表示されていることを検証する
expect(page).to have_content 'Signed out successfully.'

# Log inリンクをクリック
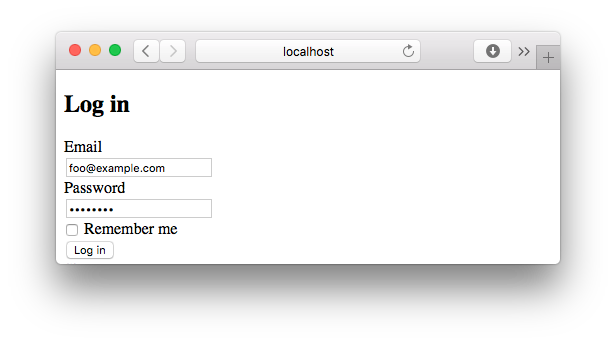
click_link 'Log in'
# メールアドレスを入力
fill_in 'Email', with: 'foo@example.com'
# パスワードを入力
fill_in 'Password', with: '12345678'
# Log inボタンをクリック
click_button 'Log in'
# ログイン成功のメッセージが表示されていることを検証する
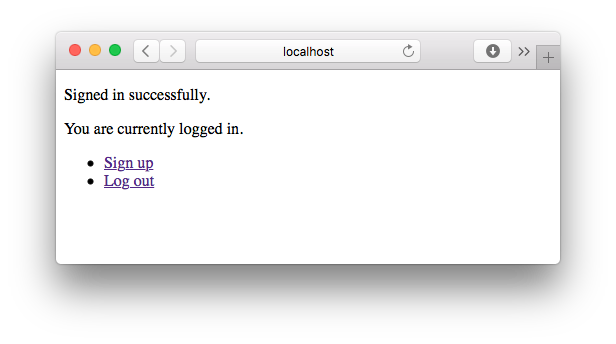
expect(page).to have_content 'Signed in successfully.'
これでテストコードの説明はおしまいです。
まとめ
いかがだったでしょうか?
このようにしてテストを自動化しておけば、毎回手作業でユーザー登録のフローを確認する必要はありません。
RailsやDeviseは仕様変更が結構激しいので、バージョンを上げると突然動かなくなった!ということがしばしば発生します。
そんなときテストが自動化してあると問題をすぐに検知できるので、精神的にとてもラクになります。
みなさんもこの記事を参考にして、自分のアプリケーションにテストコードを追加してみてください。
参考資料
RSpec
RSpecやCapybaraの使い方がわからん!という方はこちらの記事をご覧ください。
使えるRSpec入門・その1「RSpecの基本的な構文や便利な機能を理解する」 - Qiita
使えるRSpec入門・その2「使用頻度の高いマッチャを使いこなす」 - Qiita
使えるRSpec入門・その4「どんなブラウザ操作も自由自在!逆引きCapybara大辞典」 - Qiita
上のQiita記事に加えて、Everyday Railsも読んでもらえば完璧です!(宣伝)
Everyday Rails - RSpecによるRailsテスト入門
正規表現
正規表現がわからん!という方はこちらの記事をどうぞ。
初心者歓迎!手と目で覚える正規表現入門・その1「さまざまな形式の電話番号を検索しよう」 - Qiita
初心者歓迎!手と目で覚える正規表現入門・その2「微妙な違いを許容しつつ置換しよう」 - Qiita
