cocos2d-x v3.1
v.3.1からライブラリに3dフォルダが追加され、3Dへの対応が進んでいます。ここでは、v3.1で追加されたSPrite3Dクラス等を使ってOBJモデルを描画してみます。プログラム自体は、Sprite3DTest.cpp/hから切り出したものを使います。コメント以外はほぼそのままです。
リソースの追加
tests/cpp-tests/Resources フォルダにある Sprite3DTest フォルダをフォルダのままプロジェクトに追加します。
ソースは次のようになります。
HelloWorldScene.h
#ifndef __HELLOWORLD_SCENE_H__
#define __HELLOWORLD_SCENE_H__

#include "cocos2d.h"

USING_NS_CC;

class HelloWorld : public cocos2d::Layer
{
public:
    // there's no 'id' in cpp, so we recommend returning the class instance pointer
    static cocos2d::Scene* createScene();

    // Here's a difference. Method 'init' in cocos2d-x returns bool, instead of returning 'id' in cocos2d-iphone
    virtual bool init();

    // implement the "static create()" method manually
    CREATE_FUNC(HelloWorld);

private:
    void addNewSpriteWithCoords(Vec2 p);
    void onTouchesEnded(const std::vector<Touch*>& touches, Event* event);
};

#endif // __HELLOWORLD_SCENE_H__
HelloWorldScene.cpp
#include "HelloWorldScene.h"

USING_NS_CC;

Scene* HelloWorld::createScene()
{
    // 'scene' is an autorelease object
    auto scene = Scene::create();

    // 'layer' is an autorelease object
    auto layer = HelloWorld::create();

    // add layer as a child to scene
    scene->addChild(layer);

    // return the scene
    return scene;
}

// on "init" you need to initialize your instance
bool HelloWorld::init()
{
    //////////////////////////////
    // 1. super init first
    if ( !Layer::init() )
    {
        return false;
    }
    // タッチイベントリスナーを作成する。
    auto listener = EventListenerTouchAllAtOnce::create();
    // コールバック関数を設定する。
    listener->onTouchesEnded = CC_CALLBACK_2(HelloWorld::onTouchesEnded, this);
    // イベントディスパッチャーに登録する。
    _eventDispatcher->addEventListenerWithSceneGraphPriority(listener, this);

    // 画面のサイズを取得する。
    auto s = Director::getInstance()->getWinSize();
    // 座標を指定して、3Dスプライトを追加する。
    addNewSpriteWithCoords(Vec2(s.width / 2, s.height / 2));

    return true;
}

/**
 * 座標を指定して、3Dスプライトを追加する。
 *
 * @param p 追加する2D座標
 */
void HelloWorld::addNewSpriteWithCoords(Vec2 p)
{
    // 3Dスプライトを作成する。
    auto sprite = Sprite3D::create("Sprite3DTest/boss.obj");
    // 3Dスプライトにスケールを設定する。
    sprite->setScale(3.f);
    // 3Dスプライトにテクスチャを設定する。
    sprite->setTexture("Sprite3DTest/boss.png");

    // 3Dスプライトをシーンに追加する。
    addChild(sprite);

    // 3Dスプライトの位置を設定する。
    sprite->setPosition(Vec2(p.x, p.y));

    // 乱数により挙動を変更する。
    ActionInterval* action;
    float random = CCRANDOM_0_1();

    if (random < 0.20)
    {
        // 拡大する。
        action = ScaleBy::create(3, 2);
    }
    else if (random < 0.40)
    {
        // 回転する。
        action = RotateBy::create(3, 360);
    }
    else if (random < 0.60)
    {
        // 点滅する。
        action = Blink::create(1, 3);
    }
    else if (random < 0.8)
    {
        // 色を変更する。
        action = TintBy::create(2, 0, -255, -255);
    }
    else
    {
        // フェードアウトする。
        action = FadeOut::create(2);
    }

    // 元に戻すアクションを設定する。
    auto action_back = action->reverse();
    // シーケンスとして登録する。
    auto seq = Sequence::create(action, action_back, NULL);

    // 3Dスプライトでアクションを実行する。
    sprite->runAction(RepeatForever::create(seq));
}

/**
 * タッチが終了した場合のコールバック関数、
 *
 * @param touches タッチデータリスト
 * @param event イベント
 */
void HelloWorld::onTouchesEnded(const std::vector<Touch*>& touches, Event* event)
{
    for (auto touch: touches)
    {
        auto location = touch->getLocation();

        addNewSpriteWithCoords( location );
    }
}
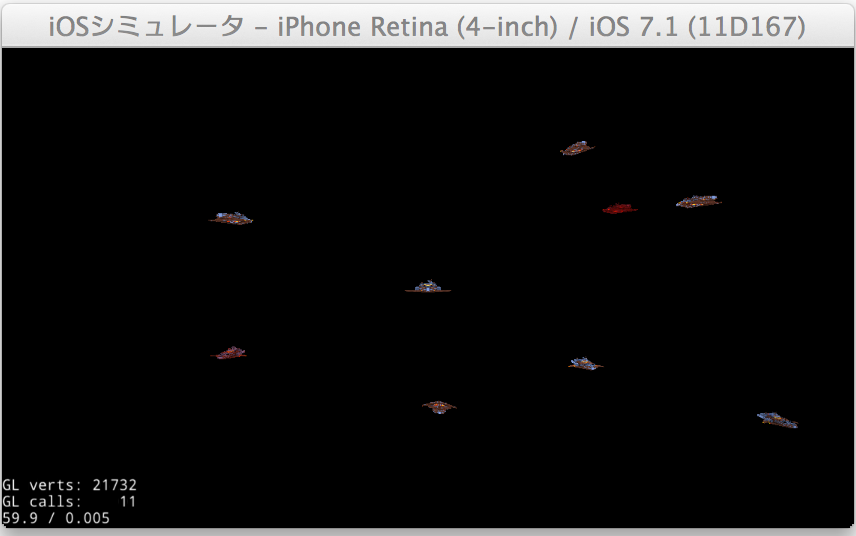
実行結果
実行結果は次のようになります。タッチした位置にモデルが追加されていきます。実際にはそれぞれがアニメーションしています。
