ElectronでSocket.ioを導入するテスト編です。
参考にしたところ
やりたいこと
- スマホでリモート操作
- Electronアプリと連動すること
とりあえず、動かしてみる
前提条件:
Node.jsやElectronのあれこれが済んでいること。
まだの場合は、コチラを参照するといいでしょう。
さっそく、Node.jsとSocket.IOによるPCとスマホブラウザのペアリングデモのコードをダウンロードし、適当な箇所に解凍します。
組み込み予定のElectron内に、先ほど解凍したコード全部コピーし、Electronのメインファイルへ「server.js → index.js」へ移植します。
...
// ここから
// サーバー構築
var http = require("http");
// fsモジュールの読み込み
var fs = require("fs");
// pathモジュールの読み込み
var path = require("path");
// httpサーバーを立てる
var server = http.createServer(requestListener);
// httpサーバーを起動する。
server.listen((process.env.PORT || 5000), function() {
    console.log((process.env.PORT || 5000) + "でサーバーが起動しました");
});
...
    // コントローラーからmouseUpFromControlerというデータを受信
    //(コントローラでマウスアップイベントが発生)
    socket.on("mouseUpFromControler", function(data) {
        socket.to(roomID).broadcast.emit("mouseUpToMain", data);
    });
});
// 接続エラー
io.sockets.on("connect_error", function(socket) {
    console.log("connect_error");
});
// 接続終了
io.sockets.on("disconnect", function(socket) {
    socket.emit("disconnectEvent");
    console.log("disconnecth");
});
// ここまで
// server.js内のスクリプトを移植し、追加します。
また、上記に加えて、ElectronでjQueryを動作させるために、以下を追加する。
なお、よくスマホアプリで使われているような、
Help実装をWebViewで表示したりするタイプなどにも適応が可能。
...
app.on('ready', function() {
  // Create the browser window.
  mainWindow = new BrowserWindow({width: 950, height: 600, 'node-integration': false});
 // 'node-integration': false これを入れることで、jQueryの読み込みが通常のWebと同様になる。
...
これくらいの手間だけで、webアプリの移植が完了です。
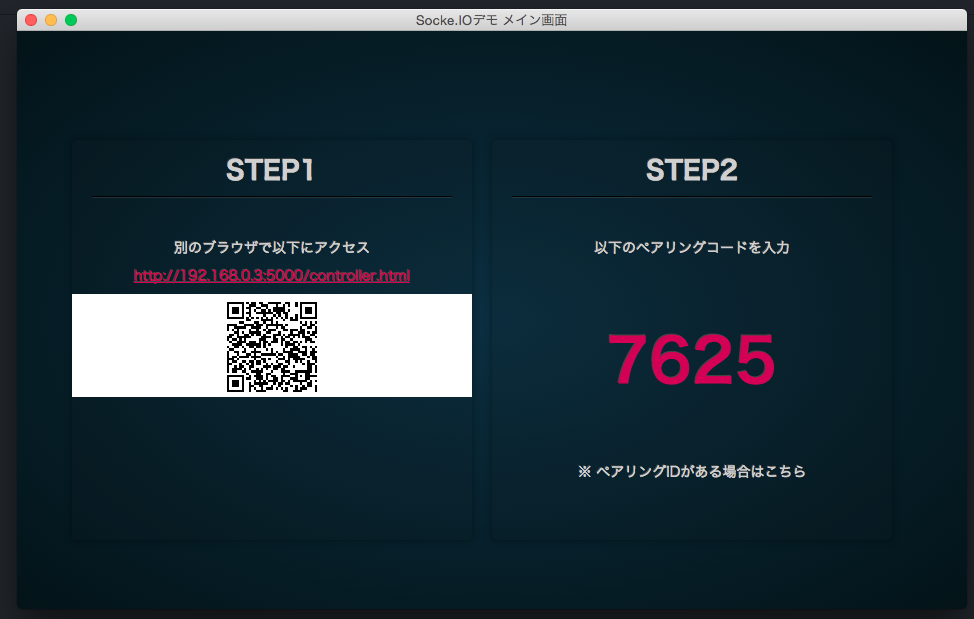
起動時の画面
その他に実装したもの
IPアドレスを表示&取得してみたかったので、下記の内容も実装してみた。
- Node.jsのModule OS側のネットワーク情報を取得するやつ
- QRコード生成js
...
var os = require('os');
var ifaces = os.networkInterfaces();
var ipAddress;

Object.keys(ifaces).forEach(function (ifname) {
  ifaces[ifname].forEach(function (iface) {

    if ('IPv4' !== iface.family || iface.internal !== false) {
      // skip over internal (i.e. 127.0.0.1) and non-ipv4 addresses
      return;
    }

    console.log(ifname, iface.address);
    // en0 192.168.1.NNN
    ipAddress = iface.address;

  });
});
...
このモジュールとQRコード生成jsを組み合わせ、IPアドレスを取得した後、QRcodeジェネレーターと連携させることで、QRリーダーで読み込めば、入力せずにブラウザ起動が可能。
これでIPアドレスが自動で変わっても遊べますね。
    <script>
        // デモ用コード
        $(function() {
            $("#controllerURL").text(location.origin + "/controller.html");
            $('#qrcode').qrcode({width: 90,height: 90, text: location.origin + "/controller.html"});
        });
   </script>
また、進展したら、投稿します。
