結構アプリ制作で用いる手法だけれども、いつも忘れてわからなくなるので書き記します。
完成イメージは以下。

Viewの作成
1. Main.storyboardのUIViewControllerを削除
2. ViewController.swiftを削除
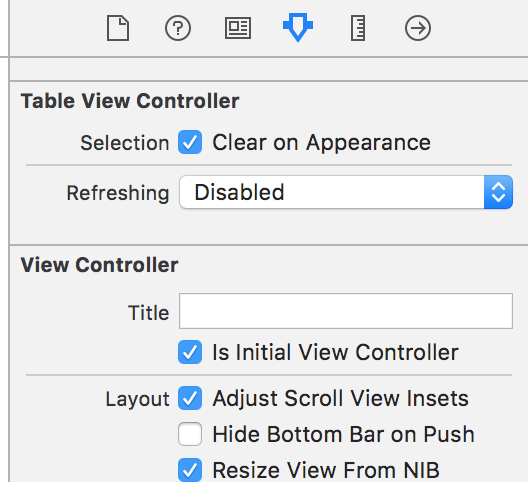
3. UITableViewControllerをStoryboardへ配置
Attributes inspector > View ControllerのisInitialViewControllerにチェックを入れる
4. simpleListController作成
File > New > File... > Cocoa Touch Class > Next
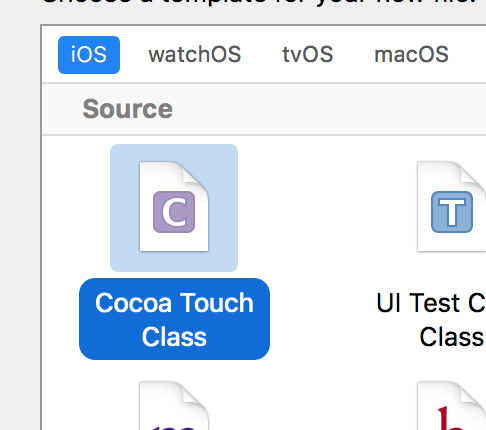
"simpleListController"と名前をつける > Create

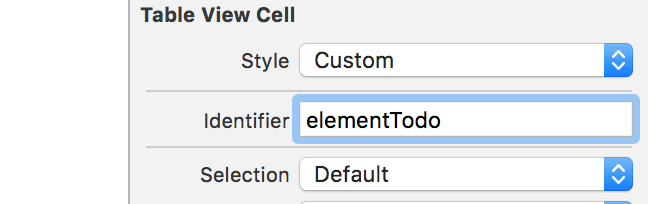
5. Main.storyboardでcellに名称をつける
今回は"elementTodo"とする
6. TableViewとsimpleListController classを関連づける
先ほど追加したTableViewを選択し、Indentity inspector > simpleListControllerと設定
7. Navigation Controllerの追加
Main.storuboard > simpleListControllerを選択 > Editor Tab > Embed in > Navigation Controller
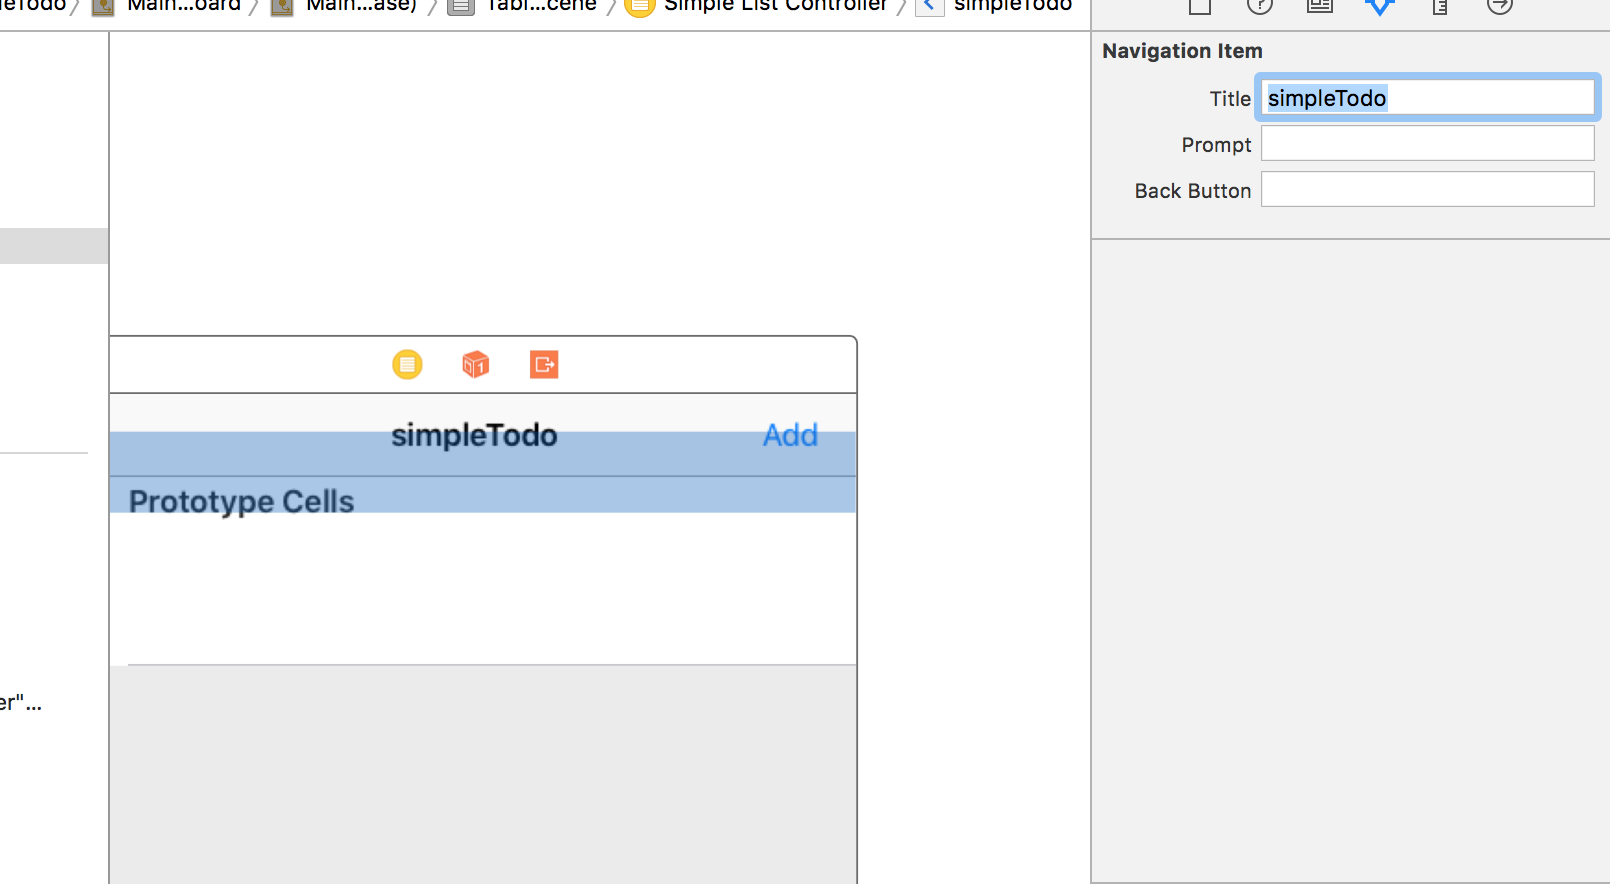
8. "Bar button Item"を右上に配置し、"Add"に文字変更
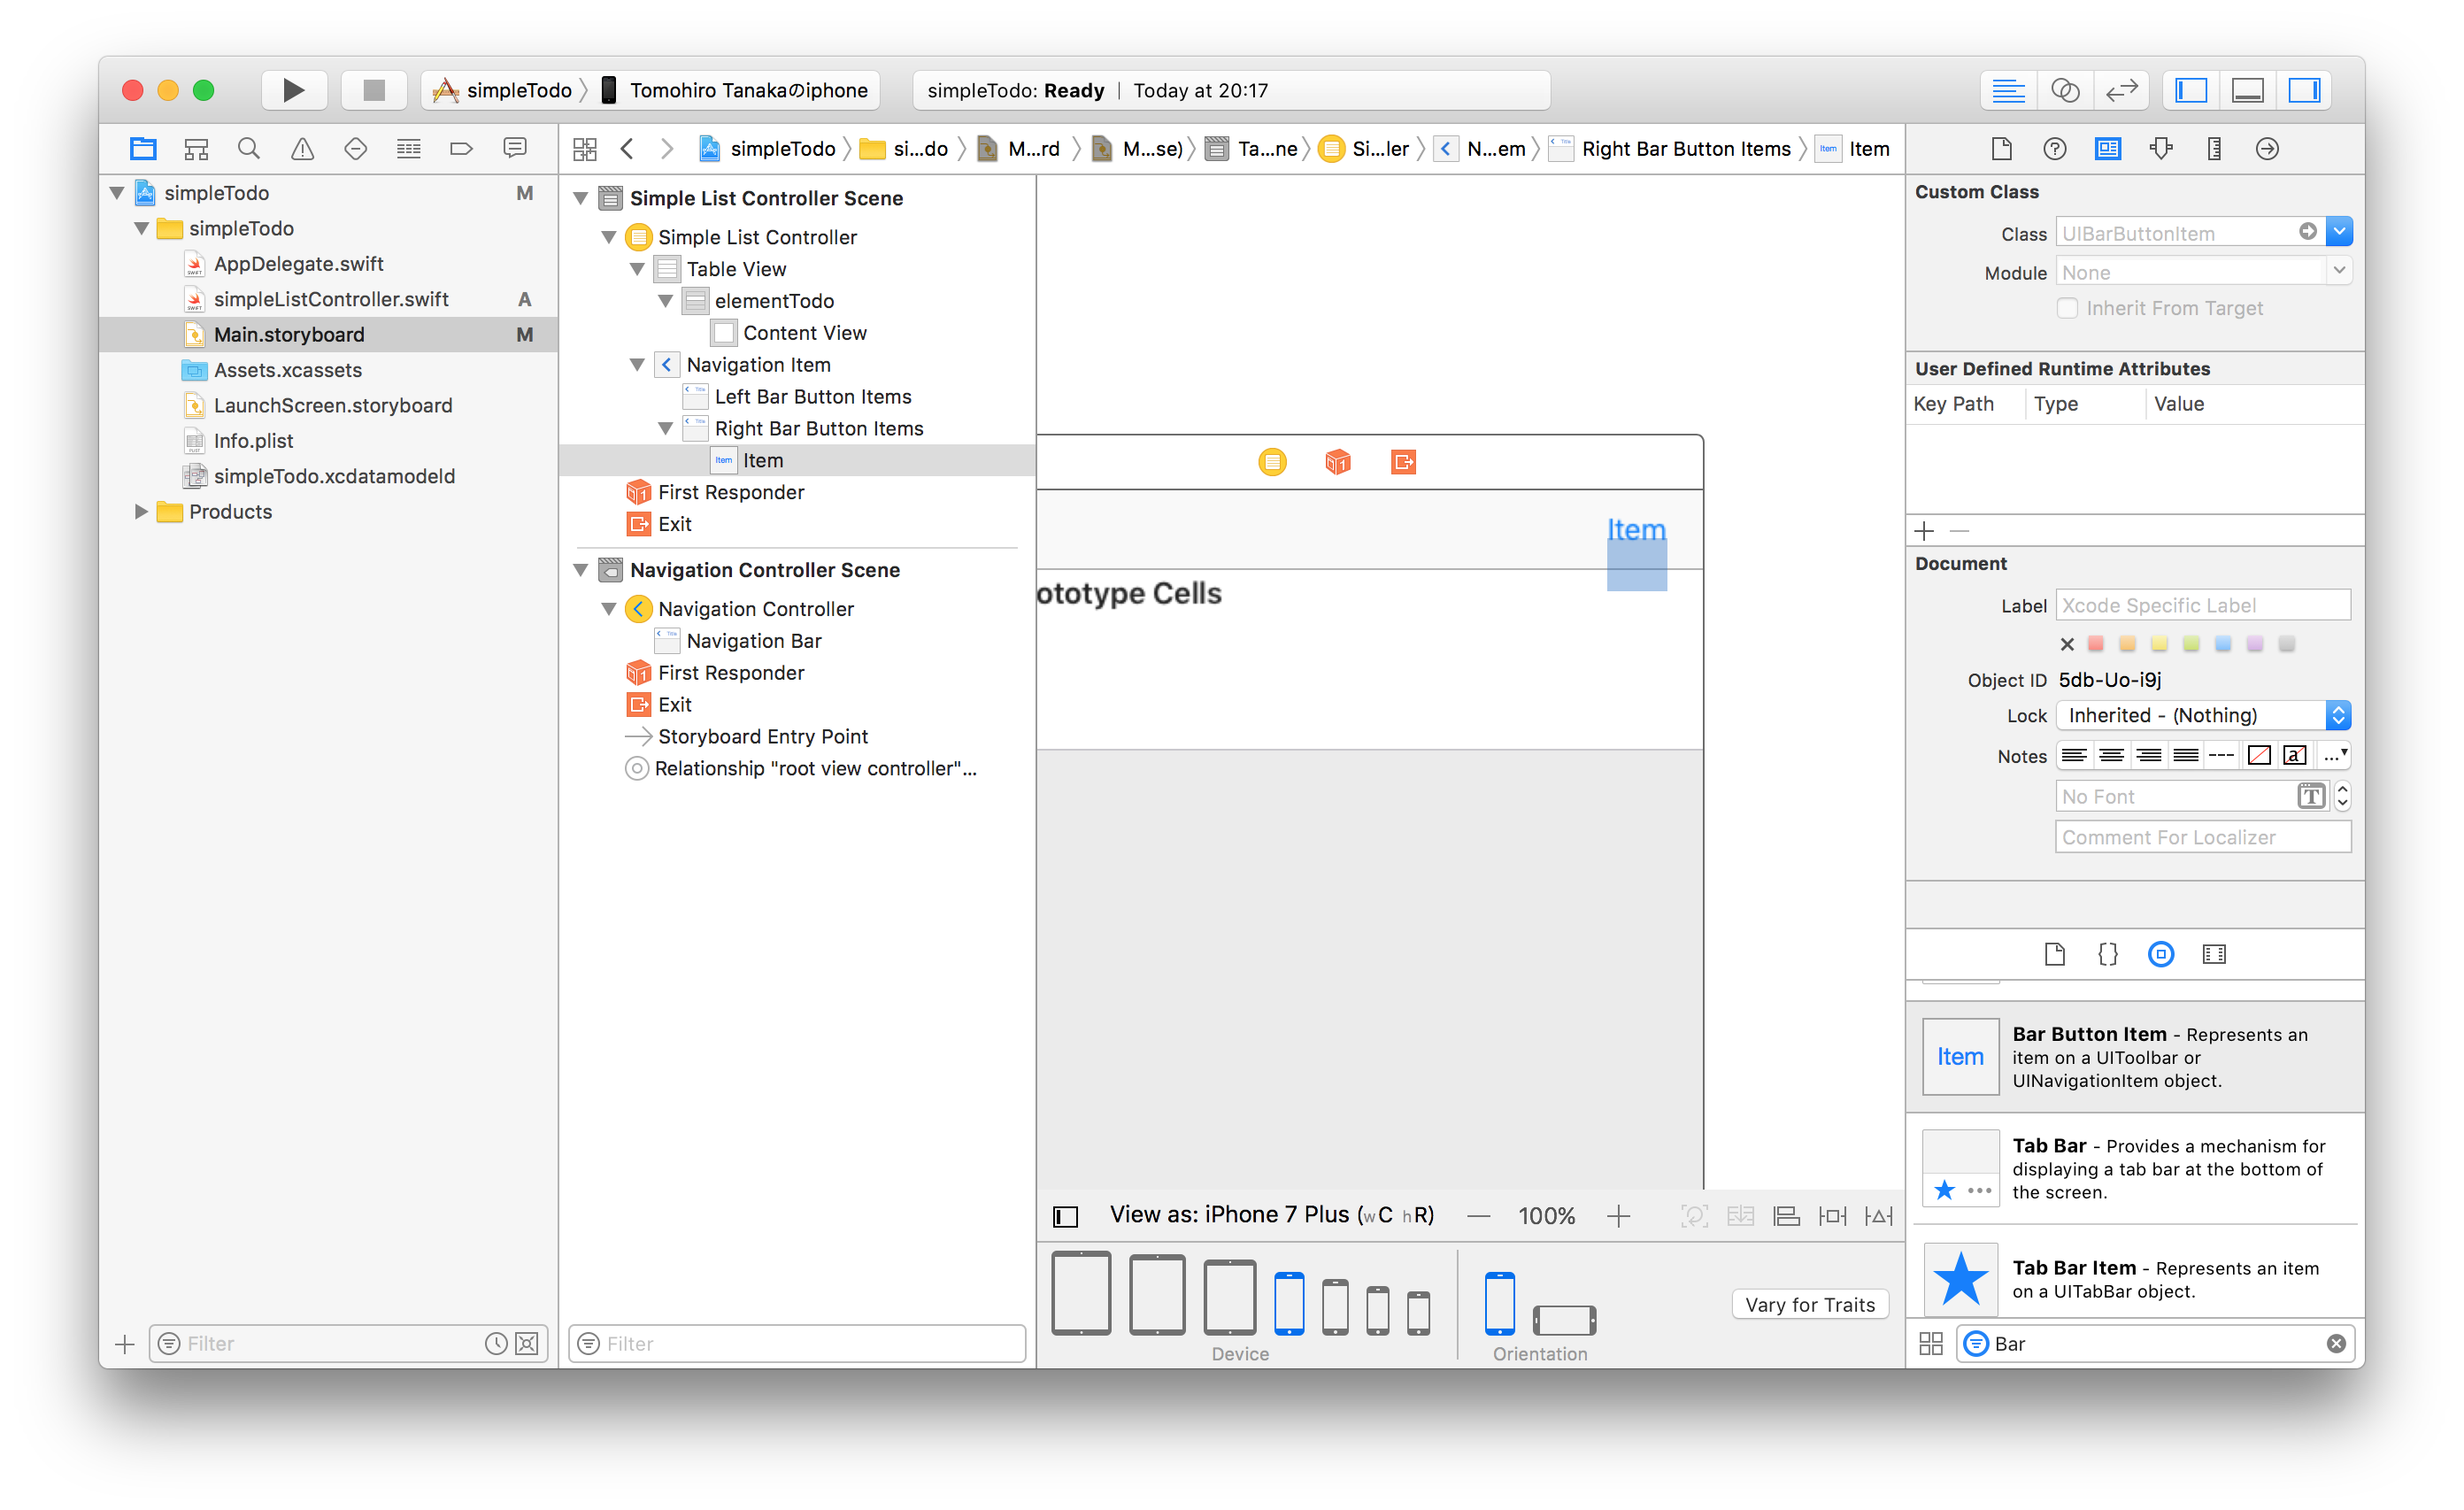
9. Navigation Itemに"simpleTodo"と記入
データ登録用のView作成
1. "Add"が押された時の入力画面用にUIViewControllerを追加
2. "Add"Viewの設定
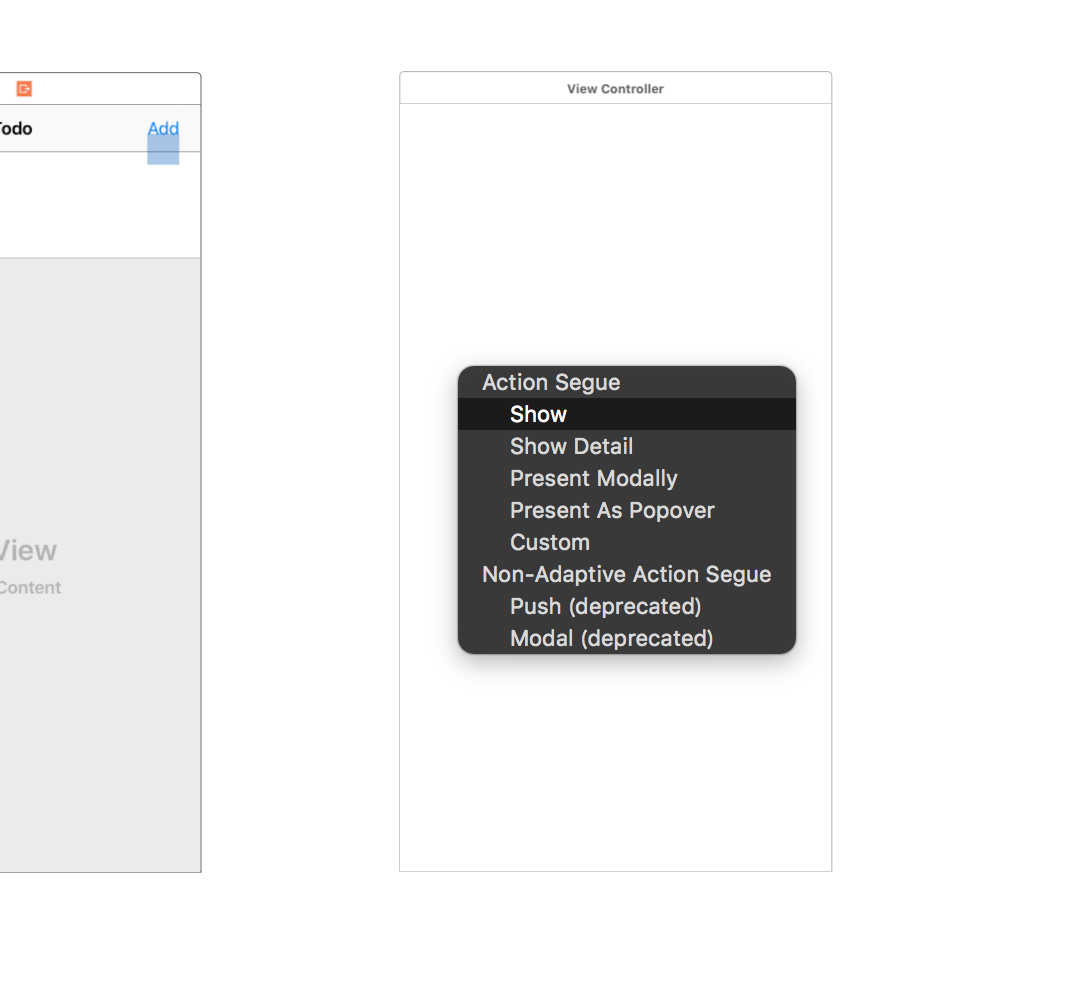
Add buttonでCtrl + ドラッグでView選択。この時showを選択。(Pushは推奨されていない)
*PresentModally: 現在のコンテナの種類に関係なく、多い被されるように新しいScenceを表示。呼び出し元のSceneに対して何らかの応答を返すために用いられる。
3. elementViewController.swiftをUIViewControllerと結びつける
File > New > File... > Cocoa Touch Class > elementViewController.swiftと入力 > Next > Create
4. Main.storyboard
Identity inspector > classを"elementViewController"に
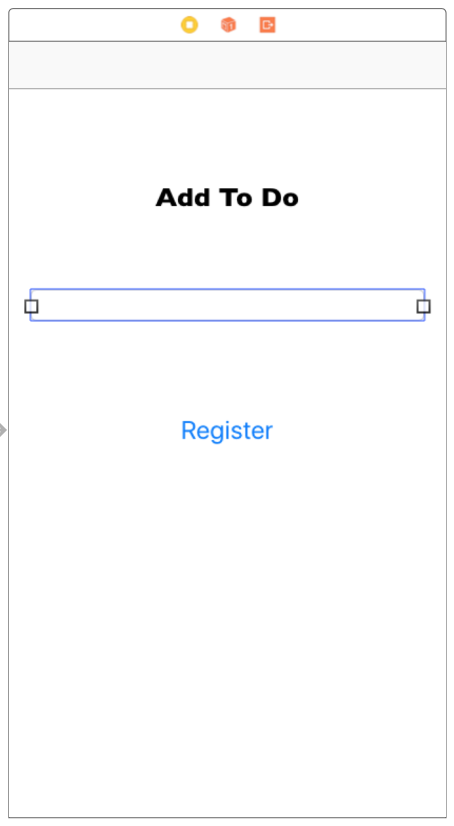
5. elementViewにtextField, Button, Labelを配置
アプリ内にデータを保存する
UserDefaultsを用いる。キー値をつけて保存する。キー値は自由につけてOK。
- アプリ内保存
UserDefaults.standard.set(sample_array, forKey: "sampleKey")
- データの取り出し
if UserDefaults.standard.object(forKey: "sampleKey") != nil {
            elementOfArray = UserDefaults.standard.object(forKey: "sampleKey") as! [String]
}
1. elementView.swiftにデータ登録用のコードを記述
ソースコードを以下にあげる
import UIKit

class elementView: UIViewController {

    var elements = [String]()

    @IBOutlet var textElement: UITextField!

    override func viewDidLoad() {
        super.viewDidLoad()

        // Do any additional setup after loading the view.
    }

    //Viewが呼ばれる度に呼ばれる
    override func viewWillAppear(_ animated: Bool) {


    }


    @IBAction func registerElement(_ sender: Any) {
        //以前に登録していたelementsを読み出す
        if UserDefaults.standard.object(forKey: "elementsOfArray") != nil {
            elements = UserDefaults.standard.object(forKey: "elementsOfArray") as! [String]
        }


        //Add element to elementsArray
        elements.append(textElement.text!)

        //App内にelementsデータを保存
        UserDefaults.standard.set(elements, forKey: "elementsOfArray")

        //戻る
        self.navigationController?.popViewController(animated: true)
    }


    override func didReceiveMemoryWarning() {
        super.didReceiveMemoryWarning()
        // Dispose of any resources that can be recreated.
    }
}
2. simpleListController.swiftで登録要素を取り出して表示する
ソースコードを以下にあげる
import UIKit

class simpleListController: UITableViewController {

    var showedArray = [String]()

    override func viewDidLoad() {
        super.viewDidLoad()

        // Uncomment the following line to preserve selection between presentations
        // self.clearsSelectionOnViewWillAppear = false
        // Uncomment the following line to display an Edit button in the navigation bar for this view controller.
        // self.navigationItem.rightBarButtonItem = self.editButtonItem()
    }

    //viewDidLoadが呼ばれない可能性があるため
    override func viewWillAppear(_ animated: Bool) {
        super.viewWillAppear(animated)

        //保存されたelementsを取り出す
        if UserDefaults.standard.object(forKey: "elementsOfArray") != nil {
            showedArray = UserDefaults.standard.object(forKey: "elementsOfArray") as! [String]
        }

        tableView.reloadData()
    }

    override func didReceiveMemoryWarning() {
        super.didReceiveMemoryWarning()
        // Dispose of any resources that can be recreated.
    }

    // MARK: - Table view data source
    override func numberOfSections(in tableView: UITableView) -> Int {
        // #warning Incomplete implementation, return the number of sections
        return 1
    }

    override func tableView(_ tableView: UITableView, numberOfRowsInSection section: Int) -> Int {
        // #warning Incomplete implementation, return the number of rows
        return showedArray.count //取り出す配列の数の分を表示する
    }

    //Cellの再利用
    override func tableView(_ tableView: UITableView, cellForRowAt indexPath: IndexPath) -> UITableViewCell {
        let cell = tableView.dequeueReusableCell(withIdentifier: "elementTodo", for: indexPath)

        // Configure the cell...
        cell.textLabel?.text = showedArray[indexPath.row]

        return cell
    }

    // Override to support editing the table view.
    override func tableView(_ tableView: UITableView, commit editingStyle: UITableViewCellEditingStyle, forRowAt indexPath: IndexPath) {
        if editingStyle == .delete {
            // Delete the row from the data source
            //elementsの各cellについてdeleteする配列番号の消去
            showedArray.remove(at: indexPath.row)
            //その配列を再び保存
            UserDefaults.standard.set(showedArray, forKey: "elementsOfArray")
            //TableViewの更新
            tableView.reloadData()

        } else if editingStyle == .insert {
            // Create a new instance of the appropriate class, insert it into the array, and add a new row to the table view
        }
    }
}
- 以下の部分のSectionを1に変更(元は
return 0)
override func numberOfSections(in tableView: UITableView) -> Int {
    // #warning Incomplete implementation, return the number of sections
    return 1
}
- 以下の部分でreturnを取り出す配列の数にする。今回はUserDefaultsでアプリ内からデータを取り出して格納する
showedArrayの配列数を返す
override func tableView(_ tableView: UITableView, numberOfRowsInSection section: Int) -> Int {
    // #warning Incomplete implementation, return the number of rows
    return showedArray.count //取り出す配列の数の分を表示する
}
- UITableViewのdelegate methodである以下の部分のコメントアウトを外す
//Cellの再利用
override func tableView(_ tableView: UITableView, cellForRowAt indexPath: IndexPath) -> UITableViewCell {
    let cell = tableView.dequeueReusableCell(withIdentifier: "elementTodo", for: indexPath)

    // Configure the cell...
    cell.textLabel?.text = showedArray[indexPath.row]

    return cell
}
* 今回はデフォルトのUITableViewControllerを用いたが、UIView + TableView + TableCellを利用するとカスタマイズ可
3. 登録した要素をelementViewが遷移しても表示するように設定
このままだと、毎回simpleListControllerのViewに戻ると、配列が真っ新な状態で表示されてしますので、以前登録した配列を取り出す必要がある。
registerが押された時に保存していたものを読み込む仕様にする。
@IBAction func registerElement(_ sender: Any) {
    //以前に登録していたelementsを読み出す
    if UserDefaults.standard.object(forKey: "elementsOfArray") != nil {
        elements = UserDefaults.standard.object(forKey: "elementsOfArray") as! [String]
    }


    //Add element to elementsArray
    elements.append(textElement.text!)

    //App内にelementsデータを保存
    UserDefaults.standard.set(elements, forKey: "elementsOfArray")

    //状態を保持して戻る
    self.navigationController?.popViewController(animated: true)
}
4. cellの消去機能を組み込む
- UITableViewのdelegate methodであるデータ編集部分のコメントアウトを外す。
指定配列の削除 -> 全配列を再び保存する (1つ要素消したら要素が1つ減った配列をtableView.reloadData()により更新する)
// Override to support editing the table view.
override func tableView(_ tableView: UITableView, commit editingStyle: UITableViewCellEditingStyle, forRowAt indexPath: IndexPath) {
    if editingStyle == .delete {
        // Delete the row from the data source
        //elementsの各cellについてdeleteする配列番号の消去
        showedArray.remove(at: indexPath.row)
        //その配列を再び保存
        UserDefaults.standard.set(showedArray, forKey: "elementsOfArray")
        //TableViewの更新
        tableView.reloadData()

    } else if editingStyle == .insert {
        // Create a new instance of the appropriate class, insert it into the array, and add a new row to the table view
    }
}