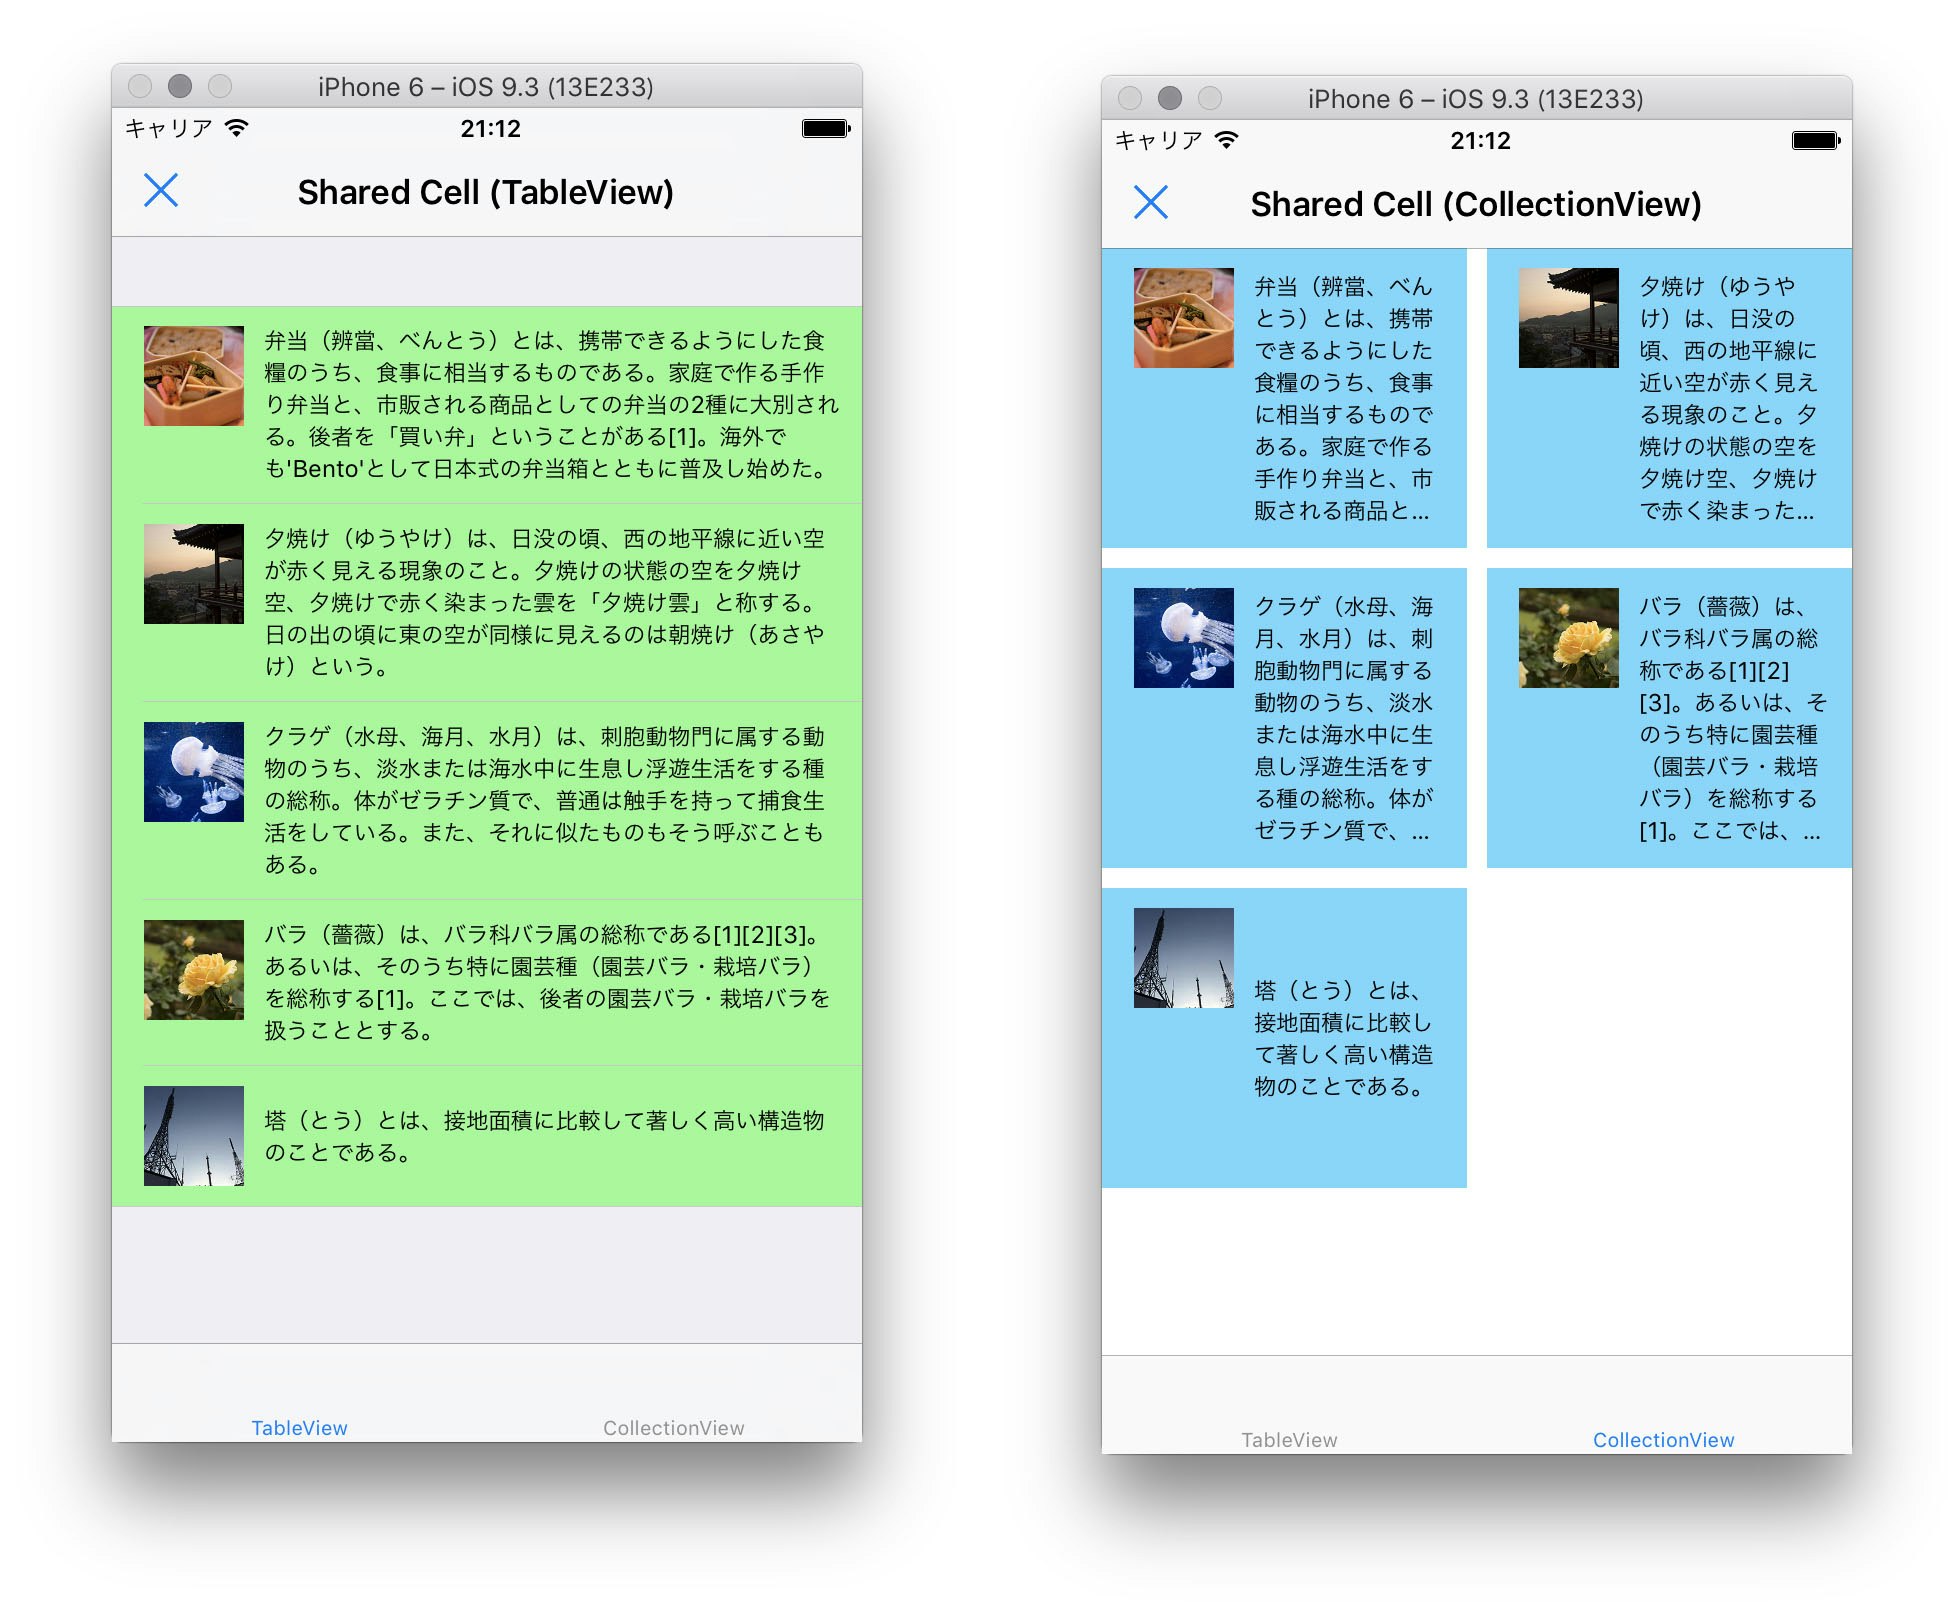
ときどき、同じレイアウトのセルをテーブルビューとコレクションビューの両方で使用したくなることがあります。しかしそれぞれのセルに対応するUITableViewCellとUICollectionViewCellは別々のクラスですので、通常XIBで作成したセルのレイアウトを共有することはできません。
ただ問題はクラスの型だけですので、UIViewを基底とするカスタムビューをXIBで作成し、これをそれぞれのセルに載せてしまえば、レイアウトを共有することができます。
共通レイアウトセル(UIView)の作成
サンプルコードはGitHubからダウンロードできます。
https://github.com/imk2o/uicatalog
まずUIViewを基底とするカスタムビュークラスSharedCellを作成します。
ただ"Cocoa Touch Class"からクラスを作成しても"Also create XIB file"が選択できないため、XIBファイルは別途追加してください。
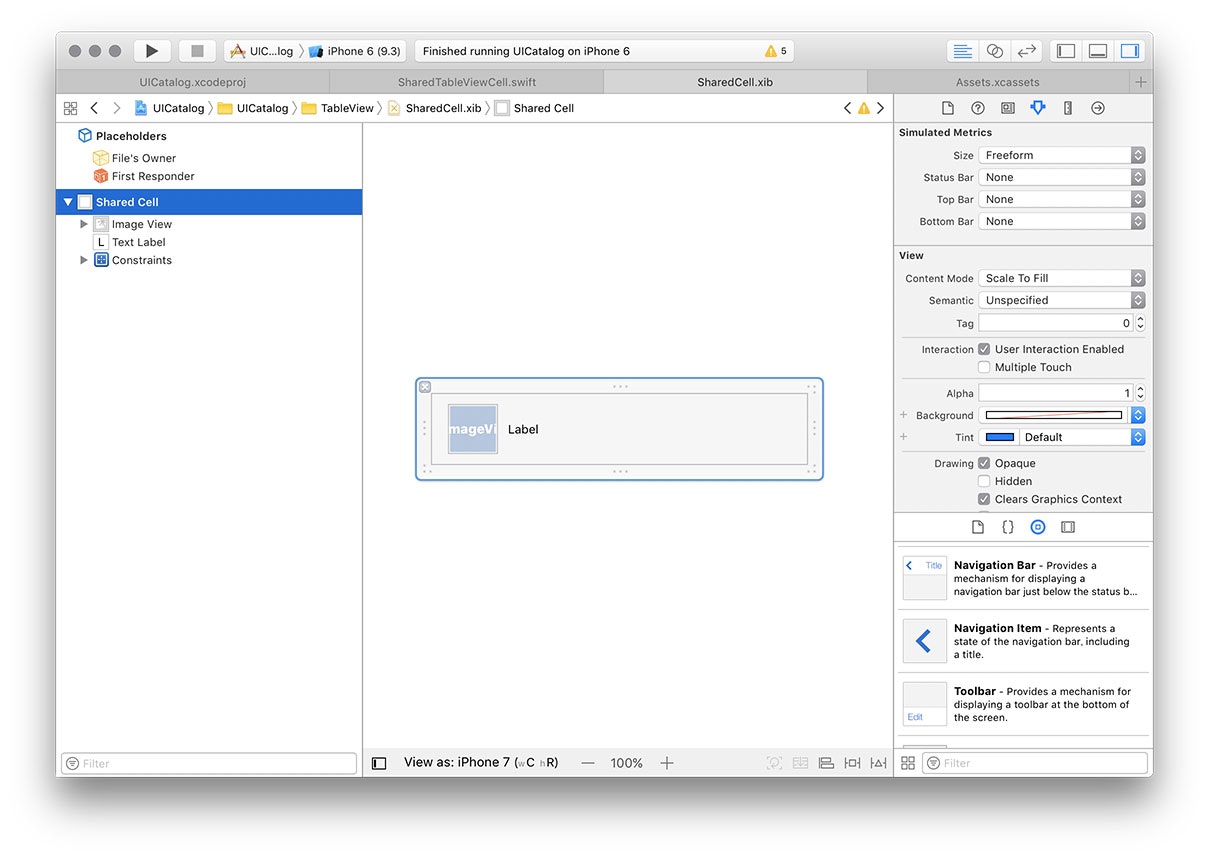
ここにインスタンス化メソッドinstantiateFromNib()を実装しておきます。
SharedCell.swift
import UIKit

class SharedCell: UIView {
    @IBOutlet weak var textLabel: UILabel!
    @IBOutlet weak var imageView: UIImageView!

    static func instantiateFromNib() -> SharedCell {
        let nib = UINib(nibName: String(describing: self), bundle: nil)
        guard let cell = nib.instantiate(withOwner: nil, options: nil).first as? SharedCell else {
            fatalError()
        }

        return cell
    }
}
UITableViewCell, UICollectionViewCellへの埋め込み
それぞれのカスタムセルクラスの初期化処理でSharedCellをインスタンス化し追加します。
-
contentViewにaddSubview()する -
contentViewいっぱいに表示するConstraintを付加する
を行っていれば、ちゃんとAuto LayoutやSelf sizing cellが適用されます。
SharedTableViewCell.swift
import UIKit

class SharedTableViewCell: UITableViewCell {
    var body: SharedCell? {
        return self.contentView.subviews.first as? SharedCell
    }

    override func awakeFromNib() {
        super.awakeFromNib()

        // SharedCellの埋め込み
        let body = SharedCell.instantiateFromNib()
        self.contentView.addSubviewAndFitConstraints(body)
    }

    func configure(withText text: String, image: UIImage? = nil) {
        guard let body = self.body else {
            return
        }

        body.imageView.image = image
        body.textLabel.text = text
    }
}

extension UIView {
    func addSubviewAndFitConstraints(_ subview: UIView) {
        self.addSubview(subview)

        subview.translatesAutoresizingMaskIntoConstraints = false

        // subviewを自身いっぱいに表示するConstraintを与える
        self.addConstraint(NSLayoutConstraint(
            item: subview, attribute: .top,
            relatedBy: .equal,
            toItem: self, attribute: .top,
            multiplier: 1.0, constant: 0.0
        ))

        self.addConstraint(NSLayoutConstraint(
            item: subview, attribute: .left,
            relatedBy: .equal,
            toItem: self, attribute: .left,
            multiplier: 1.0, constant: 0.0
        ))

        self.addConstraint(NSLayoutConstraint(
            item: subview, attribute: .bottom,
            relatedBy: .equal,
            toItem: self, attribute: .bottom,
            multiplier: 1.0, constant: 0.0
        ))

        self.addConstraint(NSLayoutConstraint(
            item: subview, attribute: .right,
            relatedBy: .equal,
            toItem: self, attribute: .right,
            multiplier: 1.0, constant: 0.0
        ))
    }
}
各カスタムセルをStoryboardやXIB上に用意しない実装方法もありますが、イニシャライザをオーバライドしなければならなくなるため、上記の方法のほうが簡単かと思います。