「NotificationCenterってそもそも何?」「何がいいの?」「最低限で使うにはどうしたらいいの?」に答えるSwift3対応記事があまりなさそうだったので(Objective-Cのはあったけど)書いてみます。
図にするとこんな感じです。
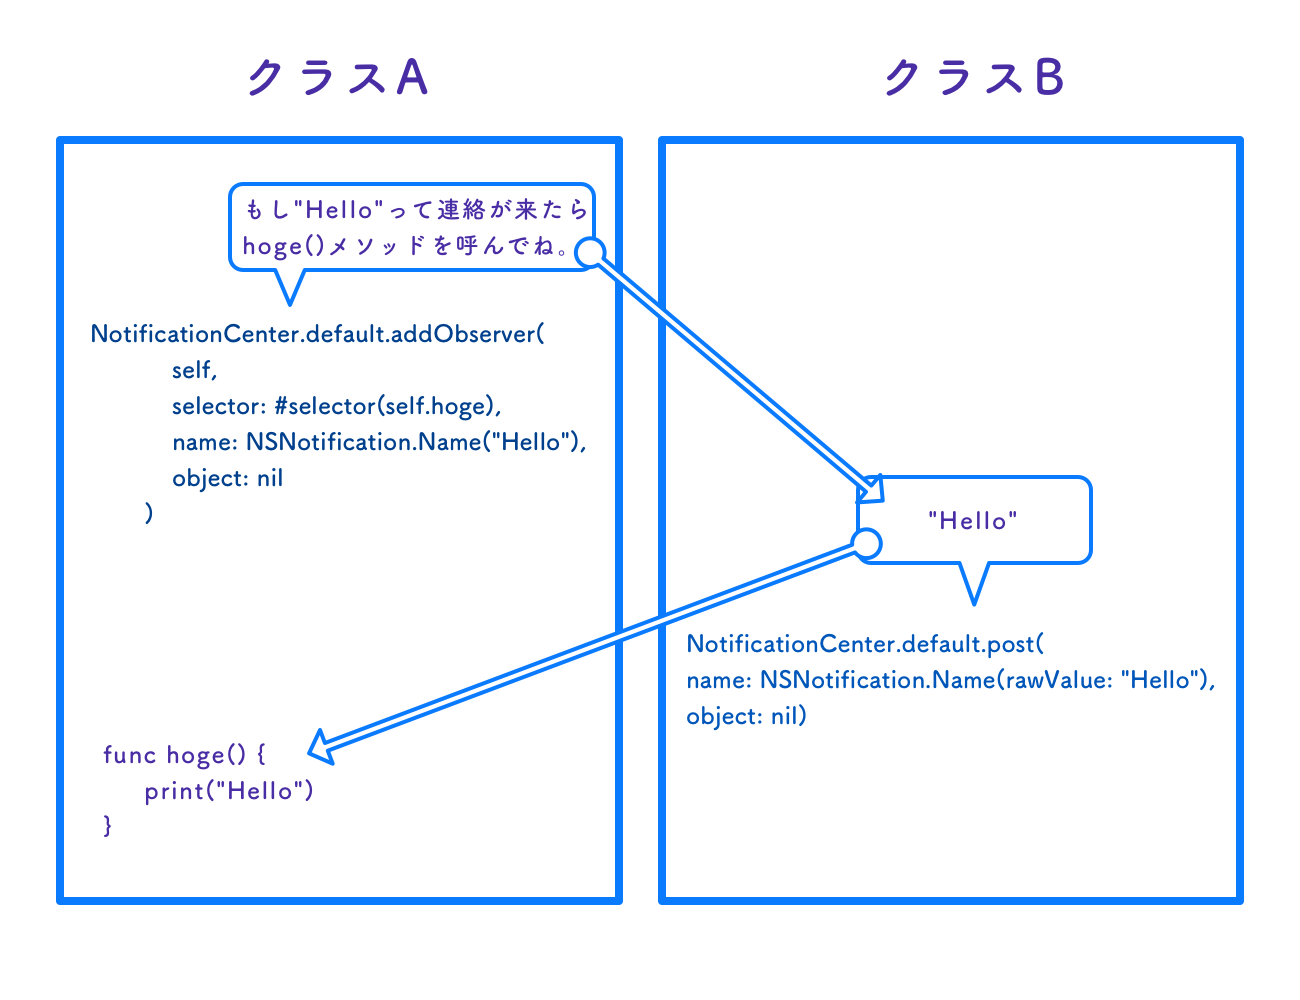
親子関係がないクラス同士の連絡にすごく重宝します。
メッセージが統一されていれば
クラスAが複数あっても、クラスBが複数あっても大丈夫。連絡が取りあえます。
サンプルとしてホームボタンを押してバックグラウンドに行く時に"willResignActive"というメッセージを発信して、ViewControllerで受け取るサンプルを作ります。
まずSingleViewApplicationプロジェクトを作ります

AppDelegate.swift内で発信コードを書きます
    func applicationWillResignActive(_ application: UIApplication) {

        // "willResignActive"を発信!
        NotificationCenter.default.post(name: NSNotification.Name(rawValue: "willResignActive"), object: nil)
    }
ViewController.swift内に監視コードと受け取りコードを記述
import UIKit

class ViewController: UIViewController {

    override func viewDidLoad() {
        super.viewDidLoad()

        // 「"willResignActive"って呼ばれたらこのクラス(self)に書いてあるhoge()を呼んでね」
        NotificationCenter.default.addObserver(
            self,
            selector: #selector(self.hoge),
            name: NSNotification.Name("willResignActive"),
            object: nil
        )
    }

    func hoge() {
        print("willResignActiveって呼ばれたよー!")
    }

}
たったこれだけで使えます。
アプリ開発を始めた頃とてもありがたい仕組みだったので、ぜひ使ってみてください。連絡を取り合うクラス同士に親子関係があるならDelegateを使った方がいいですけどね。