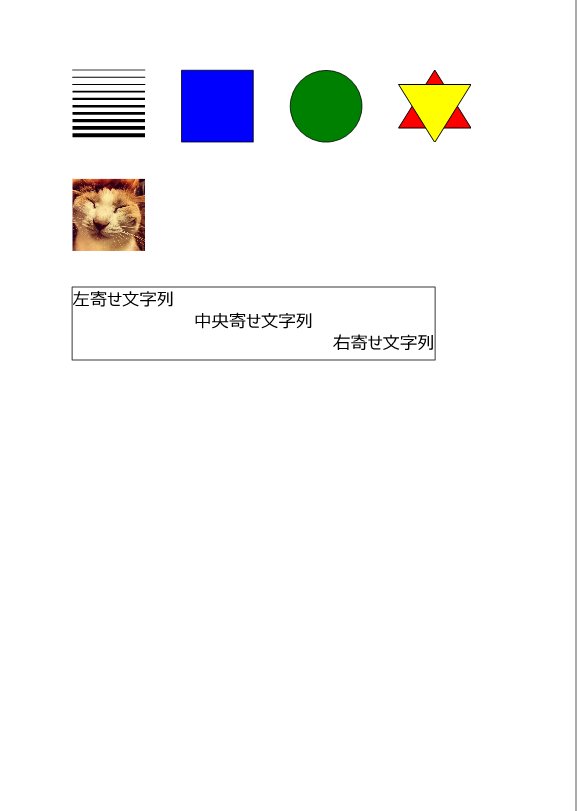
図形や文字の印字サンプル
各種図形や文字の印字サンプル。
UIElement派生クラスのインスタンスを作成し、FixedPageに追加していくだけ。特に説明が必要なところはないと思うけど、TextBlockに関しては配置しやすいようにContentControlでラップするようにしています。
// Lineオブジェクトの生成
private Line CreateLine(double x1, double y1, double x2, double y2, Brush brush, Double thickness)
{
    Line line = new Line();
    line.X1 = x1;
    line.Y1 = y1;
    line.X2 = x2;
    line.Y2 = y2;
    line.Stroke = brush;
    line.StrokeThickness = thickness;
    return line;
}

// Rectangleオブジェクトの生成
private Rectangle CreateRect(double x, double y, double width, double height, Brush stroke, double thickness, Brush fill)
{
    Rectangle rect = new Rectangle();
    Canvas.SetLeft(rect, x);
    Canvas.SetTop(rect, y);
    rect.Width = width;
    rect.Height = height;
    rect.Stroke = stroke;
    rect.StrokeThickness = thickness;
    rect.Fill = fill;
    return rect;
}

// Ellipseオブジェクトの生成
private Ellipse CreateEllipse(double x, double y, double width, double height, Brush stroke, double thickness, Brush fill)
{
    Ellipse ellipse = new Ellipse();
    Canvas.SetLeft(ellipse, x);
    Canvas.SetTop(ellipse, y);
    ellipse.Width = width;
    ellipse.Height = height;
    ellipse.Stroke = stroke;
    ellipse.StrokeThickness = thickness;
    ellipse.Fill = fill;
    return ellipse;

}

// Polygonオブジェクトの生成
private Polygon CreatePolygon(double x, double y, double width, double height, Brush stroke, double thickness, Brush fill, IEnumerable<Point> points)
{
    Polygon polygon = new Polygon();
    Canvas.SetLeft(polygon, x);
    Canvas.SetTop(polygon, y);
    polygon.Width = width;
    polygon.Height = height;
    polygon.Stretch = Stretch.None;
    polygon.Stroke = stroke;
    polygon.StrokeThickness = thickness;
    polygon.Fill = fill;

    foreach (var point in points)
        polygon.Points.Add(point);

    return polygon;
}

// Imageオブジェクトの生成
private Image CreateImage(Uri imageUri, double x, double y, double width, double height, Stretch stretch)
{
    Image image = new Image();
    image.Source = new BitmapImage(imageUri);
    Canvas.SetLeft(image, x);
    Canvas.SetTop(image, y);
    image.Width = width;
    image.Height = height;
    image.Stretch = stretch;
    return image;
}

// TextBlockオブジェクトの生成(配置を指定するためのContentControlでラップする)
private ContentControl CreateText(string text, double fontSize, Brush brush, double x, double y, double widh, double height, HorizontalAlignment hAlign, VerticalAlignment vAlign)
{
    ContentControl content = new ContentControl();
    Canvas.SetLeft(content, x);
    Canvas.SetTop(content, y);
    content.Width = widh;
    content.Height = height;

    TextBlock tb = new TextBlock();
    tb.Text = text;
    tb.FontSize = fontSize;
    tb.Foreground = brush;
    tb.HorizontalAlignment = hAlign;
    tb.VerticalAlignment = vAlign;
    content.Content = tb;

    return content;
}

// ページデータの作成
private FixedPage CreatePage()
{
    FixedPage page = new FixedPage();
    Canvas canvas = new Canvas();

    // Lineの描画
    for (int i = 0; i < 10; i++)
        canvas.Children.Add(CreateLine(100.0d, 100.0d + (i * 10.0d), 200.0d, 100.0d + (i * 10.0d), Brushes.Black, 1.0d + (i * 0.5d)));

    // 矩形の描画
    canvas.Children.Add(CreateRect(250.0d, 100.0d, 100.0d, 100.0d, Brushes.Black, 1.0d, Brushes.Blue));

    // 円の描画
    canvas.Children.Add(CreateEllipse(400.0d, 100.0d, 100.0d, 100.0d, Brushes.Black, 1.0d, Brushes.Green));

    // ポリゴンの描画
    Point[] points1 = new Point[] {
        new Point(50.0d, 0.0d),
        new Point(0.0d, 80.0d),
        new Point(100.0d, 80.0d)
    };
    canvas.Children.Add(CreatePolygon(550.0d, 100.0d, 100.0d, 100.0d, Brushes.Black, 2.0d, Brushes.Red, points1));

    Point[] points2 = new Point[] {
        new Point(0.0d, 20.0d),
        new Point(100.0d, 20.0d),
        new Point(50.0d, 100.0d)
    };
    canvas.Children.Add(CreatePolygon(550.0d, 100.0d, 100.0d, 100.0d, Brushes.Black, 2.0d, Brushes.Yellow, points2));

    // イメージの描画
    Uri image_uri = new Uri("file://c:/temp/CAT.JPG");
    canvas.Children.Add(CreateImage(image_uri, 100.0d, 250.0d, 100.0d, 100.0d, Stretch.Fill));

    // テキストの描画
    canvas.Children.Add(CreateRect(99.0d, 399.0d, 502.0d, 102.0d, Brushes.Black, 1.0d, null));
    canvas.Children.Add(CreateText("左寄せ文字列", 24.0d, Brushes.Black, 100.0d, 400.0d, 500.0d, 30.0d, HorizontalAlignment.Left, VerticalAlignment.Center));
    canvas.Children.Add(CreateText("中央寄せ文字列", 24.0d, Brushes.Black, 100.0d, 430.0d, 500.0d, 30.0d, HorizontalAlignment.Center, VerticalAlignment.Center));
    canvas.Children.Add(CreateText("右寄せ文字列", 24.0d, Brushes.Black, 100.0d, 460.0d, 500.0d, 30.0d, HorizontalAlignment.Right, VerticalAlignment.Center));

    page.Children.Add(canvas);
    return page;
}

// 印刷処理
private void PrintPage()
{
    LocalPrintServer lps = new LocalPrintServer();
    PrintQueue queue = lps.DefaultPrintQueue;
    XpsDocumentWriter writer = PrintQueue.CreateXpsDocumentWriter(queue);
    PrintTicket ticket = queue.DefaultPrintTicket;

    PrintCapabilities pcap = queue.GetPrintCapabilities();

    // 用紙サイズの設定
    ticket.PageMediaSize = new PageMediaSize(PageMediaSizeName.ISOA4);
    ticket.PageOrientation = PageOrientation.Portrait;

    // 印刷データの作成
    FixedPage page = CreatePage();

    // 印刷の実行
    writer.Write(page, ticket);

}
出力サンプル