13
16

Delete article

Deleted articles cannot be recovered.

Draft of this article would be also deleted.

Are you sure you want to delete this article?

More than 5 years have passed since last update.

Arduino で昇圧チョッパー回路

Last updated at Posted at 2015-11-08

Arduino の電源(5V)から昇圧チョッパー回路でもっと高い電圧を得たい。方法は

等にあるとおり、昇圧チョッパーで電圧を上げ、抵抗分圧で目的の電圧になるよう制御する。Arduino の ADC は 5V 以下を 0~1023 で取得できるので、その値を見つつ、トランジスタ(MOSFET)へデューティー比を考慮して PWM で出力する。

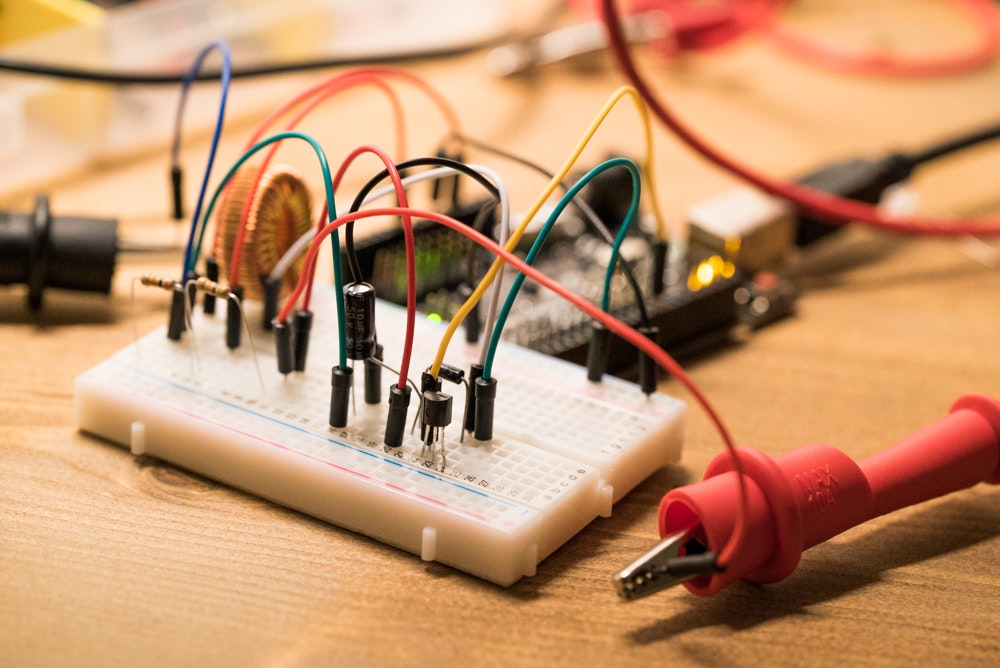
20151109-DSC04589.jpg

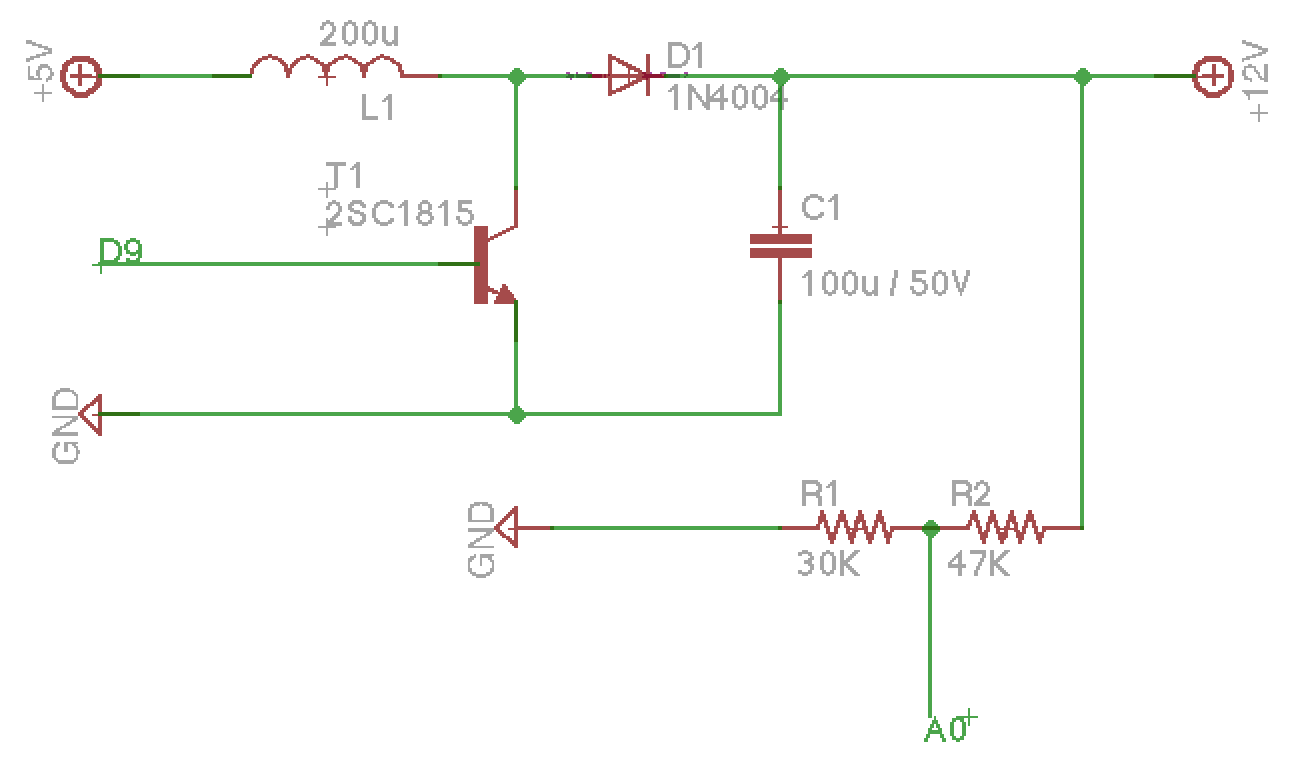
今回は手元に MOSFET が無いため、トランジスタは手元にあった2SC1815を使用。高い電圧にするとトランジスタ死にそうなので、控えめの昇圧になるように。R2 を 47K, R1 を 30K の抵抗にしたので、ADC で 1023(=5V) になる電圧は 5V / (30 / (30 + 47)) = 12.83V なので、約12.8V へ昇圧されれば成功。

Arduino の昇圧するためのコードは

にかかれてるコードそのままで。回路図はこんな感じで作った。

スクリーンショット 2015-11-09 1.15.23.png

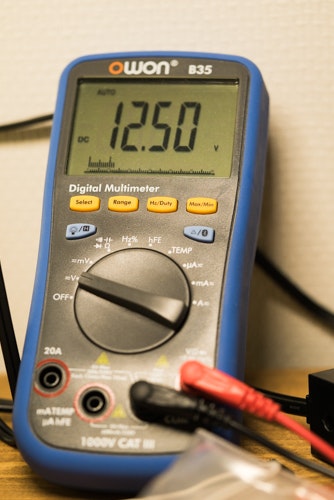
実行したところだいたい 12.5V で安定してる。

20151109-DSC04594.jpg

13
16
1

Register as a new user and use Qiita more conveniently

  1. You get articles that match your needs
  2. You can efficiently read back useful information
  3. You can use dark theme
What you can do with signing up
13
16

Delete article

Deleted articles cannot be recovered.

Draft of this article would be also deleted.

Are you sure you want to delete this article?