Titanium Advent Calendar 2014 の14日目です。
2015/09/13 追記
クライアント側のサンプルコードが欲しいとの問い合わせを頂いたので、サンプルコード (サーバ、クライアント両方) を書き直しました。
モジュールもデータの受け渡し部分を修正加筆のうえ、SDK 4.1.1に対応させてビルドしなおしました。
ただこの黄さんのモジュールの書き方だと、serviceをTitanium側で書いているので、アプリが立ち上がっていない時にはPushを受け取られません。
フォアグラウンドかバックグランドでアプリが動いている必要があります。
アプリが立ち上がる前でもPush通知が受け取られる様にするには、service部分もモジュール側で書く必要があります。
もし要望が多ければ別途モジュール作ります。
はじめに
その昔、Titanium で Android というとなかなかシンドイという話が多かった様ですが、今もまぁまぁシンドイです。
でもそれは、UIの設計や進め方(どうしてもiOSファーストになりがち)に寄る所も多く、ポイントを押さえれば最近のTitanium での Andorid はかなり出来ないことが減って使える子になってきてます。
なので昔挫折した方もレッツトライです。是非。
そんな中で、非常に重要であるのにもかかわらず、iOSなら簡単なのにAndroidではすこぶる面倒くさいのがPush通知まわり、Google Cloud Messaging (GCM)のトコです。結論から言うとモジュールを使うor作るしか方法が無くて、いきなりハードル上げてる感じです。
gcmといえばこれという位定番のモジュールがこちらのiamyellowさん(以下黃さん)のgcm.jsです。
https://github.com/iamyellow/gcm.js
黄さんご自身がブログに大変丁寧に解説されています。英語ですが。
GCM push notifications for Titanium (made easy)
これ読んでやればまぁいけるっちゃーいけるんですが、英語はちょっと・・・という人もいると思うのと、gcm.jarがオワコンになって久しいのにも関わらず、未だにTitaniumのGCMなモジュールとかは gcm.jar が現役な感じなので、頑張って Google Play Service に置き換えてみました。
Google側のAPI準備とGCM_sender_id取得
奇しくも明日(15日)担当のdksgさん が書かれた記事が参考になります。
SE奮闘記: TitaniumアプリでPush Notification【Android版】
ただここも英語はちょっと・・・な人もいるかもなので、Google Developer Console を久々に触ったらいつのまにか日本語化されてた事もあって一応日本語でも書いておきます。内容としては同じです。
-
Google API Console をブラウザで開く
-
[プロジェクトを作成]ボタンをクリックしプロジェクトを作成する。クレジットカード情報の入力とか要るかもしれないので適宜指示に従い入力。
-
作成したプロジェクトをクリック
-
左メニュー[APIと認証] - [API] をクリック
-
下にスクロールし[Google Cloud Messaging for Android]の右端のステータスを[...]クリック
-
上の方の[有効なAPI]に[Google Cloud Messaging for Android]が移動しステータスが有効になっている事を確認
-
左メニュー[APIと認証] - [認証情報] をクリック
-
[公開APIへのアクセス] の [新しいキーを作成]をクリック
-
[サーバー キー]をクリック
-
[作成]をクリック
-
左メニュー[概要] をクリック
-
上部のプロジェクト番号をメモしておく。(あとでGCM_sender_idとしてtiapp.xmlに書く事になる)
titaniumプロジェクト作成
テスト用にTitaniumのプロジェクトを作成します。Alloy前提です。Titanium Studioな人はそっちでAlloyのプロジェクトを作ってください。
cd ~/dev/
ti create --platforms android --id com.tdtsh.app.gcmtest --name gcmtest --workspace-dir ./
cd gcmtest
alloy new
モジュールのダウンロードとビルド
黄さんのgcm.jsの代わりに、私がfolkして修正したやつをcloneします。
gcm.jar の替わりに google-play-services.jar ※スリムなjarファイルの重要性についてはコメント欄参照を使うようにしているなど、各所手直ししています。
出来るだけ後方互換に気をつけて書いたつもりなので、オリジナルの代替として動くと思います。多分。
cd ~/dev/
git clone https://github.com/tdtsh/gcm.js
build.propertiesを修正します。おもいっきり私の例ですが自分の環境にあわせてPATHは適宜修正してください。
titanium.platform=/Users/tadatoshi_hanazaki/Library/Application Support/Titanium/mobilesdk/osx/3.4.1.GA/android
android.platform=/Users/tadatoshi_hanazaki/android-sdk-macosx/platforms/android-21
google.apis=/Users/tadatoshi_hanazaki/android-sdk-macosx/add-ons/addon-google_apis-google-21
んでビルドして、titaniumのプロジェクトにコピーします。
cd gcm.js
ant clean
ant

cp dist/net.iamyellow.gcmjs-android-*.zip ~/dev/gcmtest/
Androidのモジュールをビルドする環境つくりが面倒くさい方は、ビルド済みのものをダウンロードしてお使いください。
gcm.jarの組み込み
tiapp.xmlを編集して最初に取得したGCM_sender_idをYOUR_SENDER_IDのトコに書きます。
ついでにビルドしたモジュールも設定しときます。
<property name="GCM_sender_id" type="string">YOUR_SENDER_ID</property>
<modules>
	<module platform="android">net.iamyellow.gcmjs</module>
</modules>
GCMモジュールと連携するjsの部分を書く
まずは黄さんの言うとおり、GCMモジュールを動かす為のコードを書いていきます。1つめのコードはindex.jsに。中身はオリジナルとほぼ同じですが、オリジナルのコールバック方式に加え、イベントも受け取れる様にしています。
オリジナルのコールバック方式は処理が重たい時とかに一部機種(Galaxy3とかGalaxy3とかGalaxy3とか)でクラッシュする事があったので。お好みで選んでください。
var gcm = require('net.iamyellow.gcmjs')

var pendingData = gcm.data;
if (pendingData && pendingData !== null) {
	// if we're here is because user has clicked on the notification
	// and we set extras for the intent
	// and the app WAS NOT running
	// (don't worry, we'll see more of this later)
	Ti.API.info('******* data (started) ' + JSON.stringify(pendingData));
}

/*
// オリジナルのコールバック方式
gcm.registerForPushNotifications({
		Ti.API.info('******* success, ' + ev.deviceToken);
	},
	error: function (ev) {
		// when an error occurs
		Ti.API.info('******* error, ' + ev.error);
	},
	callback: function () {
		// when a gcm notification is received WHEN the app IS IN FOREGROUND
		alert('hellow yellow!');
	},
	unregister: function (ev) {
		// on unregister
		Ti.API.info('******* unregister, ' + ev.deviceToken);
	},
	data: function (data) {
		// if we're here is because user has clicked on the notification
		// and we set extras in the intent
		// and the app WAS RUNNING (=> RESUMED)
		// (again don't worry, we'll see more of this later)
		Ti.API.info('******* data (resumed) ' + JSON.stringify(data));
	}
});
*/

// イベント返す方式
var receivePush = function() {
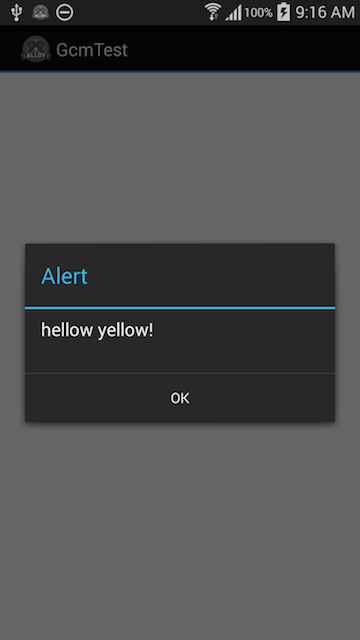
	alert('hellow yellow!');
};

var deviceTokenSuccess = function(ev) {
	Ti.API.info('GCM ******* success, ' + ev.deviceToken);
};

var deviceTokenError = function(ev) {
	Ti.API.info('GCM ******* error, ' + ev.error);
};

var dataWhenResume = function(data) {
	Ti.API.info('GCM ******* data (resumed) ' + JSON.stringify(data));
};

gcm.addEventListener('callback', receivePush);
gcm.addEventListener('success', deviceTokenSuccess);
gcm.addEventListener('error', deviceTokenError);
gcm.addEventListener('data', dataWhenResume);
gcm.registerForPushNotifications({});

// in order to unregister:
// require('net.iamyellow.gcmjs').unregister();
2つめのコードはここに。オリジナルと同じでOKです。
黄さんのモジュールの何がイケてるって、ココがTitanium側というかjsな事です。
ここでNotificationとかを出しているので適宜カスタマイズすればいいと思います。
Androidに強い人はここをモジュール側でやるといいと思います。
/*global Ti: true, require: true */

(function (service) {

	var serviceIntent = service.getIntent(),
	...中略
	service.stop();

})(Ti.Android.currentService);
3つめのコードをコピーしてここに配置します。これも中身はオリジナルと同じです。
必ずしも必要では無いけど、後方互換の為にここはそのまま残しました。
/*global Ti: true, require: true */

(function (activity, gcm) {

	var intent = activity.intent;
	...中略
	}
})(Ti.Android.currentActivity, require('net.iamyellow.gcmjs'));
GCMモジュールを動かす
あとは
ti build -p android -T device
して、フォアグラウンドやバックグランドの時にPush通知打ってみてください。
明日はdksgさんのTitaniumとWordPressで簡単SNSアプリです。
