38
38

Delete article

Deleted articles cannot be recovered.

Draft of this article would be also deleted.

Are you sure you want to delete this article?

More than 5 years have passed since last update.

ES6 で書く環境を作る(WebStorm + Babel 編)

Last updated at Posted at 2015-05-22

[2015/05/22追記]
WebStorm でなく gulp のタスクで Babel を動かす方法はこちらに書きました。
ES6 で書く環境を作る(gulp + Babel 編)


この辺りの環境は、移り変わりが激しいので、現時点(2015/5/22)の参考ということで。書いた ES6 のスクリプトをどの環境でも動かせるよう、Babel で ES5 へ変換することとします。

前提環境

OS:Mac OS X 10.9.5
Bable:5.4.7
WebStorm:10.0.2
npm:2.7.5

手順

といっても、WebStorm のバージョン 10 系なら簡単だった。

スクリーンショット 2015-05-22 11.43.43.png

ただ WebStorm を使うといえど、トランスパイラ(今回は Babel)は別途、必要なので、次のように npm で手元の環境へ導入しておきます。

$ npm install -g babel

バージョンを確認してみます。

$ babel --version

5.4.7

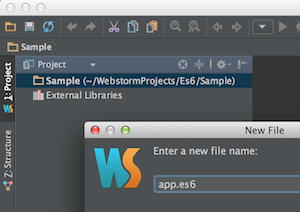
WebStorm で適当なプロジェクトを作成し、拡張子を .es6 としてファイルを作成します。

スクリーンショット 2015-05-22 15.00.32.png

すかさず watcher に追加するかい?というメッセージが表示されるので、今回は Babel の方の Add watcher リンクを追加します。

スクリーンショット 2015-05-22 15.00.46.png

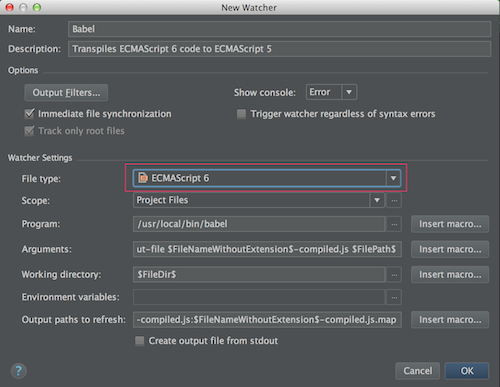
私の場合は File Type を次のように変更するだけでした。[OK]ボタンを押下します。

スクリーンショット_2015-05-22_15_01_25.png

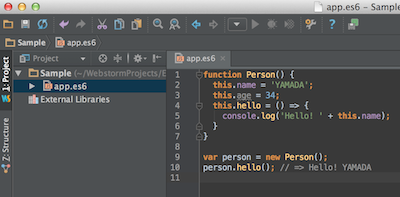
あとは次のように ES6 の記法でスクリプトを書くと、

スクリーンショット 2015-05-22 15.12.06.png

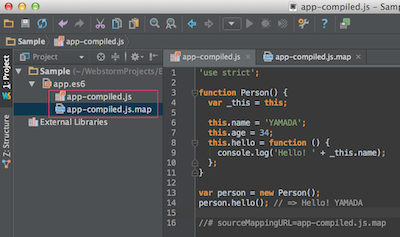
自動的に ES5 へ変換後のファイルおよびソースマップが作成されます。

スクリーンショット_2015-05-22_15_12_34.png

ブラウザで動作確認してもいいのですが、console.log 程度なら次のようにコマンドでも確認できます。

スクリーンショット 2015-05-22 15.12.57.png

〜 以上 〜

38
38
0

Register as a new user and use Qiita more conveniently

  1. You get articles that match your needs
  2. You can efficiently read back useful information
  3. You can use dark theme
What you can do with signing up
38
38

Delete article

Deleted articles cannot be recovered.

Draft of this article would be also deleted.

Are you sure you want to delete this article?