- 一番簡単に実現するには、
$httpサービスで外部APIコール時にcache: tureオプションを渡します。- cacheFactory 内の
$httpという名称の領域にキャッシュされます。
- cacheFactory 内の
'use strict';

angular.module('apiTestApp')
  .factory('JsonData', ['$http', function ($http) {

    return {

      getSampleData: function () {

        return $http.get('data/sample.json', {cache: true})
          .success(function(data, status, headers, config) {

            return data;

        });

      }

    }

  }])
;
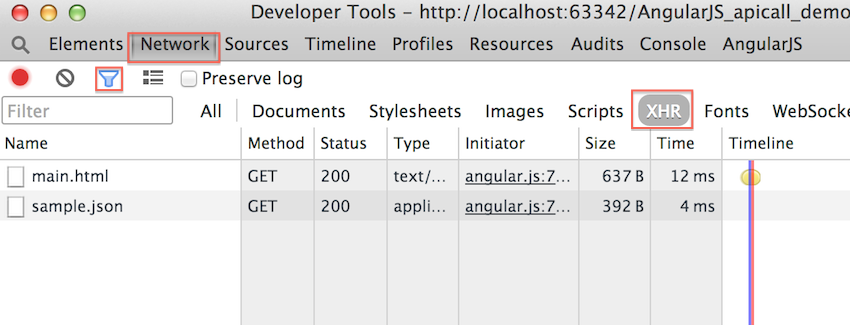
- きちんとキャッシュされているか否かは、Chrome の Developer Tools で確認できます。
- 2回目以降はAPIコールがされなければOK(後述しますがキャッシュ先はヒープメモリなので、ブラウザをリロードするとキャッシュは消えてしまうので注意)。
- もしキャッシュの挙動を変えたい場合は、独自の Factory を作成します。
- 下の例では、独自に
apiCacheという Factory を作成し、cacheFactory 内のapiという名称の領域にキャッシュさせています。 - この際、
capacityオプションを指定し、最も利用されている10件のみキャッシュするようにしています。
- 下の例では、独自に
'use strict';

angular.module('apiTestApp')
  .factory('apiCache', function($cacheFactory) {

    return $cacheFactory('api', {capacity: 10});

  })
  .factory('JsonData', ['$http', 'apiCache', function ($http, apiCache) {

    return {

      getSampleData: function () {

        return $http.get('data/sample.json', {cache: apiCache})
          .success(function(data, status, headers, config) {

            return data;

        });

      }

    }

  }])
;
補足
- キャッシュ先およびアルゴリズムは $cacheFactory に準じます。
- キャッシュ先はヒープメモリです。
- ブラウザをリロードするとキャッシュは消えます。
-
capacityオプションを指定した際、LRUアルゴリズムが適用されます。
- キャッシュ先はヒープメモリです。
参考
- 公式ドキュメント($http, $cacheFactory)
- https://www.ng-book.com/p/Caching/
- http://www.phase2technology.com/blog/caching-json-arrays-using-cachefactory-in-angularjs-1-2-x/
ほか
- angular-cacheというサードパーティのモジュールもあります。
