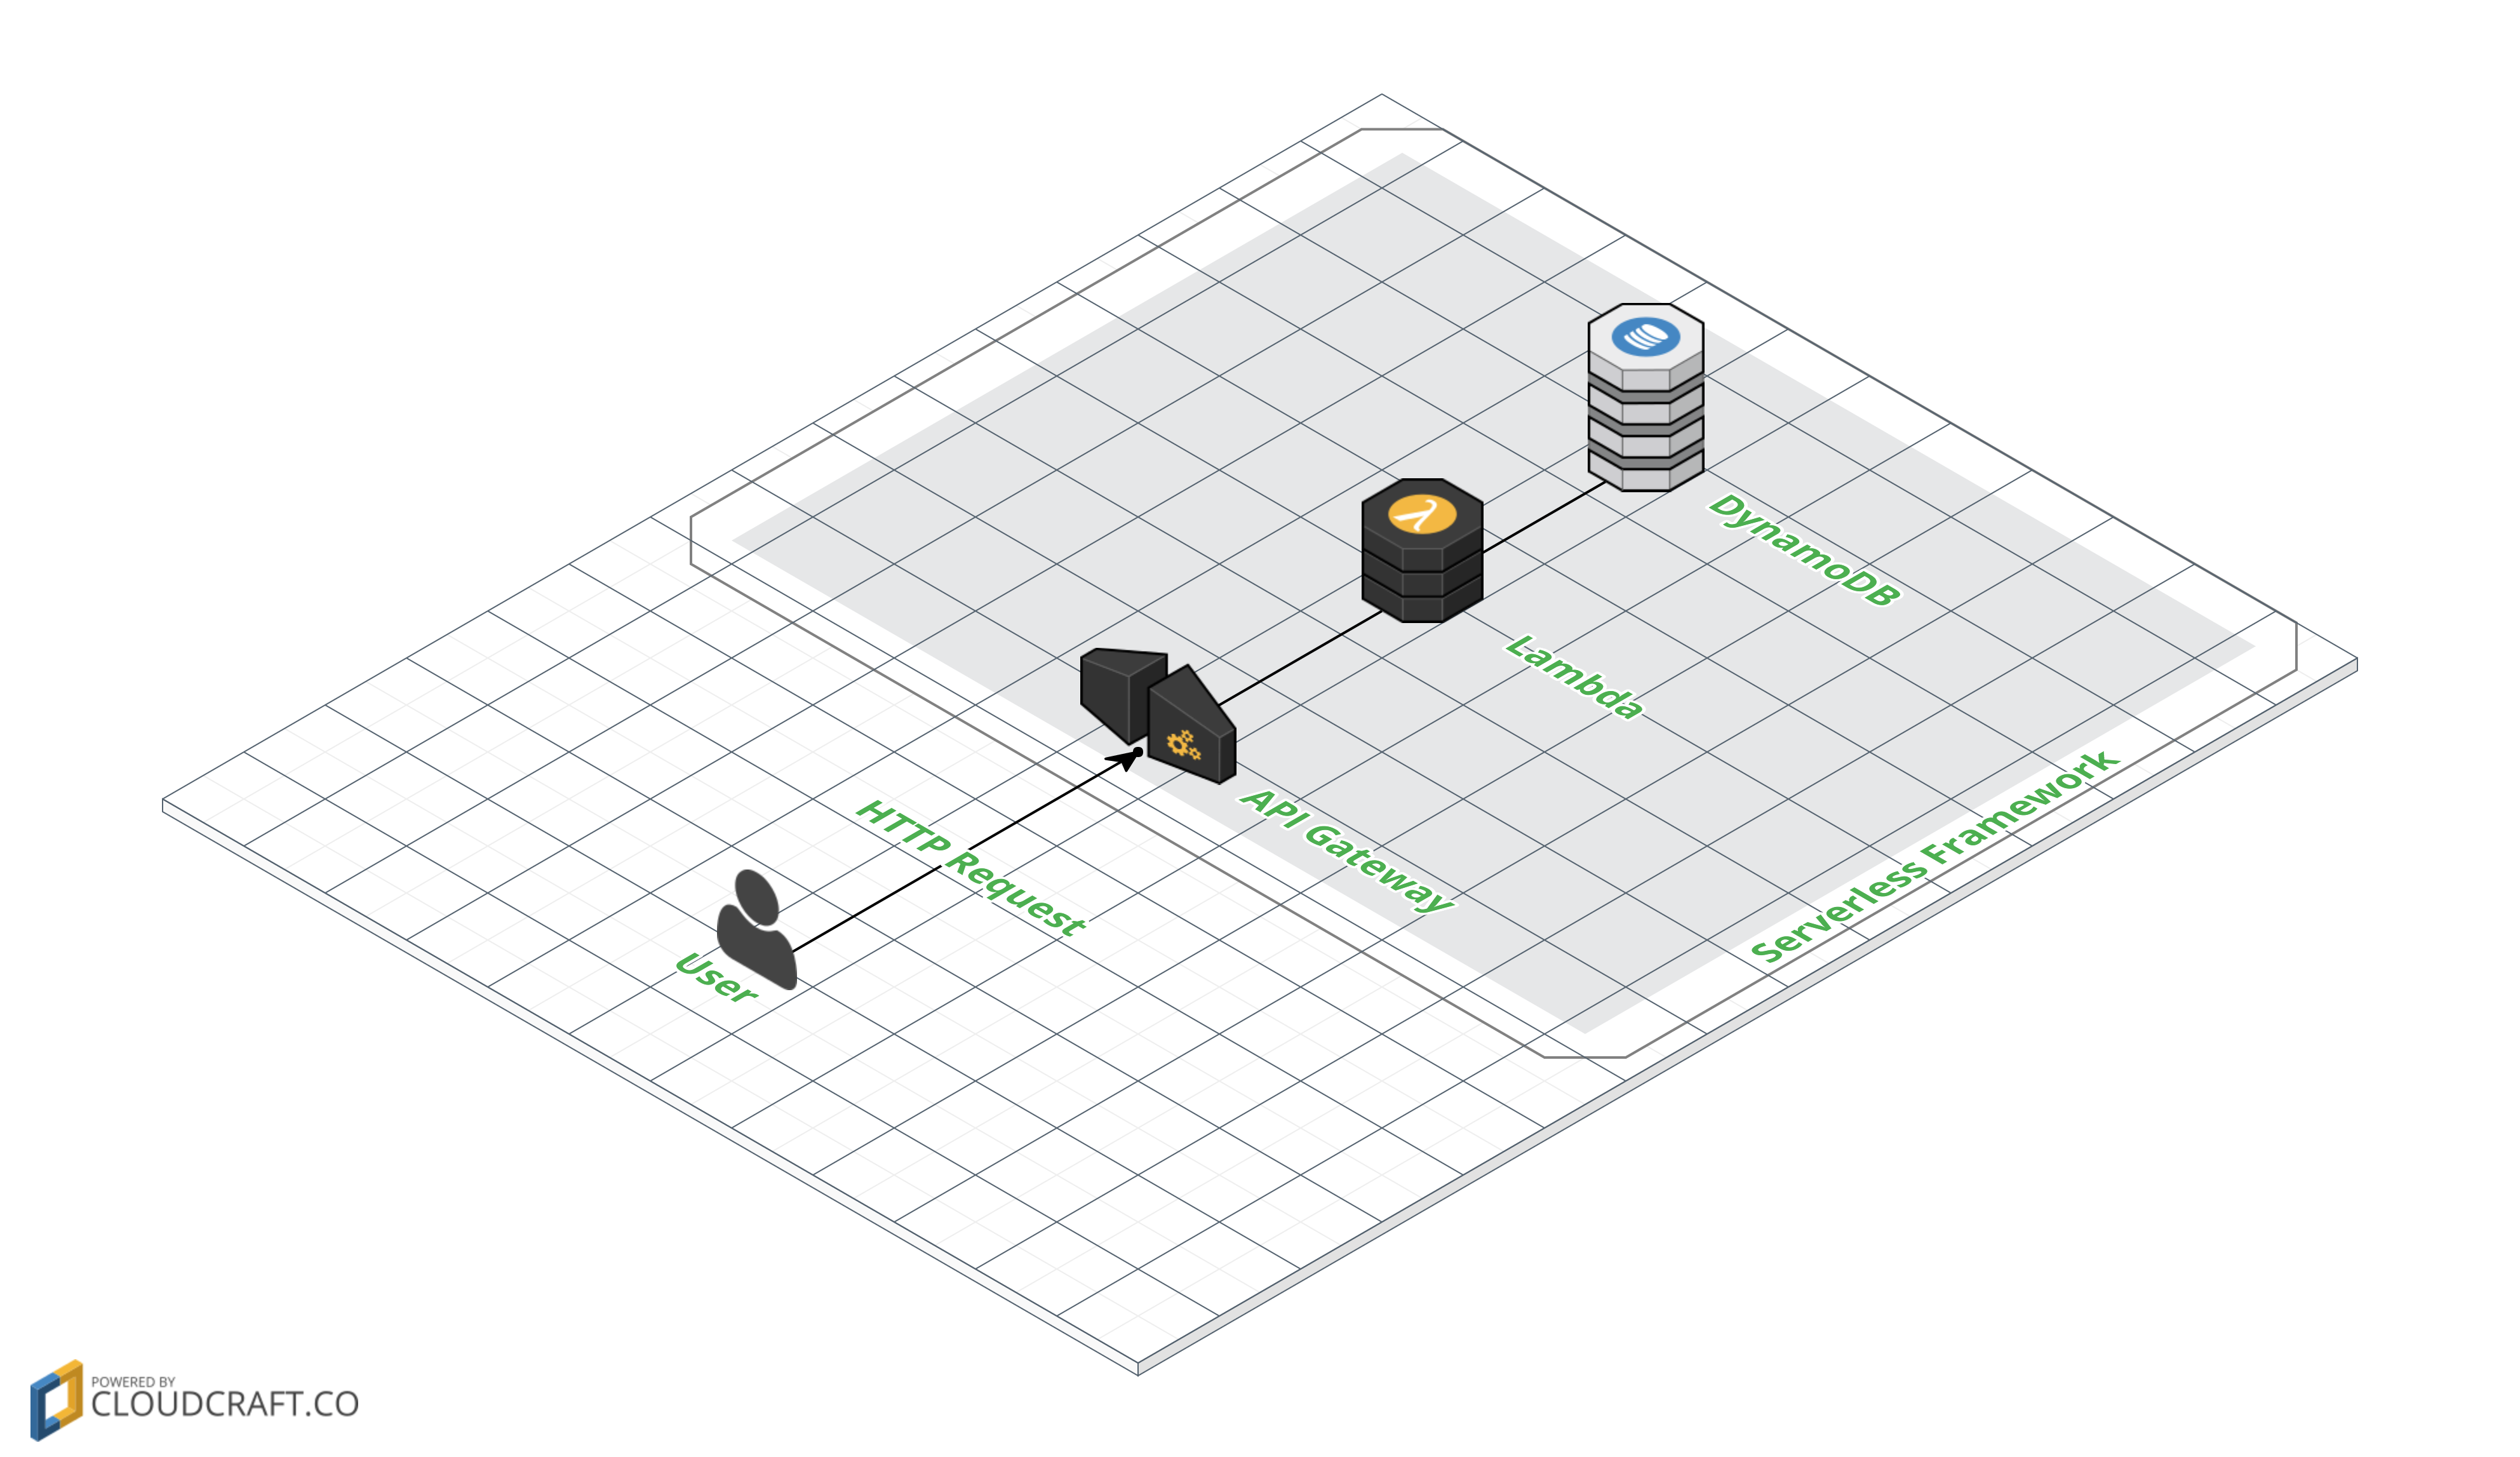
Serverless Frameworkとは
最近巷で騒がれているサーバーレスなアーキテクチャを容易に作成、管理できる一般的なフレームワークというよりツールに近いもの。
Severless FrameworkのAWS環境においては、CloudFormation・Lambda・API Gateway・DynamoDB・S3・IAMなどのサービスを組み合わせてサーバーレスなアーキテクチャを管理・構成している。
今回は、Severless Frameworkを用いてLambda・API Gateway・DynamoDBのアーキテクチャで簡単なREST APIを実装する。
なお、本記事ではv1.0.xを対象としている。
v0.xと大きく構成・設定が変わっているので注意。
環境
今回はAWS上で、Severless Frameworkを用いて簡単なREST APIを作成する。
Severless Frameworkでは、1.0.x時点でNode.js、Python、Java、Scalaがサポートされている。
今回は、Node.jsを対象として進めていく。
なお、JavaScriptに関しては、ES6を使用する。
| パッケージ | バージョン |
|---|---|
| npm | 3.10 |
| node | 6.2 |
| Serverless Framework | 1.0.3 |
GitHub
セットアップ
Serverless Frameworkインストール
早速Serverless Frameworkのインストール。
$ sudo npm install -g serverless
AWS Credentialsの設定
まずはSeverless Frameworkで使用するIAMを作成する。
作成の仕方は下記の公式ドキュメントを参考にしてください。
一旦ここでは、管理ポリシーとして「AdministratorAccess」のポリシーをもつユーザーを作成する。
次に、AWSサービスを管理するためのコマンドラインインターフェース(CLI)のツールをインストールしてServerless Frameworkで使用するIAMの設定を行う。
$ curl "https://bootstrap.pypa.io/get-pip.py" -o "get-pip.py"
$ sudo python get-pip.py
$ sudo pip install awscli
今回は、DefaultのAWS Profilesを使っていきます。
$ aws configure
AWS Access Key ID [None]: 作成したIAMのアクセスキーID
AWS Secret Access Key [None]: 作成したIAMのシークレットアクセスキー
Default region name [None]: ap-northeast-1
Default output format [None]: ENTER
既にDefaultのAWS Profilesが設定されている方は、下記を参考にProfileを切り替えてください。
プロジェクトの作成
今回はnode.jsでhelloというプロジェクトを作成する。
※serverlessコマンドはインストール時に追加されるslsエイリアスを使っていく。
$ mkdir hello-serverless
$ cd hello-serverless
$ sls create --template aws-nodejs --name hello
ファイルを確認してみる。
| ファイル | 用途 |
|---|---|
| event.json | 各Functionにeventで渡されるテストデータ |
| handler.js | 実際のLambda Functionを記述する |
| serverless.yml | 各種設定。Lambda Functionの設定、エンドポイントの設定、リソースの設定などを記述する |
handler.js
デフォルトのhandler.jsの中身を確認してみる。
'use strict';

module.exports.hello = (event, context, callback) => {
  const response = {
    statusCode: 200,
    body: JSON.stringify({
      message: 'Go Serverless v1.0! Your function executed successfully!',
      input: event,
    }),
  };

  callback(null, response);

  // Use this code if you don't use the http event with the LAMBDA-PROXY integration
  // callback(null, { message: 'Go Serverless v1.0! Your function executed successfully!', event });
};
Go Serverless v1.0! Your function executed successfully!というメッセージとevent内容を出力をJSON形式で表示する簡単な処理になっている。
これらを実際に確認してみる。
デプロイ先のリージョン設定
デフォルトでは、デプロイ先のリージョンとしてes-east-1(バージニア北部)に指定されているのでap-northeast-1(東京)に変更する。
provider:
  name: aws
  runtime: nodejs4.3

# you can overwrite defaults here
  stage: dev
  region: ap-northeast-1
デプロイ
$ sls deploy -v
実行
sls invoke -f hello -p event.json
メッセージとevent内容が表示されただろうか?
イベントソース
どのイベントをトリガーにして、それぞれのLambda functionを呼び出すかを定義する。イベントの種類に関しては、AWSでサポートしているLambda functionのトリガーの全てが定義可能。
今回はHTTP APIを定義する。
これによりAPI Gatewayへのアクセスによりトリガーされる。
eventsを追記する。
functions:
  hello:
    handler: handler.hello
    events:
       - http:
           path: hello
           method: get
           cors: true
再度デプロイ
$ sls deploy -v
Service Information
service: hello
stage: dev
region: ap-northeast-1
api keys:
  None
endpoints:
  GET - https://xxxxxxxxxx.execute-api.ap-northeast-1.amazonaws.com/dev/greet
functions:
  hello-dev-hello: arn:aws:lambda:ap-northeast-1:xxxxxxxxxx:function:hello-dev-hello
実際に、上記endpointsに記載されているAPIを叩いてみる。
$ curl -X GET https://xxxxxxxxxx.execute-api.ap-northeast-1.amazonaws.com/dev/greet
ES6の設定
Babel + WebPackを用いて、ES6の環境を作成する。
パッケージのインストール
$ npm install --save-dev babel-core babel-loader babel-plugin-transform-runtime babel-polyfill babel-preset-es2015 babel-preset-stage-0 serverless-webpack webpack
$ npm install --save babel-runtime babel-polyfill
Babelの設定
{
  "plugins": ["transform-runtime"],
  "presets": ["es2015", "stage-0"]
}
webpackの設定
今回は、Babelとローカルの実行環境を作成するためにwebpackを用いる。
plugins:
  - serverless-webpack
module.exports = {
  entry: './handler.js',
  target: 'node',
  module: {
    loaders: [{
      test: /\.js$/,
      loaders: ['babel'],
      include: __dirname,
      exclude: /node_modules/,
    }]
  },
  externals: {
    'aws-sdk': 'aws-sdk'
  }
};
ES6
handler.jsをまるっとES6へ
export const hello = (event, context, callback) => {
  const response = {
    statusCode: 200,
    body: JSON.stringify({
      message: 'Go Serverless v1.0! Your function executed successfully!',
      input: event,
    }),
  }

  callback(null, response)

  // Use this code if you don't use the http event with the LAMBDA-PROXY integration
  // callback(null, { message: 'Go Serverless v1.0! Your function executed successfully!', event });
}
デプロイして確認してみましょう。
ローカル実行
ここまでくると、serverless-webpackによりローカルでの実行も可能となる。
$ sls webpack serve
表示されたローカルのエンドポイントにcurlコマンドでリクエストしてみる。
$ curl -X GET http://localhost:8000/hello
DynamoDBの設定
AWSのNoSQLなDynamoDBを使って、名前を登録、Hello, {登録名}とレスポンスを返すように変更していく。
API概要
ここでは、下記のHTTP APIを用意していく。
| パス | メソッド | リクエストJSONフォーマット | 用途 |
|---|---|---|---|
| /names | POST | {"id":ID, "name":"登録名"} | 名前のDynamoDBへの登録 |
| /hello/{id} | GET | "Hello, {登録名}"メッセージの取得 |
パッケージのインストール
$ npm install --save-dev aws-sdk
DynamoDBの設定
Severless Frameworkでは、serverless.ymlのresourcesという項目でDynamoDBはじめ、S3などの各種リソースの設定を行える。特にAWSのコンソールを用いる必要はない。
今回は、単純に「名前」を扱うidとnameカラムをもつnamesテーブルの設定を行う。
(nameカラムに関してはここでは定義しないことにする)
  Resources:
    hello:
      Type: "AWS::DynamoDB::Table"
      Properties:
        TableName: names
        AttributeDefinitions:
          - AttributeName: id
            AttributeType: N
        KeySchema:
          - AttributeName: id
            KeyType: HASH
        ProvisionedThroughput:
          ReadCapacityUnits: 1
          WriteCapacityUnits: 1
また、合わせてデプロイ時にDynamoDBを扱うIAMを作成するためにproviderにRoleを設定する。
provider:
  name: aws
  runtime: nodejs4.3
# you can overwrite defaults here
  stage: dev
  region: ap-northeast-1
  iamRoleStatements:
    - Effect: Allow
      Resource: "arn:aws:dynamodb:${self:provider.region}:*:table/*"
      Action:
        - "dynamodb:*"
Lambda処理
DynamoDBに名前を登録するregistメソッドと指定されたIDに対して、Hello, {登録名}を返すhelloメソッドを定義する。
import AWS from 'aws-sdk'

AWS.config.update({region: 'ap-northeast-1'})

const db = new AWS.DynamoDB()

export const hello = (event, context, callback) => {
  const params = {
    TableName: 'names',
    Key: {
      id: {N: event.pathParameters.id}
    }
  }

  try {
    db.getItem(params, (error, data) => {
      if (error) {
        callback(null, {statusCode: 400, body: JSON.stringify({message: 'Failed.', error: error})})
      }
      callback(null, {statusCode: 200, body: JSON.stringify({message: `Hello, ${data.Item.name.S}.`})});
    })
  } catch (error) {
    callback(null, {statusCode: 400, body: JSON.stringify({message: 'Failed.', error: error})})
  }
}

export const regist = (event, context, callback) => {
  const body = JSON.parse(event.body)
  const params = {
    TableName: 'names',
    Item: {
      id: {N: String(body.id)},
      name: {S: body.name}
    },
    Expected: {
      id: {Exists: false}
    }
  }


  try {
    db.putItem(params, (error, data) => {
      if (error) {
        callback(null, {statusCode: 400, body: JSON.stringify({message: 'Failed.', error: error})})
      }
      callback(null, {statusCode: 200, body: JSON.stringify({message: 'Succeeded!', params: params})});
    })
  } catch (error) {
    callback(null, {statusCode: 400, body: JSON.stringify({message: 'Failed.', error: error})})
  }
}
Lambda Functionの設定
functions:
  hello:
    handler: handler.hello
    events:
      - http:
           path: hello/{id}
           method: get
           cors: true

  create:
    handler: handler.regist
    events:
      - http:
           path: names
           method: post
           cors: true
確認
デプロイしてcurlコマンドで確認してみる。
まずはID1でTaroを登録する。
$ curl -H "Accept: application/json" -H "Content-type: application/json" -X POST -d '{"id":1, "name":"Taro"}' https://xxxxxxxxxx.execute-api.ap-northeast-1.amazonaws.com/dev/hello
メッセージの確認
$ curl https://xxxxxxxxxx.execute-api.ap-northeast-1.amazonaws.com/dev/hello/1
レスポンスJSONにmessageにHello, Taro.と表示されればok :)
次回
今回は、Serverless Frameworkを使ってREST APIを作成した。
次回は、QraphQLに対応してみる。
